Car window tint offers a fantastic array of benefits, from enhanced privacy and a sleek aesthetic to crucial UV ray protection and glare reduction. It’s no surprise many car owners choose to invest in this upgrade. However, there are times when removing window tint becomes necessary. Perhaps you’re dealing with bubbling or peeling from a lower-quality film, or you’re aiming for an upgrade to a more advanced tint technology. Whatever the reason, removing car window tint can be a task that requires careful consideration.
Embarking on DIY tint removal might seem straightforward, but it can quickly become a complex endeavor. Alternatively, opting for professional services ensures a hassle-free and damage-free process. In this guide, we’ll explore the best approaches for removing old window tint, comparing DIY methods with the benefits of professional intervention, helping you make the best decision for your vehicle.
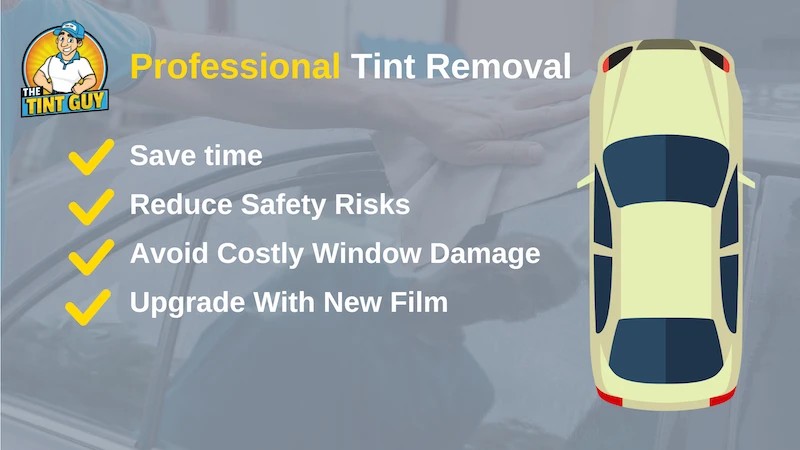
DIY vs. Professional Tint Removal: Weighing Your Options
When it comes to removing car window tint, you’re faced with a key decision: tackling it yourself or entrusting the job to professionals. While the DIY route might appear cost-effective initially, it’s crucial to understand the potential benefits and drawbacks compared to professional services.
The Convenience and Cost of Professional Removal
Choosing a professional window tint removal service offers significant advantages, primarily in terms of time and convenience. Removing car tint can be a time-consuming and physically demanding task, especially when dealing with multiple windows or stubborn, aged film. Professionals have the experience, specialized tools, and efficient techniques to complete the removal quickly and effectively, saving you considerable time and effort.
Moreover, and perhaps most importantly, professional removal minimizes the risk of damage to your vehicle. Car windows are delicate, and improper tint removal techniques can easily lead to scratches or even breakage. Replacing a windshield, side window, or rear window can be surprisingly expensive. Professionals are trained to handle the removal process with precision, protecting your car’s glass from potential harm.
Beyond just removal, many window tint services, like The Tint Guy, also offer new tint installation. Opting for a combined service can be even more convenient and potentially cost-saving. Many providers offer discounted rates for removal when you choose to install new tint, making it a streamlined and economical solution for upgrading your window film.
Finally, safety is a key consideration. DIY tint removal often involves sharp tools like razor blades and can generate dust and debris that are harmful to inhale. Professionals are equipped with the necessary safety gear and understand the precautions needed to ensure a safe working environment, protecting both themselves and your vehicle.
The DIY Approach: When to Consider It
For those who are particularly hands-on, enjoy automotive projects, and are meticulous in their approach, DIY tint removal might be a viable option. If you possess a talent for detail-oriented tasks and are comfortable working with tools, you might find the DIY route satisfying. However, it’s essential to be realistic about the time commitment, potential challenges, and the need for patience and precision.
Before choosing DIY, assess your comfort level with the tools required, such as heat guns and razor blades. Understand that the process can be physically demanding and may not always yield perfectly clean results, especially if you are new to tint removal. While DIY can save on initial service costs, it’s important to weigh this against the potential for mistakes, vehicle damage, and the time invested. If you are unsure or value convenience and guaranteed results, professional service is generally the recommended path.
Step-by-Step Guide: How to Remove Window Tint Yourself
If you decide to undertake the task of removing your car’s window tint on your own, following a structured approach is crucial to ensure the best possible outcome and minimize potential damage. Here’s a detailed guide to the DIY window tint removal process:
Gather Your Tools and Equipment
Before you begin, ensure you have all the necessary tools and supplies readily available. This will streamline the process and prevent interruptions. You will need:
- Heat Gun or Fabric Steamer: Essential for loosening the adhesive. A heat gun is more effective, but a fabric steamer can work as a gentler alternative. A hairdryer can be used but will be significantly slower.
- Razor Blade or Plastic Razor Blades: For carefully lifting the edge of the tint. Plastic blades are safer for glass but may be less effective on tougher films.
- Scraper (Plastic): To help peel and lift the film once heated. Avoid metal scrapers, which can scratch glass.
- Spray Bottle: For applying cleaning solutions and water.
- Cleaning Solution: Options include isopropyl alcohol, ammonia-based window cleaner (use with caution and proper ventilation), or a specialized adhesive remover. Soapy water can also be used for residue removal.
- Face Mask: To protect against inhaling dust and debris.
- Safety Glasses: To shield your eyes from chemicals and debris.
- Safety Gloves: To protect your hands and improve grip, especially when using razor blades and cleaning solutions.
- Microfiber Towels: For cleaning windows and wiping away residue.
- Tarps or Plastic Sheeting: To protect the surrounding area and interior of your car from debris and cleaning solutions.
Prepare Your Workspace
Proper preparation of your workspace is vital for a smooth and safe tint removal process. Choose a well-ventilated area. Outdoors is ideal, or a garage with the door fully open. This is important because the removal process can release dust and fumes from adhesives and cleaning solutions.
Protect your vehicle’s surroundings by laying down tarps or plastic sheeting around the car. Cover the interior surfaces as well, especially dashboards, door panels, and seats, to prevent damage from cleaning solutions and to make cleanup easier.
Before you begin the physical removal, put on all your safety gear: face mask, safety glasses, and gloves. This is essential to protect yourself from potential hazards throughout the process.
Heating and Peeling the Tint Film
The first step in removing the tint film itself is to soften the adhesive that bonds it to the window. Lower your car window slightly, just enough to expose the top edge of the tint film.
Using your heat gun, fabric steamer, or hairdryer, apply heat evenly across the exterior surface of the window where the tint is applied. Hold the heat source a few inches away from the glass and move it slowly and steadily across the window surface. Focus on one section at a time.
Continue heating for several minutes per section. You’ll notice the edges of the tint film beginning to curl or loosen. This is an indication that the adhesive is softening and the film is ready to be peeled.
Once the edge is loose, carefully use your razor blade or plastic razor blade to gently lift the edge of the tint film away from the glass at a corner. Grip the lifted edge and slowly and steadily peel the film downwards and across the window. Pull at a shallow angle to minimize tearing the film. If you encounter resistance, re-apply heat to that area to further soften the adhesive. Work slowly and patiently to avoid leaving excessive adhesive residue behind and to prevent damaging the window.
Removing Stubborn Adhesive Residue
After peeling off the tint film, you will likely be left with adhesive residue on the window. This residue needs to be thoroughly removed to achieve a clean finish.
Apply your chosen adhesive remover to the affected area. Isopropyl alcohol, ammonia solution, or commercial adhesive removers are effective options. Follow the product instructions for application and safety precautions. You can apply the remover by spraying it directly onto the residue or applying it to a microfiber towel and wiping the window.
Allow the remover to sit for a few minutes to soften the adhesive. Then, using a clean microfiber towel, firmly rub the residue to break it down and wipe it away. For stubborn spots, you can gently use a plastic scraper to help lift the adhesive, being careful not to scratch the glass. Repeat the application of adhesive remover and wiping as needed until all residue is removed. For less stubborn residue, soapy water and a bit of scrubbing can also be effective.
Final Cleaning and Inspection
Once all adhesive residue has been removed, the final step is to thoroughly clean the window. Use a quality window cleaner and clean microfiber towels to wipe down the entire window surface. This will remove any remaining traces of adhesive remover and ensure a streak-free, clear window.
Inspect the window carefully in good lighting to ensure all tint film and adhesive residue are completely gone. If you find any remaining spots, repeat the residue removal and cleaning steps as necessary. A clean window is essential, especially if you plan to re-tint the windows.
How Much Does Professional Tint Removal Cost?
If the DIY approach seems daunting, or if you prefer the assurance of professional service, understanding the costs involved is important. The price of professional window tint removal can vary based on several factors, including the type of vehicle, the number of windows, and the type of tint film being removed.
However, as a general guideline, professional window tint removal typically costs around $60 for all four standard side windows of a car. For larger windows like a windshield or rear window, the cost is usually around $85 per window. These are average estimates, and actual prices can vary depending on your location and the specific service provider.
While professional removal involves a cost, it’s important to consider the value it offers in terms of time saved, reduced risk of damage to your vehicle, and the convenience of a hassle-free service. When comparing costs, also factor in the potential expense of replacing a damaged window if you were to attempt DIY removal and make a mistake.
Considering New Window Tint After Removal
Often, the removal of old window tint is part of a larger plan to upgrade to a newer, higher-quality film. The advancements in window tint technology mean that replacing old tint can offer significant improvements in UV protection, heat rejection, privacy, and aesthetic appeal.
High-quality window tint provides numerous benefits, and for many drivers, once accustomed to tinted windows, it’s hard to imagine going without them. If you’re considering re-tinting after removal, explore the latest options in ceramic tints, which offer superior heat rejection and UV protection compared to traditional films.
Companies like The Tint Guy specialize in both tint removal and professional installation of high-quality films. Choosing a provider that offers both services can streamline the entire process. They can assist you in selecting the ideal film to meet your needs and preferences and ensure a flawless installation that is designed to last, avoiding the issues you might have experienced with your previous tint.
Conclusion
Removing car window tint can be accomplished through DIY methods with careful preparation, the right tools, and patience. However, professional window tint removal services offer significant advantages in terms of convenience, safety, and minimizing the risk of damage to your vehicle. For those seeking a hassle-free experience and guaranteed results, especially when combined with new tint installation, professional services are highly recommended. Whether you choose to tackle it yourself or seek expert help, understanding the process and your options is key to successfully removing your car’s window tint and achieving your desired outcome.