Car Coasters, those unassuming little circles nestled in your cup holders, are becoming the latest trend in vehicle personalization. If you’re like many car enthusiasts, you might just be discovering the world of custom car coasters and the fantastic opportunity they present for adding a touch of personality to your ride. As your automotive expert from cars.edu.vn, I’m excited to guide you through creating your own unique car coasters using sublimation. This step-by-step tutorial will show you how to sublimate neoprene car coasters, transforming them from simple blanks into eye-catching accessories. Perfect for personalizing your own vehicle or crafting for sale at craft bazaars, let’s dive into the world of DIY car coasters!
Gathering Your Creative Arsenal: Images for Your Car Coasters
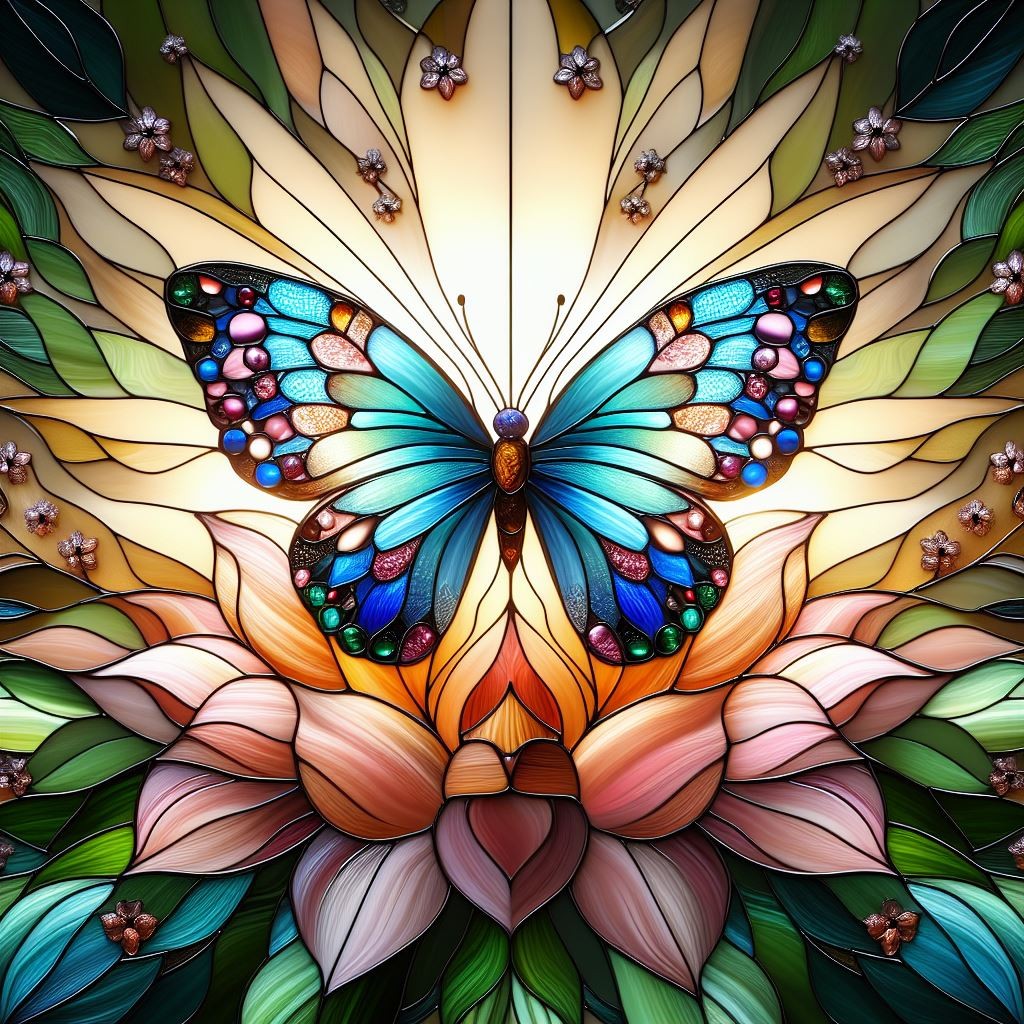
The beauty of car coasters lies in their customizability. The design possibilities are truly endless, ranging from subtle patterns to vibrant floral designs, and even humorous quotes to reflect your personality. For my first foray into crafting these car coasters, I decided to use some striking butterfly images I generated using Bing AI a few months prior. My aim was to achieve a stained-glass effect, and the results were wonderfully intricate and colorful.
In addition to these AI-generated designs, I also discovered some captivating Dream Catcher images on Creative Fabrica. These designs were specifically created for car coasters, simplifying the process. The file offered images both with and without notches for different coaster styles. To streamline placement, I opted for the full circle images, ideal for these neoprene car coasters.
Crafting Your Digital Blueprint: Creating a Canva Template for Car Coasters
While the Dream Catcher images were pre-sized for car coasters, my AI-generated butterfly images needed resizing. This is where Canva, a user-friendly graphic design platform, comes into play. Even the free version of Canva is perfectly adequate for creating a template for your car coasters. Let’s begin by clicking “Create a Design”.
Next, select “Custom Size” to define the dimensions of your car coaster template.
Here, input the desired width and height for your template. Ensure you switch the units to “Inches” if needed. For standard car coasters, a 3” square template works well.
With your square template established, it’s time to incorporate a circular frame. Navigate to “Elements” in the left-hand menu, then select “Frames” and click “See All” if necessary. Choose the circle frame to add it to your square design. This circle will define the printable area for your car coaster design.
Now, resize the circle frame to fit your car coaster blank. My car coasters are approximately 2.75” in diameter. To avoid wasting sublimation ink, I resized my frame to 2.8” in diameter. Center and align the frame both horizontally and vertically within your square template. Your car coaster template is now ready! I duplicated the template and locked the first one to prevent accidental alterations.
To integrate your chosen image, go to the “Uploads” menu and upload your image if it’s not already there. I selected one of the butterfly images. Click on your chosen image to place it onto your design. To seamlessly fit it into the frame, click and drag the image slightly. It will automatically snap into the circular frame, perfectly positioned for your car coaster.
Your car coaster design is now prepared for printing! I recommend downloading sublimation images as PNG files for optimal print quality and printing them using software like Microsoft Word for straightforward sizing and printing.
Priming Your Canvas: Preparing Neoprene Coasters for Sublimation
With your designs printed, let’s prepare the neoprene car coasters for sublimation. Crucial for all sublimation projects, cleaning the surface is paramount. This is especially important if you’ve been working with glitter or other materials that could transfer to the car coasters. I meticulously used a lint roller over the surface of each coaster to ensure they were completely free of debris.
Once cleaned, carefully position the printed image over the car coaster, aligning it precisely. Since the design is slightly larger than the coaster, take your time to ensure perfect placement. Secure the image to the coaster with heat-resistant tape. If your car coasters have a notch (common for fitting around cup holders), ensure consistent notch placement across all coasters, especially if selling them in sets.
Heat Press Magic: Sublimating Your Car Coaster Images
Before starting the sublimation process, it’s wise to consult the car coaster manufacturer’s recommended time and temperature settings. However, these recommendations can sometimes be broad (e.g., 356 to 428 degrees Fahrenheit and 20 to 60 seconds). After reviewing various tutorials, I decided to start with 385 degrees Fahrenheit for 50 seconds using my HTVRont Auto Heat Press. To test, I sublimated a single car coaster first to assess the results and adjust settings if needed.
While the first car coaster turned out beautifully at 50 seconds, I slightly increased the time to 55 seconds for the second one. It also sublimated perfectly. As you can see below, the subtle shade difference between the 50-second and 55-second car coasters is minimal.
Learning from Setbacks: Keeping it Real with Sublimation Mishaps
In the spirit of authentic crafting, it’s important to acknowledge that mistakes happen! Eager to see my first car coaster reveal, I was surprised to find a cupped neoprene piece and no ink transfer. Initially, I thought pre-pressing was necessary. However, as I prepared to re-press, the real issue dawned on me – the car coaster was upside down!
Regrettably, this wasn’t my only instance of disorientation. It happened again with another set of car coasters! Worse, I compounded the error by simply flipping them over and re-pressing immediately. As the image shows, while they did flatten and sublimate, the coaster and image shifted, resulting in a misaligned design. These are now functional car coasters in my husband’s work truck – a testament to even flawed car coasters having a purpose!
Victory in Vinyl: Showcasing Finished Car Coasters
Despite a few comical mishaps, the majority of my car coasters were a success! The first butterfly set is truly stunning. I’m also delighted with the dream catcher car coasters, which sublimated beautifully. I’m slightly less certain about the wood plank and sunflower set. The wood design has a hint of green, which I’m unsure if it’s intentional in the design or a result of needing to adjust temperature or time.
Since I plan to sell these car coaster sets at an upcoming craft bazaar, professional packaging is key. The car coasters I ordered from Amazon included cellophane bags and backing cards, providing a polished presentation. Before sealing the bags, I’ll stamp my branding on the cards and include care instructions, also sourced from Creative Fabrica, ensuring customers know how to maintain their personalized car coasters.
Thank you for joining me on this journey to create sublimated neoprene car coasters! I trust you’ve learned valuable tips and perhaps even enjoyed a laugh at my expense. Remember, even experienced crafters encounter hiccups! For more DIY automotive crafts and sublimation projects, explore cars.edu.vn. Until next time, have a fantastic week, and happy crafting!