Looking for a fantastic way to keep your kids entertained and cool during the summer months? This DIY kiddie car wash is the perfect solution! It’s a simple and fun project that you can easily build at home, providing hours of outdoor fun for your little ones. Inspired by creative ideas from Lowe’s, this sprinkler car wash is guaranteed to be a hit with kids of all ages.
Image: Children joyfully playing in a homemade DIY car wash, highlighting summer fun.
This project is not only easy to construct but also budget-friendly. Using readily available materials, you can transform your backyard into a mini car wash that will spark joy and laughter. Perfect for hot days, this Diy Car Wash provides a refreshing escape and encourages imaginative play. Let’s dive into how you can build this exciting summer toy for your kids.
Materials You’ll Need for Your DIY Car Wash
Before you start building, gather all the necessary materials. Most of these items can be easily found at your local hardware store like Lowe’s. Here’s what you’ll need to create your own kiddie car wash:
- 8 pieces of 10-ft. 3/4″ PVC pipe
- 11 PVC T-joints
- 7 PVC elbow-joints
- 4 PVC cross joints
- 4 PVC caps
- 1 hose connector
- 7 pool noodles
- 5 sponges
- Colored nylon rope
- Plastic table cloths or trash bags
- Drill & 1/16″ drill bit
- Scissors
- Hacksaw or PVC cutters
- Permanent marker
For decoration, you can get creative and use various items. The cost to build the sprinkler structure itself is quite affordable, usually under $25. The decorative elements can be customized based on what you have available or wish to purchase to enhance the fun.
Step-by-Step Instructions to Build Your Kiddie Car Wash
Follow these simple steps to assemble your DIY car wash and get the kids splashing in no time!
1. Cutting the PVC Pipes
Start by cutting the PVC pipes into the required lengths. You will need:
- 3 pieces at 3-foot length
- 26 pieces at 2.5-foot length
- 2 pieces at 1-foot length
- 3 pieces at 6-inch length
You can cut these yourself using a hacksaw or PVC cutters. Some hardware stores like Lowe’s may also offer pipe cutting services, which can save you time and effort.
2. Assembling the Frame Structure
Now it’s time to assemble the PVC frame.
- Take one of the 6-inch pieces and attach the hose connector to it. For a more secure connection, consider using PVC glue.
- Use the PVC joints (T-joints, elbow-joints, and cross joints) to connect the 2.5-foot pieces together. These will form the main structure of the car wash.
- The 3-foot pieces will act as horizontal connectors at the top of the frame, providing stability.
- Cap off the 1-foot pieces with PVC caps.
- Attach the remaining two 6-inch pieces to the top front of the structure and cap them. These will be used to hold the pool noodles.
Image: Step-by-step construction of the DIY car wash frame using PVC pipes and joints.
Refer to the image below for a visual guide on how to connect the pieces and visualize the dimensions. This will help ensure you’re assembling the frame correctly.
Image: Dimensional diagram illustrating the PVC pipe lengths and connections for the DIY car wash.
3. Drilling Water Sprinkler Holes
Once the frame is built, you’ll need to drill holes to create the sprinkler effect. This step might require some adjustments based on your water pressure.
- Start by drilling a few holes using a 1/16″ drill bit.
- Drill approximately 4 or 5 holes across each 3-foot horizontal piece, and 2 or 3 holes in the vertical 2.5-foot pieces.
- Also, drill a hole in the top of the caps on the 1-foot pieces.
- Test the water flow. If the water pressure is too strong and causing the structure to become unstable, you may need to add more holes to distribute the water more evenly.
4. Decorating and Adding Fun Elements
Now comes the fun part – decorating your kiddie car wash!
- Cut pool noodles in half and attach them to the frame. The 6-inch pieces at the top front are designed to hold pool noodles perfectly.
- Use colored nylon rope to add extra decorative touches and create soft, dangling elements.
- Attach sponges to the frame for kids to grab and use as “wash mitts.”
- Hang plastic table cloths or trash bags on the sides to create curtains that kids can drive or run through.
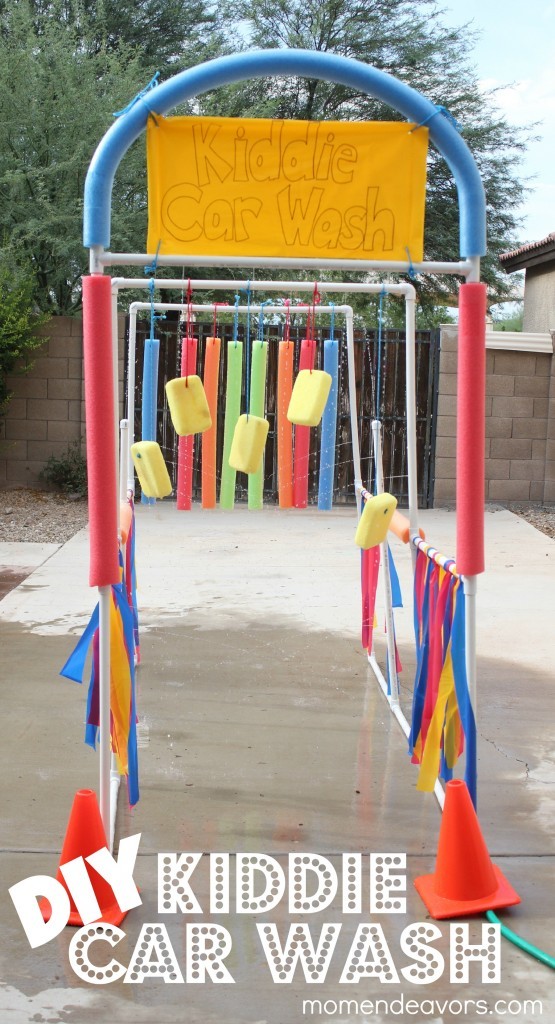
- Get creative with a sign! Use a folded plastic table cloth and a permanent marker to make a “Kiddie Car Wash” sign and attach it to the frame.
Image: A decorated DIY car wash with pool noodles, sponges and plastic tablecloths ready for kids to enjoy.
Consider making DIY sponge balls to attach for added fun. Let your imagination run wild and customize the car wash to make it extra appealing for your kids.
Time to Play and Enjoy Your DIY Car Wash!
Image: Kids happily playing with toy cars and running through their new DIY car wash.
Once everything is set up and decorated, connect your garden hose to the hose connector, turn on the water, and let the fun begin! Kids will absolutely love running, driving bikes, scooters, or toy cars through their very own DIY car wash. It’s a fantastic way to beat the summer heat and create joyful memories right in your backyard. This DIY car wash is more than just a toy; it’s an invitation to endless summer adventures.