Spider plants (Chlorophytum comosum) are a timeless favorite in the world of houseplants, and for good reason. Their elegant, arching foliage and air-purifying qualities make them a welcome addition to homes and offices alike. Renowned for their resilience and minimal care demands, spider plants are perfectly suited for both novice plant parents and seasoned green thumbs. If you’re wondering, “How Do I Care For A Spider Plant?”, you’ve come to the right place. This comprehensive guide will walk you through everything you need to know to keep your spider plant happy and healthy.
Explore our selection of Air Purifying Houseplants from Between Two Thorns.
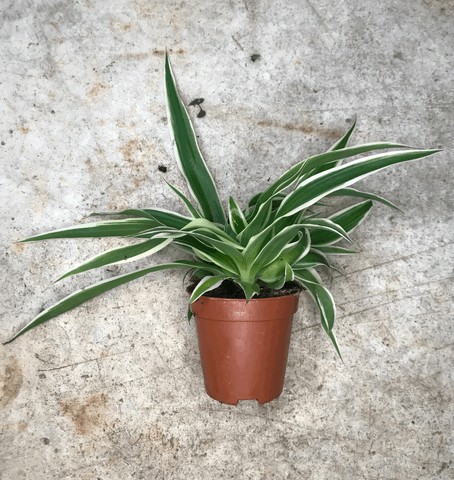
Animated image showcasing the vibrant green and white striped leaves of a spider plant, gently swaying to illustrate its lively and graceful nature.
The Chlorophytum comosum has a rich history as a houseplant, gracing interiors for over two centuries. Its enduring popularity stems from its rapid growth and straightforward care requirements. Originating from the lush landscapes of South Africa, the spider plant made its way to Europe in the late 18th century, thanks to Carl Peter Thunburg, a dedicated student of the renowned botanist Carl Linnaeus. Initially classified under different genera, it was formally placed within the Chlorophytum genus in 1862. Notably, in 1989, the spider plant’s air-purifying prowess was recognized when it was included in NASA’s groundbreaking Clean Air Study, solidifying its status not just as a decorative plant, but also as a beneficial one for indoor environments.
Mastering Spider Plant Care: Essential Tips
While spider plants are known for their easy-going nature, providing them with the right conditions will ensure they flourish and bring vibrant greenery to your space. Here’s a breakdown of the key care aspects:
Light Requirements for Spider Plants
Spider plants thrive in environments that mimic their natural habitat – bright but filtered light. Indirect sunlight is ideal; think of the light conditions near an east-facing window or a slightly shaded south or west-facing window. Direct, harsh sunlight can scorch their delicate leaves, leading to unsightly brown patches.
While they are adaptable and can tolerate lower light conditions, less light will impact their growth rate. You might notice slower growth and less vibrant foliage in dimly lit spaces. If you observe your spider plant’s leaves becoming pale or its characteristic stripes fading, it might be a sign that it needs more light. Conversely, scorched tips indicate too much direct sun.
Watering Your Spider Plant Properly
Watering correctly is crucial for spider plant health. The key is to allow the topsoil to slightly dry out between waterings. A good rule of thumb is to wait until the top two inches of soil feel dry to the touch. When you water, do so thoroughly, ensuring water drains freely from the pot’s drainage holes. This prevents waterlogging, which can lead to root rot, a common issue for overwatered spider plants.
During the active growing season (spring and summer), you’ll likely need to water more frequently than in the dormant winter months. Always adjust your watering schedule based on environmental factors like temperature and humidity. If the leaves start to droop or turn yellow, it could indicate either overwatering or underwatering, so check the soil moisture to diagnose the issue accurately.
Humidity Needs of Spider Plants
Spider plants appreciate a boost in humidity, reflecting their tropical origins. However, they are remarkably adaptable and generally do well in average household humidity levels. If your home environment is particularly dry, especially during winter months when heating systems are in use, you might notice brown tips on the leaves. This is often a sign of low humidity.
To increase humidity for your spider plant, you can:
- Mist the plant regularly: Lightly mist the foliage with room temperature water.
- Use a humidifier: A humidifier can increase the overall humidity in the room.
- Place the pot on a pebble tray: Fill a tray with pebbles, add water to just below the top of the pebbles, and place the pot on top. As the water evaporates, it increases humidity around the plant.
- Group plants together: Plants naturally release moisture through transpiration, so grouping them can create a more humid microclimate.
Temperature Range for Spider Plants
Spider plants are comfortable in average room temperatures, ideally between 60-75°F (15-24°C). They can tolerate slightly cooler temperatures, especially during the nighttime, but it’s best to avoid exposing them to temperatures below 50°F (10°C). Protect them from drafts and sudden temperature fluctuations, especially during colder months.
Fertilizing Your Spider Plant for Optimal Growth
To encourage healthy growth, especially during the spring and summer growing season, spider plants benefit from regular fertilization. Use a balanced, water-soluble fertilizer diluted to half strength every 2-4 weeks. Over-fertilizing can lead to a buildup of salts in the soil, which can damage the plant. It’s best to fertilize less frequently during the fall and winter months when plant growth naturally slows down.
Repotting Your Spider Plant: When and How
Repotting becomes necessary when your spider plant outgrows its current container or becomes root-bound. You’ll know it’s time to repot if you see roots circling tightly around the inside of the pot or emerging from the drainage holes. Spring is generally the best time for repotting, as the plant is entering its active growth phase.
Here’s how to repot your spider plant:
- Choose a new pot: Select a pot that is only slightly larger than the current one, about 1-2 inches wider in diameter. Ensure it has drainage holes.
- Prepare the pot: Add a layer of fresh, well-draining potting mix to the bottom of the new pot.
- Remove the plant: Gently remove the spider plant from its existing pot, being careful not to damage the roots. You might need to loosen the soil around the edges to ease removal.
- Position the plant: Place the spider plant in the center of the new pot, ensuring the top of the root ball is at the same level as it was in the previous pot.
- Fill with soil: Fill in around the root ball with more fresh potting mix, gently firming it as you go.
- Water thoroughly: After repotting, water the plant thoroughly to help settle the soil.
You can also take this opportunity to separate and pot any “spiderettes” or baby plants that the mother plant has produced (more on propagation below).
Propagating Spider Plants: Growing New Plants from Pups
Spider plants are prolific propagators, readily producing “pups” or “spiderettes” – miniature versions of themselves that dangle from long stems called runners. These pups are easy to propagate, allowing you to expand your spider plant collection or share them with friends.
Here’s how to propagate spider plant pups:
- Identify pups: Look for pups that have developed small root nodules at their base. These are ready for propagation.
- Separate the pup: You can propagate pups in two ways:
- Cutting: Use clean scissors or pruning shears to carefully cut the pup from the runner.
- Rooting in place: You can also root the pup while it’s still attached to the mother plant by placing its base in a small pot of soil. Once rooted, you can sever the runner.
- Plant the pup: Plant the separated pup in a small pot filled with well-draining potting mix.
- Keep soil moist: Keep the soil consistently moist, but not waterlogged, until the pup establishes roots and begins to show new growth. You can cover the pot with a plastic bag or humidity dome to increase humidity and encourage rooting.
Another animated image, this time highlighting the spider plant’s characteristic “pups” or spiderettes hanging from runners, illustrating the plant’s propagation ability.
Addressing Common Spider Plant Questions
How Often Should You Water a Spider Plant?
Watering frequency isn’t fixed and depends on various factors including the season, temperature, humidity, pot size, and type of potting mix. A general guideline is to water every 1-2 weeks, but always check the soil moisture first. Allow the top two inches of soil to dry out before watering again. In warmer, drier conditions, you’ll likely need to water more often, while in cooler, more humid conditions, less frequent watering will be necessary.
How to Prune a Spider Plant?
Pruning spider plants is mainly for aesthetic purposes, to remove any dead, brown, or yellowing leaves and maintain a tidy appearance. Use clean scissors or pruning shears to trim leaves at the base, close to the soil line. You can also trim back any brown tips on otherwise healthy leaves, cutting at an angle to mimic the natural leaf shape.
What is the Best Soil for a Spider Plant?
Spider plants need a well-draining potting mix to prevent waterlogging and root rot. A standard houseplant potting mix generally works well. You can improve drainage by amending it with perlite, vermiculite, or a bit of coarse sand. A mix of peat moss, perlite, and vermiculite is a good starting point.
How Much Sunlight Do Spider Plants Need?
Spider plants thrive in bright, indirect light. Avoid prolonged exposure to direct sunlight, which can scorch their leaves. They can tolerate lower light levels, but their growth and the vibrancy of their variegation will be diminished. An east-facing window is often ideal, providing gentle morning sun.
Why Is My Spider Plant Turning Brown?
Brown tips on spider plant leaves are a common issue and can be caused by several factors:
- Low humidity: Dry air is a frequent culprit.
- Fluoride in tap water: Spider plants are sensitive to fluoride and other salts in tap water. Use filtered water or rainwater if possible.
- Over-fertilizing: Excess fertilizer can lead to salt buildup and leaf burn.
- Underwatering: While overwatering is more commonly feared, severe underwatering can also cause brown tips.
- Salt buildup in soil: Over time, salts from fertilizers and tap water can accumulate in the soil, leading to leaf tip burn. Regular repotting can help refresh the soil.
How to Revive a Dying Spider Plant?
If your spider plant is looking unwell, assess its growing conditions and care routine. Check for signs of:
- Improper watering: Adjust your watering habits based on soil dryness.
- Light issues: Ensure it’s getting appropriate indirect light.
- Nutrient deficiency or toxicity: Consider fertilizing or flushing the soil with water to remove excess salts.
- Pests or diseases: Inspect for any signs of pests and treat accordingly. Root rot, caused by overwatering, is a serious issue that may require repotting and removing affected roots.
Are Spider Plants Toxic to Pets?
Fortunately, spider plants are considered non-toxic to cats, dogs, and most other pets. The ASPCA lists them as non-toxic to both cats and dogs. However, some pets might be tempted to chew on the leaves out of curiosity. While not poisonous, ingestion can sometimes cause mild gastrointestinal upset in pets. If your pet is persistently interested in your spider plant, it’s best to place it out of reach to prevent any potential digestive issues and protect your plant from being nibbled on.
With these comprehensive care tips, you’re well-equipped to ensure your spider plant thrives, bringing beauty and air-purifying benefits to your indoor environment for years to come. Happy growing!