How Do I Take Tint Off Car Windows? It’s a common question, and CARS.EDU.VN is here to provide a comprehensive guide to safely and effectively remove old or damaged window film. Discover expert techniques, both DIY and professional, to restore your car’s windows to their original clarity. Learn about window tint removal, film replacement options, and professional installation services.
1. DIY vs. Professional Window Tint Removal: Which is Right for You?
Removing window tint from your car can seem like a simple task, but it often presents unexpected challenges. While the DIY route might be tempting, carefully consider the pros and cons before committing. Let’s explore the key differences between DIY and professional window tint removal to help you make an informed decision.
DIY Window Tint Removal:
-
Pros:
- Cost Savings: The most apparent advantage is the potential to save money on labor costs. You’ll only need to purchase the necessary tools and supplies.
- Flexibility: You can tackle the project at your own pace and convenience, fitting it into your schedule.
- Learning Experience: For those who enjoy hands-on projects, DIY removal can be a satisfying learning experience.
-
Cons:
- Time-Consuming: Removing window tint, especially if it’s old or poorly installed, can be a lengthy and tedious process.
- Risk of Damage: Improper techniques can easily lead to scratches, streaks, or even breakage of the glass.
- Uneven Results: Achieving a clean, residue-free finish can be difficult without the right tools and expertise.
- Potential for Injury: Working with sharp tools like razor blades increases the risk of accidental cuts.
- Adhesive Residue: Removing stubborn adhesive residue can be challenging and require specialized products.
Professional Window Tint Removal:
-
Pros:
- Expertise and Experience: Professionals have the knowledge and skills to remove window tint safely and efficiently.
- Specialized Tools and Equipment: They possess the right tools, including heat guns, steamers, and specialized solvents, for optimal results.
- Reduced Risk of Damage: Professionals are trained to minimize the risk of scratching or damaging the glass.
- Time Savings: They can complete the removal process much faster than the average DIYer.
- Clean and Residue-Free Finish: Professionals ensure a smooth, clean surface ready for new tint or leaving the windows as is.
-
Cons:
- Higher Cost: Professional removal services come at a higher price compared to DIY.
- Scheduling: You’ll need to schedule an appointment and potentially wait for availability.
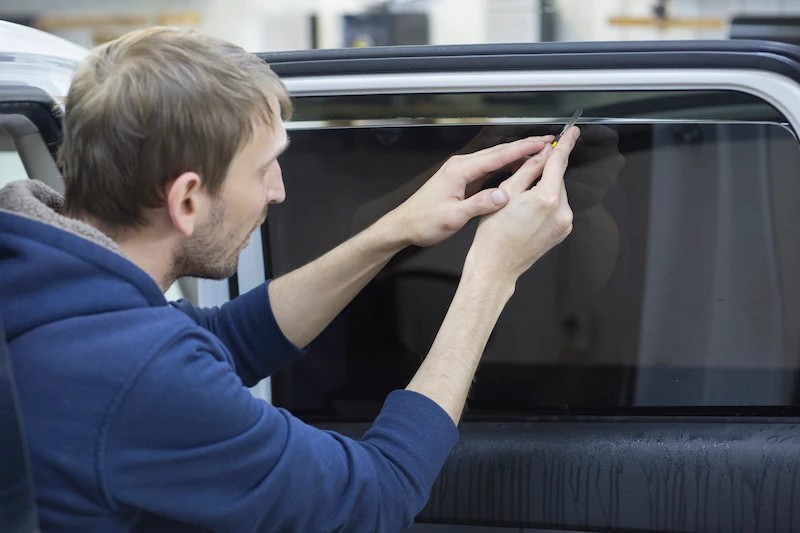 Man Installing Window Film
Alt Text: A professional auto technician expertly applies window film, ensuring precise alignment and a smooth, bubble-free finish, highlighting the skill involved in professional window tinting services.
According to a survey by the International Window Film Association (IWFA), approximately 70% of car owners prefer professional window tint removal due to the reduced risk of damage and the convenience it offers.
Key Considerations:
- Your Skill Level: Are you comfortable working with tools and following detailed instructions?
- Time Availability: Do you have the time and patience to dedicate to the project?
- Budget: Can you afford the cost of professional removal services?
- Vehicle Value: Are you concerned about potentially damaging your car’s windows?
- Tint Condition: Is the tint old, brittle, or peeling, making it more difficult to remove?
Ultimately, the decision depends on your individual circumstances and preferences. If you’re unsure, it’s always best to consult with a professional window tinting service for advice. Remember, at CARS.EDU.VN, we provide resources to connect you with trusted professionals in your area. Our goal is to help you make informed decisions about your car care needs.
2. Essential Tools and Equipment for DIY Window Tint Removal
If you decide to tackle the project of removing your car’s window tint yourself, having the right tools and equipment is crucial. Using the wrong tools or attempting to cut corners can lead to frustration, damage, and ultimately, a less-than-satisfactory result. Here’s a comprehensive list of essential tools and equipment, along with tips for selecting the right ones:
-
Heat Gun:
- Purpose: Softens the adhesive holding the tint film to the glass, making it easier to peel off.
- Selection Tips: Choose a heat gun with adjustable temperature settings to avoid overheating and damaging the glass. A nozzle attachment can help focus the heat on specific areas.
- Alternative: A fabric steamer can also be used, providing a gentler heat source. Avoid using a hair dryer as it may not generate enough heat.
-
Razor Blade Scraper:
- Purpose: Used to lift the edges of the tint film and scrape away stubborn adhesive residue.
- Selection Tips: Opt for a scraper with a comfortable handle and replaceable blades. Use high-quality, sharp blades to minimize the risk of scratching the glass.
- Safety Note: Exercise extreme caution when using razor blades. Always wear safety gloves and avoid applying excessive pressure.
-
Plastic Scraper:
- Purpose: A safer alternative to razor blades for removing film and adhesive residue, especially on delicate surfaces.
- Selection Tips: Choose a scraper made from durable plastic that won’t scratch the glass.
- Versatility: Useful for removing film from defroster lines on rear windows without causing damage.
-
Spray Bottle:
- Purpose: To apply cleaning solutions and adhesive removers to the window surface.
- Selection Tips: Use a spray bottle with an adjustable nozzle to control the spray pattern.
- Durability: Ensure the bottle is made of chemical-resistant material to prevent degradation.
-
Cleaning Solution:
- Purpose: To clean the window surface before and after tint removal.
- Options:
- Mild dish soap and water: A gentle option for general cleaning.
- Glass cleaner: Effective for removing streaks and smudges.
- Isopropyl alcohol: Helps to dissolve adhesive residue.
- Safety Note: Avoid using harsh chemicals that could damage the glass or interior surfaces.
-
Adhesive Remover:
- Purpose: To dissolve and remove stubborn adhesive residue left behind after peeling off the tint film.
- Options:
- Goo Gone: A popular commercial adhesive remover.
- Acetone (nail polish remover): Effective but use with caution as it can damage some surfaces.
- WD-40: Can help loosen adhesive but may leave an oily residue.
- Safety Note: Always test adhesive removers in an inconspicuous area first to ensure they don’t damage the glass or surrounding surfaces.
-
Microfiber Towels:
- Purpose: For cleaning and wiping the window surface.
- Selection Tips: Use high-quality microfiber towels that are lint-free to avoid leaving streaks or scratches.
- Quantity: Have several towels on hand for different stages of the removal process.
-
Safety Gloves:
- Purpose: To protect your hands from chemicals, sharp tools, and adhesive residue.
- Selection Tips: Choose gloves made from chemical-resistant material, such as nitrile or latex.
- Fit: Ensure the gloves fit snugly to provide a secure grip.
-
Safety Glasses:
- Purpose: To protect your eyes from debris, chemicals, and accidental splashes.
- Selection Tips: Wear safety glasses that provide full coverage and meet ANSI safety standards.
- Comfort: Choose glasses with a comfortable fit that won’t slip or fog up.
-
Face Mask:
- Purpose: To protect your respiratory system from dust, fumes, and chemical vapors.
- Selection Tips: Wear a respirator mask that filters out particulate matter and organic vapors.
- Fit: Ensure the mask fits snugly and creates a tight seal around your nose and mouth.
-
Drop Cloth or Plastic Sheeting:
- Purpose: To protect the interior of your car from debris, chemicals, and adhesive residue.
- Placement: Cover seats, carpets, and other surfaces that could be damaged.
- Security: Secure the drop cloth or sheeting with tape to prevent it from shifting.
Having all of these tools and equipment on hand before you begin will make the window tint removal process much smoother and safer. Remember to prioritize safety and take your time to avoid damaging your car’s windows. For more detailed guidance and product recommendations, visit CARS.EDU.VN. We’re here to help you every step of the way!
3. Step-by-Step Guide: How to Remove Window Tint from Your Car
Removing window tint can be a meticulous process, but with the right tools and techniques, you can achieve professional-looking results. This step-by-step guide provides detailed instructions on how to safely and effectively remove window tint from your car.
Step 1: Preparation is Key
- Gather Your Supplies: Ensure you have all the necessary tools and equipment listed in Section 2.
- Choose a Suitable Location: Work in a well-ventilated area, such as an open garage or outdoors, to avoid inhaling fumes.
- Protect Your Vehicle: Cover the interior surfaces of your car with a drop cloth or plastic sheeting to prevent damage from chemicals and debris.
- Wear Protective Gear: Put on safety gloves, safety glasses, and a face mask to protect yourself from hazards.
Step 2: Softening the Adhesive
- Roll Down the Window: Lower the window a few inches to expose the edge of the tint film.
- Apply Heat: Use a heat gun or fabric steamer to gently heat the tint film, starting at the top corner. Move the heat source back and forth in a sweeping motion to avoid overheating a single spot.
- Heat Gun Technique: Hold the heat gun a few inches away from the window and maintain a consistent distance.
- Steamer Technique: Apply steam to the tint film, moving the nozzle slowly across the surface.
- Observe the Edges: As the adhesive softens, the edges of the tint film should start to curl or bubble. This indicates that the film is ready to be peeled.
Step 3: Peeling Off the Tint Film
- Lift the Corner: Use a razor blade scraper or plastic scraper to carefully lift a corner of the tint film.
- Razor Blade Technique: Hold the razor blade at a shallow angle and gently slide it under the edge of the film.
- Plastic Scraper Technique: Apply firm pressure to the scraper and push it under the edge of the film.
- Peel Slowly and Steadily: Once you’ve lifted a corner, grab the film with your fingers and begin peeling it away from the window.
- Maintain a Consistent Angle: Pull the film at a shallow angle to avoid tearing or leaving behind adhesive residue.
- Apply Heat as Needed: If the film becomes difficult to peel, reapply heat to soften the adhesive.
- Work in Sections: Peel the film in sections, overlapping each section slightly to ensure complete removal.
- Handle with Care: Avoid pulling the film too quickly or forcefully, as this can damage the window or leave behind more adhesive residue.
Step 4: Removing Adhesive Residue
- Apply Adhesive Remover: Spray the window surface with an adhesive remover, such as Goo Gone, isopropyl alcohol, or acetone.
- Let it Soak: Allow the adhesive remover to soak for several minutes to dissolve the residue.
- Scrub the Surface: Use a plastic scraper or microfiber towel to scrub the window surface and remove the loosened adhesive.
- Plastic Scraper Technique: Apply firm pressure to the scraper and work in small, circular motions.
- Microfiber Towel Technique: Fold the towel into a pad and rub the surface vigorously.
- Repeat as Needed: If some adhesive residue remains, reapply the adhesive remover and repeat the scrubbing process.
Step 5: Cleaning the Window
- Clean with Glass Cleaner: Spray the window surface with a glass cleaner and wipe it clean with a microfiber towel.
- Inspect for Streaks: Check the window for streaks or smudges and re-clean as needed.
- Dry Thoroughly: Use a clean, dry microfiber towel to dry the window completely.
Step 6: Final Inspection
- Inspect the Window: Carefully inspect the window for any remaining adhesive residue or streaks.
- Touch Up as Needed: If you find any imperfections, repeat the cleaning process until the window is completely clean and clear.
- Admire Your Work: Step back and admire your newly cleaned, tint-free window!
Tips for Success:
- Work in a Warm Environment: Warm temperatures can help soften the adhesive and make the film easier to peel.
- Be Patient: Removing window tint can be a time-consuming process, so don’t rush.
- Use Sharp Blades: Sharp razor blades or plastic scrapers will make the job easier and reduce the risk of scratching the glass.
- Apply Even Pressure: When using a scraper, apply even pressure to avoid damaging the window.
- Clean as You Go: Wipe up any spills or drips immediately to prevent them from drying and becoming more difficult to remove.
By following these step-by-step instructions, you can successfully remove window tint from your car and restore your windows to their original clarity. For more helpful tips and resources, visit CARS.EDU.VN. We’re here to help you keep your car looking its best!
4. Choosing the Right Adhesive Remover for Window Tint
After removing the window tint film from your car, you’re often left with a sticky residue that can be difficult to remove. Choosing the right adhesive remover is essential for achieving a clean, streak-free finish without damaging your car’s windows. Here’s a guide to help you select the best adhesive remover for your needs:
Factors to Consider:
- Effectiveness: The adhesive remover should be able to dissolve and remove stubborn adhesive residue quickly and easily.
- Safety: It should be safe to use on glass and other car surfaces without causing damage or discoloration.
- Ease of Use: The remover should be easy to apply and wipe away.
- Odor: Some adhesive removers have strong odors, so consider choosing one with a mild or pleasant scent.
- Cost: Adhesive removers range in price, so consider your budget.
Types of Adhesive Removers:
-
Commercial Adhesive Removers:
- Examples: Goo Gone, Goof Off, 3M Adhesive Remover
- Pros: Specifically formulated to remove adhesive residue, effective on a variety of surfaces, readily available at auto parts stores and hardware stores.
- Cons: Can be more expensive than household alternatives, some may have strong odors.
-
Isopropyl Alcohol (Rubbing Alcohol):
- Pros: A readily available and inexpensive solvent, effective for removing many types of adhesive residue, relatively safe to use on glass.
- Cons: May not be as effective on stubborn or dried-on adhesive, can evaporate quickly.
-
Acetone (Nail Polish Remover):
- Pros: A powerful solvent that can dissolve even the most stubborn adhesive residue.
- Cons: Can damage some surfaces, such as plastic and paint, so use with caution, has a strong odor, can be harmful if inhaled.
-
WD-40:
- Pros: A versatile lubricant that can also help loosen adhesive residue, readily available.
- Cons: May leave an oily residue that requires additional cleaning, not as effective as dedicated adhesive removers.
-
Soapy Water:
- Pros: A gentle and safe option for removing light adhesive residue, readily available, inexpensive.
- Cons: Not effective on stubborn or dried-on adhesive, requires more scrubbing.
Comparison Table:
| Adhesive Remover | Effectiveness | Safety | Ease of Use | Odor | Cost |
|---|---|---|---|---|---|
| Commercial Removers | High | Medium | High | Medium | High |
| Isopropyl Alcohol | Medium | High | High | Low | Low |
| Acetone | High | Low | High | High | Low |
| WD-40 | Medium | Medium | High | Medium | Medium |
| Soapy Water | Low | High | High | Low | Very Low |
How to Use Adhesive Remover Safely and Effectively:
- Test in an Inconspicuous Area: Before applying the adhesive remover to the entire window, test it in a small, hidden area to ensure it doesn’t damage the glass or surrounding surfaces.
- Apply Liberally: Spray or apply the adhesive remover liberally to the adhesive residue.
- Let it Soak: Allow the remover to soak for several minutes to dissolve the residue.
- Scrub Gently: Use a plastic scraper or microfiber towel to gently scrub the surface and remove the loosened adhesive.
- Wipe Clean: Wipe the window clean with a clean, damp microfiber towel to remove any remaining residue and adhesive remover.
- Repeat if Necessary: If some adhesive residue remains, repeat the process until the window is completely clean.
Safety Precautions:
- Wear Safety Gloves: Protect your hands from chemicals by wearing safety gloves.
- Ventilate the Area: Work in a well-ventilated area to avoid inhaling fumes.
- Avoid Contact with Skin and Eyes: Avoid direct contact with skin and eyes. If contact occurs, rinse immediately with water.
- Keep Away from Children: Keep adhesive removers out of reach of children.
By carefully considering these factors and following these guidelines, you can choose the right adhesive remover for your window tint removal project and achieve a clean, professional-looking finish. Remember to visit CARS.EDU.VN for more helpful tips and resources on car care and maintenance. We’re here to help you make informed decisions and keep your car looking its best!
5. Dealing with Difficult Window Tint Removal Situations
While the step-by-step guide in Section 3 provides a solid foundation for removing window tint, you may encounter some challenging situations that require special techniques and solutions. Here are some common difficulties and how to overcome them:
-
Old and Brittle Tint:
- Problem: Over time, window tint can become brittle and crack, making it difficult to peel off in one piece.
- Solution:
- Apply more heat: Use a heat gun or steamer to thoroughly heat the tint film, softening the adhesive and making it more pliable.
- Work in smaller sections: Instead of trying to peel off large sections, work in smaller, more manageable pieces.
- Use a plastic scraper: A plastic scraper can help to gently lift the edges of the brittle tint without causing it to shatter.
-
Stubborn Adhesive Residue:
- Problem: Some adhesive residue can be extremely difficult to remove, even with strong adhesive removers.
- Solution:
- Apply multiple applications of adhesive remover: Spray the residue with adhesive remover, let it soak for several minutes, and then scrub with a plastic scraper or microfiber towel. Repeat this process several times.
- Use a razor blade scraper with caution: If the residue is particularly stubborn, you can carefully use a razor blade scraper to remove it. Hold the blade at a shallow angle and apply gentle pressure to avoid scratching the glass.
- Try a clay bar: A clay bar, typically used for detailing car paint, can also be effective at removing stubborn adhesive residue from glass.
-
Tint on Rear Windows with Defroster Lines:
- Problem: Rear windows often have defroster lines, which are delicate and can be easily damaged during tint removal.
- Solution:
- Use a steamer: A steamer is a gentler alternative to a heat gun and is less likely to damage defroster lines.
- Peel carefully: Peel the tint film slowly and carefully, avoiding any sudden movements that could pull on the defroster lines.
- Use a plastic scraper: A plastic scraper is safer to use around defroster lines than a razor blade scraper.
- If a defroster line comes loose, use a defroster grid repair kit to reattach it.
-
Tint on Curved Windows:
- Problem: Curved windows can be more difficult to tint because the film needs to be stretched and conformed to the shape of the glass.
- Solution:
- Apply heat evenly: Use a heat gun or steamer to evenly heat the tint film, making it more pliable and easier to peel.
- Work in small sections: Peel the film in small sections, using a plastic scraper to gently lift the edges.
- Use a heat-resistant glove: Wear a heat-resistant glove to protect your hand from the heat while you’re working.
-
Damaged or Scratched Windows:
- Problem: If the windows are already damaged or scratched, removing the tint can exacerbate the problem.
- Solution:
- Proceed with caution: Be extra careful when removing the tint to avoid further damaging the glass.
- Consider professional help: If you’re concerned about damaging the windows, it’s best to hire a professional window tinting service.
- Repair the damage: After removing the tint, you can repair any scratches or damage using a glass polishing kit.
Additional Tips:
- Be Patient: Don’t rush the process. Take your time and work carefully to avoid damaging the windows.
- Use the Right Tools: Make sure you have the right tools for the job, including a heat gun or steamer, razor blade scraper, plastic scraper, adhesive remover, and microfiber towels.
- Wear Protective Gear: Protect your hands, eyes, and respiratory system by wearing safety gloves, safety glasses, and a face mask.
- Consult a Professional: If you’re unsure about any aspect of the removal process, consult a professional window tinting service.
By following these tips and techniques, you can overcome even the most challenging window tint removal situations and achieve professional-looking results. Remember to visit CARS.EDU.VN for more helpful tips and resources on car care and maintenance. We’re here to help you keep your car looking its best!
6. Tint Removal Cost: DIY vs. Professional
One of the primary considerations when deciding whether to remove window tint yourself or hire a professional is the cost. Let’s break down the expenses associated with both options to help you make an informed decision.
DIY Tint Removal Costs:
-
Tools and Equipment:
- Heat Gun: $20 – $50
- Razor Blade Scraper: $5 – $10
- Plastic Scraper: $3 – $5
- Spray Bottle: $2 – $5
- Cleaning Solution: $5 – $10
- Adhesive Remover: $10 – $20
- Microfiber Towels: $10 – $20
- Safety Gloves: $5 – $10
- Safety Glasses: $5 – $10
- Face Mask: $5 – $10
- Drop Cloth or Plastic Sheeting: $10 – $20
- Total: $80 – $170
-
Time:
- The amount of time it takes to remove window tint yourself will vary depending on your experience, the condition of the tint, and the number of windows you’re removing.
- Expect to spend anywhere from 2 to 8 hours on the project.
- Consider the value of your time when making your decision.
Professional Tint Removal Costs:
-
Labor:
- Professional window tint removal typically costs between $50 and $150 per window, depending on the size and complexity of the job.
- Some shops may charge a flat rate for the entire vehicle, ranging from $200 to $500.
-
Materials:
- The cost of materials is usually included in the labor charge.
-
Time:
- Professional tint removal typically takes 1 to 3 hours, depending on the number of windows and the condition of the tint.
Comparison Table:
| Expense | DIY | Professional |
|---|---|---|
| Tools & Equipment | $80 – $170 | Included |
| Labor | Your Time | $50 – $500 |
| Time | 2 – 8 hours | 1 – 3 hours |
| Risk of Damage | Higher | Lower |
| Quality of Results | Variable | Higher |
Additional Considerations:
- Vehicle Value: If you own a high-end or classic car, it’s generally best to hire a professional to avoid any risk of damage.
- Your Skill Level: If you’re not comfortable working with tools or following detailed instructions, it’s best to leave the job to a professional.
- Warranty: Some professional window tinting services offer a warranty on their work, which can provide peace of mind.
According to a survey by Angie’s List, the average cost of professional window tint removal is $75 per window.
The Bottom Line:
- DIY tint removal can be a cost-effective option if you have the time, skills, and tools to do the job properly.
- Professional tint removal is a more expensive option, but it offers the peace of mind of knowing that the job will be done safely and correctly.
- Consider your individual circumstances and preferences when making your decision.
At CARS.EDU.VN, we believe in empowering you with the information you need to make the best choices for your car care needs. Weigh the costs and benefits of DIY vs. professional tint removal, and choose the option that’s right for you. And if you decide to go the professional route, be sure to check out our directory of trusted window tinting services in your area!
7. Replacing Your Film: Upgrading to a Higher-Quality Window Tint
Removing old window tint often presents the perfect opportunity to upgrade to a higher-quality film that offers enhanced benefits and performance. Whether you’re seeking improved heat rejection, UV protection, privacy, or aesthetics, choosing the right replacement film can significantly enhance your driving experience. Let’s explore the key factors to consider when selecting a new window tint film:
1. Types of Window Tint Films:
-
Dyed Film:
- Description: The most basic and affordable type of window tint film.
- Pros: Cost-effective, available in a variety of shades.
- Cons: Offers limited heat rejection and UV protection, prone to fading over time.
-
Metalized Film:
- Description: Contains tiny metallic particles that reflect heat and light.
- Pros: Offers better heat rejection and UV protection than dyed film, more durable.
- Cons: Can interfere with electronic signals (e.g., cell phones, GPS), has a reflective appearance.
-
Carbon Film:
- Description: Contains carbon particles that absorb heat and light.
- Pros: Offers excellent heat rejection and UV protection, non-reflective, doesn’t interfere with electronic signals.
- Cons: More expensive than dyed or metalized film.
-
Ceramic Film:
- Description: The highest-quality and most advanced type of window tint film, containing ceramic particles that block heat, UV rays, and infrared light.
- Pros: Offers superior heat rejection, UV protection, and glare reduction, doesn’t interfere with electronic signals, very durable.
- Cons: The most expensive type of window tint film.
Comparison Table:
| Film Type | Heat Rejection | UV Protection | Glare Reduction | Signal Interference | Durability | Cost |
|---|---|---|---|---|---|---|
| Dyed | Low | Low | Medium | None | Low | Low |
| Metalized | Medium | Medium | Medium | High | Medium | Medium |
| Carbon | High | High | High | None | High | High |
| Ceramic | Superior | Superior | Superior | None | Superior | Very High |
2. Key Factors to Consider:
-
Heat Rejection:
- Important for: Keeping your car cool and comfortable, reducing the need for air conditioning, and saving fuel.
- Look for: Films with a high Total Solar Energy Rejection (TSER) rating.
-
UV Protection:
- Important for: Protecting your skin from harmful UV rays, preventing fading and cracking of your car’s interior.
- Look for: Films that block 99% or more of UV rays.
-
Visible Light Transmission (VLT):
- Description: The percentage of visible light that passes through the film.
- Important for: Determining the darkness of the tint, complying with local laws and regulations.
- Check your local laws: Before choosing a VLT, check your local laws and regulations regarding window tint darkness.
-
Glare Reduction:
- Important for: Improving visibility and reducing eye strain, especially when driving in bright sunlight.
- Look for: Films with a low glare reduction rating.
-
Appearance:
- Consider: The color, shade, and reflectivity of the film.
- Choose: A film that complements the look of your car.
-
Warranty:
- Look for: Films with a comprehensive warranty that covers fading, peeling, and bubbling.
3. Choosing a Reputable Brand:
- Research: Reputable brands offer high-quality films with consistent performance and reliable warranties.
- Consider: 3M, Llumar, Hüper Optik, and SunTek.
4. Professional Installation:
- Even: The best window tint film won’t perform properly if it’s not installed correctly.
- Hire: A professional window tinting service to ensure a flawless installation.
According to a report by the National Renewable Energy Laboratory (NREL), high-performance window tint films can reduce solar heat gain by up to 77%.
The Bottom Line:
Upgrading to a higher-quality window tint film is a worthwhile investment that can enhance your driving experience and protect your car’s interior. Consider your individual needs and preferences, research different film types and brands, and choose a reputable installer to ensure a perfect result. At CARS.EDU.VN, we’re committed to providing you with the information and resources you need to make informed decisions about your car care needs. Explore our articles and guides to learn more about window tinting and other car care topics!
8. Legal Considerations for Car Window Tint
Before you rush out to tint your car windows, it’s crucial to understand the legal restrictions in your state. Window tint laws vary significantly across the United States, and violating these regulations can result in fines, tickets, or even the requirement to remove the tint. Here’s a breakdown of the key legal considerations for car window tint:
1. Visible Light Transmission (VLT):
- Definition: VLT refers to the percentage of visible light that can pass through the tinted window. Each state sets specific VLT percentages for the front side windows, rear side windows, and rear window.
- Front Side Windows: Typically, the legal VLT for front side windows ranges from 30% to 70%. Some states may have different VLT requirements for cars, SUVs, and trucks.
- Rear Side Windows and Rear Window: Many states allow darker tint on the rear side windows and the rear window. Some states even permit these windows to be completely blacked out.
- Windshield: Most states prohibit any tinting below the AS-1 line on the windshield. However, some states allow a narrow strip of tinting at the top of the windshield.
2. Reflectivity:
- Some states have restrictions on the reflectivity of window tint. Reflective window tint can create glare for other drivers, which can be dangerous.
- Reflectivity is measured as the percentage of light that is reflected off the window.
3. Color:
- Some states prohibit certain colors of window tint, such as red, amber, or blue.
- These colors are typically reserved for emergency vehicles.
4. Medical Exemptions:
- Most states offer medical exemptions for window tint laws. If you have a medical condition that makes you sensitive to sunlight, you may be able to obtain a medical exemption that allows you to have darker tint on your windows.
- To obtain a medical exemption, you typically need to provide a letter from your doctor.
5. Enforcement:
- Window tint laws are typically enforced by state and local law enforcement officers.
- If you violate window tint laws, you may be issued a ticket or citation. You may also be required to remove the tint from your windows.
6. Resources for Finding State Laws:
- Window tint laws are subject to change, so it’s essential to stay up-to-date on the regulations in your state. Here are some resources for finding state window tint laws:
- International Window Film Association (IWFA): The IWFA website provides a summary of window tint laws for each state.
- State Department of Motor Vehicles (DMV): Your state’s DMV website will have the most accurate and up-to-date information on window tint laws.
- Local Law Enforcement Agencies: Your local law enforcement agency can provide information on window tint laws in your area.
7. Consequences of Violating Window Tint Laws:
- Fines: Fines for violating window tint laws vary by state, but they can range from $50 to $500 or more.
- Tickets: You may receive a traffic ticket for violating window tint laws.
- Requirement to Remove Tint: You may be required to remove the illegal tint from your windows.
- Vehicle Inspection Failure: Your vehicle may fail its annual inspection if it has illegal window tint.
8. Tips for Complying with Window Tint Laws:
- Check Your State’s Laws: Before you tint your windows, check the window tint laws in your state.
- Use a VLT Meter: Use a VLT meter to measure the VLT of your tinted windows.
- Keep Documentation: Keep documentation of your window tint installation, including the VLT of the film.
- If you’re unsure whether your window tint complies with the law, consult with a professional window tinting service.
According to the IWFA, approximately 75% of vehicles with aftermarket window tint violate state laws.
The Bottom Line:
Understanding and complying with window tint laws is essential to avoid fines, tickets, and other legal consequences. Before you tint your car windows, research the regulations in your state and choose a film that meets those requirements. And remember, cars.edu.vn is here to provide you with the information and resources you need to make informed decisions about your car care needs. Stay informed and drive safely!
9. Maintaining Your Car Windows After Tint Removal
Once you’ve successfully removed the window tint from your car, it’s essential to maintain the windows to keep them clean, clear, and in good condition. Here are some tips for maintaining your car windows after tint removal:
-
Regular Cleaning:
- Clean your windows regularly to remove dirt, dust, and grime.
- Use a high-quality glass cleaner and a microfiber towel to avoid streaks.
- Avoid using abrasive cleaners or paper towels, as they can scratch the glass.
-
Remove Bug Splatter and Bird Droppings Promptly:
- Bug splatter and bird droppings can be corrosive and can damage the glass if left on for too long.
- Remove them as soon as possible using a glass cleaner or a mixture of soap and water.
-
Inspect for Scratches and Chips:
- Regularly inspect your windows for scratches and chips.
- Small scratches can often be buffed