A sagging car headliner is more than just an eyesore; it can detract from your driving experience and even hint at underlying issues. If you’re noticing the fabric above you drooping or detaching, you’re likely dealing with a common problem caused by aging adhesive. Fortunately, restoring your car’s headliner doesn’t always require a costly professional replacement. This comprehensive guide will walk you through effective DIY methods to fix a sagging headliner without the hassle of complete removal, saving you time and money.
Understanding Your Car Headliner
Before diving into repairs, let’s understand what a headliner is and its crucial role in your vehicle. The headliner is the fabric lining the interior roof of your car. It’s not just for aesthetics; it’s a functional component designed to:
- Enhance Interior Appearance: It provides a smooth, finished look to your car’s interior.
- Noise Reduction: The layers of material, including foam, help to absorb road noise and vibrations, contributing to a quieter cabin.
- Temperature Insulation: It acts as an insulator, helping to regulate the temperature inside your car by buffering against external heat and cold.
- Acoustics for Audio: Headliners can improve the sound quality of your car’s audio system by optimizing the cabin’s acoustics.
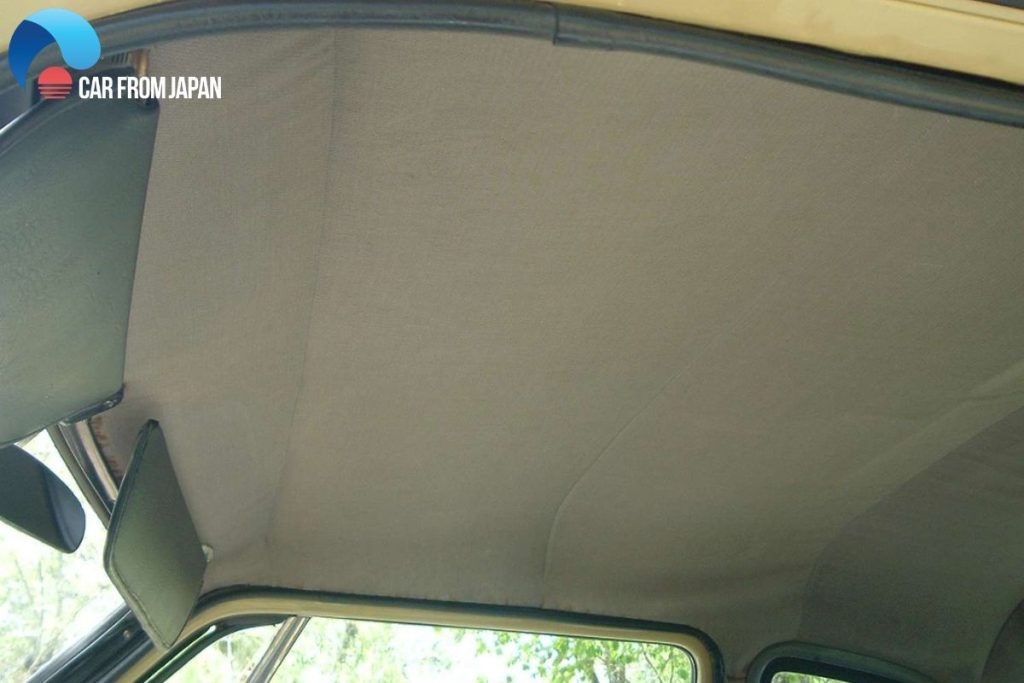
Typically, a car headliner is constructed from multiple layers. This often includes a foam backing, usually polyurethane, which is bonded to a rigid headliner board. This assembly is then attached to the car’s roof frame. Over time, the adhesive holding these layers together can degrade, leading to the dreaded sag.
Alt text: Car headliner fabric attached to the roof frame, providing insulation and a finished interior.
Why Car Headliners Sag: Common Causes
Sagging headliners are a common issue, particularly in older vehicles or those exposed to harsh conditions. Several factors contribute to this problem:
1. Heat and Sunlight:
Excessive heat is a primary culprit. When your car’s roof is exposed to intense sunlight and high temperatures, the adhesive bonding the headliner fabric to the backing board can break down. This heat weakens the glue, causing the fabric to loosen and sag.
2. Humidity and Moisture:
Moisture, whether from humidity, leaks, or condensation, can be absorbed by the foam backing of the headliner. This moisture weakens the adhesive and can cause the foam to lose its structural integrity, leading to warping and sagging. Leaks around sunroofs or windshields are common sources of moisture damage.
3. Age and Adhesive Degradation:
Over time, even without extreme conditions, the adhesive used in headliners naturally degrades. This is simply due to the aging process of the materials. As the adhesive becomes brittle and loses its flexibility, it can no longer hold the fabric firmly in place.
4. Poor Initial Installation:
In some cases, a sagging headliner can be attributed to poor manufacturing or installation. If insufficient adhesive was used during the initial assembly or improper techniques were employed, the headliner may be more prone to sagging from the start.
5. Physical Stress:
While less common, physical stress can also contribute to sagging. Children or pets may pull or scratch at the headliner fabric, weakening the adhesive bonds over time and accelerating the sagging process.
DIY Methods: How to Fix Sagging Headliner Without Removing It
Replacing the entire headliner can be expensive, especially for older cars. Fortunately, there are several effective and budget-friendly methods to fix a sagging headliner without removing it completely. These DIY solutions can restore the look of your car’s interior and prevent further sagging.
Alt text: Close-up of a car headliner sagging, indicating adhesive failure and fabric detachment.
1. Fabric Glue or Headliner Adhesive Spray
For minor sagging, especially around edges or corners, fabric glue or a specialized headliner adhesive spray can be a simple and effective solution. This method works best when the fabric is only partially detached.
Steps:
- Prepare the Area: Gently clean the sagging area of the headliner and the exposed backing board with a soft brush or vacuum to remove any loose debris or dust.
- Apply Adhesive: Use a spray-on headliner adhesive for even coverage. For smaller areas, fabric glue can be applied directly. Hold the nozzle a few inches away and apply a light, even coat to both the fabric and the backing board.
- Reattach Fabric: Allow the adhesive to become slightly tacky (as per the product instructions, usually a minute or two). Carefully press the fabric back into place, starting from the area that is still attached and working outwards.
- Secure and Dry: Use painter’s tape or clamps to hold the fabric firmly against the backing board while the adhesive dries completely. Follow the adhesive manufacturer’s drying time recommendations.
- Remove Tape/Clamps: Once dry, carefully remove the tape or clamps.
Tips:
- Choose a high-quality headliner adhesive spray specifically designed for automotive interiors.
- Work in a well-ventilated area.
- Avoid applying too much adhesive at once, as it can soak through the fabric or create a stiff, uneven finish.
- Test the adhesive in an inconspicuous area first to ensure it doesn’t stain or damage the fabric.
2. Twist Pins or Headliner Sagging Repair Pins
For more significant sagging, especially when larger sections of fabric are detached, twist pins or headliner sagging repair pins offer a quick and inexpensive fix. These pins, sometimes called “saggy stoppers,” are designed to hold the fabric in place without causing further damage.
Steps:
- Gather Pins: Purchase clear-headed twist pins or headliner repair pins. These are readily available online or at auto parts stores.
- Push and Twist: Gently push the pin through the sagging fabric and into the foam backing board.
- Secure Fabric: Twist the pin head to secure the fabric against the backing board.
- Repeat as Needed: Space the pins evenly across the sagging area, pushing the fabric back into place as you go. You can arrange the pins in a pattern for a more visually appealing result.
Tips:
- Clear-headed pins are less noticeable and blend in with most headliner fabrics.
- Distribute pins evenly to avoid creating new stress points on the fabric.
- Avoid over-tightening the pins, as this could tear the fabric.
- This method is particularly effective for larger areas of sagging and can be done quickly.
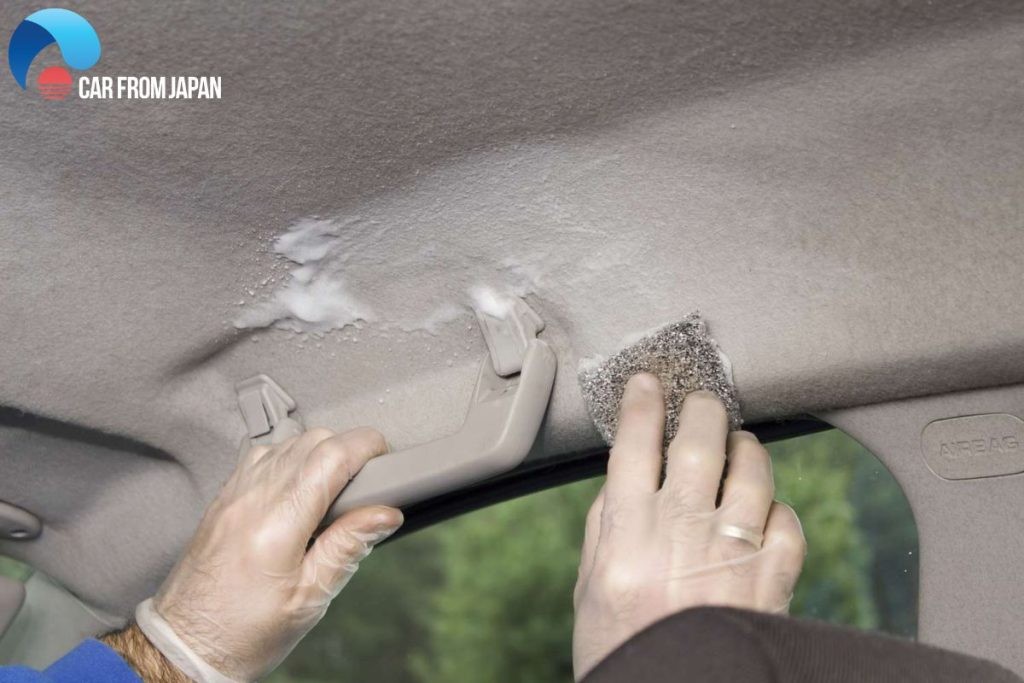
3. Steam Cleaner and Paint Roller Method
For headliners sagging around the edges or areas where the adhesive has softened but not completely failed, a steam cleaner and paint roller can help reactivate the existing adhesive.
Steps:
- Steam the Sagging Area: Use a handheld steam cleaner to gently apply steam to the sagging fabric. The steam will help to soften and reactivate the old adhesive.
- Roll Fabric Back in Place: Immediately after steaming an area, use a clean paint roller to gently press the fabric back against the backing board. Apply even pressure to smooth out any wrinkles or creases.
- Repeat as Necessary: Work in small sections, steaming and rolling until the sagging is resolved.
Tips:
- Use a low steam setting to avoid damaging the headliner fabric.
- Keep the steam cleaner moving and avoid concentrating steam in one spot for too long.
- Use a soft, clean paint roller to avoid transferring dirt or lint to the headliner.
- This method works best when the original adhesive is still somewhat pliable.
Preventing Headliner Sagging: Proactive Measures
While fixing a sagging headliner is manageable, preventing it in the first place is even better. Here are some tips to help prolong the life of your car’s headliner:
- Park in the Shade: Whenever possible, park your car in shaded areas or use a car cover, especially during hot and sunny weather. This reduces heat buildup inside the car and minimizes adhesive degradation.
- Regularly Check for Leaks: Inspect your car’s seals around windows, sunroofs, and windshields regularly. Address any leaks promptly to prevent moisture damage to the headliner.
- Climate Control: Use your car’s air conditioning in hot and humid conditions to reduce moisture buildup inside the cabin.
- Gentle Cleaning: When cleaning your car’s interior, be gentle around the headliner. Avoid harsh chemicals or abrasive cleaners. Use a soft brush or vacuum with an upholstery attachment to remove dust and light dirt.
- Minimize Physical Stress: Discourage children and pets from pulling or scratching at the headliner fabric.
Avoid DIY “Quick Fixes” That Can Cause Damage:
Resist the temptation to use ineffective or potentially damaging quick fixes like:
- Hairspray: Hairspray can stain the fabric and won’t provide a lasting solution.
- Staples or Tacks: These can damage the headliner board and fabric, creating more problems in the long run.
- Household Glues: Ordinary glues are often not formulated for automotive interiors and may not withstand temperature fluctuations or provide sufficient adhesion.
Headliner Replacement Cost: When DIY Isn’t Enough
While DIY methods are often successful, in some cases, the damage may be too extensive, or you may prefer a professional solution. Headliner replacement costs vary depending on your car’s make and model, the complexity of the headliner design (e.g., sunroof, accessories), and labor rates.
Estimated Replacement Costs:
| Vehicle Type | Estimated Cost Range |
|---|---|
| Sedan/Hatchback/Coupe (Simple Design) | $300 – $750 |
| SUV/Crossover (Sunroof/Moonroof) | $500 – $900 |
| Luxury Vehicle (Complex, High-Quality Ceiling) | $1,000 – $6,000+ |
These are general estimates. Luxury vehicles and those with complex headliner designs or integrated features will typically be at the higher end of the price range. Always get quotes from local auto upholstery shops or mechanics for a more accurate estimate specific to your car.
Conclusion: Restoring Your Car’s Interior
A sagging car headliner is a common problem that can detract from your car’s appearance, but it’s not a problem you have to live with. By understanding the causes of sagging and utilizing these DIY methods, you can effectively fix your car’s headliner without the expense of full replacement. Whether you choose adhesive, pins, or the steam and roll method, taking action will restore your car’s interior and enhance your driving enjoyment. If DIY isn’t for you, remember that professional headliner replacement is always an option to bring your car’s ceiling back to its former glory.
FAQs About Sagging Car Headliners
How do I know if my car ceiling is sagging?
Signs of a sagging headliner include:
- Visible drooping fabric that hangs down from the roof.
- A cracking or rustling sound from the headliner area, especially when the car moves or doors are closed.
- The fabric may be detached from the edges or corners.
- You might notice a change in the texture or feel of the headliner, becoming loose or spongy.
Is it okay to fix a sagging headliner myself?
Yes, for many cases of sagging, DIY fixes are perfectly acceptable and can save you significant money compared to professional replacement. DIY methods are particularly effective for minor to moderate sagging.
Can I paint a car headliner?
While technically possible, painting a headliner is generally not recommended. Paint can make the fabric stiff, alter its texture, and may not adhere well over time due to temperature changes inside the car. The effort involved in proper preparation and masking is often better spent on repairing or replacing the headliner fabric.
Does car insurance cover headliner replacement?
Generally, standard car insurance policies do not cover headliner replacement due to wear and tear or cosmetic issues like sagging. Headliner damage is typically considered a maintenance or age-related issue, not a sudden or accidental event covered by insurance. Extended warranties may sometimes offer coverage, but it’s best to review your specific policy details.