Discovering chewing gum stuck to your car seat is frustrating. CARS.EDU.VN offers simple methods for effective gum removal. We provide safe and easy solutions to maintain your car’s interior, focusing on methods that avoid harsh chemicals and unrealistic approaches. Restore your car seat’s pristine condition and discover expert tips for interior car care.
1. Understand the Sticky Situation: Gum Removal Basics
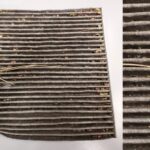
Chewing gum’s adhesive properties make it a formidable foe when it lands on your car seat. Whether it’s a classic fabric, supple leather, or durable vinyl, gum’s stickiness can cause headaches. Understanding the different types of car seat materials is crucial because each requires a specific approach to avoid damage during the cleaning process. The key is to act quickly and use the right tools and techniques to lift the gum without leaving residue or harming the upholstery. CARS.EDU.VN provides detailed guides and expert advice, making tackling this sticky situation easier and ensuring your car’s interior remains pristine.
- Fabric Seats: Tend to be more absorbent, making gum removal slightly more challenging.
- Leather Seats: Require gentle cleaning methods to prevent damage or discoloration.
- Vinyl Seats: Durable but can still be affected by harsh chemicals or abrasive cleaning.
2. The Deep Freeze: Using Ice to Remove Gum
Freezing gum is a reliable and straightforward method, especially on fabrics sensitive to chemicals. The cold hardens the gum, making it easier to remove without leaving a sticky residue.
2.1 Gathering Your Supplies for the Ice Method
Before you start, collect these essential items:
- Ice Cubes: The colder, the better.
- Plastic Bag: To hold the ice and prevent water damage.
- Scraper: A plastic scraper or old credit card works wonders.
- Clean Cloth: For wiping away any residue.
Having everything ready ensures a smooth and efficient cleaning process.
2.2 Step-by-Step Guide to Freezing Gum Off Your Car Seat
Follow these steps for effective gum removal:
- Prepare the Ice Pack: Fill the plastic bag with ice cubes and seal it tightly.
- Apply to Gum: Place the ice pack directly onto the gum.
- Freeze the Gum: Hold the ice pack on the gum for 5-10 minutes, or until the gum hardens completely.
- Scrape Gently: Use the plastic scraper or credit card to gently lift the hardened gum from the car seat. Keep the scraper flat against the surface to avoid damaging the material.
- Wipe Clean: Use a clean cloth to wipe away any remaining residue.
This method is particularly effective because the freezing process minimizes the gum’s stickiness, making it easier to remove without pulling at the fabric or leaving behind a mess.
2.3 Maximizing the Effectiveness of the Ice Method
To get the best results, consider these tips:
- Use a Thick Ice Pack: Ensure the ice pack is thick enough to maintain a consistent freezing temperature.
- Avoid Direct Water Contact: Make sure the plastic bag is sealed tightly to prevent water from soaking into the car seat.
- Be Patient: Allow enough time for the gum to freeze completely before attempting to scrape it off.
By following these guidelines, you can effectively remove gum from your car seat using the freezing method.
3. White Vinegar Solution: Dissolving Gum’s Stickiness
White vinegar is a versatile household remedy, and its natural acidity makes it excellent for breaking down sticky residues like gum. This method is particularly effective on vinyl and fabric seats.
3.1 Preparing Your Vinegar Arsenal
Collect these items before starting:
- White Vinegar: Ensure it’s plain white vinegar, not flavored.
- Microwave-Safe Bowl: For heating the vinegar.
- Clean Cloth: To apply the vinegar.
- Soft Toothbrush: For gentle scrubbing.
3.2 Step-by-Step Guide to Using Vinegar for Gum Removal
Follow these steps for best results:
- Heat the Vinegar: Pour a small amount of white vinegar into a microwave-safe bowl and heat it until it is warm, not boiling.
- Soak a Cloth: Dip a clean cloth into the warm vinegar, ensuring it is well-saturated.
- Apply to Gum: Press the vinegar-soaked cloth against the gum for 2-3 minutes. The warmth and acidity will help to break down the gum’s adhesive properties.
- Gentle Scrubbing: Use a soft toothbrush to gently scrub the gum in a circular motion until it loosens.
- Wipe Away: Wipe away the loosened gum and any remaining vinegar with a clean cloth.
3.3 Important Considerations When Using Vinegar
Keep these points in mind to protect your car seat:
- Test on a Hidden Area: Before applying vinegar to the entire area, test it on a small, inconspicuous spot to ensure it doesn’t affect the upholstery color or material.
- Avoid Leather: Do not use white vinegar on leather seats, as it can dry out the material. CARS.EDU.VN recommends specialized leather cleaners for these surfaces.
- Ventilate the Area: Ensure the car is well-ventilated to dissipate the vinegar smell.
By using white vinegar carefully and following these steps, you can effectively remove gum from your car seat while minimizing the risk of damage.
4. Peanut Butter Power: An Oily Solution
The natural oils in peanut butter can surprisingly break down the adhesive properties of gum, making it easier to remove. This method works well but requires careful cleaning to avoid leaving oil stains.
4.1 Assembling Your Peanut Butter Toolkit
Gather these items before you begin:
- Smooth Peanut Butter: Avoid chunky varieties.
- Spatula or Butter Knife: For applying the peanut butter.
- Damp Cloth: For wiping away the peanut butter and gum.
- Soapy Water: For cleaning any remaining oil residue.
4.2 Step-by-Step Guide to Using Peanut Butter
Follow these steps for effective gum removal:
- Apply Peanut Butter: Use the spatula or butter knife to spread a thin layer of peanut butter over the gum.
- Let It Sit: Allow the peanut butter to sit for a few minutes. This allows the oils to penetrate and break down the gum’s stickiness.
- Wipe Away: Gently wipe away the gum and peanut butter with a damp cloth.
- Clean Thoroughly: Clean the area thoroughly with soapy water to remove any remaining oil residue.
4.3 Precautions When Using Peanut Butter
Keep these considerations in mind:
- Fabric Seats: Be cautious when using this method on fabric seats, as peanut butter can leave oil stains.
- Allergy Alert: Be aware of potential peanut allergies, especially if you frequently have passengers in your car.
- Test First: Test the peanut butter on a hidden area first to ensure it doesn’t stain the upholstery.
With careful application and thorough cleaning, peanut butter can be a surprisingly effective solution for removing gum from your car seat. For more specialized cleaning advice, visit CARS.EDU.VN.
5. Adhesive Removers: Chemical Solutions for Stubborn Gum
Adhesive removers like Goo Gone are specifically designed to tackle sticky messes, making them effective for gum removal. However, they should be used sparingly to avoid discoloring the upholstery.
5.1 Gathering Your Chemical Arsenal
Collect these items before starting:
- Adhesive Remover: Choose a product specifically designed for automotive interiors.
- Scraper: A plastic scraper or old credit card.
- Clean Cloth: For wiping away the remover and residue.
- Water: For rinsing the area.
5.2 Step-by-Step Guide to Using Adhesive Removers
Follow these steps for optimal results:
- Apply Remover: Apply a small amount of adhesive remover to the gum.
- Soak Time: Allow it to soak for 1-2 minutes to penetrate the gum.
- Gently Scrape: Gently scrape off the gum with a plastic scraper.
- Wipe Clean: Wipe the area clean with a damp cloth.
- Rinse: Rinse the area with water to remove any remaining remover.
5.3 Safety and Usage Tips for Adhesive Removers
Keep these guidelines in mind:
- Ventilation: Ensure the area is well-ventilated to avoid inhaling fumes.
- Manufacturer’s Instructions: Always follow the manufacturer’s instructions closely.
- Test First: Test the remover on a hidden area first to ensure it doesn’t discolor the upholstery.
Adhesive removers can be highly effective, but they require careful handling to protect your car’s interior. For more safety tips and product recommendations, visit CARS.EDU.VN.
6. Duct Tape Trick: Picking Up Leftover Residue
Duct tape can be a lifesaver for removing leftover gum bits after the bulk of the gum has been removed. Its strong adhesive properties make it ideal for picking up stubborn residue.
6.1 Preparing Your Duct Tape Toolkit
Gather these items before starting:
- Duct Tape: Ensure it’s a strong, adhesive brand.
- Scissors: For cutting the tape.
- Clean Cloth: For wiping the area afterward.
6.2 Step-by-Step Guide to Using Duct Tape
Follow these steps for effective residue removal:
- Cut a Piece of Tape: Cut a piece of duct tape slightly larger than the gum residue.
- Press Firmly: Press the sticky side firmly onto the residue.
- Peel Sharply: Peel the tape off sharply to lift the leftover gum.
- Repeat: Repeat with fresh tape until all residue is gone.
- Wipe Clean: Wipe the area with a clean cloth to remove any remaining stickiness.
6.3 Tips for Effective Duct Tape Usage
Keep these points in mind for best results:
- Use Fresh Tape: Ensure the tape is fresh and sticky for optimal adhesion.
- Press Firmly: Press the tape firmly onto the residue to ensure good contact.
- Peel Quickly: Peel the tape off quickly to lift the residue effectively.
Duct tape is a simple but effective tool for removing those last, annoying bits of gum from your car seat.
7. Advanced Cleaning Techniques for Different Car Seat Materials
Different car seat materials require tailored cleaning approaches to ensure effective gum removal without causing damage. CARS.EDU.VN offers specialized advice for each type of material.
7.1 Fabric Seats: Deep Cleaning Methods
Fabric seats tend to absorb gum residue, making deep cleaning essential.
- Upholstery Cleaner: Use a high-quality upholstery cleaner specifically designed for automotive interiors.
- Steam Cleaning: Steam cleaning can help lift stubborn residue from the fabric. Be sure to follow the manufacturer’s instructions and test on a hidden area first.
- Enzyme Cleaners: For tough stains, enzyme cleaners can break down organic matter and eliminate odors.
7.2 Leather Seats: Gentle Care is Key
Leather seats require gentle cleaning to avoid drying or cracking.
- Leather Cleaner: Use a pH-balanced leather cleaner to avoid damaging the material.
- Leather Conditioner: After cleaning, apply a leather conditioner to keep the leather supple and prevent cracks.
- Microfiber Cloth: Use a soft microfiber cloth to avoid scratching the leather.
7.3 Vinyl Seats: Balancing Durability and Care
Vinyl seats are durable but can still be damaged by harsh chemicals.
- Mild Soap and Water: A mixture of mild soap and water is often sufficient for cleaning vinyl seats.
- Vinyl Cleaner: Use a cleaner specifically designed for vinyl to avoid discoloration or damage.
- Soft Brush: A soft brush can help remove gum residue without scratching the vinyl.
By tailoring your cleaning approach to the specific material of your car seats, you can ensure effective gum removal while maintaining the integrity of your car’s interior.
8. Preventing Future Gum Incidents: Proactive Measures
Prevention is always better than cure. Taking proactive measures can help avoid future gum mishaps in your car.
8.1 Practical Prevention Tips
Follow these tips to minimize the risk of gum ending up on your car seats:
- Use Seat Covers: Protect your upholstery with removable seat covers that are easy to clean.
- Keep a Cleaning Kit: Having basic supplies like ice packs, vinegar, and a scraper in your car can help you act quickly if an incident occurs.
- Educate Passengers: Gently remind passengers to dispose of gum properly to avoid accidental messes.
- Provide a Designated Disposal Area: Keep a small trash bag or container in the car for gum disposal.
8.2 Maintaining a Clean Car Interior
Regular maintenance is key to keeping your car’s interior in top condition.
- Regular Vacuuming: Vacuum your car’s interior regularly to remove loose debris and prevent stains from setting in.
- Prompt Stain Removal: Address spills and stains promptly to prevent them from becoming permanent.
- Professional Detailing: Consider professional detailing services for a thorough cleaning and restoration of your car’s interior.
By taking these proactive steps, you can keep your car’s interior clean and prevent future gum-related headaches. For more tips on car maintenance, visit CARS.EDU.VN.
9. Post-Removal Care: Restoring Your Car Seat’s Glory
After successfully removing the gum, it’s essential to clean and condition your car seats to restore their appearance.
9.1 Cleaning and Conditioning Steps
Follow these steps to rejuvenate your car seats:
- Fabric Seats: Use an upholstery cleaner to eliminate any lingering stains. Apply the cleaner according to the manufacturer’s instructions and allow it to dry thoroughly.
- Leather Seats: Use a high-quality leather conditioner to keep them supple and prevent cracks. Apply the conditioner with a soft cloth and buff gently.
- Vinyl Seats: Wipe down the seats with a vinyl cleaner to remove any remaining residue and protect the material.
9.2 Maintaining a Fresh Interior
Regular maintenance will ensure your car’s interior looks its best.
- Regular Cleaning: Clean your car seats regularly to prevent dirt and stains from accumulating.
- Protective Products: Use protective products like seat covers and dashboard protectants to shield your car’s interior from wear and tear.
- Professional Detailing: Consider professional detailing services periodically to keep your car’s interior in top condition.
By following these post-removal care tips, you can maintain a clean, comfortable, and inviting car interior.
10. CARS.EDU.VN: Your Partner in Car Care
At CARS.EDU.VN, we understand the challenges of maintaining your vehicle. From removing stubborn gum to providing expert car care tips, we’re here to help you keep your car in top condition.
10.1 Comprehensive Car Care Resources
We offer a wealth of resources to address all your car care needs:
- Detailed Guides: Step-by-step guides on various car maintenance tasks.
- Expert Advice: Tips and insights from automotive professionals.
- Product Reviews: Recommendations for the best car care products on the market.
- Service Locator: Find trusted car care services in your area.
10.2 Addressing Customer Challenges
We understand the difficulties car owners face:
- Finding Reputable Services: We connect you with trusted and quality car repair services.
- Lack of Maintenance Knowledge: We provide easy-to-understand guides for routine car maintenance.
- Choosing the Right Vehicle: We offer in-depth reviews and comparisons to help you select the perfect car.
- DIY Repairs: We provide guidance on simple fixes to save you time and money.
10.3 Meeting Your Car Care Needs
CARS.EDU.VN is dedicated to providing services that meet your needs:
- Detailed Service Information: In-depth information on car care and repair services.
- Easy-to-Understand Maintenance Guides: Simple guides for routine car maintenance.
- In-Depth Vehicle Reviews: Expert reviews and comparisons of different car models.
- DIY Repair Guides: Step-by-step instructions for simple car repairs.
- Latest Automotive News: Updates on the latest car technologies and trends.
Contact us today to discover how CARS.EDU.VN can help you maintain and protect your vehicle. Our team is ready to provide the information and support you need.
Address: 456 Auto Drive, Anytown, CA 90210, United States
WhatsApp: +1 555-123-4567
Website: CARS.EDU.VN
Don’t let car troubles get you down. Visit CARS.EDU.VN today for expert advice, detailed guides, and comprehensive car care solutions. Let us help you keep your vehicle running smoothly and looking its best. Explore our site for more articles and services that address all your car care needs.
Frequently Asked Questions (FAQ)
Here are some frequently asked questions about removing gum from car seats:
-
What is the best way to remove gum from a car seat?
The best method depends on the car seat material. Freezing with ice works well for most fabrics, while white vinegar is effective on vinyl. Peanut butter can also break down the gum’s stickiness, but be sure to clean thoroughly afterward. -
Can I use WD-40 to remove gum from a car seat?
WD-40 can be used to remove gum, but it’s essential to use it sparingly and test it on a hidden area first. After applying WD-40, clean the area thoroughly with soapy water to remove any residue. -
How do I remove gum from a leather car seat without damaging it?
Use a leather cleaner specifically designed for automotive interiors. Apply the cleaner with a soft microfiber cloth and gently wipe away the gum. Follow up with a leather conditioner to keep the leather supple. -
What should I do if the gum has hardened on my car seat?
Try the freezing method with ice. Place an ice pack on the gum for 5-10 minutes to harden it, then gently scrape it off with a plastic scraper. -
Is it safe to use adhesive removers on car seats?
Adhesive removers like Goo Gone can be used, but they should be applied sparingly. Always test the remover on a hidden area first to ensure it doesn’t discolor the upholstery. Follow the manufacturer’s instructions closely. -
How can I prevent gum from sticking to my car seats in the future?
Use seat covers to protect your upholstery. Remind passengers to dispose of gum properly and keep a trash bag in the car for gum disposal. -
Can I use a hair dryer to soften the gum before removing it?
A hair dryer can soften the gum, making it easier to remove. Use the low setting and keep the hair dryer moving to avoid overheating the area. Gently scrape off the softened gum with a plastic scraper. -
What is the best way to clean up peanut butter after using it to remove gum?
Clean the area thoroughly with soapy water to remove any remaining oil residue. Use a clean cloth to wipe away the soap and water, and allow the area to dry completely. -
How often should I clean my car seats to prevent stains and buildup?
Clean your car seats at least every few months, or more frequently if you notice stains or buildup. Regular cleaning will help keep your car’s interior looking its best. -
Where can I find more car care tips and advice?
Visit cars.edu.vn for detailed guides, expert advice, and comprehensive car care solutions. Our website offers a wealth of resources to help you maintain and protect your vehicle.