Do you want to know How Do You Get Scratches Out Of A Car? CARS.EDU.VN offers expert advice on car scratch removal, helping you restore your vehicle’s appearance and value with proven methods and products. Discover the best techniques for fixing minor paint imperfections, clear coat damage, and deep scratches, ensuring your car looks its best. Learn about paint correction, car detailing, and professional auto body repair services to make your vehicle shine.
1. Understanding Car Scratches: Types and Severity
Knowing how do you get scratches out of a car begins with identifying the type of scratch on your vehicle. Scratches can range from minor surface blemishes to deep gouges that penetrate the paint layers. Understanding the severity of the scratch is crucial in determining the appropriate removal method. Let’s explore the different types of scratches:
-
Clear Coat Scratches: These are the most common type, affecting only the clear coat layer of the paint. They appear as light, superficial marks and can often be removed with simple polishing techniques.
-
Paint Scratches: These scratches go deeper, penetrating the clear coat and reaching the paint layer. They are more visible than clear coat scratches and require more aggressive methods for removal.
-
Primer Scratches: These are significant scratches that cut through the clear coat and paint layers, exposing the primer underneath. They are usually more noticeable and require filling and painting for a proper repair.
-
Deep Scratches: The most severe type, deep scratches go through all the paint layers and expose the bare metal of the car’s body. These require professional repair to prevent rust and ensure a lasting finish.
Table 1: Types of Car Scratches and Recommended Actions
| Scratch Type | Depth | Appearance | Recommended Action |
|---|---|---|---|
| Clear Coat | Superficial, affects only the clear coat | Light, hairline marks | Polishing, scratch removal compounds |
| Paint | Penetrates clear coat and reaches the paint | More visible, colored marks | Polishing with more abrasive compounds, touch-up paint |
| Primer | Cuts through clear coat and paint to the primer | Exposes grey or white primer | Filling, sanding, priming, and painting |
| Deep (Bare Metal) | Goes through all layers to the metal | Exposes bare metal, prone to rust | Professional auto body repair, welding, and painting |
Understanding these distinctions is the first step in determining how do you get scratches out of a car effectively. Addressing each type with the appropriate method ensures the best possible outcome and prevents further damage.
2. Essential Tools and Materials for Scratch Removal
When tackling the question of how do you get scratches out of a car, gathering the right tools and materials is paramount. Having everything you need on hand will not only make the process smoother but also ensure you achieve the best possible results. Here’s a comprehensive list of essential tools and materials:
- Cleaning Supplies:
- Car Wash Soap: Use a pH-balanced car wash soap to clean the area around the scratch thoroughly.
- Microfiber Towels: Soft microfiber towels are essential for washing, drying, and polishing without causing further scratches.
- Detailing Clay: Use detailing clay to remove contaminants from the surface, providing a clean base for scratch removal.
- Scratch Removal Products:
- Scratch Removal Compound: Choose a high-quality scratch removal compound designed for your car’s paint type.
- Polishing Compound: A polishing compound helps to refine the finish after using the scratch removal compound.
- Wax or Sealant: Apply wax or sealant to protect the repaired area and enhance the shine.
- Application Tools:
- Foam Applicator Pads: These pads are ideal for applying scratch removal and polishing compounds evenly.
- Polishing Machine (Optional): A dual-action polisher can make the job easier and more effective, especially for larger areas.
- Buffing Pads: Use clean buffing pads with the polishing machine to achieve a smooth finish.
- Repair Tools:
- Fine-Grit Sandpaper: For deeper scratches, you might need fine-grit sandpaper (e.g., 3000-grit) to level the surface.
- Touch-Up Paint: Use touch-up paint that matches your car’s color code to fill in deeper scratches.
- Primer: If the scratch exposes the primer, use a primer pen or brush to prepare the surface for touch-up paint.
- Miscellaneous:
- Masking Tape: Protect surrounding areas by masking them off with tape.
- Water Spray Bottle: Keep the surface damp while sanding to prevent overheating and scratching.
- Gloves: Wear gloves to protect your hands from chemicals and paint.
- Good Lighting: Ensure you have adequate lighting to see the scratches clearly and monitor your progress.
Table 2: Essential Tools and Materials for Car Scratch Removal
| Tool/Material | Purpose | Notes |
|---|---|---|
| Car Wash Soap | Cleaning the area around the scratch | Use pH-balanced soap to avoid damaging the paint. |
| Microfiber Towels | Washing, drying, and polishing | Use clean, soft towels to prevent further scratches. |
| Detailing Clay | Removing contaminants from the surface | Use with a lubricant to avoid scratching the paint. |
| Scratch Removal Compound | Removing minor scratches from the clear coat | Choose a compound designed for your car’s paint type. |
| Polishing Compound | Refining the finish after using scratch removal compound | Use a less abrasive compound for a smooth finish. |
| Wax or Sealant | Protecting the repaired area and enhancing the shine | Apply after polishing to protect the paint. |
| Foam Applicator Pads | Applying scratch removal and polishing compounds evenly | Use clean pads to avoid contamination. |
| Polishing Machine | Making the job easier and more effective (optional) | Use with appropriate buffing pads and follow the manufacturer’s instructions. |
| Fine-Grit Sandpaper | Leveling the surface for deeper scratches (e.g., 3000-grit) | Use wet sanding technique to prevent overheating and scratching. |
| Touch-Up Paint | Filling in deeper scratches | Match the paint to your car’s color code. |
| Primer | Preparing the surface for touch-up paint if the scratch exposes the primer | Use a primer pen or brush for precise application. |
| Masking Tape | Protecting surrounding areas | Use high-quality masking tape to prevent paint bleed. |
| Water Spray Bottle | Keeping the surface damp while sanding | Prevents overheating and scratching during wet sanding. |
| Gloves | Protecting your hands from chemicals and paint | Use chemical-resistant gloves. |
| Good Lighting | Ensuring you can see the scratches clearly | Use a bright work light or natural sunlight. |
Having these tools and materials ready will set you up for success in learning how do you get scratches out of a car. Proper preparation is key to achieving a professional-looking result.
3. Step-by-Step Guide to Removing Minor Scratches
How do you get scratches out of a car when they are minor? Removing minor scratches, such as those affecting only the clear coat, is a manageable task with the right approach. Here’s a detailed step-by-step guide to help you restore your car’s paint:
Step 1: Wash and Dry the Car
Start by thoroughly washing the area around the scratch with car wash soap and water. Rinse well and dry with a clean microfiber towel. This removes dirt and debris that could cause further scratches during the removal process.
Step 2: Inspect the Scratch
Carefully examine the scratch to determine its depth. If it’s only a surface-level scratch, it should be treatable with a scratch removal compound.
Step 3: Apply Scratch Removal Compound
Apply a small amount of scratch removal compound to a foam applicator pad. Gently rub the compound onto the scratch using circular motions. Apply moderate pressure and work in small sections.
Step 4: Buff the Area
After applying the compound, use a clean microfiber towel to buff the area. Use circular motions and moderate pressure to remove the compound residue and smooth the paint.
Step 5: Polish the Surface
Apply a polishing compound to a clean foam applicator pad. Polish the area using circular motions to refine the finish and enhance the shine. This step helps to remove any swirl marks left by the scratch removal compound.
Step 6: Buff Again
Use a clean microfiber towel to buff the area again, removing any polishing compound residue.
Step 7: Apply Wax or Sealant
Apply a coat of wax or sealant to protect the repaired area and enhance the shine. This step helps to seal the paint and prevent future scratches.
Step 8: Inspect and Repeat if Necessary
Inspect the area under good lighting. If the scratch is still visible, repeat the process. For deeper scratches, you may need to use a more aggressive compound or consider professional help.
Table 3: Step-by-Step Guide for Minor Scratch Removal
| Step | Action | Materials | Notes |
|---|---|---|---|
| 1 | Wash and Dry the Car | Car wash soap, water, microfiber towel | Ensure the area is clean and dry before proceeding. |
| 2 | Inspect the Scratch | Visual inspection | Determine the depth of the scratch. |
| 3 | Apply Scratch Removal Compound | Scratch removal compound, foam applicator pad | Use circular motions and moderate pressure. |
| 4 | Buff the Area | Clean microfiber towel | Remove compound residue and smooth the paint. |
| 5 | Polish the Surface | Polishing compound, foam applicator pad | Refine the finish and enhance the shine. |
| 6 | Buff Again | Clean microfiber towel | Remove polishing compound residue. |
| 7 | Apply Wax or Sealant | Wax or sealant, foam applicator pad | Protect the repaired area and enhance the shine. |
| 8 | Inspect and Repeat if Necessary | Visual inspection | Check for remaining scratches and repeat the process if needed. |
By following these steps, you can effectively remove minor scratches and restore your car’s paint. For more in-depth guidance and product recommendations, visit CARS.EDU.VN.
4. Dealing with Deeper Scratches: Touch-Up Paint Method
How do you get scratches out of a car when they are deeper and penetrate the clear coat and paint layers? Deeper scratches require a more involved approach to ensure a lasting and aesthetically pleasing repair. The touch-up paint method is effective for these types of scratches. Here’s a detailed guide:
Step 1: Clean and Prepare the Area
Thoroughly wash the area around the scratch with car wash soap and water. Rinse and dry with a clean microfiber towel. Use detailing clay to remove any contaminants from the surface.
Step 2: Sand the Scratch (If Necessary)
If the edges of the scratch are rough, use fine-grit sandpaper (e.g., 3000-grit) to gently smooth them. Wet the sandpaper and the area around the scratch, then lightly sand in a back-and-forth motion.
Step 3: Apply Primer (If Necessary)
If the scratch exposes the primer or bare metal, apply a thin coat of automotive primer using a small brush or primer pen. Allow the primer to dry completely according to the manufacturer’s instructions.
Step 4: Apply Touch-Up Paint
Using a fine brush or the applicator provided with the touch-up paint, carefully apply thin layers of touch-up paint to the scratch. Allow each layer to dry completely before applying the next. Apply enough layers to build the paint level to match the surrounding area.
Step 5: Allow the Paint to Cure
Allow the touch-up paint to cure completely. This may take several hours or even a day, depending on the paint and environmental conditions.
Step 6: Wet Sand (Optional)
If the touch-up paint is slightly higher than the surrounding paint, you can wet sand it to level it. Use fine-grit sandpaper (e.g., 3000-grit) and water, and gently sand the area until it is flush with the surrounding paint.
Step 7: Polish the Area
Apply polishing compound to a foam applicator pad and polish the area using circular motions to refine the finish. This step helps to blend the touch-up paint with the surrounding paint.
Step 8: Wax or Sealant
Apply a coat of wax or sealant to protect the repaired area and enhance the shine.
Table 4: Step-by-Step Guide for Deeper Scratch Repair with Touch-Up Paint
| Step | Action | Materials | Notes |
|---|---|---|---|
| 1 | Clean and Prepare the Area | Car wash soap, water, microfiber towel, detailing clay | Ensure the area is clean and free of contaminants. |
| 2 | Sand the Scratch (If Necessary) | Fine-grit sandpaper (e.g., 3000-grit), water | Smooth rough edges of the scratch. Use wet sanding technique. |
| 3 | Apply Primer (If Necessary) | Automotive primer, small brush or primer pen | Apply a thin coat if the scratch exposes primer or bare metal. Allow to dry completely. |
| 4 | Apply Touch-Up Paint | Touch-up paint, fine brush or applicator | Apply thin layers, allowing each to dry before applying the next. Build the paint level to match the area. |
| 5 | Allow the Paint to Cure | N/A | Allow the paint to cure completely (several hours or a day). |
| 6 | Wet Sand (Optional) | Fine-grit sandpaper (e.g., 3000-grit), water | Level the touch-up paint with the surrounding paint if necessary. Use wet sanding technique. |
| 7 | Polish the Area | Polishing compound, foam applicator pad | Refine the finish and blend the touch-up paint with the surrounding paint. |
| 8 | Wax or Sealant | Wax or sealant, foam applicator pad | Protect the repaired area and enhance the shine. |
Using the touch-up paint method can significantly improve the appearance of deeper scratches. For expert advice and product recommendations, visit CARS.EDU.VN.
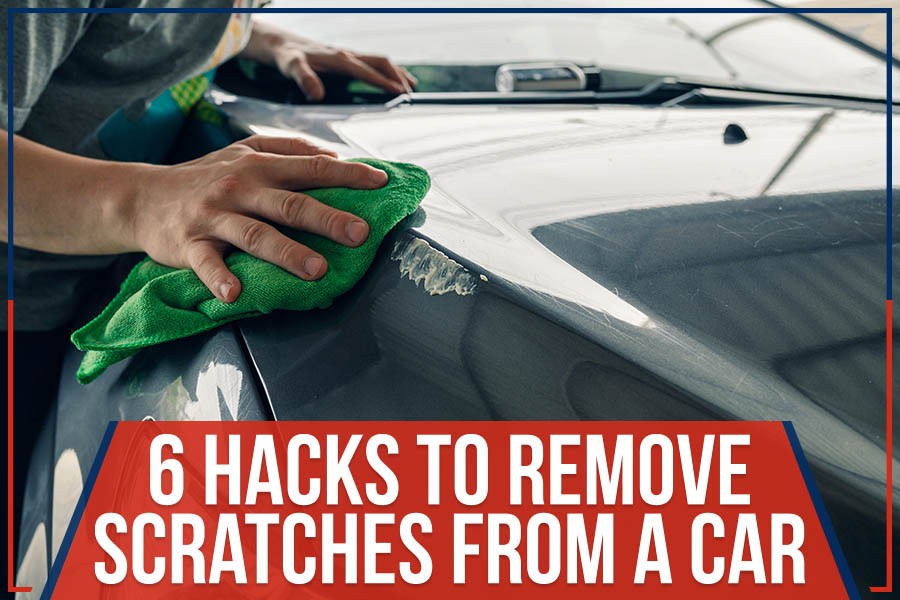 Car scratch
5. Advanced Techniques: Wet Sanding and Polishing
For more severe scratches or imperfections, advanced techniques like wet sanding and polishing can make a significant difference. Here’s how do you get scratches out of a car using these methods:
Wet Sanding
Wet sanding involves using fine-grit sandpaper with water as a lubricant to smooth out imperfections in the paint.
Step 1: Prepare the Area
Clean the area thoroughly with car wash soap and water. Rinse and dry with a clean microfiber towel.
Step 2: Gather Your Materials
You will need fine-grit sandpaper (e.g., 2000-grit, 3000-grit), a sanding block, a spray bottle filled with water, and a bucket of clean water.
Step 3: Soak the Sandpaper
Soak the sandpaper in the bucket of water for at least 10-15 minutes. This helps to soften the sandpaper and prevent it from scratching the paint.
Step 4: Wet Sand the Area
Attach the sandpaper to the sanding block and spray the area with water. Gently sand the area using light, even pressure. Sand in a back-and-forth motion, keeping the surface wet at all times.
Step 5: Rinse and Inspect
Rinse the area with water and inspect your progress. The surface should appear smooth and even. If necessary, repeat the sanding process with a higher grit sandpaper (e.g., 3000-grit) to further refine the finish.
Polishing
After wet sanding, polishing is essential to restore the shine to the paint.
Step 1: Prepare the Polishing Machine
Attach a polishing pad to your dual-action polishing machine. Apply a small amount of polishing compound to the pad.
Step 2: Polish the Area
Turn on the polishing machine and gently polish the area using overlapping passes. Use moderate pressure and work in small sections.
Step 3: Buff the Area
After polishing, use a clean microfiber towel to buff the area and remove any polishing compound residue.
Step 4: Inspect and Repeat
Inspect the area under good lighting. If necessary, repeat the polishing process with a finer polishing compound to further enhance the shine.
Step 5: Apply Wax or Sealant
Apply a coat of wax or sealant to protect the repaired area and enhance the shine.
Table 5: Step-by-Step Guide for Wet Sanding and Polishing
| Step | Action | Materials | Notes |
|---|---|---|---|
| Wet Sanding | |||
| 1 | Prepare the Area | Car wash soap, water, microfiber towel | Ensure the area is clean and free of contaminants. |
| 2 | Gather Your Materials | Fine-grit sandpaper (e.g., 2000-grit, 3000-grit), sanding block, water | Use high-quality sandpaper and a sanding block for even pressure. |
| 3 | Soak the Sandpaper | Sandpaper, water | Soak the sandpaper for at least 10-15 minutes. |
| 4 | Wet Sand the Area | Sandpaper, sanding block, water | Use light, even pressure and keep the surface wet at all times. |
| 5 | Rinse and Inspect | Water | Rinse the area with water and inspect your progress. |
| Polishing | |||
| 1 | Prepare the Polishing Machine | Dual-action polishing machine, polishing pad, polishing compound | Ensure the polishing pad is clean and in good condition. |
| 2 | Polish the Area | Polishing machine, polishing compound | Use overlapping passes and moderate pressure. |
| 3 | Buff the Area | Clean microfiber towel | Remove any polishing compound residue. |
| 4 | Inspect and Repeat | Visual inspection | Inspect the area under good lighting and repeat if necessary. |
| 5 | Apply Wax or Sealant | Wax or sealant, foam applicator pad | Protect the repaired area and enhance the shine. |
Wet sanding and polishing require patience and attention to detail. For expert guidance and product recommendations, visit CARS.EDU.VN.
6. Home Remedies: Toothpaste, Baking Soda, and Vinegar
When asking how do you get scratches out of a car, you might wonder about home remedies. While commercial products are often the best choice, several household items can be used for minor scratch removal. Here’s how to use toothpaste, baking soda, and vinegar:
Toothpaste
Toothpaste can act as a mild abrasive to buff out minor scratches in the clear coat.
How to Use:
- Clean the area around the scratch with car wash soap and water. Rinse and dry.
- Apply a small amount of non-gel toothpaste to a clean microfiber towel.
- Rub the toothpaste onto the scratch using circular motions.
- Rinse the area with water and dry with a clean towel.
- Inspect the scratch. Repeat if necessary.
Baking Soda
Baking soda can be mixed with water to create a paste that can gently buff out minor scratches.
How to Use:
- Mix baking soda with water to create a thick paste.
- Apply the paste to the scratch with a clean microfiber towel.
- Rub the paste onto the scratch using circular motions.
- Rinse the area with water and dry with a clean towel.
- Inspect the scratch. Repeat if necessary.
Vinegar
Vinegar can be used to clean and lightly etch the surface, which may help blend minor scratches with the surrounding paint.
How to Use:
- Mix equal parts white vinegar and water in a spray bottle.
- Spray the solution onto the scratch.
- Wipe the area with a clean microfiber towel.
- Rinse the area with water and dry with a clean towel.
- Inspect the scratch. Repeat if necessary.
Table 6: Home Remedies for Minor Scratch Removal
| Remedy | Method | Notes |
|---|---|---|
| Toothpaste | Apply to a microfiber towel, rub in circular motions, rinse, and dry. | Use non-gel toothpaste. It acts as a mild abrasive. |
| Baking Soda | Mix with water to form a paste, apply, rub in circular motions, rinse, and dry. | Use a thick paste to gently buff out minor scratches. |
| Vinegar | Mix equal parts vinegar and water, spray, wipe, rinse, and dry. | Vinegar can help clean and lightly etch the surface, blending minor scratches. |
While these home remedies can be effective for very minor scratches, they may not provide the same results as commercial scratch removal products. For best results and expert advice, visit CARS.EDU.VN.
7. Professional Scratch Repair Services: When to Seek Help
While many scratches can be addressed with DIY methods, some damage requires professional attention. Here’s when seeking professional scratch repair services is the best option:
- Deep Scratches: If the scratch penetrates through the clear coat, paint, and primer, exposing the bare metal, professional repair is necessary to prevent rust and ensure a proper finish.
- Large Areas of Damage: Scratches covering a large area or multiple panels may be too complex for DIY repair. Professionals have the tools and expertise to handle extensive damage.
- Color Matching: Achieving a perfect color match can be challenging with DIY methods. Professionals have the equipment and experience to precisely match your car’s paint color.
- Lack of Experience: If you are uncomfortable performing scratch repair yourself or have had unsuccessful attempts, it’s best to seek professional help.
- High-Value Vehicles: For luxury or classic cars, professional repair is recommended to maintain the vehicle’s value and appearance.
Table 7: When to Seek Professional Scratch Repair Services
| Situation | Reason | Benefits |
|---|---|---|
| Deep Scratches | Scratches exposing bare metal | Prevents rust, ensures proper finish |
| Large Areas of Damage | Extensive damage covering multiple panels | Handles complex repairs efficiently |
| Color Matching | Difficulty achieving a perfect color match | Ensures a seamless repair that matches the car’s original paint |
| Lack of Experience | Uncomfortable or unsuccessful DIY attempts | Avoids further damage and ensures a professional result |
| High-Value Vehicles | Maintaining the value and appearance of luxury or classic cars | Preserves the vehicle’s value and appearance with expert care |
Professional scratch repair services offer expertise, precision, and quality results. For trusted service recommendations, visit CARS.EDU.VN.
8. Cost Considerations: DIY vs. Professional Repair
The cost of scratch repair varies widely depending on the severity of the scratch and whether you choose to DIY or seek professional services. Here’s a breakdown of the cost considerations:
DIY Repair
- Materials: The cost of materials for DIY scratch repair can range from $20 to $100, depending on the products you need (e.g., scratch removal compound, touch-up paint, sandpaper).
- Time: DIY repair requires time and effort. Minor scratches may take a few hours, while deeper scratches could take a full day to repair properly.
- Tools: If you don’t already have them, you may need to purchase tools like a polishing machine, foam pads, and sanding blocks, adding to the overall cost.
Professional Repair
- Minor Scratches: Professional repair of minor scratches can cost between $150 and $300 per panel.
- Deeper Scratches: Repairing deeper scratches that require filling, sanding, and painting can cost between $300 and $800 per panel.
- Full Panel Repainting: If the damage is extensive, repainting an entire panel can cost between $500 and $1200.
Table 8: Cost Considerations: DIY vs. Professional Repair
| Factor | DIY Repair | Professional Repair |
|---|---|---|
| Materials | $20 – $100 (scratch removal compound, touch-up paint, sandpaper) | Included in service cost |
| Time | Several hours to a full day | Varies, typically a few hours to a few days |
| Tools | Additional cost if not already owned (polishing machine, foam pads, sanding blocks) | N/A |
| Minor Scratches | Low cost; time-consuming | $150 – $300 per panel; convenient |
| Deeper Scratches | Moderate cost; requires skill and precision | $300 – $800 per panel; professional results |
| Full Panel | Lowest cost; may not achieve professional results | $500 – $1200; ensures a seamless finish |
Choosing between DIY and professional repair depends on your budget, skill level, and the severity of the damage. For cost-effective solutions and expert advice, visit CARS.EDU.VN.
9. Preventative Measures: Protecting Your Car’s Paint
Preventing scratches is always better than having to repair them. Here are several preventative measures you can take to protect your car’s paint:
- Regular Washing: Wash your car regularly to remove dirt, grime, and contaminants that can scratch the paint.
- Waxing: Apply a coat of wax or sealant every few months to protect the paint from the elements and minor scratches.
- Paint Protection Film (PPF): Consider applying paint protection film to high-impact areas like the hood, fenders, and bumpers. PPF provides a durable barrier against scratches, chips, and other damage.
- Careful Parking: Park in areas where your car is less likely to be scratched, such as away from shopping carts and other vehicles.
- Avoid Automatic Car Washes: Automatic car washes with brushes can scratch the paint. Opt for touchless car washes or hand washing.
- Use Soft Washing Tools: When washing your car, use soft microfiber towels and sponges to avoid scratching the paint.
- Avoid Dusty or Dirty Cloths: Never use dusty or dirty cloths to wipe your car, as they can cause scratches.
- Be Mindful of Your Surroundings: Be careful when loading and unloading items from your car to avoid accidentally scratching the paint.
Table 9: Preventative Measures for Protecting Your Car’s Paint
| Measure | Description | Benefits |
|---|---|---|
| Regular Washing | Washing your car regularly to remove dirt and contaminants | Prevents dirt and grime from scratching the paint |
| Waxing | Applying wax or sealant every few months | Protects the paint from the elements and minor scratches |
| Paint Protection Film (PPF) | Applying a durable film to high-impact areas | Provides a barrier against scratches, chips, and other damage |
| Careful Parking | Parking in areas less likely to cause scratches | Reduces the risk of accidental scratches from shopping carts and other vehicles |
| Avoid Automatic Car Washes | Opting for touchless car washes or hand washing | Prevents scratches from brushes in automatic car washes |
| Use Soft Washing Tools | Using soft microfiber towels and sponges | Avoids scratching the paint during washing |
| Avoid Dusty or Dirty Cloths | Never using dusty or dirty cloths to wipe your car | Prevents scratches from abrasive particles |
| Be Mindful of Surroundings | Being careful when loading and unloading items | Reduces the risk of accidental scratches during loading and unloading |
Taking these preventative measures can help keep your car’s paint looking its best. For more tips and product recommendations, visit CARS.EDU.VN.
10. Latest Car Paint Protection Technologies
The automotive industry is continually innovating to provide better paint protection solutions. Here are some of the latest technologies:
- Self-Healing Paint: Some luxury vehicles now come with self-healing paint that can repair minor scratches and swirl marks with heat.
- Ceramic Coatings: Ceramic coatings provide a durable, hydrophobic layer that protects the paint from scratches, UV rays, and chemical contaminants.
- Graphene Coatings: Graphene coatings are an advanced type of ceramic coating that offers enhanced durability, scratch resistance, and gloss.
- Advanced Paint Protection Films (PPF): Newer PPFs are more transparent, durable, and self-healing, providing superior protection compared to older films.
Table 10: Latest Car Paint Protection Technologies
| Technology | Description | Benefits |
|---|---|---|
| Self-Healing Paint | Paint that can repair minor scratches and swirl marks with heat | Automatically repairs minor damage, maintaining a pristine appearance |
| Ceramic Coatings | Durable, hydrophobic layer protecting from scratches, UV rays, and chemical contaminants | Provides long-lasting protection, enhances shine, and makes cleaning easier |
| Graphene Coatings | Advanced ceramic coating with enhanced durability, scratch resistance, and gloss | Offers superior protection and appearance compared to traditional ceramic coatings |
| Advanced PPF | More transparent, durable, and self-healing paint protection films | Provides superior protection against scratches, chips, and other damage with improved appearance |
Staying informed about these technologies can help you make the best choices for protecting your car’s paint. For the latest automotive news and expert advice, visit CARS.EDU.VN.
Table 11: New Car Models with Advanced Paint Protection Technologies (2024)
| Car Model | Paint Protection Technology | Key Features |
|---|---|---|
| Lexus LS | Self-Healing Paint | Automatically repairs minor scratches and swirl marks with heat, maintaining a pristine appearance. |
| Tesla Model S | Ceramic Coating | Provides long-lasting protection, enhances shine, and makes cleaning easier. |
| Mercedes-Benz S-Class | Graphene Coating | Offers superior protection and appearance compared to traditional ceramic coatings, enhancing durability. |
| BMW iX | Advanced Paint Protection Film (PPF) | Provides superior protection against scratches, chips, and other damage with improved appearance and durability. |
| Audi e-tron GT | Combination of Ceramic Coating and Advanced PPF | Ultimate protection against scratches, UV rays, chemical contaminants, and physical damage. |
This table showcases some of the latest car models that incorporate advanced paint protection technologies, giving you an idea of what’s available in the market to keep your car’s paint looking its best.
FAQ: Addressing Your Car Scratch Concerns
Q1: How do I know if a scratch is deep enough to require professional repair?
A: If you can feel the scratch with your fingernail and it penetrates through the clear coat and paint layers, exposing the primer or bare metal, it likely requires professional repair.
Q2: Can I use any type of toothpaste to remove scratches from my car?
A: It’s best to use non-gel toothpaste, as it has a mild abrasive quality that can help buff out minor scratches. Avoid using whitening toothpaste, as it can be too abrasive.
Q3: What is the best type of sandpaper to use for wet sanding?
A: Use fine-grit sandpaper, such as 2000-grit or 3000-grit, for wet sanding. Always soak the sandpaper in water for at least 10-15 minutes before use.
Q4: How often should I wax my car to protect the paint?
A: It’s recommended to wax your car every 3-4 months to protect the paint from the elements and minor scratches.
Q5: Is paint protection film (PPF) worth the investment?
A: Yes, PPF is a worthwhile investment, especially for high-impact areas like the hood, fenders, and bumpers. It provides a durable barrier against scratches, chips, and other damage.
Q6: Can I use a household polishing compound on my car?
A: No, it’s best to use automotive-specific polishing compounds, as they are designed to be safe for car paint. Household polishing compounds may be too abrasive and can damage the paint.
Q7: How do I match the touch-up paint to my car’s color?
A: You can find your car’s paint code on a sticker located on the driver’s side doorjamb, in the glove box, or under the hood. Use this code to purchase touch-up paint that matches your car’s color.
Q8: What is the difference between ceramic coating and graphene coating?
A: Graphene coatings are an advanced type of ceramic coating that offers enhanced durability, scratch resistance, and gloss compared to traditional ceramic coatings.
Q9: Can I apply ceramic coating myself, or should I have it professionally installed?
A: While you can apply ceramic coating yourself, professional installation is recommended for best results. Professionals have the experience and equipment to properly prepare the surface and apply the coating evenly.
Q10: What should I do if I accidentally scratch someone else’s car?
A: If you accidentally scratch someone else’s car, leave a note with your contact information and insurance details. It’s also a good idea to take photos of the damage.
CARS.EDU.VN: Your Ultimate Resource for Car Care
At CARS.EDU.VN, we understand the challenges car owners face in maintaining their vehicles’ appearance and value. From minor scratches to significant repairs, our goal is to provide you with the knowledge and resources you need to keep your car looking its best.
Are you struggling to find reliable car repair services? Do you need help with routine maintenance? Are you unsure about which car or brand fits your needs and budget? Do you want to learn how to fix minor car issues yourself?
CARS.EDU.VN offers detailed information on car care and repair services, easy-to-understand maintenance guides, expert car reviews, and DIY repair tips.
Visit cars.edu.vn today to explore our extensive collection of articles, guides, and resources. Let us help you keep your car in top condition. Contact us at 456 Auto Drive, Anytown, CA 90210, United States. Whatsapp: +1 555-123-4567.