Car batteries are essential for starting your vehicle and powering its electrical systems. However, they are also one of the most expensive components to replace. If your car battery is starting to show signs of weakness, you might be wondering, “How Do You Refurbish A Car Battery?” The good news is that reconditioning your car battery at home is a viable DIY option that can save you money and extend the life of your battery. Instead of immediately heading to the store for a costly replacement, you can learn how to breathe new life into your old battery.
Understanding Car Battery Refurbishment
Refurbishing, or reconditioning, a car battery is the process of restoring its charge capacity and overall health. Over time, lead-acid batteries can suffer from sulfation, a buildup of lead sulfate crystals on the battery plates. This buildup reduces the battery’s ability to hold a charge. Refurbishment aims to reverse this process, essentially cleaning the plates and improving the battery’s performance. Before you consider discarding a seemingly dead battery, understanding how to refurbish a car battery can potentially save you from unnecessary expenses and contribute to environmental sustainability by reducing battery waste.
Why Choose to Refurbish Your Car Battery?
Many people automatically replace their car batteries when they fail, often unaware that refurbishment is an option. Replacing a car battery can be a significant expense, and these costs can be particularly frustrating as vehicles age. Learning how to refurbish a car battery offers several compelling advantages:
- Cost Savings: The most immediate benefit is the significant financial saving compared to buying a new battery. Refurbishing requires minimal materials, making it a budget-friendly solution.
- Environmental Responsibility: Car batteries contain harmful chemicals and are difficult to recycle. By refurbishing your battery, you reduce waste and minimize the environmental impact associated with disposal and the manufacturing of new batteries. This proactive approach aligns with environmentally conscious practices.
- Extending Battery Life: Refurbishment can significantly extend the lifespan of your battery, potentially giving you another one to three years of reliable service. This delays the need for replacement and maximizes the value of your initial investment.
- DIY Satisfaction: For those who enjoy hands-on car maintenance, refurbishing a car battery is a satisfying and empowering DIY project. It allows you to understand your car’s components better and take control of its upkeep.
Let’s delve into the practical steps and discover how to refurbish a car battery effectively and safely at home.
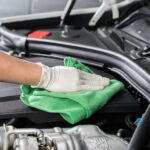
Caption: Learning how to refurbish a car battery at home can be a cost-effective solution to extend battery life. (Photo: pinterest.com)
Step-by-Step Guide: How to Refurbish a Car Battery
Refurbishing a car battery is a straightforward process that requires common tools and materials. Follow these steps carefully to learn how to refurbish a car battery and restore its performance.
Essential Equipment for Battery Refurbishment
Before you begin, gather the necessary tools and safety gear. Having everything prepared will make the process smoother and safer.
- Battery Charger: A standard car battery charger is essential for recharging the battery after refurbishment. Consider a charger with a slow charge setting.
- Safety Gear: Neoprene chemical-resistant gloves and safety goggles are crucial to protect your skin and eyes from battery acid.
- Flathead Screwdriver: Used to pry open battery cell caps.
- Plastic Funnel: For safely pouring liquids into battery cells.
- Distilled Water: Essential for creating the electrolyte solution and rinsing battery components.
- Plastic Bucket: For mixing solutions and safely disposing of old battery acid.
- Voltmeter: To check battery voltage before and after refurbishment.
- Baking Soda: Used to neutralize battery acid and clean corrosion.
- Battery Post Cleaner (Optional): A specialized tool or brush for cleaning battery terminals, though baking soda paste works effectively as well.
Refurbishment Process: Step-by-Step
Now, let’s go through the detailed steps on how to refurbish a car battery.
Step 1: Initial Preparation and Corrosion Cleaning
Begin by cleaning any corrosion from the battery terminals. Corrosion is a common issue that can impede battery performance. You can use a commercial battery post cleaner or make a simple and effective cleaning solution using baking soda.
To make a baking soda paste, mix 2 teaspoons of baking soda with 1 teaspoon of water until it forms a paste. Apply this paste to the corroded terminals using an old toothbrush. For heavy corrosion, you can use steel wool or a wire brush. Ensure you wear your safety gloves and goggles during this step to protect yourself from corrosion and any potential acid exposure.
If you encounter significant corrosion, using 300-grain sandpaper or steel wool can effectively remove tougher buildup.
Note: Always prioritize safety by wearing gloves and goggles throughout the entire refurbishment process.
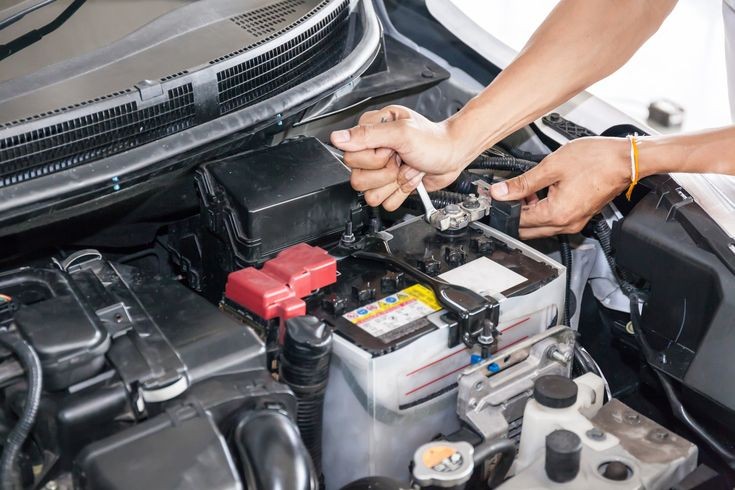
Step 2: Battery Voltage Verification
Next, check the battery voltage using a voltmeter. This step is crucial to determine if your battery is a suitable candidate for refurbishment. Connect the voltmeter to the battery terminals – red lead to the positive terminal and black lead to the negative terminal.
A healthy battery should read around 12.6 volts. If the reading is above 12.6V, it indicates overcharging, and if it’s between 10 and 12 volts, refurbishment is likely to be beneficial. However, if the voltage is below 10 volts, the battery may be too damaged for refurbishment to be effective, and attempting to refurbish it might not yield satisfactory results. A reading of zero volts often indicates a short circuit, suggesting more serious internal damage. In such cases, it’s best to consult a mechanic or consider battery replacement.
Step 3: Electrolyte Removal and Cell Inspection
Caption: Always use distilled water when working with car batteries to avoid contamination. (Photo: istockphoto.com)
After verifying the voltage, carefully remove the old electrolyte (battery acid). Locate the cell caps on top of the battery. These can vary in number from two to six, depending on the battery type. Use a flathead screwdriver to gently pry open and remove all the caps. Keep a plastic bucket nearby to collect the old acid.
Before emptying all cells, consider testing each cell individually with a hydrometer if you have one. This can help identify if a specific cell is dead or significantly weaker than others. If a single cell is severely damaged, refurbishment might not restore the battery’s overall performance effectively.
Once you’re ready to remove the electrolyte, carefully pour the acid from each cell into the plastic bucket. After emptying the battery, neutralize the removed acid by adding ½ lb of baking soda to the bucket. The baking soda will react with the acid, neutralizing it for safer disposal. Dispose of the neutralized solution according to local regulations.
Note: Battery electrolyte is a hazardous substance. It’s a mixture of sulfuric acid and water and is highly corrosive. Avoid contact with skin, eyes, and clothing. Ensure you are wearing full safety gear during this step.
Step 4: Refilling with New Electrolyte Solution
With the old acid removed, it’s time to prepare and add the new electrolyte solution. A common and effective solution for battery refurbishment is made with Epsom salt and distilled water. This solution helps to dissolve sulfation and improve the battery’s charging capability.
Mix Epsom salt with warm distilled water until the salt is fully dissolved. A general guideline is to use about 1 pound of Epsom salt per gallon of distilled water, but for car batteries, a slightly more concentrated solution might be beneficial. Ensure the solution is thoroughly mixed and clear before proceeding.
Using a plastic funnel, carefully pour the Epsom salt solution into each battery cell, filling them to the recommended level, usually indicated by a fill line or just below the bottom of the cap opening.
Step 5: Battery Charging and Testing
The final step in how to refurbish a car battery is charging the battery. Leave the cell caps off during charging, as the electrolyte may expand and overflow as the battery heats up.
Connect your battery charger, ensuring the correct polarity – red (positive) lead to the positive terminal and black (negative) lead to the negative terminal. Set the charger to a slow charge rate, around 2 amps at 12 volts. Charge the battery for an extended period, ideally for 24 to 36 hours. Slow charging helps to gently reform the battery plates and improve electrolyte absorption.
After charging, disconnect the charger and let the battery rest for a few hours. Then, use your voltmeter to check the voltage again. A successfully refurbished battery should ideally read 12.42V or higher. For a more comprehensive assessment, you can perform a battery load test at an auto parts store to evaluate its cranking power. If the battery holds a charge and passes the load test, you have successfully refurbished your car battery!
Tips and Warnings for Car Battery Refurbishment
Helpful Tips for Success
- Trickle Charge Maintenance: If you’re not using the refurbished battery immediately, use a trickle charger to maintain its charge. This prevents sulfation from reoccurring during storage.
- Extended Charging for Maximum Capacity: For optimal performance after refurbishment, consider charging the battery for three to four nights on a slow charge setting.
- Leave Caps Off During Charging: Always leave the battery cell caps off while charging to prevent pressure buildup from electrolyte expansion.
Important Safety Warnings
- Avoid Tap Water: Never use tap water in car batteries as it contains minerals and chemicals that can contaminate the electrolyte and damage the battery. Always use distilled water.
- Sulfuric Acid Hazard: Car batteries contain sulfuric acid, which is extremely dangerous. Work in a well-ventilated area and keep open flames away from the battery.
- Protective Gear is Essential: Always wear safety goggles and chemical-resistant rubber gloves to protect your eyes and skin from acid splashes.
- First Aid for Acid Contact: If battery acid comes into contact with your skin, immediately flush the affected area with plenty of water. Seek medical attention if irritation persists or if acid gets into your eyes.
Alternatives to Epsom Salt Electrolyte
While Epsom salt is a commonly recommended and effective solution for battery refurbishment, there are alternative substances you can consider, although they may have varying degrees of effectiveness.
Aluminum Sulfate
Aluminum sulfate can be used as an alternative electrolyte. Mix 1 lb of aluminum sulfate with 1 gallon of boiling distilled water. Stir thoroughly until the solution becomes clear. After cooling, use this solution to refill the battery cells and proceed with charging. Aluminum sulfate is reported to potentially facilitate faster charging due to its electrolytic properties.
Copper Sulfate
Copper sulfate is another alternative, but it is generally considered less effective than Epsom salt. While it can work, results may not be as consistent or long-lasting compared to using Epsom salt solutions. Epsom salt remains the more reliable and commonly preferred choice for DIY battery refurbishment.
Conclusion
Learning how to refurbish a car battery is a valuable skill for any car owner. By following these steps, you can potentially revive a weak or seemingly dead car battery, saving money and contributing to environmental sustainability. While refurbishment is not always guaranteed to restore a battery to its original condition, it often provides a significant extension to its lifespan, offering a cost-effective alternative to immediate replacement. Remember to prioritize safety throughout the process and enjoy the satisfaction of successfully reconditioning your car battery. For more car maintenance tips and solutions to common car problems, explore our other articles on cars.edu.vn.