Removing old window tint from your car windows can be a rewarding DIY project or a task best left to professionals. Whether you’re upgrading to a better film, dealing with bubbling, or simply prefer a clear view, understanding the removal process is crucial. At CARS.EDU.VN, we’re dedicated to providing you with expert advice and solutions to keep your vehicle looking its best. Discover effective techniques for window film removal and explore options for professional assistance, ensuring a smooth transition to your desired window aesthetic. For superior car care tips and service recommendations, trust CARS.EDU.VN to guide you through auto maintenance and enhancement.
1. Understanding the Reasons for Window Tint Removal
There are several compelling reasons why you might find yourself needing to remove old window tint. Over time, window film can degrade due to exposure to sunlight and weather, leading to bubbling, peeling, and fading. Low-quality films are particularly prone to these issues. Additionally, you might want to upgrade to a newer, more advanced film with better UV protection, heat rejection, or a different aesthetic. Laws regarding window tint darkness vary by state, so you may need to remove or replace a tint that doesn’t comply with local regulations. Finally, personal preferences change, and you might simply decide you prefer the look of clear windows. Regardless of the reason, knowing the proper techniques for removing old tint is essential to avoid damaging your car’s windows. Remember, CARS.EDU.VN is your resource for all things automotive, including detailed guides on window tinting and removal.
2. DIY vs. Professional Window Tint Removal: Weighing Your Options
Deciding whether to tackle window tint removal yourself or hire a professional involves considering several factors. DIY removal can save money, but it requires time, patience, and the right tools. Improper techniques can lead to scratches, adhesive residue, or even broken windows, potentially costing more in the long run. Professionals, on the other hand, have the experience and equipment to remove tint quickly and safely. They can also handle tricky situations, such as removing tint from rear windows with defroster lines, without causing damage. While professional removal costs more upfront, it can prevent costly mistakes and ensure a flawless result. Before making a decision, assess your skills, budget, and the condition of your window tint. CARS.EDU.VN provides valuable insights into the pros and cons of each approach, helping you make an informed choice.
2.1. DIY Window Tint Removal: The Pros and Cons
| Pros | Cons |
|---|---|
| Cost Savings: Significantly cheaper than professional service. | Time-Consuming: Can take several hours, especially for multiple windows. |
| Flexibility: Can be done at your convenience. | Risk of Damage: Potential for scratching windows or damaging defroster lines. |
| Learning Experience: Opportunity to learn a new skill. | Requires Patience: Demands careful execution to avoid mistakes and achieve a clean finish. |
| Messy Process: Adhesive residue can be difficult to remove and may require additional cleaning. |

2.2. Professional Window Tint Removal: The Pros and Cons
| Pros | Cons |
|---|---|
| Expertise: Professionals have the knowledge and tools for safe removal. | Higher Cost: More expensive than DIY, depending on the number of windows and vehicle type. |
| Time Efficiency: Faster removal process, minimizing inconvenience. | Scheduling: Requires booking an appointment and adhering to their schedule. |
| Reduced Risk of Damage: Minimizes the chances of scratching or breaking windows. | Potential Inconvenience: May need to drop off your car and arrange transportation. |
| Warranty: Some professionals offer warranties against damage during removal. |
3. Essential Tools and Equipment for DIY Window Tint Removal
Before embarking on your DIY window tint removal project, gather all the necessary tools and equipment. Having the right supplies on hand will make the process smoother, safer, and more effective. Here’s a comprehensive list:
- Heat Gun or Steamer: Used to soften the adhesive and make the film easier to peel.
- Razor Blade or Scraper: For gently lifting and peeling the tint from the window.
- Spray Bottle: To apply cleaning solutions or soapy water.
- Cleaning Solution: Options include ammonia-based cleaners, adhesive removers, or a mixture of soap and water.
- Microfiber Towels: For wiping down the windows and removing residue.
- Safety Glasses: To protect your eyes from debris and chemicals.
- Gloves: To protect your hands from chemicals and sharp tools.
- Face Mask: To avoid inhaling dust and fumes.
- Plastic Drop Cloths or Tarps: To protect your car’s interior and surrounding areas.
- Rubbing Alcohol: Effective for removing stubborn adhesive residue.
- Goo Gone: A specialized adhesive remover for tough spots.
Ensuring you have these tools readily available will streamline the removal process and minimize potential setbacks. CARS.EDU.VN emphasizes preparation as key to successful DIY car care projects.
4. Step-by-Step Guide to Removing Old Window Tint
Follow these detailed steps to safely and effectively remove old window tint from your car windows.
4.1. Preparation is Key
Start by parking your car in a well-ventilated area, such as a garage with the door open or outdoors in the shade. This is important to minimize exposure to fumes and ensure proper ventilation. Cover the interior surfaces of your car, including the seats, dashboard, and door panels, with plastic drop cloths or tarps. This will protect them from adhesive residue and cleaning solutions. Put on your safety glasses, gloves, and face mask to protect yourself from potential hazards.
4.2. Softening the Adhesive
The next step involves softening the adhesive that bonds the tint to the window. Use a heat gun or steamer, holding it a few inches away from the window surface. Move the heat source in a sweeping motion, focusing on one area at a time. Avoid holding the heat gun in one spot for too long, as this could damage the glass. As you apply heat, you’ll notice the edges of the tint starting to lift or bubble. This indicates that the adhesive is softening. For larger windows, work in sections to ensure even heating.
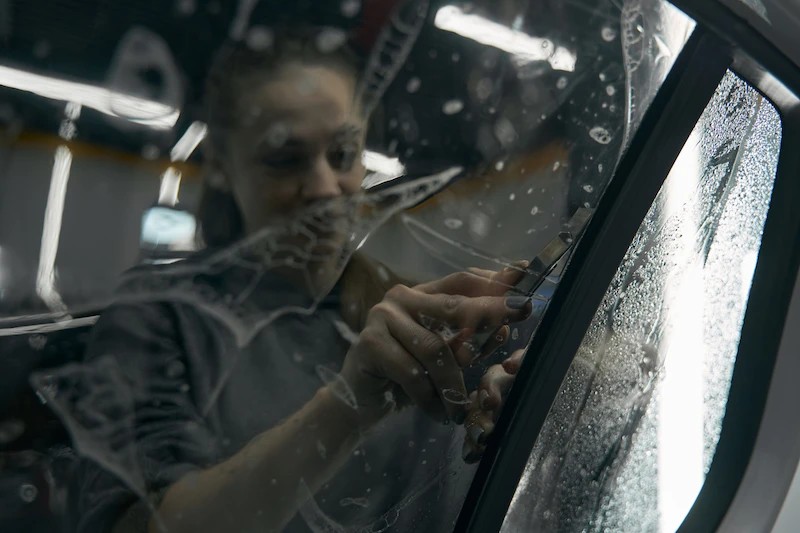
4.3. Peeling the Tint
Once the adhesive is softened, use a razor blade or scraper to gently lift a corner of the tint film. Slowly peel the tint away from the window, pulling it at a shallow angle. If the tint is difficult to remove, apply more heat to the area ahead of where you’re peeling. Work deliberately, avoiding sudden jerks that could tear the film and leave behind more residue. If the tint tears, simply start again at the tear point and continue peeling.
4.4. Removing Adhesive Residue
After removing the tint film, you’ll likely be left with adhesive residue on the window. Spray the affected area with your chosen cleaning solution, such as an ammonia-based cleaner, adhesive remover, or a mixture of soap and water. Let the solution sit for a few minutes to loosen the residue. Use a microfiber towel to scrub the window, applying firm pressure. For stubborn residue, try using a razor blade or scraper at a shallow angle to gently lift it away. Repeat the process as needed until the window is clear of adhesive.
4.5. Final Cleaning
Once the adhesive is removed, give the window a final cleaning to remove any remaining cleaning solution or streaks. Spray the window with a glass cleaner and wipe it down with a clean microfiber towel. Inspect the window for any remaining residue or imperfections and repeat the cleaning process if necessary. Ensure the window is completely dry before rolling it up or applying new tint. CARS.EDU.VN recommends using high-quality microfiber towels to avoid leaving lint or scratches on the glass.
5. Alternative Methods for Removing Window Tint
While the heat gun method is widely used, several alternative techniques can also effectively remove old window tint. Here are a few options:
- Soapy Water and Black Trash Bag: Spray the tinted window with soapy water and cover it with a black trash bag, securing it with tape. Leave it in the sun for a few hours to allow the heat to loosen the adhesive. Then, peel off the tint as described above.
- Ammonia and Sunlight: Spray the tinted window with ammonia and cover it with plastic wrap. Park the car in direct sunlight for an hour or two to soften the adhesive. Ensure you wear gloves and a mask when working with ammonia.
- Fabric Steamer: A fabric steamer can be used to gently heat and loosen the adhesive, making it easier to peel off the tint. This method is particularly useful for delicate windows, such as those with defroster lines.
- Hair Dryer: While less effective than a heat gun, a hair dryer can be used to soften the adhesive. This method requires more time and patience but can be a safer option for those concerned about overheating the glass.
Experiment with these methods to find the one that works best for you, but always prioritize safety and caution to avoid damaging your car’s windows. CARS.EDU.VN encourages exploring different approaches to find the most efficient and effective solution.
6. Common Mistakes to Avoid When Removing Window Tint
Removing window tint can be tricky, and it’s easy to make mistakes that can damage your car or make the process more difficult. Here are some common pitfalls to avoid:
- Using Excessive Heat: Applying too much heat can crack the glass or damage the defroster lines on rear windows. Use a moderate heat setting and keep the heat gun moving.
- Using Sharp Objects Aggressively: Scraping too hard with a razor blade or scraper can scratch the glass. Apply gentle pressure and use a shallow angle.
- Neglecting Safety Precautions: Failing to wear safety glasses, gloves, and a mask can expose you to harmful chemicals and debris.
- Rushing the Process: Trying to remove the tint too quickly can result in tearing the film and leaving behind more adhesive residue.
- Using Inappropriate Cleaning Solutions: Some cleaning solutions can damage the glass or leave behind a film. Use products specifically designed for cleaning car windows.
- Ignoring Defroster Lines: Applying heat or scraping too aggressively on rear windows with defroster lines can damage them. Use extra caution and consider seeking professional help for these windows.
By avoiding these common mistakes, you can increase your chances of a successful DIY window tint removal and protect your car from damage. CARS.EDU.VN emphasizes the importance of careful planning and execution in all DIY car care projects.
7. Dealing with Stubborn Adhesive Residue
Even with careful removal techniques, stubborn adhesive residue can sometimes remain on the window. Here are some effective methods for tackling this issue:
- Isopropyl Alcohol: Apply rubbing alcohol to the residue and let it sit for a few minutes before scrubbing with a microfiber towel.
- Goo Gone: This specialized adhesive remover is designed to dissolve tough residues. Follow the instructions on the bottle for best results.
- Acetone (Nail Polish Remover): Acetone can be effective for removing stubborn residue, but use it sparingly and avoid contact with plastic or painted surfaces.
- Baking Soda Paste: Mix baking soda with water to create a paste and apply it to the residue. Let it sit for a few minutes before scrubbing with a microfiber towel.
- Steam Cleaning: Use a steam cleaner to loosen the residue before wiping it away with a microfiber towel.
When using any of these methods, test them on a small, inconspicuous area of the window first to ensure they don’t cause damage or discoloration. CARS.EDU.VN recommends patience and persistence when dealing with stubborn adhesive residue.
8. Protecting Your Car’s Windows After Tint Removal
After successfully removing the old window tint, it’s important to protect your car’s windows to maintain their clarity and prevent damage. Here are some tips:
- Regular Cleaning: Clean your windows regularly with a quality glass cleaner and a microfiber towel to remove dirt, dust, and fingerprints.
- Avoid Abrasive Cleaners: Avoid using abrasive cleaners or scouring pads, as they can scratch the glass.
- Protect from UV Rays: Consider applying a UV-protective film to your windows to prevent fading and damage from sunlight.
- Park in the Shade: Whenever possible, park your car in the shade to reduce exposure to sunlight and heat.
- Repair Chips and Cracks: Promptly repair any chips or cracks in the glass to prevent them from spreading.
By following these simple tips, you can keep your car’s windows looking their best and protect them from damage. CARS.EDU.VN provides comprehensive advice on car care and maintenance to help you keep your vehicle in top condition.
9. The Cost of Professional Window Tint Removal
If you decide to opt for professional window tint removal, the cost will vary depending on several factors, including the size and type of vehicle, the number of windows being serviced, and the local labor rates. On average, you can expect to pay around $60 for all four side windows and $85 for the windshield or rear window. Some shops may offer package deals for removing tint from all windows on the vehicle. Get quotes from multiple shops to compare prices and services. Be sure to ask about any additional fees, such as disposal fees or charges for removing stubborn adhesive residue. While professional removal costs more than DIY, it can save you time, hassle, and the risk of damaging your car’s windows. CARS.EDU.VN provides resources for finding reputable auto service providers in your area.
10. Replacing Your Window Film: A New Beginning
Removing old window tint often paves the way for a fresh, new installation. Upgrading to a higher-quality film can offer numerous benefits, including improved UV protection, enhanced heat rejection, increased privacy, and a stylish appearance. When choosing a new window film, consider factors such as the level of tint, the type of film (dyed, metallic, ceramic), and the warranty offered by the manufacturer. Professional installation is recommended to ensure a flawless finish and avoid bubbling, peeling, or other issues. Many window tinting shops offer package deals that include both removal of the old tint and installation of the new film. CARS.EDU.VN provides detailed information on the different types of window films and their benefits, helping you make an informed decision.
11. Selecting the Right Window Tint Film for Your Needs
Choosing the right window tint film involves considering several factors to ensure it meets your specific needs and preferences. Here are some key aspects to evaluate:
- Tint Darkness (VLT): Visible Light Transmittance (VLT) refers to the percentage of light that passes through the film. Lower VLT percentages mean darker tint. Check local laws regarding legal tint darkness levels.
- UV Protection: Look for films that block 99% or more of harmful UV rays to protect your skin and prevent fading of your car’s interior.
- Heat Rejection (IRR): Infrared Rejection (IRR) measures the film’s ability to block heat. Higher IRR percentages mean better heat reduction, keeping your car cooler.
- Film Type:
- Dyed Films: Least expensive option, offering basic tint and UV protection.
- Metallic Films: Offer better heat rejection than dyed films but can interfere with electronic signals.
- Carbon Films: Provide good heat rejection and UV protection without interfering with electronic signals.
- Ceramic Films: The highest quality option, offering excellent heat rejection, UV protection, and clarity.
- Warranty: Choose a film with a comprehensive warranty that covers bubbling, peeling, fading, and other defects.
- Aesthetic: Consider the appearance of the film and how it will complement your car’s overall look.
By carefully evaluating these factors, you can select a window tint film that provides the desired level of protection, comfort, and style. CARS.EDU.VN offers detailed comparisons of different window film brands and types to help you make the right choice.
12. Finding a Reputable Window Tinting Professional
If you decide to have your window tint professionally removed or installed, it’s important to choose a reputable shop with experienced technicians. Here are some tips for finding a qualified professional:
- Check Online Reviews: Look for shops with positive reviews on websites like Google, Yelp, and Facebook.
- Ask for Recommendations: Ask friends, family, or colleagues for recommendations.
- Verify Certification: Look for shops that are certified by organizations like the International Window Film Association (IWFA).
- Inquire About Experience: Ask about the technicians’ experience and training.
- Inspect Their Work: Visit the shop and inspect examples of their work.
- Get a Written Estimate: Obtain a detailed written estimate that includes all costs and fees.
- Ask About Warranty: Inquire about the warranty offered on their work and the film itself.
Choosing a qualified professional will ensure a high-quality installation and minimize the risk of problems down the road. CARS.EDU.VN provides a directory of trusted auto service providers in your area, making it easy to find a reputable window tinting shop.
13. Maintaining Your New Window Tint for Longevity
Once your new window tint is installed, proper maintenance is essential to ensure its longevity and performance. Here are some tips:
- Wait Before Cleaning: Wait at least 48-72 hours after installation before cleaning the tinted windows.
- Use Ammonia-Free Cleaners: Use only ammonia-free glass cleaners, as ammonia can damage the tint film.
- Use Soft Cloths: Use soft, lint-free cloths or microfiber towels to clean the windows.
- Avoid Abrasive Materials: Avoid using abrasive cleaners, scouring pads, or paper towels, as they can scratch the tint film.
- Clean Gently: Clean the windows gently, using a side-to-side motion rather than a circular motion.
- Avoid Parking in Direct Sunlight: Whenever possible, park your car in the shade to reduce exposure to sunlight and heat.
- Inspect Regularly: Inspect the tint film regularly for any signs of bubbling, peeling, or fading.
By following these maintenance tips, you can keep your window tint looking its best and extend its lifespan. CARS.EDU.VN offers a wealth of information on car care and maintenance, helping you keep your vehicle in top condition.
14. Addressing Common Window Tint Problems
Even with proper installation and maintenance, window tint can sometimes experience problems. Here are some common issues and how to address them:
- Bubbling: Bubbling can occur due to improper installation, low-quality film, or exposure to extreme heat. Small bubbles may disappear over time, but larger bubbles may require professional repair or replacement.
- Peeling: Peeling can be caused by poor adhesion, low-quality film, or damage to the film. Loose edges can sometimes be re-adhered with a special adhesive, but more extensive peeling may require replacement.
- Fading: Fading is a natural process that occurs over time due to exposure to sunlight. Higher-quality films are more resistant to fading.
- Scratching: Scratching can be caused by abrasive cleaners, sharp objects, or improper cleaning techniques. Minor scratches can sometimes be buffed out, but more severe scratches may require replacement.
- Purple Tint: Some older films can turn purple over time due to the breakdown of the dye. This is a sign that the film needs to be replaced.
If you experience any of these problems, consult with a window tinting professional to determine the best course of action. CARS.EDU.VN provides resources for finding qualified auto service providers who can diagnose and repair window tint issues.
15. Legal Considerations for Window Tinting
Window tint laws vary by state and regulate the darkness of the tint, measured by Visible Light Transmittance (VLT). Before installing or replacing window tint, it’s essential to familiarize yourself with the laws in your state to avoid potential fines or legal issues. Here are some common legal considerations:
- VLT Requirements: Most states have specific VLT requirements for front side windows, rear side windows, and rear windows.
- Windshield Tinting: Some states prohibit tinting the windshield below a certain point.
- Reflectivity: Some states limit the reflectivity of window tint.
- Medical Exemptions: Some states offer medical exemptions for individuals with certain medical conditions that require darker tint.
- Enforcement: Law enforcement officers typically use a device called a photometer to measure the VLT of window tint.
Violating window tint laws can result in fines, tickets, or even the requirement to remove the tint. CARS.EDU.VN provides links to state-specific window tint laws, helping you stay informed and compliant.
FAQ: How Do You Remove Old Tint From Car Windows?
- What is the easiest way to remove old window tint from car windows? The heat gun method is generally considered the easiest. It involves using a heat gun to soften the adhesive and then peeling the tint off.
- Can I use a hair dryer instead of a heat gun to remove window tint? Yes, but it will take longer and may not be as effective as a heat gun.
- What is the best solution for removing adhesive residue after removing window tint? Isopropyl alcohol, Goo Gone, or a mixture of soap and water can be effective.
- How much does it cost to have a professional remove window tint? On average, it costs around $60 for all four side windows and $85 for the windshield or rear window.
- Is it legal to remove window tint from my car? Yes, removing window tint is legal, but be sure to comply with local laws regarding window tint darkness if you plan to replace it.
- Can I damage my car windows by removing window tint myself? Yes, improper techniques can lead to scratches or broken windows.
- What safety precautions should I take when removing window tint? Wear safety glasses, gloves, and a mask to protect yourself from chemicals and debris.
- How long does it take to remove window tint from a car? DIY removal can take several hours, while professional removal typically takes an hour or two.
- Can I remove window tint from rear windows with defroster lines? Yes, but use extra caution and consider seeking professional help to avoid damaging the defroster lines.
- What are the benefits of replacing old window tint with new film? Improved UV protection, enhanced heat rejection, increased privacy, and a stylish appearance.
At CARS.EDU.VN, we’re committed to providing you with the knowledge and resources you need to make informed decisions about your car care needs. Visit our website at CARS.EDU.VN to explore more articles, guides, and service recommendations. Contact us at 456 Auto Drive, Anytown, CA 90210, United States or via Whatsapp at +1 555-123-4567 for personalized assistance. We look forward to helping you keep your car looking and performing its best.
Ready to Upgrade Your Car’s Windows?
Visit CARS.EDU.VN today for expert advice, detailed guides, and trusted service recommendations. Whether you’re looking to remove old tint, install a new film, or simply learn more about car care, cars.edu.vn has you covered. Explore our website now and discover a wealth of information to help you make informed decisions and keep your vehicle looking its best. Your journey to automotive excellence starts here!