Removing old vinyl stickers from your car can be a frustrating task, especially when they’ve been baked on by the sun and time. Whether you’re dealing with faded racing stripes on a classic car or outdated decals on a used vehicle, you need effective methods that won’t damage your car’s paint. This guide will walk you through proven techniques to safely and efficiently remove even the most stubborn vinyl stickers, restoring your car’s clean look.
Understanding the Challenge of Removing Old Vinyl Stickers
Old vinyl stickers are notoriously difficult to remove because the adhesive hardens and bonds more strongly to the car’s surface over time. Sun exposure and temperature fluctuations further degrade the vinyl, making it brittle and prone to tearing into small pieces when you try to peel it off. This often leaves behind a sticky residue that’s just as challenging to eliminate. Attempting to scrape them off with force can easily scratch your car’s paint, leading to costly repairs. Therefore, a gentle yet effective approach is crucial.
Tools and Materials for Vinyl Sticker Removal
Before you start, gather the right tools and materials to make the process smoother and safer:
- Heat Gun or Hair Dryer: To soften the adhesive.
- Plastic Scraper or спонж: For gently lifting edges and scraping off vinyl without scratching paint. Avoid metal scrapers.
- Adhesive Remover: Specifically designed for cars, such as 3M Adhesive Remover or Goo Gone Automotive.
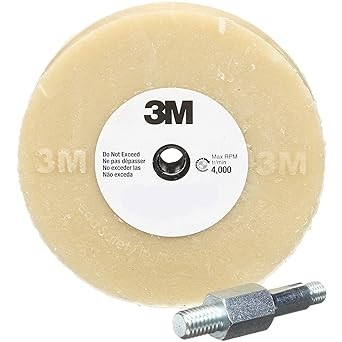
- Eraser Wheel (Optional but Recommended): For large areas and stubborn stickers, a 3M Eraser Wheel or similar can significantly speed up removal without damaging paint.
- Microfiber Towels: For wiping surfaces and applying cleaning solutions.
- Spray Bottle: For applying adhesive remover or soapy water.
- Rubbing Alcohol or Mineral Spirits: For cleaning up remaining adhesive residue.
- Soapy Water: For initial cleaning and lubrication.
- Gloves: To protect your hands from chemicals and adhesive.
Step-by-Step Methods to Remove Vinyl Stickers
Here are several methods you can use, starting with the least aggressive and moving to stronger approaches if needed.
Method 1: Heat and Peel
This is often the first and gentlest method to try. Heat softens the adhesive, making it easier to peel off the vinyl.
- Clean the Area: Wash the area around the sticker with soapy water and dry it thoroughly. This removes dirt and grime that could scratch the paint when you’re working.
- Apply Heat: Use a heat gun or hair dryer on a low setting. Hold it a few inches away from the sticker and move it back and forth to evenly heat the vinyl. Avoid overheating one spot, which could damage the paint.
- Peel and Scrape: Once the sticker is warm, try to peel up an edge with your fingernail or a plastic scraper. Work slowly and gently peel at a shallow angle, keeping the heat applied ahead of the peeling edge. If the vinyl breaks, reheat the area and continue.
- Remove Residue: After removing the sticker, you’ll likely have adhesive residue. Proceed to the “Dealing with Adhesive Residue” section below.
Method 2: Adhesive Remover Sprays
For stickers that are proving stubborn with heat alone, adhesive remover sprays are a great next step.
- Test in an Inconspicuous Area: Before applying adhesive remover to the sticker, test it on a hidden area of your car’s paint to ensure it doesn’t cause any damage or discoloration.
- Apply Adhesive Remover: Spray the adhesive remover liberally over the vinyl sticker, ensuring it’s fully saturated. Let it sit for the time recommended on the product label, usually a few minutes. This allows the chemicals to penetrate and break down the adhesive.
- Peel and Scrape: Use a plastic scraper to gently lift an edge and peel away the sticker. The adhesive remover should make this process much easier than heat alone. Reapply remover as needed if you encounter resistance.
- Clean Residue: Once the sticker is removed, clean the area with more adhesive remover to get rid of any remaining stickiness. Wipe clean with a microfiber towel.
Method 3: Eraser Wheel for Large or Stubborn Areas
For large stickers or particularly stubborn, brittle vinyl, an eraser wheel can be a game-changer. These wheels are designed to safely remove vinyl and adhesives using friction.
- Attach Eraser Wheel to Drill: Securely attach the eraser wheel to a drill.
- Work at Low RPM: Start with a low RPM setting on your drill. High speed can generate heat and potentially damage the paint.
- Lightly Glide Over the Sticker: Gently move the eraser wheel over the surface of the vinyl sticker. Use light pressure and let the wheel do the work. Work in sections and avoid staying in one spot for too long.
- Clean Up Debris: The eraser wheel will create rubber debris as it works. Wipe this away periodically with a microfiber towel to see your progress and keep the area clean.
- Remove Remaining Residue: After using the eraser wheel, there might be some adhesive residue left. Use adhesive remover or rubbing alcohol to clean it up.
Method 4: DIY Chemical Solutions (Use with Caution)
In some cases, you might consider household chemicals like WD-40, mineral spirits, or even rubbing alcohol. However, use these with caution as they can potentially damage certain types of car paint or clear coats. Always test in an inconspicuous area first.
- Apply Solution: Apply a small amount of your chosen solution to a microfiber cloth and gently dab it onto the edge of the sticker. Let it sit for a few minutes to penetrate the adhesive.
- Peel and Scrape Gently: Try to peel and scrape as described in Method 1 and 2. Reapply the solution as needed.
- Thoroughly Clean the Area: After removal, thoroughly clean the area with soapy water to remove any traces of the chemical solution, followed by a car wash and wax to protect the paint.
Dealing with Adhesive Residue
No matter which method you use, you’ll likely be left with some adhesive residue. Here’s how to remove it:
- Adhesive Remover: Reapply your automotive adhesive remover to the residue and let it sit for a few minutes. Wipe firmly with a microfiber towel. Repeat as needed.
- Rubbing Alcohol or Mineral Spirits: These can also be effective for removing residue. Apply to a cloth and rub the sticky areas until clean.
- Soapy Water Final Wash: Once the residue is gone, wash the area again with soapy water and dry it. You might want to follow up with a wax or polish to restore shine and protection to the cleaned area.
Tips to Protect Your Car’s Paint During Sticker Removal
- Always Test Products: Before using any chemical or tool on a visible area, test it in an inconspicuous spot to check for adverse reactions.
- Use Plastic Tools: Avoid metal scrapers or abrasive pads that can scratch your car’s paint.
- Work in a Shaded Area: Direct sunlight can make adhesives even stickier and harder to remove. Work in the shade or in a garage if possible.
- Be Patient: Rushing the process can lead to mistakes and potential damage. Take your time and work methodically.
- Wash and Wax After: After removing the sticker and residue, wash and wax the area to protect the paint and restore its shine.
Removing old vinyl stickers from your car requires patience and the right techniques. By following these methods and taking precautions, you can successfully remove even the most stubborn stickers and restore your car’s appearance without damaging its paint.