How often should I change brakes on my car? Maintaining your vehicle’s braking system is crucial for your safety and the safety of others on the road. CARS.EDU.VN is here to provide you with a comprehensive guide on understanding brake wear, identifying potential issues, and ensuring your car’s braking system is always in top condition. We’ll explore the factors that influence brake pad lifespan, signs of wear, and the importance of regular inspections, helping you keep your vehicle safe and reliable. Discover expert advice, maintenance tips, and reliable repair services at CARS.EDU.VN today for optimal brake performance, brake system maintenance, and vehicle safety measures.
1. Understanding Brake Pad Lifespan and Replacement Frequency
The lifespan of your car’s brake pads can vary significantly depending on several factors. Understanding these factors will help you determine how often you should change your brakes and maintain optimal braking performance.
1.1. Driving Habits and Conditions
Your driving habits play a significant role in determining how quickly your brake pads wear down. Aggressive driving, characterized by hard braking and rapid acceleration, puts more stress on the braking system, leading to faster wear.
- City vs. Highway Driving: City driving, with its frequent stops and starts, requires more braking than highway driving, which involves consistent speeds and less frequent use of the brakes.
- Aggressive Braking: Regularly braking hard increases friction and heat, accelerating the wear of brake pads.
- Terrain: Driving in hilly or mountainous areas requires more frequent braking to control speed, leading to quicker wear.
1.2. Brake Pad Material and Quality
The type of brake pad material also influences its lifespan and performance. There are several types of brake pads available, each with its own set of characteristics:
| Brake Pad Type | Material | Pros | Cons | Lifespan Estimate (Miles) |
|---|---|---|---|---|
| Organic | Organic materials like rubber, carbon, and fiberglass | Quiet, gentle on rotors, and environmentally friendly. | Wear down quickly, produce more dust, and are less effective in high-performance situations. | 20,000 – 40,000 |
| Ceramic | Ceramic fibers and non-ferrous fillers | Excellent stopping power, quiet operation, produce very little dust, and are durable. | More expensive than other types of brake pads. | 30,000 – 70,000 |
| Semi-Metallic | Mixture of metal fibers (30-70%) and other materials | Good stopping power, dissipate heat well, and are more affordable. | Noisier than organic or ceramic pads and can cause more wear on rotors. | 30,000 – 70,000 |
| Metallic (NAO) | Non-Asbestos Organic | Reliable performance and cost-effective, often used as standard equipment. | Can be noisier and produce more dust compared to organic options, and may wear rotors more aggressively. | 25,000 – 65,000 |
| Low-Metallic | Contains a small percentage of metal | Provide a good balance between performance and cost, suitable for general driving conditions. | Can generate more noise and dust than ceramic or organic options, and may not perform as well under extreme braking conditions. | 30,000 – 60,000 |
| High-Performance | Specialized compounds | Designed for high-performance vehicles, offering superior stopping power and heat resistance. | Can be more expensive and may produce more noise and dust compared to standard brake pads. | 20,000 – 50,000 |
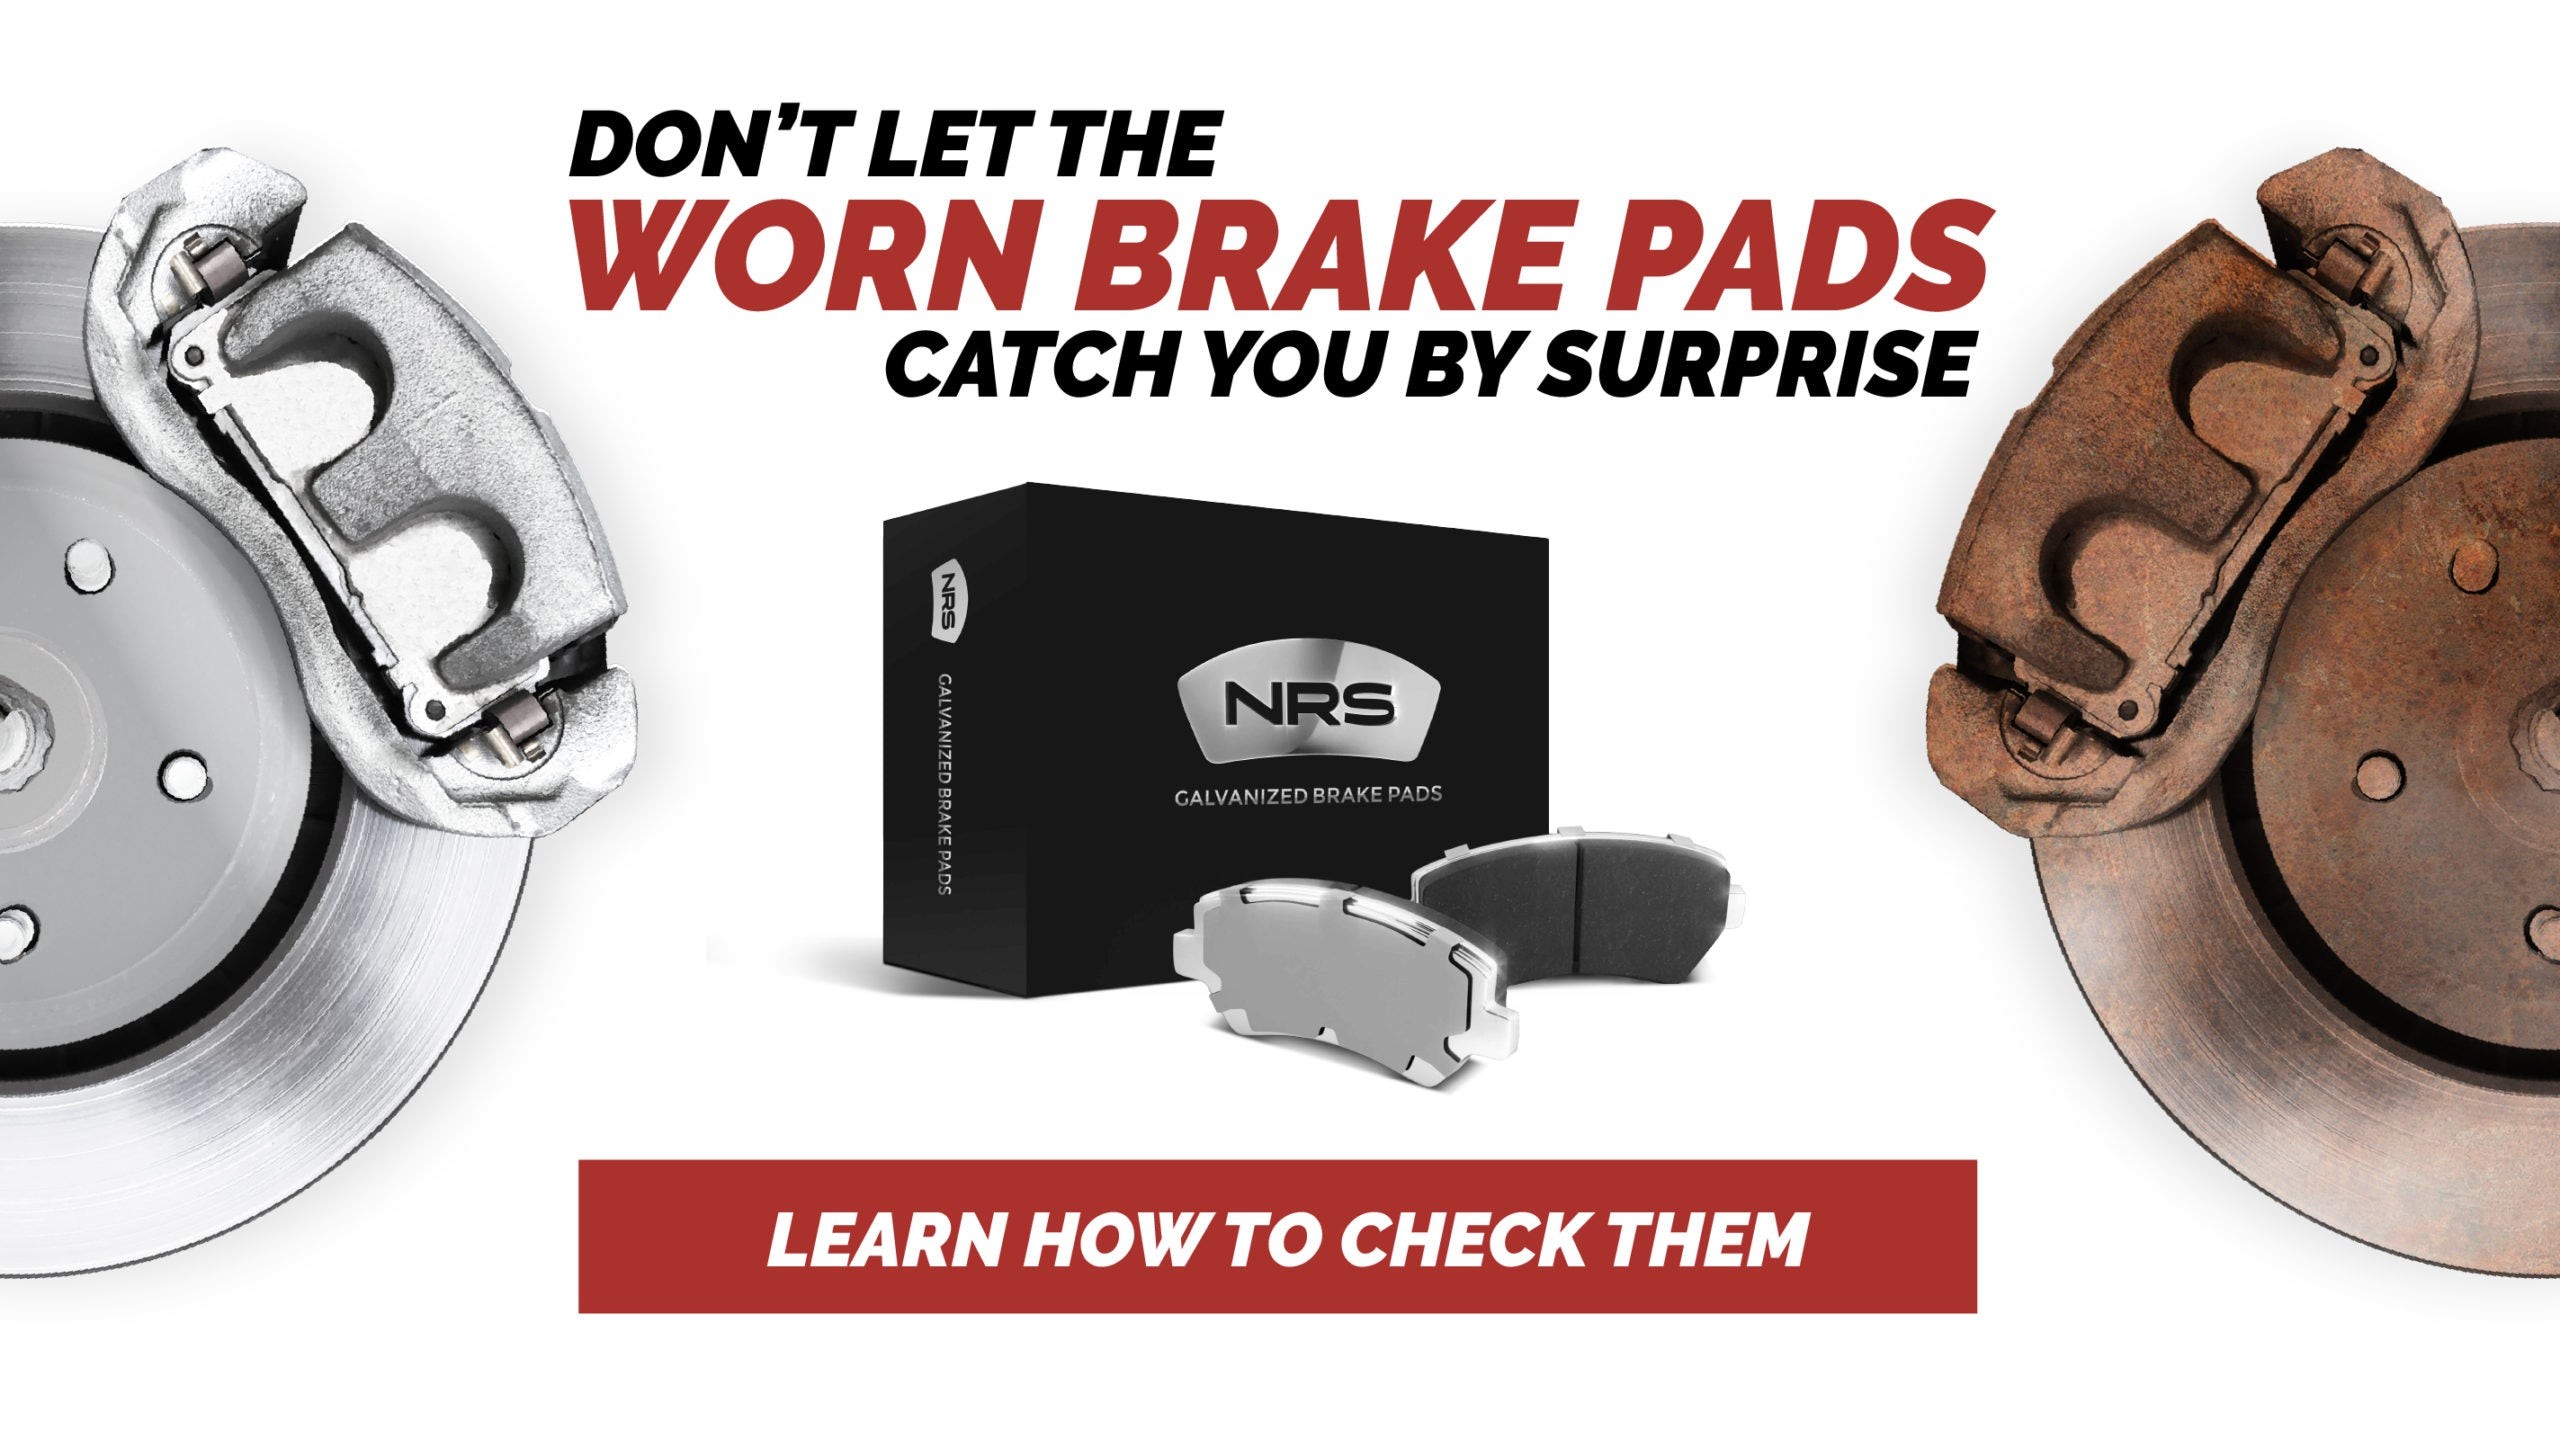
| Galvanized | Steel with mechanical attachment | Prevents rust and falling apart, ensuring longevity and safety with superior performance compared to painted brake pads, recommended by CARS.EDU.VN for optimal braking performance. | Can be slightly more expensive than painted brake pads, but the benefits outweigh the cost for long-term reliability and safety. | 40,000 – 80,000 |
1.3. Vehicle Type and Weight
The type and weight of your vehicle also affect brake pad wear. Heavier vehicles require more braking force to stop, which puts additional stress on the brake pads.
- Trucks and SUVs: These vehicles are generally heavier than sedans and compact cars, requiring more robust braking systems and potentially leading to faster brake pad wear.
- Performance Cars: High-performance vehicles often have more powerful braking systems, but the aggressive driving style associated with these cars can also accelerate brake pad wear.
1.4. Environmental Factors
Environmental factors, such as road conditions and climate, can also impact the lifespan of your brake pads.
- Road Salt: In regions where road salt is used during winter, the corrosive effects of salt can accelerate the wear of brake pads and rotors.
- Dust and Debris: Driving on dusty or gravel roads can introduce abrasive particles into the braking system, increasing wear.
1.5. Typical Replacement Intervals
Generally, brake pads should be replaced every 20,000 to 70,000 miles. However, this range can vary widely based on the factors mentioned above.
- Average Lifespan: Most drivers can expect to replace their brake pads every 30,000 to 50,000 miles.
- Inspection is Key: Regularly inspect your brake pads to assess their condition and determine if replacement is necessary, regardless of mileage. CARS.EDU.VN recommends checking your brake pads at least twice a year or every 10,000 miles.
 Brake Pads
Description: A close-up view of worn brake pads, emphasizing the importance of regular inspections and timely replacement to ensure vehicle safety.
By considering these factors and staying proactive with regular inspections, you can ensure your vehicle’s braking system remains in optimal condition. CARS.EDU.VN provides detailed guides and expert advice to help you maintain your brakes and drive safely.
2. Recognizing the Signs of Worn Brake Pads
Identifying the signs of worn brake pads early can prevent more serious damage and ensure your safety on the road. Here are some common indicators that your brake pads may need replacement.
2.1. Squealing or Screeching Noises
One of the most common signs of worn brake pads is a high-pitched squealing or screeching noise when you apply the brakes.
- Wear Indicators: Many brake pads have built-in wear indicators, which are small metal tabs that create noise when the pads wear down to a certain thickness.
- Noise Frequency: The noise may occur constantly while driving or only when you apply the brakes.
- Immediate Action: If you hear this noise, it’s time to have your brakes inspected by a professional.
2.2. Grinding Noises
A grinding noise coming from your brakes is a more serious sign of wear. This usually indicates that the brake pads have worn down completely, and the metal backing plate is rubbing against the rotor.
- Metal-on-Metal Contact: The grinding noise is caused by the direct contact of metal components, which can damage the rotors.
- Rotor Damage: Continuing to drive with metal-on-metal contact can lead to costly rotor replacements.
- Safety Hazard: Grinding brakes reduce stopping power and pose a significant safety risk.
2.3. Reduced Braking Response
If you notice that your vehicle takes longer to stop or that you need to apply more pressure to the brake pedal, it could be a sign of worn brake pads.
- Increased Stopping Distance: Worn brake pads reduce the friction needed to stop the vehicle effectively.
- Pedal Feel: The brake pedal may feel soft or spongy, indicating a problem with the braking system.
- Emergency Situations: Reduced braking response can be particularly dangerous in emergency situations.
2.4. Vibration or Pulsation
Vibration or pulsation in the brake pedal or steering wheel when braking can indicate warped rotors or unevenly worn brake pads.
- Warped Rotors: Heat and wear can cause rotors to warp, leading to vibrations when the brakes are applied.
- Uneven Pad Wear: Unevenly worn brake pads can also cause vibrations due to inconsistent contact with the rotor.
- Inspection Needed: Vibration or pulsation requires a thorough inspection of the braking system to identify the cause.
2.5. Visual Inspection of Brake Pads
A visual inspection of your brake pads can provide valuable information about their condition.
- Pad Thickness: Check the thickness of the brake pads. If they are less than ¼ inch thick, they likely need to be replaced.
- Cracks or Damage: Look for cracks, chips, or other signs of damage on the brake pads.
- Professional Assessment: If you are unsure about the condition of your brake pads, consult a mechanic for a professional assessment.
2.6. Pulling to One Side While Braking
If your car pulls to one side when you apply the brakes, it could indicate a problem with the braking system, such as unevenly worn brake pads or a malfunctioning caliper.
- Uneven Wear: Unevenly worn brake pads can cause inconsistent braking force, leading to pulling.
- Caliper Issues: A stuck or malfunctioning caliper can also cause pulling during braking.
- Safety Concern: Pulling to one side can make it difficult to control the vehicle, especially in emergency situations.
2.7. Brake Pad Warning Light
Many modern vehicles are equipped with a brake pad warning light on the dashboard.
- Sensor Activation: This light illuminates when the brake pads have worn down to a certain level, triggering a sensor.
- Prompt Action: If the brake pad warning light comes on, schedule an inspection and replacement as soon as possible.
- System Check: Ensure the warning light system is functioning correctly during regular maintenance checks.
By staying alert to these signs and performing regular inspections, you can address brake pad issues before they become serious problems. CARS.EDU.VN offers detailed guides and expert advice to help you maintain your brakes and drive safely. If you notice any of these symptoms, visit CARS.EDU.VN to find trusted local repair services.
3. Step-by-Step Guide to Inspecting Your Brakes
Regular brake inspections are essential for maintaining your vehicle’s safety and performance. Here’s a step-by-step guide to help you inspect your brakes effectively.
3.1. Gather Your Tools
Before you begin, gather the necessary tools:
- Jack and Jack Stands: To safely lift and support your vehicle.
- Lug Wrench: To remove the wheels.
- Wheel Chocks: To prevent the vehicle from rolling.
- Flashlight: To provide adequate lighting for inspection.
- Measuring Tool: Such as a ruler or caliper, to measure brake pad thickness.
- Gloves: To protect your hands.
- Safety Glasses: To protect your eyes.
3.2. Prepare Your Vehicle
- Park on a Level Surface: Ensure your vehicle is parked on a flat, stable surface.
- Engage the Parking Brake: Set the parking brake to prevent the vehicle from moving.
- Place Wheel Chocks: Position wheel chocks behind the rear wheels to provide additional security.
3.3. Loosen the Lug Nuts
- Use the Lug Wrench: Loosen the lug nuts on the wheel you plan to inspect. Do not remove them completely at this stage.
- Turn Counterclockwise: Turn the lug wrench counterclockwise to loosen the nuts.
3.4. Lift the Vehicle
- Position the Jack: Place the jack under the vehicle’s frame near the wheel you are inspecting. Refer to your vehicle’s owner’s manual for the correct jacking points.
- Raise the Vehicle: Slowly raise the vehicle until the tire is off the ground.
- Secure with Jack Stands: Place jack stands under the vehicle’s frame for safety. Never work under a vehicle supported only by a jack.
3.5. Remove the Wheel
- Remove Lug Nuts: Completely remove the lug nuts and set them aside in a safe place.
- Pull Off the Wheel: Carefully pull the wheel off the hub and set it aside.
3.6. Inspect the Brake Pads
- Locate the Brake Pads: The brake pads are located inside the caliper, pressing against the rotor.
- Measure Pad Thickness: Use a measuring tool to measure the thickness of the brake pads. Measure the thinnest part of the pad.
- Minimum Thickness: If the brake pads are less than ¼ inch (6.35 mm) thick, they should be replaced.
- Check for Damage: Look for signs of damage, such as cracks, chips, or uneven wear.
3.7. Inspect the Rotors
- Check for Wear: Examine the surface of the rotor for grooves, cracks, or excessive rust.
- Feel the Surface: Run your finger across the rotor surface. If you feel deep grooves or ridges, the rotor may need to be resurfaced or replaced.
- Look for Blue Tint: A blue tint on the rotor indicates excessive heat, which can warp the rotor.
3.8. Inspect the Calipers
- Check for Leaks: Look for signs of brake fluid leakage around the caliper.
- Inspect the Hoses: Check the brake hoses for cracks, bulges, or leaks.
- Ensure Movement: Make sure the caliper slides smoothly. A stuck caliper can cause uneven brake pad wear.
3.9. Reassemble the Wheel
- Mount the Wheel: Carefully place the wheel back onto the hub, aligning the lug bolt holes.
- Install Lug Nuts: Hand-tighten the lug nuts in a star pattern to ensure even pressure.
- Lower the Vehicle: Slowly lower the vehicle using the jack until the tire touches the ground.
- Tighten Lug Nuts: Use the lug wrench to tighten the lug nuts in a star pattern to the manufacturer’s specified torque.
- Final Lowering: Fully lower the vehicle and remove the jack and jack stands.
3.10. Repeat for Other Wheels
Repeat the process for each wheel to inspect all brake pads and rotors.
3.11. Test the Brakes
- Pump the Brakes: After reassembling the wheels, pump the brake pedal several times to restore brake pressure.
- Test Drive: Take the vehicle for a short test drive in a safe area to ensure the brakes are functioning correctly. Listen for any unusual noises and check for proper braking response.
3.12. When to Consult a Professional
If you are not comfortable performing a brake inspection or if you find any significant issues, consult a qualified mechanic. CARS.EDU.VN can help you find trusted local repair services.
By following this step-by-step guide, you can effectively inspect your brakes and identify potential issues before they become major problems. Regular inspections, combined with timely maintenance and repairs, will help ensure your vehicle’s braking system remains in optimal condition.
4. Factors Affecting Brake Pad Wear
Several factors can influence the rate at which your brake pads wear down. Understanding these factors can help you adjust your driving habits and maintenance schedule to prolong the life of your brakes.
4.1. Driving Habits
Your driving style has a significant impact on brake pad wear.
- Aggressive Driving: Hard braking, rapid acceleration, and frequent stops put more stress on the braking system.
- Gentle Driving: Gradual braking and maintaining a consistent speed reduce wear on the brake pads.
4.2. Vehicle Load
The weight your vehicle carries affects how hard the brakes have to work.
- Heavy Loads: Carrying heavy loads or towing trailers increases the braking force required, leading to faster wear.
- Light Loads: Driving with minimal weight reduces the strain on the brakes.
4.3. Road Conditions
The type of roads you drive on can also impact brake pad wear.
- Hilly or Mountainous Terrain: Driving in hilly areas requires more frequent braking to control speed.
- City vs. Highway Driving: City driving, with its frequent stops and starts, requires more braking than highway driving.
- Road Salt: The corrosive effects of salt can accelerate the wear of brake pads and rotors.
- Dust and Debris: Driving on dusty or gravel roads can introduce abrasive particles into the braking system, increasing wear.
4.4. Brake Pad Material
The material of your brake pads affects their durability and performance.
Refer to the table in Section 1.2 for details on different brake pad materials and their characteristics.
4.5. Brake System Maintenance
Regular maintenance of the brake system can help prolong the life of your brake pads.
- Fluid Checks: Regularly check and replace brake fluid to ensure optimal performance.
- Caliper Maintenance: Keep the calipers clean and lubricated to prevent sticking, which can cause uneven pad wear.
- Rotor Condition: Ensure the rotors are in good condition. Warped or damaged rotors can accelerate brake pad wear.
4.6. Climate
Climate conditions can also affect brake pad wear.
- Cold Weather: Cold temperatures can cause brake components to contract, leading to increased wear.
- Humidity: High humidity can promote rust and corrosion, affecting brake performance.
4.7. Vehicle Type
The type of vehicle you drive influences brake pad wear.
- Trucks and SUVs: These vehicles are generally heavier, requiring more robust braking systems and potentially leading to faster brake pad wear.
- Performance Cars: High-performance vehicles often have more powerful braking systems, but the aggressive driving style associated with these cars can also accelerate brake pad wear.
4.8. Quality of Brake Pads
The quality of the brake pads you use can significantly affect their lifespan.
- OEM vs. Aftermarket: Original Equipment Manufacturer (OEM) brake pads are designed to meet the specific requirements of your vehicle and often provide better performance and longevity compared to aftermarket options.
- Reputable Brands: Choose brake pads from reputable brands known for quality and reliability.
By understanding and addressing these factors, you can extend the life of your brake pads and ensure your vehicle’s braking system remains in optimal condition. CARS.EDU.VN provides expert advice and resources to help you maintain your brakes effectively.
5. Choosing the Right Brake Pads
Selecting the right brake pads for your vehicle is crucial for ensuring optimal braking performance and safety. Here’s a guide to help you make an informed decision.
5.1. Understand Your Driving Needs
Consider your driving habits and conditions to determine the best type of brake pad for your needs.
- Daily Commuting: If you primarily use your vehicle for daily commuting, consider ceramic or organic brake pads for their quiet operation and good stopping power.
- Heavy-Duty Use: If you frequently carry heavy loads or drive in hilly areas, semi-metallic or metallic brake pads may be a better choice for their durability and heat dissipation.
- High-Performance Driving: If you own a high-performance vehicle and engage in aggressive driving, high-performance brake pads are designed to provide superior stopping power and heat resistance.
5.2. Consider Brake Pad Material
Each type of brake pad material has its own advantages and disadvantages.
Refer to the table in Section 1.2 for details on different brake pad materials and their characteristics.
5.3. Check Compatibility
Ensure that the brake pads you choose are compatible with your vehicle’s make and model.
- Vehicle Specifications: Refer to your vehicle’s owner’s manual or consult a mechanic to determine the correct brake pad specifications.
- Online Resources: Use online resources or parts finders to verify compatibility.
5.4. Read Reviews and Ratings
Research different brake pad brands and models by reading reviews and ratings from other drivers.
- Customer Feedback: Look for feedback on braking performance, noise levels, and longevity.
- Expert Reviews: Consult expert reviews from automotive publications and websites.
5.5. Consider Galvanized Brake Pads
For optimal safety and longevity, consider galvanized brake pads.
- Rust Prevention: Galvanized brake pads are coated to prevent rust, which can cause premature wear and failure.
- Superior Performance: These pads offer superior performance and durability compared to painted brake pads.
5.6. Consult a Professional
If you are unsure about which brake pads to choose, consult a qualified mechanic.
- Expert Advice: A mechanic can assess your driving needs and recommend the best brake pads for your vehicle.
- Professional Installation: Consider having a mechanic install the brake pads to ensure proper fit and function.
5.7. Stick to Reputable Brands
Choosing brake pads from reputable brands can ensure quality and reliability.
- Established Manufacturers: Brands like Brembo, Akebono, and Bosch are known for producing high-quality brake pads.
- Warranty: Look for brake pads that come with a warranty to protect against defects.
5.8. Check for Certifications
Look for brake pads that meet industry standards and certifications.
- SAE Standards: Ensure that the brake pads meet the standards set by the Society of Automotive Engineers (SAE).
- ECE Regulations: Check for compliance with Economic Commission for Europe (ECE) regulations.
By considering these factors and doing your research, you can choose the right brake pads for your vehicle and ensure optimal braking performance and safety. CARS.EDU.VN provides detailed guides and expert advice to help you make an informed decision.
6. The Importance of Brake Fluid
Brake fluid is a critical component of your vehicle’s braking system. It plays a vital role in transferring the force from your foot on the brake pedal to the brake calipers, enabling your vehicle to stop. Understanding the importance of brake fluid and maintaining it properly is essential for ensuring your safety on the road.
6.1. Role of Brake Fluid in the Braking System
Brake fluid is a hydraulic fluid that operates under high pressure. When you press the brake pedal, the master cylinder forces brake fluid through the brake lines to the calipers at each wheel. The calipers then squeeze the brake pads against the rotors, slowing down or stopping the vehicle.
6.2. Types of Brake Fluid
There are several types of brake fluid, each with its own characteristics and specifications:
| Type | Composition | Boiling Point (Dry) | Boiling Point (Wet) | Notes |
|---|---|---|---|---|
| DOT 3 | Glycol-based | 401°F (205°C) | 284°F (140°C) | Commonly used in older vehicles; absorbs moisture quickly, requiring more frequent replacement. |
| DOT 4 | Glycol-based with borate esters | 446°F (230°C) | 311°F (155°C) | Offers higher boiling points than DOT 3, making it suitable for vehicles with anti-lock braking systems (ABS) and those driven in more demanding conditions. |
| DOT 5 | Silicone-based | 500°F (260°C) | 356°F (180°C) | Does not absorb moisture, which reduces corrosion; not compatible with ABS systems and can cause spongy brake feel. |
| DOT 5.1 | Glycol-based with borate esters and inhibitors | 500°F (260°C) | 356°F (180°C) | Similar to DOT 4 but with higher boiling points; suitable for high-performance vehicles and ABS systems; can be mixed with DOT 3 and DOT 4 fluids but is best used when replacing all brake fluid. |
| DOT 6 | Glycol Ether Borate Ester | 590°F (310°C) | 410°F (210°C) | Offers even higher boiling points and superior performance compared to DOT 5.1, but requires more frequent changes as it is more hygroscopic and can quickly degrade with moisture absorption, making it less suitable for street use. |
6.3. Why Brake Fluid Needs to be Changed
Brake fluid is hygroscopic, meaning it absorbs moisture from the air. Over time, the moisture content in the brake fluid increases, which can lead to several problems:
- Reduced Boiling Point: Moisture lowers the boiling point of the brake fluid, increasing the risk of brake fade, where the brakes become less effective due to overheating.
- Corrosion: Moisture can cause corrosion in the brake lines, calipers, and other brake system components.
- Compromised Performance: Contaminated brake fluid can compromise the performance of the entire braking system.
6.4. How Often Should Brake Fluid Be Changed?
The recommended interval for changing brake fluid varies depending on the vehicle and the type of brake fluid used. Generally, brake fluid should be changed every two to three years or every 24,000 to 36,000 miles.
- Check Your Owner’s Manual: Refer to your vehicle’s owner’s manual for the manufacturer’s recommended interval.
- Test the Brake Fluid: Use a brake fluid tester to measure the moisture content in the fluid. If the moisture level exceeds 3%, it’s time to change the fluid.
6.5. Symptoms of Contaminated Brake Fluid
Several symptoms can indicate that your brake fluid needs to be changed:
- Spongy Brake Pedal: A soft or spongy brake pedal feel can indicate the presence of air or moisture in the brake lines.
- Reduced Braking Performance: If your vehicle takes longer to stop or the brakes feel less effective, the brake fluid may be contaminated.
- Dark or Dirty Fluid: Inspect the brake fluid reservoir. If the fluid appears dark or dirty, it’s likely contaminated and needs to be replaced.
6.6. How to Check Brake Fluid
Checking your brake fluid is a simple process:
- Locate the Brake Fluid Reservoir: The reservoir is usually located under the hood, near the master cylinder. It’s typically made of clear plastic with markings indicating the minimum and maximum fluid levels.
- Check the Fluid Level: Ensure that the fluid level is between the minimum and maximum markings.
- Inspect the Fluid: Check the color and condition of the fluid. It should be clear or light amber in color. If it’s dark or dirty, it needs to be replaced.
6.7. Changing Brake Fluid
Changing brake fluid can be done at home with the right tools and knowledge. However, it’s important to follow the correct procedure to avoid introducing air into the brake lines.
- Gather Your Supplies: You’ll need new brake fluid, a wrench to open the bleeder screws, a clear hose, a container to collect the old fluid, and a helper.
- Bleed the Brakes: Start with the wheel farthest from the master cylinder (usually the rear passenger side). Open the bleeder screw, have your helper press the brake pedal, and collect the old fluid. Repeat until the new fluid runs clear.
- Repeat for Each Wheel: Repeat the process for each wheel, working your way closer to the master cylinder.
- Top Off the Reservoir: After bleeding all the brakes, top off the brake fluid reservoir to the correct level.
6.8. When to Consult a Professional
If you are not comfortable changing brake fluid yourself, consult a qualified mechanic. CARS.EDU.VN can help you find trusted local repair services.
By understanding the importance of brake fluid and maintaining it properly, you can ensure your vehicle’s braking system remains in optimal condition. CARS.EDU.VN provides expert advice and resources to help you maintain your brakes effectively.
7. Resurfacing or Replacing Rotors
The brake rotors are critical components of your vehicle’s braking system. Over time, they can wear down, become damaged, or warp, affecting your vehicle’s braking performance. Understanding when to resurface or replace your rotors is essential for maintaining your safety on the road.
7.1. What are Brake Rotors?
Brake rotors, also known as brake discs, are the flat, circular components that the brake pads clamp onto to slow down or stop your vehicle. They are typically made of cast iron or steel and are designed to withstand high temperatures and friction.
7.2. Signs That Rotors Need Attention
Several signs can indicate that your rotors need to be resurfaced or replaced:
- Vibration or Pulsation: Vibration or pulsation in the brake pedal or steering wheel when braking is a common sign of warped rotors.
- Squealing or Grinding Noises: Unusual noises coming from the brakes can indicate that the rotors are worn or damaged.
- Increased Stopping Distance: If your vehicle takes longer to stop, the rotors may be worn or glazed.
- Visible Damage: Cracks, grooves, or excessive rust on the rotor surface can indicate that it needs to be addressed.
7.3. Resurfacing Rotors
Resurfacing involves machining the surface of the rotors to remove imperfections and restore a smooth, flat surface. This can be a cost-effective solution for rotors that are only slightly worn or have minor damage.
- Benefits of Resurfacing: Resurfacing can eliminate vibrations, reduce noise, and improve braking performance.
- Limitations of Resurfacing: Resurfacing removes material from the rotor, making it thinner. If the rotor is already close to its minimum thickness, resurfacing may not be possible.
7.4. Replacing Rotors
Replacing the rotors involves installing new rotors on your vehicle. This is the best option for rotors that are severely worn, cracked, or damaged.
- Benefits of Replacing: Replacing the rotors ensures that you have a fresh, undamaged braking surface, which can significantly improve braking performance.
- When to Replace: Replace rotors if they are below the minimum thickness specified by the manufacturer, have deep cracks or grooves, or cannot be resurfaced.
7.5. How to Determine Whether to Resurface or Replace
To determine whether to resurface or replace your rotors, consider the following factors:
- Rotor Thickness: Measure the thickness of the rotors using a micrometer. Compare the measurement to the minimum thickness specified by the manufacturer. If the rotor is below the minimum thickness, it should be replaced.
- Damage: Inspect the rotors for cracks, deep grooves, or excessive rust. If the damage is severe, the rotor should be replaced.
- Cost: Compare the cost of resurfacing and replacing the rotors. In some cases, the cost of resurfacing may be close to the cost of replacing, making replacement the better option.
7.6. Step-by-Step Guide to Replacing Rotors
If you decide to replace your rotors, follow these steps:
- Gather Your Tools: You’ll need a jack, jack stands, a lug wrench, a socket set, a torque wrench, brake cleaner, and new rotors.
- Prepare the Vehicle: Park on a level surface, engage the parking brake, and loosen the lug nuts on the wheel you’re working on.
- Lift the Vehicle: Use the jack to lift the vehicle and secure it with jack stands.
- Remove the Wheel: Remove the lug nuts and take off the wheel.
- Remove the Caliper: Remove the brake caliper bolts and carefully slide the caliper off the rotor. Support the caliper so it doesn’t hang by the brake hose.
- Remove the Rotor: Remove the rotor by pulling it straight off the hub. If the rotor is stuck, use a rubber mallet to gently tap it until it comes loose.
- Clean the Hub: Clean the hub surface with brake cleaner to remove any rust or debris.
- Install the New Rotor: Place the new rotor onto the hub, making sure it sits flush.
- Reinstall the Caliper: Reinstall the brake caliper and tighten the bolts to the manufacturer’s specified torque.
- Reinstall the Wheel: Put the wheel back on and tighten the lug nuts in a star pattern.
- Lower the Vehicle: Lower the vehicle and remove the jack stands.
- Torque the Lug Nuts: Use a torque wrench to tighten the lug nuts to the manufacturer’s specified torque.
- Repeat for Other Side: Repeat the process for the other side of the vehicle.
- Test the Brakes: Pump the brake pedal several times to restore brake pressure. Take the vehicle for a short test drive to ensure the brakes are functioning correctly.
7.7. When to Consult a Professional
If you are not comfortable resurfacing or replacing rotors yourself, consult a qualified mechanic. CARS.EDU.VN can help you find trusted local repair services.
By understanding the importance of brake rotors and maintaining them properly, you can ensure your vehicle’s braking system remains in optimal condition. cars.edu.vn provides expert advice and resources to help you maintain your brakes effectively.
8. The Role of Brake Calipers
Brake calipers are essential components of your vehicle’s braking system. They play a crucial role in applying the necessary force to the brake pads, which in turn clamp against the rotors to slow down or stop your vehicle. Understanding the function of brake calipers and maintaining them properly is vital for ensuring your safety on the road.
8.1. What are Brake Calipers?
Brake calipers are the components that house the brake pads and contain the pistons that press the pads against the rotors. When you press the brake pedal, hydraulic pressure from the master cylinder forces the pistons in the calipers to extend, pushing the brake pads against the rotors.
8.2. Types of Brake Calipers
There are two main types of brake calipers:
- Fixed Calipers: Fixed calipers have pistons on both sides of the rotor and do not move relative to the rotor. They provide more even pressure on the brake pads but are more complex and expensive.
- Floating Calipers: Floating calipers have pistons on only one side of the rotor and slide along guide pins to apply pressure to both brake pads. They are simpler and more affordable but may not provide as even pressure as fixed calipers.
8.3. Signs of Caliper Problems
Several signs can indicate that your brake calipers are malfunctioning:
- Pulling to One Side: If your vehicle pulls to one side when braking, it could indicate that one of the calipers is sticking or not applying pressure evenly.
- Squealing or Grinding Noises: Unusual noises coming from the brakes can indicate that the calipers are not releasing properly.
- Uneven Brake Pad Wear: If the brake pads on one wheel wear down much faster than the pads on the other wheel, it could indicate a problem with the caliper.
- Leaking Brake Fluid: Leaking brake fluid around the caliper is a clear sign that it needs to be inspected and possibly rebuilt or replaced.
8.4. Caliper Maintenance
Regular maintenance of the brake calipers can help prevent problems and ensure optimal performance.
- Lubrication: Keep the caliper guide pins lubricated to ensure they slide smoothly. Use a high-temperature brake caliper grease.
- Inspection: Inspect the calipers for leaks, damage, or corrosion. Replace any worn or damaged components.
- Cleaning: Clean the calipers regularly to remove dirt and debris. Use a brake cleaner to remove brake dust and other contaminants.
8.5. Rebuilding Calipers
Rebuilding calipers involves replacing the seals and pistons to restore