Proper wheel alignment is crucial for optimal car performance, tire longevity, and safe handling. Misaligned wheels can lead to uneven tire wear, poor fuel economy, and compromised handling, making your vehicle less responsive and potentially unsafe. While professional alignment services are available, understanding How To Align A Car yourself can save you money and provide a deeper understanding of your vehicle’s mechanics. This guide will walk you through the basics of DIY car alignment, focusing on toe adjustment, a critical aspect you can effectively manage at home.
Understanding the Basics of Car Alignment
Before diving into the process of how to align a car, it’s important to grasp the fundamental alignment angles:
- Toe: Toe refers to the direction your wheels point relative to each other. Toe-in means the front of the wheels are closer together than the rear, while toe-out is the opposite. Toe is the most critical angle affecting tire wear and straight-line stability.
- Camber: Camber is the vertical tilt of your wheels. Negative camber means the top of the tire tilts inward towards the car, often used for performance handling. Positive camber is the opposite, with the top tilting outwards.
- Caster: Caster is the angle of the steering pivot axis when viewed from the side of the vehicle. It affects steering stability and self-centering.
While camber and caster adjustments often require specialized tools and are more complex, toe adjustments can be effectively performed at home with relatively simple tools and techniques. This guide will primarily focus on how to align a car by adjusting toe.
Tools You’ll Need for DIY Car Alignment
To successfully align a car in your garage, you’ll need to gather the following tools:
- Toe Plates: These are specialized tools designed to measure toe. They clamp onto your wheels and provide a reference for accurate toe readings.
- String Box (or String and Jack Stands): For more precise individual wheel toe measurements, a string box setup is ideal. You can purchase a professional string box or create your own using jack stands, metal tubing, string, and clamps.
- Wrench Set: You’ll need wrenches to loosen and tighten jam nuts and adjustment bolts on your car’s tie rods and control arms.
- Penetrating Oil: Applying penetrating oil to jam nuts and bolts beforehand will make adjustments easier, especially on older vehicles where rust and corrosion can be a problem.
- Measuring Tape: Essential for setting up your string box and verifying measurements.
- Level: To ensure your string box is level, which is crucial for accurate readings.
- Wheel Chocks: For safety, always use wheel chocks to prevent your car from rolling.
- Jack and Jack Stands: To safely lift your car and access the adjustment points.
- Ruler or Measuring Device: For measuring toe adjustments.
DIY wheel alignment using toe plates for measuring changes, an effective method for tracking adjustments and tuning toe settings for improved handling.
Step-by-Step Guide: How to Align a Car for Toe
Here’s a step-by-step guide on how to align a car for toe using both toe plates and a string box method:
1. Preparation is Key:
- Safety First: Ensure your car is parked on a level surface. Engage the parking brake and use wheel chocks behind the rear wheels.
- Locate Adjustment Points: Familiarize yourself with your car’s alignment adjustment points. For front toe, these are typically on the tie rods. Rear toe adjustments vary depending on your vehicle’s make and model, often involving eccentric bolts on control arms or adjustable arms. Consult your car’s service manual if needed.
- Apply Penetrating Oil: Spray penetrating oil on all jam nuts and adjustment bolts related to toe adjustment. Let it soak for a while to loosen any rust or corrosion.
2. Measuring Toe with Toe Plates:
- Mount Toe Plates: Carefully attach the toe plates to your front wheels, ensuring they are securely mounted and parallel to the ground.
- Take Initial Readings: Measure the distance between the toe plates at the front and rear of the tires. The difference between these measurements indicates your toe.
- If the front measurement is smaller than the rear, you have toe-in.
- If the front measurement is larger than the rear, you have toe-out.
- Record Measurements: Note down your initial toe measurements for reference.
Close-up view of toe plates mounted on a vehicle’s wheel, demonstrating how they provide a reference point for measuring and adjusting toe alignment.
3. Setting Up a String Box for Individual Wheel Toe Measurement:
- Position Jack Stands and Tubing: Place jack stands on each side of your car, aligned with the horizontal centerline of your wheels. Attach metal tubing to the stands using clamps or vice grips, ensuring the tubing is level and at the same height on both sides.
- Run String: Thread string through the holes drilled at each end of the metal tubing, creating a rectangular “box” around your car at wheel level.
- Square the String Box: Measure the distance from the string to the center point of each wheel. Adjust the string box so it’s equidistant from the center of the wheels on each side. If your car has different front and rear track widths, compensate by adjusting the string box accordingly (half the track width difference on each side).
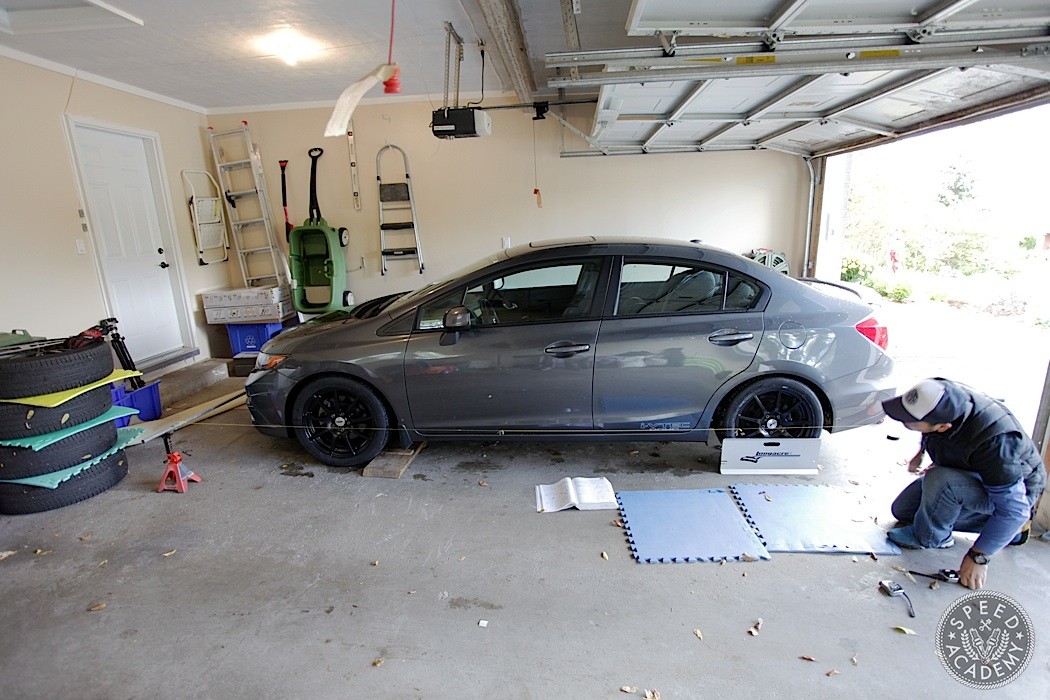
Setting up a DIY string box for wheel alignment using jack stands, metal tubing, and string, illustrating a cost-effective method for precise toe measurements.
4. Measuring Toe with a String Box:
- Measure to the String: At each wheel, measure the distance from the front and rear of the tire sidewall to the string.
- Calculate Toe: The difference between the rear and front measurements for each wheel indicates individual wheel toe.
- Record Measurements: Note down the individual toe measurements for each wheel.
Detailed view of measuring toe using a string box, showing the process of taking measurements from the tire sidewall to the string to determine toe angle.
5. Adjusting Toe:
- Loosen Jam Nuts: Locate the jam nuts on your tie rods (for front toe) or control arms (for rear toe). Use wrenches to loosen these nuts.
- Adjust Tie Rods/Bolts:
- Toe-in Adjustment: To increase toe-in, shorten the tie rod length by turning it in the appropriate direction. On many cars, this involves turning the tie rod inwards.
- Toe-out Adjustment: To increase toe-out, lengthen the tie rod by turning it in the opposite direction.
- For rear toe adjustments using eccentric bolts, rotate the bolts to adjust the arm’s position and change toe.
- Make Small Adjustments: Make small, incremental adjustments and remeasure after each adjustment. It’s better to sneak up on your desired settings gradually.
- Tighten Jam Nuts: Once you achieve the desired toe setting, securely tighten the jam nuts to lock the adjustment in place.
Demonstration of adjusting toe using a tie rod and wrench, illustrating the practical steps involved in making toe adjustments during a DIY car alignment.
6. Final Checks and Refinements:
- Re-measure: After tightening the jam nuts, re-measure toe to confirm the settings haven’t changed during tightening.
- Bounce the Car: Push down on each corner of the car to settle the suspension and then re-measure one last time.
- Check Steering Wheel Center: Ensure your steering wheel is centered when driving straight. If not, minor toe adjustments may be needed to correct it.
Close-up view of tie rod adjustment showing the jam nut and threaded rod, highlighting the components involved in adjusting front toe alignment.
Toe Settings and Driving Style
Optimal toe settings vary depending on your driving style and vehicle use:
- Street Cars: Slight toe-in on the front axle generally provides better straight-line stability and tire wear for everyday driving. Rear toe settings are often close to zero or slightly toe-in for stability.
- Track Cars: Track cars often benefit from slight toe-out on the front for quicker turn-in response. Rear toe settings can vary; front-wheel-drive (FWD) cars may use slight toe-out to aid rotation, while rear-wheel-drive (RWD) cars often use slight toe-in for mid-corner stability.
- Drift Cars: Drift cars typically use more aggressive toe settings to promote oversteer and control during drifting.
Rear suspension components showing eccentric bolts used for camber and toe adjustments on a rear-wheel-drive car, demonstrating common adjustment mechanisms.
Illustration of eccentric bolts used for rear alignment adjustment, emphasizing the importance of understanding your car’s specific adjustment mechanisms.
Example of aftermarket adjustable arm for rear camber adjustment on a Honda, showcasing alternative methods for alignment adjustments on different vehicle types.
Conclusion: Mastering DIY Car Alignment
Learning how to align a car at home, specifically focusing on toe adjustment, is a valuable skill for any car enthusiast. While it may take time and patience initially, DIY alignment can save you money, improve your car’s performance, and enhance your understanding of vehicle mechanics. By following these steps and investing in the right tools, you can effectively manage your car’s toe alignment and enjoy the benefits of properly aligned wheels. Remember to always prioritize safety and consult your vehicle’s service manual for specific instructions and torque specifications.