Applying car wrap can transform your vehicle’s appearance and protect its paint. CARS.EDU.VN provides a step-by-step guide to help you achieve a professional-looking vinyl wrap, covering everything from preparation to application. Discover expert techniques for vehicle customization, vinyl application, and paint protection film to elevate your automotive experience.
1. Essential Preparations Before You Begin
Before diving into the car wrapping process, meticulous preparation is key to a flawless finish. This involves gathering the necessary tools, selecting the appropriate vinyl, and preparing your workspace and vehicle. Proper planning will not only make the application process smoother but also ensure the longevity and appearance of your car wrap.
1.1. Assembling Your Toolkit
Having the right tools at your disposal is essential for a successful car wrap application. Here’s a comprehensive list of what you’ll need:
| Tool | Description | Use |
|---|---|---|
| Vinyl Wrap Film | High-quality vinyl film designed for vehicle wraps. | Applying a new color, finish, or design to your vehicle. |
| Measuring Tape | Used to accurately measure the vehicle panels. | Determining the amount of vinyl needed. |
| Utility Knife or Cutting Tool | A sharp blade for trimming excess vinyl. | Cutting the vinyl to size and trimming around edges. |
| Squeegee | A tool with a smooth edge used to apply vinyl smoothly and remove air bubbles. | Applying the vinyl to the vehicle surface and ensuring proper adhesion. |
| Heat Gun | Used to soften the vinyl and help it conform to curved surfaces. | Stretching the vinyl around complex shapes and setting the wrap in place. |
| Isopropyl Alcohol (70%) | Used to clean the vehicle surface and remove any contaminants. | Preparing the surface for vinyl application. |
| Microfiber Cloths | Lint-free cloths for cleaning and drying the vehicle. | Cleaning the vehicle and wiping down surfaces with isopropyl alcohol. |
| Blue Painter’s Tape | Used for measuring panels and marking areas. | Marking and measuring the vehicle panels for accurate vinyl cutting. |
| 3M Primer 94 | An adhesion promoter for edges and indents. | Ensuring the vinyl adheres properly to edges and difficult areas. |
| IR Temperature Sensor | Used to monitor the surface temperature when applying heat. | Ensuring the vinyl reaches the correct temperature for proper adhesion without burning it. |
| Folding Table | Provides a clean surface for cutting the vinyl. | Cutting the vinyl to the required size and shape. |
| Gloves | To keep your hands clean and prevent transferring oils to the vinyl. | Handling the vinyl and preventing contamination. |
| Masking Tape or Wrap Cut Knife | A special knife with tape that cuts the wrap without damage the car’s paint | Ensuring the vinyl adheres properly to edges and difficult areas. |
**1.2. Selecting the Right Vinyl Wrap
Choosing the right vinyl wrap is crucial for achieving the desired look and ensuring the wrap’s longevity. Consider the following factors when selecting your vinyl:
- Type of Vinyl: Cast vinyl is generally preferred for vehicle wraps due to its durability and conformability. Calendared vinyl is a cheaper alternative but may not last as long or conform as well to complex curves.
- Finish: Vinyl wraps are available in a variety of finishes, including gloss, matte, satin, and metallic. Choose a finish that complements your vehicle’s style and personal preferences.
- Color and Design: Select a color or design that suits your taste and enhances your vehicle’s appearance. Consider custom designs or patterns for a unique look.
- Brand: Opt for reputable brands like 3M, Avery Dennison, or Oracal to ensure quality and reliability.
- Adhesive: Look for vinyl with air release channels in the adhesive to minimize air bubbles during application.
1.3. Preparing Your Workspace
A clean and well-lit workspace is essential for a successful car wrap application. Here are some tips for preparing your space:
- Choose an Indoor Space: If possible, work in a large, climate-controlled indoor space such as a garage to avoid wind, heat, humidity, and contaminants.
- Clean the Area: Sweep or vacuum the area to remove dust and debris.
- Ensure Adequate Lighting: Make sure the space is well-lit to allow you to see the surface clearly.
- Temperature Control: Ideally, the temperature should be around 72 degrees Fahrenheit (22 degrees Celsius) for optimal vinyl conformity.
- Folding Table: Set up a clean folding table to cut the vinyl.
1.4. Preparing Your Vehicle
Properly preparing your vehicle is just as important as preparing your workspace. Follow these steps to ensure a clean and smooth surface for the vinyl to adhere to:
- Repair Imperfections: Fix any dents, dings, or deep scratches before applying the vinyl.
- Check Paint Condition: Ensure your vehicle has a factory paint job in good condition. If the paint is chalking or failing, consider repainting the car before applying the wrap.
- Remove Obstacles: Remove any bulky items such as logos, trim, door handles, and hood ornaments. Research the best method for removing these safely, or consult a body shop for assistance.
- Wash the Vehicle: Give your vehicle a thorough wash using soap and water.
- Dry the Surface: Use a lint-free microfiber cloth to dry all surfaces completely. Allow the vehicle to sit overnight so that any remaining water trapped in the body panels can evaporate.
- Wipe with Isopropyl Alcohol: On the day of installation, wipe down the entire car with 70% isopropyl alcohol to ensure a clean and pristine surface. Pay special attention to edges and inside edges of body panels.
- Apply Primer (Optional): For expert installers, apply 3M Primer 94 to edges and severe indents to ensure the vinyl stays down in these critical areas. Apply the primer in sections that you plan to wrap within the next 4 hours.
Safety Note: Ensure adequate ventilation when using isopropyl alcohol and Primer 94. Read the Material Safety Data Sheet (MSDS) for both products before proceeding.
2. Step-by-Step Guide to Applying Car Wrap
With the preparation complete, you’re now ready to begin applying the car wrap. Follow these steps carefully to achieve a professional-looking finish.
2.1. Measuring and Cutting the Vinyl
- Measure the Panels: Use blue painter’s tape to measure the center (or longest section) of each panel, leaving about 1 inch on each end for tucking.
- Determine Total Length: Remove the tape, lay it across the floor, and use a tape measure to determine the total length needed.
- Unroll and Cut the Vinyl: Using the measurements you took earlier, unroll the desired amount of film and cut it with your utility knife on a clean folding table.
- Directional Film: If you’re using a film with color-changing effects, ensure the arrows on the back of the film are consistently pointing in the same direction.
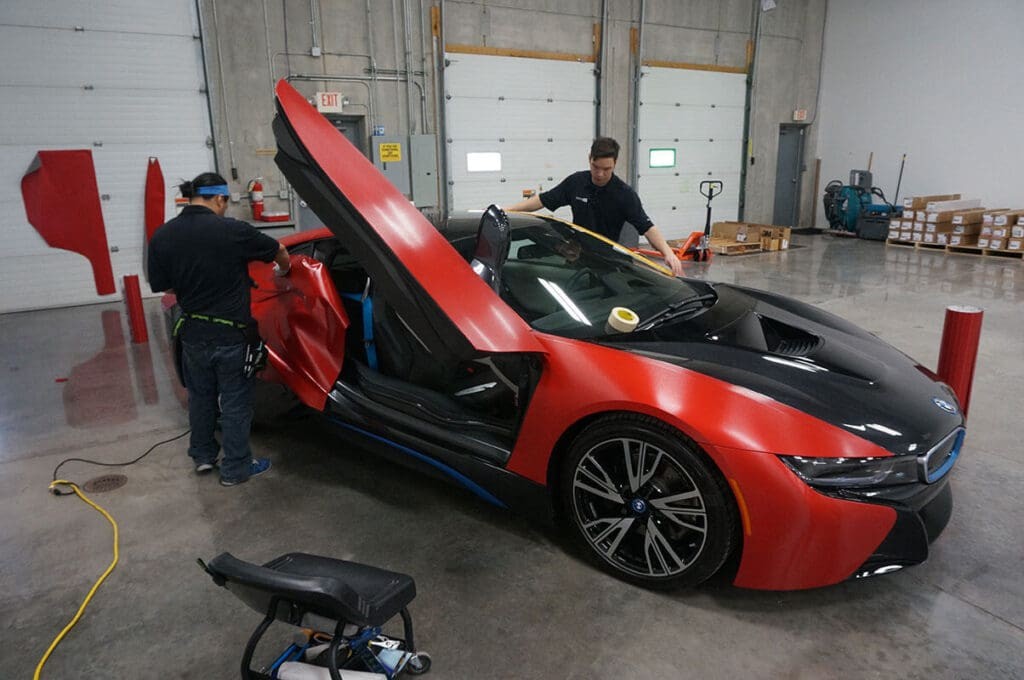
2.2. Applying the Vinyl to the First Panel
- Choose a Flat Section: Start with a flat section such as the hood, roof, or a door panel to gain experience.
- Remove the Liner Backing: With a friend, remove the liner backing from the entire piece of vinyl.
- Tack into Position: Lightly tack the vinyl into position on your first panel.
- Squeegee the Vinyl: Use your 4-inch squeegee to start in the middle of the panel and slowly work your way out to the edges. Push out all air from underneath the vinyl using overlapping strokes.
- Stretching the Vinyl: When the shape of the vehicle changes and you need to stretch the vinyl, start by stretching it cold with your squeegee. If you mess up an area, try pulling the vinyl back a bit and heating it with a heat gun (with no tension). Allow the vinyl to cool before reattempting.
- Use Gloves: Wearing gloves will reduce the risk of scratching your car during the squeegee and heating phase
2.3. Working Out Any Bubbles
- Squeegee Again: Use your squeegee to start in the middle and work your way out toward the exit points at the edges of the film.
- Post-Heat the Film: Post-heat the film to about 200 degrees Fahrenheit (93 degrees Celsius) to verify your install. This will break the memory of the film, accelerate the adhesion process, and highlight any areas where there is air trapped under the vinyl.
- Remove Bubbles: If you see any areas bubble up, stop heating the area, let it cool down, and then push the air out toward one of the edges. Then, post-heat once more.
2.4. Cutting the Wrap and Tucking the Edges
- Remove Excess Material: Using a sharp blade, carefully cut away the overhanging film, leaving about 1/4 – 1/8 inch all around.
- Tuck the Edges: Take the excess 1/4 – 1/8 inch bit and tuck it around the curved edge of the panel. If there’s too much tension, use your heat gun to soften it up and remove any wrinkles.
2.5. Applying Heat to Set
- Heat the Surface: Use your heat gun to apply heat evenly across the surface.
- Monitor Temperature: Use an IR temperature sensor to ensure you get the surface temperature up to 200 degrees Fahrenheit (93 degrees Celsius), but not so high as to burn the vinyl or underlying paint.
- Check for Peeling or Bubbles: If any of the edges begin to peel back or bubbles appear, fix or replace that section.
2.6. Wrapping the Rest of the Vehicle
Repeat steps 2.2 through 2.5 on the remainder of the vehicle. When working with curved surfaces, try to reposition the film and add a small amount of tension to avoid creases and folds. As a last resort, add a little heat to soften the film and conform it to the shaped surface.
3. Common Mistakes to Avoid
Even with careful preparation and application, mistakes can happen. Here are some common pitfalls to avoid when applying car wrap:
- Not Cleaning the Surface Properly: Failing to thoroughly clean the vehicle surface can result in poor adhesion and bubbles.
- Using Low-Quality Vinyl: Cheap vinyl may be difficult to work with and may not last as long.
- Applying Too Much Heat: Overheating the vinyl can cause it to stretch excessively or burn.
- Not Removing Air Bubbles: Leaving air bubbles under the vinyl can detract from the appearance and lead to premature failure.
- Cutting Carelessly: Cutting the vinyl without precision can damage the underlying paint.
- Rushing the Process: Applying car wrap requires patience and attention to detail. Rushing the process can lead to mistakes and a subpar finish.
- Ignoring Environmental Conditions: Applying vinyl in direct sunlight, high humidity, or cold temperatures can affect its adhesion and workability.
4. Maintaining Your Car Wrap
Once your car wrap is applied, proper maintenance is essential to keep it looking its best. Follow these tips to prolong the life of your wrap:
- Wash Regularly: Wash your vehicle regularly with a mild soap and water solution.
- Avoid Abrasive Cleaners: Do not use abrasive cleaners or scrub brushes that can scratch the vinyl.
- Hand Wash Recommended: Hand washing is preferred over automatic car washes, as the brushes in car washes can damage the vinyl.
- Remove Contaminants: Promptly remove any contaminants such as bird droppings, tree sap, or road tar.
- Avoid High-Pressure Washing: Avoid using high-pressure washers close to the edges of the vinyl, as this can cause the wrap to lift.
- Park in the Shade: When possible, park your vehicle in the shade to protect the vinyl from prolonged exposure to sunlight.
- Use a Vinyl Protectant: Apply a vinyl protectant to help maintain the color and finish of the wrap.
5. Advantages of Car Wraps
Car wraps offer several advantages over traditional paint jobs:
- Cost-Effective: Car wraps are generally less expensive than custom paint jobs.
- Paint Protection: Wraps protect the underlying paint from scratches, chips, and fading.
- Customization: Wraps allow for a wide range of customization options, including colors, finishes, and designs.
- Easy Removal: Wraps can be easily removed without damaging the underlying paint.
- Resale Value: Protecting the original paint can help maintain the vehicle’s resale value.
- Advertising: Wraps can be used for advertising purposes, turning your vehicle into a mobile billboard.
6. Car Wrap Cost Factors
The cost of a car wrap can vary depending on several factors:
- Vehicle Size: Larger vehicles require more vinyl and labor, increasing the cost.
- Type of Vinyl: Premium vinyl materials cost more than standard options.
- Complexity of Design: Intricate designs and custom graphics require more time and expertise, raising the price.
- Installation Labor: The cost of labor can vary depending on the installer’s experience and location.
- Coverage Area: Partial wraps are less expensive than full wraps.
- Additional Services: Services such as paint correction or trim removal can add to the overall cost.
7. Car Wrap Trends in 2024
Staying up-to-date with the latest car wrap trends can help you make informed decisions about customizing your vehicle. Here are some of the popular trends in 2024:
| Trend | Description | Benefits |
|---|---|---|
| Satin Finishes | Offers a smooth, velvety appearance that’s less reflective than gloss. | Provides a modern and sophisticated look. |
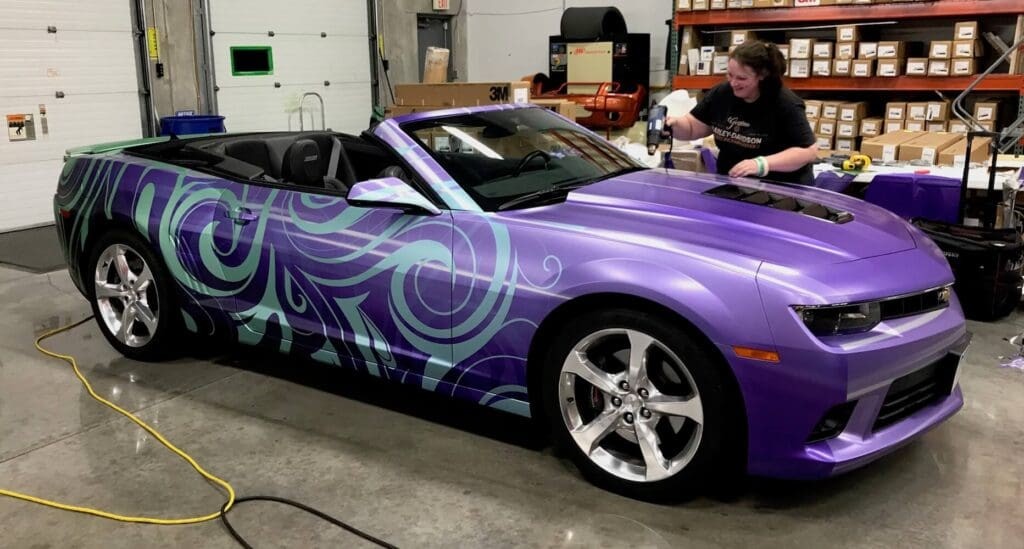
| Color Shift Wraps | Changes color depending on the viewing angle and lighting. | Creates a unique and eye-catching effect. |
| Matte Finishes | Provides a non-reflective, flat appearance. | Offers a rugged and understated look. |
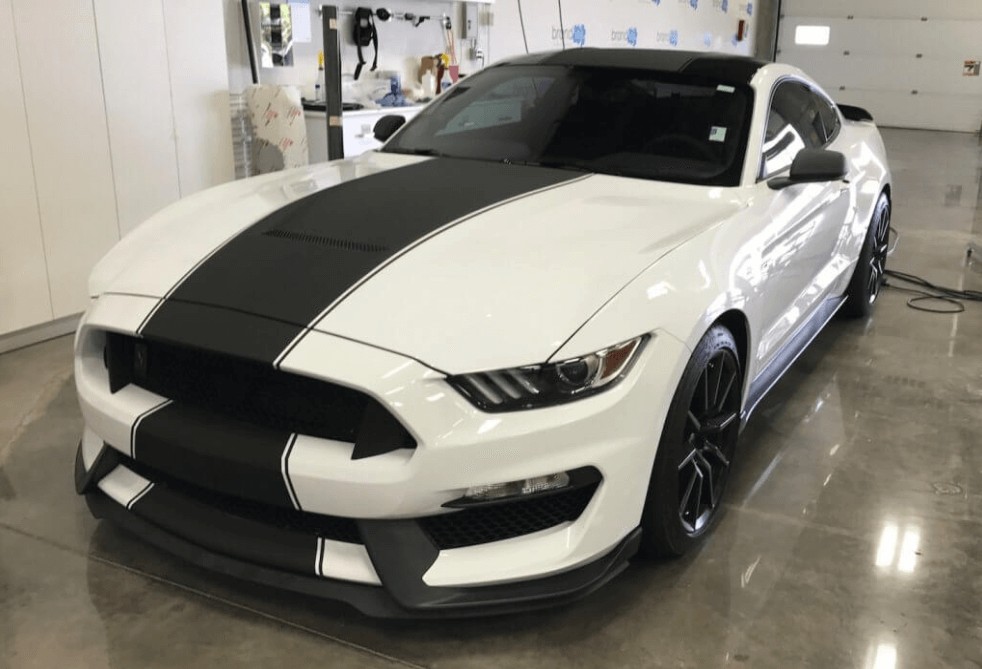
| Chrome Deletes | Involves wrapping chrome trim in black or body-colored vinyl. | Gives the vehicle a cleaner and more streamlined appearance. |
| Digital Camo Wraps | Features a modern, geometric camouflage pattern. | Adds a bold and distinctive touch to the vehicle. |
| Textured Wraps | Mimics the look and feel of materials like carbon fiber or brushed metal. | Enhances the tactile and visual appeal of the vehicle. |
| Environmentally Friendly Films | These are made of recyclable material | Minimizes carbon footprint |
8. Choosing a Professional Car Wrap Installer
If you’re not comfortable applying a car wrap yourself, it’s best to hire a professional installer. Here are some tips for choosing a reputable installer:
- Check Reviews and Ratings: Look for installers with positive reviews and high ratings on sites like Google, Yelp, and Facebook.
- Ask for Recommendations: Seek recommendations from friends, family, or online car communities.
- View Their Portfolio: Review the installer’s portfolio to see examples of their work.
- Verify Certification: Check if the installer is certified by reputable organizations like 3M or Avery Dennison.
- Inquire About Warranty: Ask about the warranty offered on the wrap and installation.
- Get a Detailed Quote: Obtain a detailed quote that includes the cost of materials, labor, and any additional services.
- Visit Their Shop: Visit the installer’s shop to assess their professionalism and cleanliness.
9. How CARS.EDU.VN Can Help You
At CARS.EDU.VN, we understand the challenges of maintaining and customizing your vehicle. Our goal is to provide you with the information and resources you need to make informed decisions and keep your car looking its best.
9.1. Expert Advice and Guidance
CARS.EDU.VN offers expert advice and guidance on all aspects of car care, from routine maintenance to advanced customization techniques like car wrapping. Our team of automotive professionals is dedicated to providing you with accurate and up-to-date information to help you achieve your goals.
9.2. Detailed Tutorials and Guides
Our website features detailed tutorials and guides on a wide range of automotive topics, including car wrapping. Whether you’re a beginner or an experienced DIYer, you’ll find valuable information and step-by-step instructions to help you tackle any project with confidence.
9.3. Product Reviews and Recommendations
CARS.EDU.VN provides honest and unbiased product reviews and recommendations to help you choose the best products for your vehicle. We evaluate a variety of car care products, including vinyl wraps, cleaning supplies, and detailing tools, to help you make informed purchasing decisions.
9.4. Community Forum
Join the CARS.EDU.VN community forum to connect with other car enthusiasts, share your experiences, and ask questions. Our forum is a great place to get advice, share tips, and learn from others in the automotive community.
9.5. Find Local Services
Need help with your car wrap project? CARS.EDU.VN can help you find reputable car wrap installers in your area. Our directory of local services makes it easy to connect with professionals who can provide expert installation and maintenance services.
10. Frequently Asked Questions (FAQ) About Car Wraps
Here are some frequently asked questions about car wraps to help you better understand the process and benefits:
| Question | Answer |
|---|---|
| How long does a car wrap last? | A high-quality car wrap can last anywhere from 5 to 7 years, depending on the type of vinyl used, environmental conditions, and maintenance practices. |
| Will a car wrap damage my car’s paint? | No, a properly installed and removed car wrap will not damage your car’s paint. In fact, it can protect the paint from scratches, chips, and fading. |
| Can I wash my car after it’s wrapped? | Yes, you can wash your car after it’s wrapped. However, it’s best to hand wash it with a mild soap and water solution. Avoid using abrasive cleaners or automatic car washes, as they can damage the vinyl. |
| How much does it cost to wrap a car? | The cost of a car wrap can vary depending on the size of the vehicle, the type of vinyl used, the complexity of the design, and the installer’s labor rates. On average, a full car wrap can cost between $2,500 and $5,000. |
| Can I wrap my car myself? | Yes, you can wrap your car yourself if you have the necessary tools, skills, and patience. However, it’s a challenging process that requires attention to detail. If you’re not comfortable doing it yourself, it’s best to hire a professional installer. |
| What are the benefits of car wrapping? | Car wrapping offers several benefits, including cost-effectiveness, paint protection, customization options, easy removal, and potential for advertising. |
| Can I wrap a leased car? | Yes, you can wrap a leased car, but you’ll need to remove the wrap before returning the vehicle. Make sure to use a professional installer who can remove the wrap without damaging the underlying paint. |
| How do I maintain a car wrap? | To maintain a car wrap, wash it regularly with a mild soap and water solution, avoid abrasive cleaners, promptly remove contaminants, avoid high-pressure washing, park in the shade, and use a vinyl protectant. |
| Can a car wrap be repaired? | Yes, a car wrap can be repaired if it’s damaged. Small tears or scratches can often be patched or repaired by a professional installer. |
| What is the difference between cast vinyl and calendared vinyl? | Cast vinyl is more durable and conformable than calendared vinyl, making it ideal for vehicle wraps. Calendared vinyl is a cheaper alternative but may not last as long or conform as well to complex curves. |
| What type of alcohol do I use to prep the car? | Use 70% isopropyl alcohol to prep the vehicle before the installation |
| Can you use a masking/wrap cut knife when cutting wrap? | Yes, a wrap cut knife allows the wrap to be cut with little or no risk of damage to the car. |
By following this comprehensive guide, you can successfully apply a car wrap and transform your vehicle’s appearance. Remember to take your time, pay attention to detail, and seek professional help when needed. And for more expert advice and resources, be sure to visit CARS.EDU.VN.
Ready to take your car’s appearance to the next level? Visit CARS.EDU.VN today to learn more about car wrapping and find the services you need to make your dream a reality. Our expert advice, detailed tutorials, and community forum will help you achieve a professional-looking finish and protect your vehicle for years to come. Contact us at 456 Auto Drive, Anytown, CA 90210, United States, or reach out via WhatsApp at +1 555-123-4567. Let cars.edu.vn be your trusted partner in all things automotive.