Buffing a scratch out of a car is a common task for car owners who want to maintain their vehicle’s appearance. At CARS.EDU.VN, we provide detailed information and guidance to help you achieve professional-quality results at home. Learn various techniques, from using polishing compounds to more advanced sanding methods, to restore your car’s finish. Discover more on our website through our auto detailing and paint correction guides.
1. Understanding Car Scratches
Before diving into the process of buffing scratches, it’s important to understand the different types of scratches that can occur on a car’s paint.
1.1. Types of Car Scratches
Understanding the type of scratch is crucial for choosing the right buffing method. Here’s a breakdown:
| Scratch Type | Description | Severity | Solution |
|---|---|---|---|
| Clear Coat | Minor scratches that only affect the clear coat layer. | Light | Polishing compound and buffing. |
| Base Coat | Scratches that penetrate the clear coat and reach the base coat (color layer). | Moderate | Requires more aggressive buffing or touch-up paint. |
| Primer | Scratches that go through the clear coat and base coat, reaching the primer layer. | Severe | Sanding, filling, and repainting may be necessary. |
| Metal/Bare Body | Scratches that go through all layers of paint, exposing the metal body. | Very Severe | Requires professional repair to prevent rust and structural damage. |
| Spiderweb Swirls | Circular, hairline scratches often caused by improper washing or polishing techniques. | Light | Gentle polishing and proper washing techniques. |
| Transfer Scratches | Marks left by another vehicle’s paint or material. | Light | Can often be removed with a clay bar and polishing compound. |
1.2. Assessing the Damage
- Visual Inspection: Examine the scratch under good lighting. Use your fingernail to gently feel the scratch. If your nail catches, the scratch is likely deep enough to require more than just buffing.
- The Water Test: Pour water over the scratch. If the scratch disappears when wet but reappears when dry, it’s likely only in the clear coat and can be buffed out. If the scratch is still visible when wet, it’s deeper and may require additional repair steps.
2. Essential Tools and Materials
Having the right tools and materials is crucial for effectively buffing out scratches. Here’s a list of essential items:
2.1. Buffing Machines
- Dual-Action (DA) Polisher: Ideal for beginners, a DA polisher oscillates and rotates simultaneously, reducing the risk of damage. According to Meguiar’s, a DA polisher provides a safe and effective way to remove scratches without the risk of burning the paint.
- Rotary Buffer: More powerful and faster than a DA polisher, but requires skill to avoid damaging the paint. Professional detailers often use rotary buffers for heavy scratch removal.
- Orbital Buffer: Provides a random orbital motion, which is less aggressive than a rotary buffer but more effective than hand polishing.
2.2. Polishing Pads
- Cutting Pads: These are the most aggressive and are used for removing severe scratches and imperfections. They are typically made of wool or a dense foam.
- Polishing Pads: Used for removing swirl marks and light scratches after using a cutting pad. These pads are made of softer foam.
- Finishing Pads: The softest pads, used for applying waxes and sealants to enhance the shine and protect the paint.
2.3. Polishing Compounds
- Cutting Compound: Used to remove deeper scratches and imperfections. These compounds are more abrasive.
- Polishing Compound: Less abrasive than cutting compounds, used to refine the paint after using a cutting compound.
- Finishing Polish: The least abrasive, used to enhance the shine and remove any remaining swirl marks.
2.4. Other Essential Materials
- Microfiber Towels: High-quality microfiber towels are essential for wiping away compound and polish without scratching the paint.
- Detailing Clay: Used to remove contaminants from the paint surface before buffing.
- Isopropyl Alcohol (IPA): Used to clean the surface after polishing to reveal the true condition of the paint.
- Painter’s Tape: Used to protect trim and sensitive areas from the buffing process.
- Spray Bottle: For applying water or detailing solutions.
- Wash Mitt and Buckets: For washing the car before starting the buffing process.
- Headlamp or Work Light: Provides adequate lighting to inspect the paint surface.
3. Step-by-Step Guide to Buffing Out Car Scratches
Follow these steps to safely and effectively buff scratches out of your car’s paint.
3.1. Preparing the Car
- Wash the Car: Thoroughly wash the car to remove dirt, grime, and other contaminants. Use a pH-neutral car soap and a soft wash mitt. Rinse thoroughly and dry with a clean microfiber towel.
- Clay Bar Treatment: Use a detailing clay bar to remove any embedded contaminants from the paint surface. Spray the surface with a clay lubricant and gently rub the clay bar over the paint until it feels smooth.
- Dry the Car Again: Ensure the car is completely dry before proceeding.
- Tape Off Sensitive Areas: Use painter’s tape to protect trim, emblems, and other sensitive areas from the buffing process.
3.2. Buffing Process
- Apply Polishing Compound: Apply a small amount of polishing compound to the appropriate polishing pad. Start with a less aggressive compound and pad combination and increase aggressiveness as needed.
- Buff the Scratch: Turn on the polisher and use a slow, overlapping motion to buff the scratch. Apply gentle pressure and keep the polisher moving to avoid overheating the paint.
- Wipe Away Residue: After buffing, use a clean microfiber towel to wipe away any remaining compound residue.
- Inspect the Area: Inspect the area under good lighting to see if the scratch has been removed. If necessary, repeat the buffing process with a more aggressive compound or pad.
- Refine the Finish: Once the scratch is removed, use a finishing polish and a soft finishing pad to refine the paint and enhance the shine.
- Clean the Surface: Use isopropyl alcohol (IPA) to clean the surface and remove any remaining polish residue.
- Apply Wax or Sealant: Apply a coat of wax or sealant to protect the paint and enhance the shine.
3.3. Hand Buffing Technique
For minor scratches or small areas, hand buffing can be an effective alternative to using a machine polisher.
- Apply Compound: Apply a small amount of polishing compound to a microfiber applicator pad.
- Rub the Scratch: Use firm, even pressure to rub the compound into the scratch using a back-and-forth motion.
- Wipe Away Residue: Use a clean microfiber towel to wipe away any remaining compound residue.
- Apply Polish: Apply a small amount of finishing polish to a clean microfiber applicator pad.
- Polish the Area: Use a circular motion to polish the area and enhance the shine.
- Wipe Away Residue: Use a clean microfiber towel to wipe away any remaining polish residue.
- Apply Wax or Sealant: Apply a coat of wax or sealant to protect the paint and enhance the shine.
4. Advanced Techniques for Deeper Scratches
For deeper scratches that cannot be removed with polishing alone, more advanced techniques may be necessary.
4.1. Sanding
Sanding is a more aggressive method that involves removing a small layer of the clear coat to level out the scratch. This should only be done if you are comfortable with the process and understand the risks involved.
- Wet Sanding: Use fine-grit sandpaper (2000-3000 grit) and water to gently sand the scratch. Soak the sandpaper in water for several minutes before use and keep the surface wet during sanding.
- Buffing: After sanding, use a cutting compound and a polishing pad to buff the area and remove the sanding marks.
- Refining: Use a polishing compound and a finishing pad to refine the paint and enhance the shine.
- Protecting: Apply wax or sealant to protect the paint.
4.2. Touch-Up Paint
For scratches that penetrate the base coat or primer, touch-up paint may be necessary to restore the color and protect the underlying layers.
- Clean the Scratch: Clean the scratch thoroughly with a wax and grease remover.
- Apply Primer (if needed): If the scratch exposes bare metal, apply a thin layer of automotive primer.
- Apply Touch-Up Paint: Apply thin layers of touch-up paint to the scratch, allowing each layer to dry completely before applying the next.
- Wet Sanding (optional): After the touch-up paint has dried, use fine-grit sandpaper to gently level the paint with the surrounding surface.
- Buffing: Use a polishing compound and a polishing pad to buff the area and blend the touch-up paint with the surrounding paint.
- Protecting: Apply wax or sealant to protect the paint.
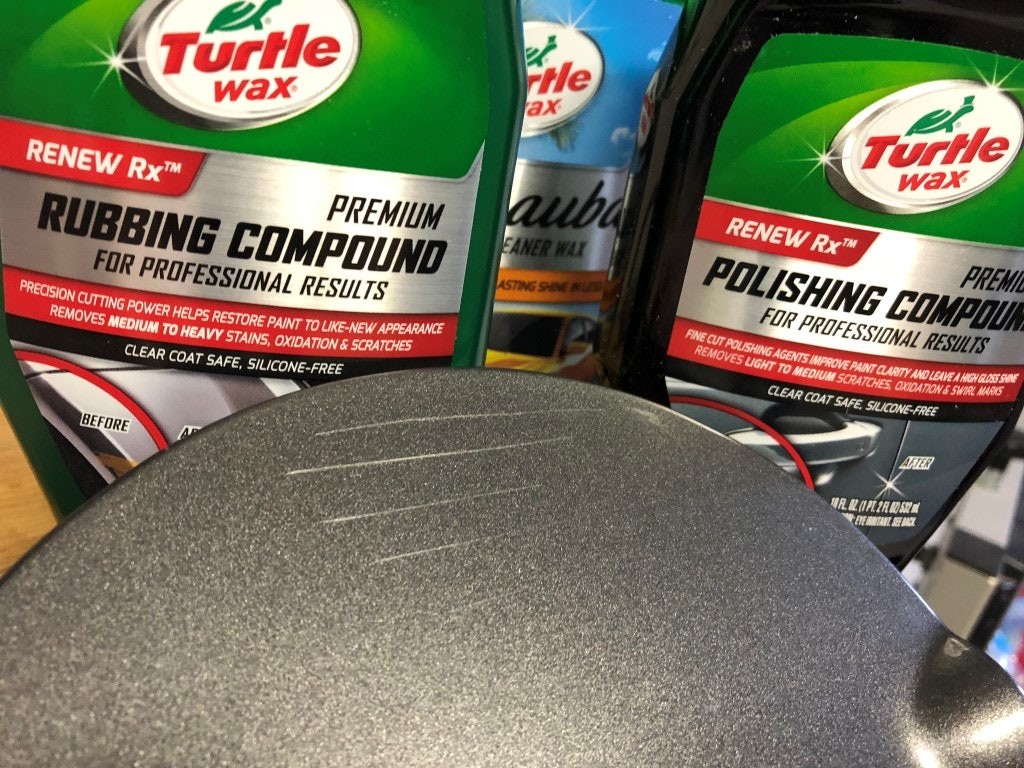
Image demonstrating the appearance of a car scratch before buffing, highlighting the need for effective scratch removal techniques.
5. Product Recommendations
Choosing the right products can make a significant difference in the effectiveness of your scratch removal efforts.
5.1. Recommended Polishing Compounds
- Meguiar’s Ultimate Compound: A versatile compound that can remove light to moderate scratches and swirl marks.
- 3M Perfect-It EX Rubbing Compound: A more aggressive compound for removing deeper scratches and imperfections.
- Chemical Guys V36 Optical Cut Cutting Polish: A high-quality cutting polish that can remove heavy swirl marks and scratches.
5.2. Recommended Polishes
- Meguiar’s Ultimate Polish: A fine polish that can enhance the shine and remove any remaining swirl marks.
- Chemical Guys V38 Optical Final Polish: A high-quality finishing polish that can create a deep, glossy finish.
- 3D One Car Scratch & Swirl Remover: An effective polish for removing light scratches and swirl marks.
5.3. Recommended Waxes and Sealants
- Meguiar’s Gold Class Carnauba Plus Premium Paste Wax: A classic wax that provides a deep, warm shine and excellent protection.
- Chemical Guys Butter Wet Wax: An easy-to-use wax that provides a wet look and excellent protection.
- Adam’s Polishes Paint Sealant: A durable sealant that provides long-lasting protection against the elements.
6. Common Mistakes to Avoid
Avoiding these common mistakes can help you achieve better results and prevent damage to your car’s paint.
6.1. Using the Wrong Products
Using the wrong products can lead to poor results or even damage to the paint. Always choose products that are appropriate for the type and severity of the scratch.
6.2. Applying Too Much Pressure
Applying too much pressure when buffing can overheat the paint and cause damage. Use gentle pressure and let the polisher do the work.
6.3. Buffing in Direct Sunlight
Buffing in direct sunlight can cause the compound or polish to dry too quickly, making it difficult to remove and potentially damaging the paint.
6.4. Neglecting Preparation
Failing to properly wash and clay bar the car before buffing can result in swirl marks and scratches.
6.5. Overlooking Safety Precautions
Always wear safety glasses and gloves when buffing to protect yourself from flying debris and chemicals.
7. Maintaining Your Car’s Paint
Proper maintenance is key to preventing scratches and keeping your car looking its best.
7.1. Regular Washing
Wash your car regularly using a pH-neutral car soap and a soft wash mitt. Avoid using abrasive sponges or brushes that can scratch the paint.
7.2. Proper Drying
Dry your car with a clean microfiber towel to avoid water spots and scratches. Consider using a leaf blower to remove excess water before drying.
7.3. Waxing and Sealing
Apply a coat of wax or sealant every few months to protect the paint from the elements and maintain the shine.
7.4. Avoiding Automatic Car Washes
Automatic car washes can cause swirl marks and scratches due to the abrasive brushes and harsh chemicals. Opt for a touchless car wash or wash your car by hand.
7.5. Parking Smart
Park your car in shaded areas or garages to protect it from the sun and other environmental factors. Avoid parking under trees that can drop sap or debris on your car.
8. When to Seek Professional Help
While many scratches can be buffed out at home, some may require professional attention.
8.1. Deep Scratches
Scratches that penetrate the base coat or primer may require professional repair to ensure a proper color match and finish.
8.2. Large Areas of Damage
Large areas of damage, such as scratches caused by vandalism, may be best left to a professional detailer or body shop.
8.3. Lack of Experience
If you are not comfortable with buffing or sanding, it is best to seek professional help to avoid damaging your car’s paint.
9. The Science Behind Buffing
Understanding the science behind buffing can help you make informed decisions about the products and techniques you use.
9.1. Abrasives
Polishing compounds and polishes contain abrasives that remove a small layer of the clear coat to level out scratches and imperfections.
9.2. Friction
The buffing process generates friction, which heats up the paint surface and allows the abrasives to work more effectively.
9.3. Oxidation
Over time, the paint on your car can oxidize, causing it to fade and lose its shine. Buffing can remove the oxidized layer and restore the paint’s original luster.
10. Innovations in Scratch Removal Technology
The field of scratch removal is constantly evolving, with new products and technologies being developed all the time.
10.1. Self-Healing Paint
Some manufacturers are developing self-healing paints that can repair minor scratches and swirl marks on their own.
10.2. Nanotechnology Polishes
Nanotechnology polishes contain ultra-fine abrasives that can remove scratches without causing swirl marks or holograms.
10.3. Laser Scratch Removal
Laser scratch removal is a new technology that uses lasers to precisely remove scratches and imperfections from the paint surface.
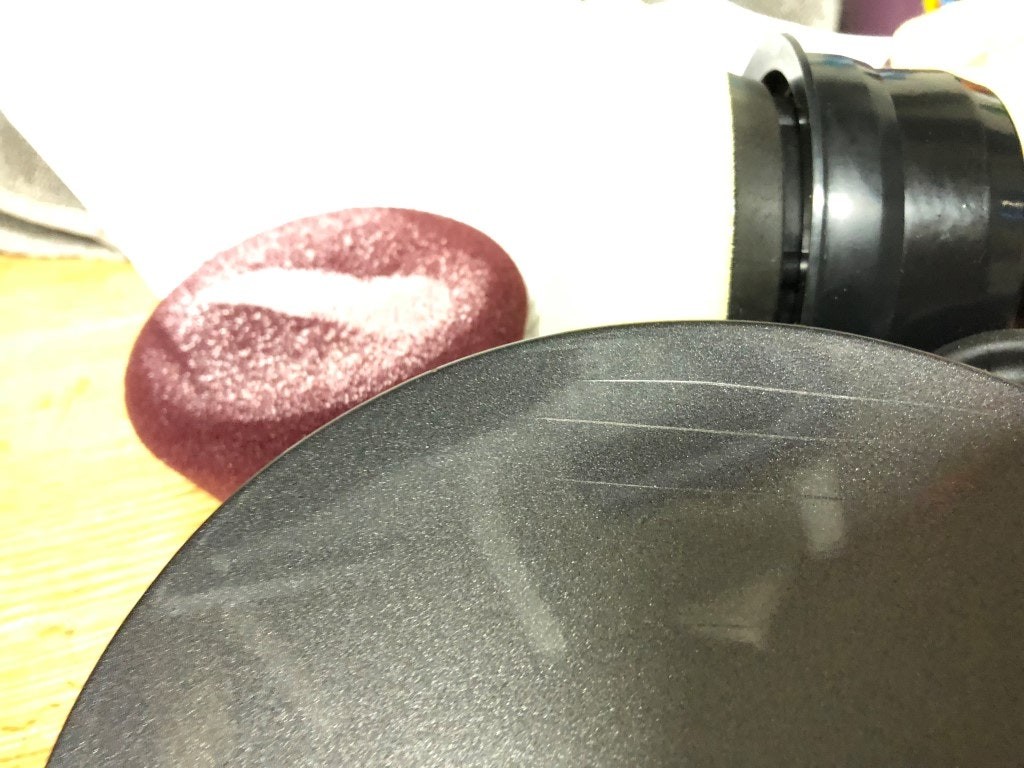
Image showing a car’s surface after polishing, demonstrating the improved clarity and scratch-free finish achieved with effective buffing.
11. Case Studies
Real-world examples of successful scratch removal can provide valuable insights and inspiration.
11.1. Restoring a Classic Car
A classic car owner was able to restore the paint on his vintage vehicle by using a combination of wet sanding, buffing, and polishing.
11.2. Removing Swirl Marks from a Daily Driver
A daily driver owner was able to remove swirl marks and scratches from his car by using a DA polisher and a high-quality polishing compound.
11.3. Repairing Vandalism Damage
A car owner was able to repair vandalism damage to his vehicle by using touch-up paint, buffing, and polishing.
12. Understanding Clear Coat
The clear coat is the outermost layer of paint on your car, providing protection and shine. Understanding its properties is crucial for effective scratch removal.
12.1. Composition
Clear coat is typically made of a polyurethane or acrylic resin that is designed to be durable and resistant to scratches, UV rays, and other environmental factors.
12.2. Thickness
The thickness of the clear coat can vary depending on the manufacturer and model of the car, but it is typically around 2-4 mils (0.002-0.004 inches).
12.3. Importance
The clear coat is essential for protecting the underlying layers of paint from damage and maintaining the car’s appearance.
13. Ethical Considerations
When buffing scratches, it’s important to consider the ethical implications of your actions.
13.1. Environmental Impact
Polishing compounds and polishes can contain chemicals that are harmful to the environment. Dispose of used products properly and consider using eco-friendly alternatives.
13.2. Safety
Always follow safety precautions when buffing to protect yourself and others from harm.
13.3. Transparency
Be transparent about the products and techniques you use and avoid making false claims about the results you can achieve.
14. The Future of Car Care
The car care industry is constantly evolving, with new products and technologies being developed all the time.
14.1. Artificial Intelligence
Artificial intelligence is being used to develop automated car washing and detailing systems that can provide consistent and high-quality results.
14.2. Robotics
Robotics are being used to develop automated paint repair systems that can precisely remove scratches and imperfections from the paint surface.
14.3. Sustainable Materials
Manufacturers are developing sustainable materials for car care products, such as biodegradable soaps and waxes.
15. Tools for Paint Thickness Measurement
Measuring paint thickness is crucial for safe buffing and polishing, ensuring you don’t remove too much clear coat.
15.1. Paint Thickness Gauges
These devices use ultrasonic or magnetic principles to measure the thickness of the paint layers on your car.
15.2. How to Use a Paint Thickness Gauge
- Calibration: Calibrate the gauge according to the manufacturer’s instructions.
- Measurement: Place the probe on a clean, flat surface of the car’s paint.
- Reading: Record the thickness reading displayed on the gauge.
- Multiple Readings: Take multiple readings across different areas of the car to get an accurate assessment.
15.3. Interpreting Readings
- Normal Range: Typically, a healthy paint thickness ranges from 100 to 150 microns (4 to 6 mils).
- Low Readings: Indicate that the paint may be thin due to previous polishing or repairs.
- High Readings: Suggest that the area has been repainted or has excessive clear coat.
Knowing the paint thickness helps you avoid aggressive buffing that could damage the paint.
16. Detailing Clay and Its Role
Detailing clay is an essential tool for removing contaminants from your car’s paint before buffing, ensuring a smooth and clean surface.
16.1. Types of Detailing Clay
- Mild Clay: For lightly contaminated surfaces.
- Medium Clay: For moderate contamination.
- Aggressive Clay: For heavily contaminated surfaces (use with caution).
16.2. How to Use Detailing Clay
- Wash the Car: Thoroughly wash and dry the car.
- Lubrication: Spray the clay lubricant (or a mixture of car soap and water) liberally on the area you’re working on.
- Claying: Gently glide the clay bar over the surface in straight, overlapping passes.
- Kneading: Periodically knead the clay to expose a clean surface.
- Wiping: Wipe off any residue with a clean microfiber towel.
16.3. Benefits of Using Detailing Clay
- Removes Contaminants: Lifts away embedded contaminants like brake dust, tree sap, and industrial fallout.
- Smoothes Paint: Leaves the paint feeling smooth and clean.
- Prepares for Polishing: Ensures the polishing compound works effectively by removing surface impurities.
17. Maintaining Buffing Pads
Properly maintaining your buffing pads is essential for achieving the best results and extending their lifespan.
17.1. Cleaning Buffing Pads
- During Use: Use a pad cleaning brush or spur to remove excess compound buildup during the buffing process.
- After Use: Wash the pads with a pad cleaning solution or mild detergent and water.
- Rinsing: Rinse thoroughly with clean water until all soap residue is removed.
- Drying: Allow the pads to air dry completely before storing.
17.2. Storing Buffing Pads
- Clean and Dry: Ensure pads are clean and dry before storing.
- Proper Storage: Store pads in a clean, dry place away from direct sunlight and extreme temperatures.
- Avoid Contamination: Keep pads in a sealed container or bag to prevent contamination from dust and debris.
17.3. When to Replace Buffing Pads
- Wear and Tear: Replace pads when they show signs of wear, such as tearing, fraying, or excessive matting.
- Contamination: Replace pads that have been heavily contaminated with embedded debris.
- Performance Decline: Replace pads when they no longer perform as effectively, even after cleaning.
18. Environmental Factors Affecting Car Paint
Understanding how environmental factors affect your car’s paint can help you take preventive measures and maintain its appearance.
18.1. UV Radiation
- Effect: UV radiation from the sun can cause the paint to fade, oxidize, and become brittle.
- Prevention: Park in shaded areas, use car covers, and apply waxes or sealants with UV protection.
18.2. Acid Rain
- Effect: Acid rain can corrode the paint and cause etching and water spots.
- Prevention: Wash the car regularly to remove acidic deposits and apply a protective wax or sealant.
18.3. Tree Sap and Bird Droppings
- Effect: These can cause staining and etching if left on the paint for extended periods.
- Prevention: Remove tree sap and bird droppings as soon as possible using a dedicated cleaner or detailing spray.
18.4. Road Salt
- Effect: Road salt can accelerate corrosion and damage the paint, especially on the undercarriage.
- Prevention: Wash the car frequently during winter months and apply a rust inhibitor to the undercarriage.
18.5. Extreme Temperatures
- Effect: Extreme temperatures can cause the paint to expand and contract, leading to cracking and peeling.
- Prevention: Park in a garage or shaded area to minimize temperature fluctuations.
19. Ceramic Coatings vs. Waxes and Sealants
Understanding the differences between ceramic coatings and traditional waxes and sealants can help you choose the best option for protecting your car’s paint.
19.1. Ceramic Coatings
- Durability: Lasts for several years, providing long-term protection.
- Protection: Highly resistant to scratches, UV rays, chemicals, and contaminants.
- Application: Requires professional application for best results.
- Cost: More expensive than waxes and sealants.
19.2. Waxes
- Durability: Lasts for a few weeks to a few months.
- Protection: Provides good protection against UV rays, water, and light contaminants.
- Application: Easy to apply and remove.
- Cost: Relatively inexpensive.
19.3. Sealants
- Durability: Lasts for several months.
- Protection: Provides good protection against UV rays, water, and contaminants.
- Application: Easy to apply and remove.
- Cost: Moderately priced.
19.4. Key Differences
| Feature | Ceramic Coatings | Waxes | Sealants |
|---|---|---|---|
| Durability | Years | Weeks to Months | Months |
| Protection | High | Moderate | Good |
| Application | Professional Recommended | Easy | Easy |
| Cost | High | Low | Moderate |
| Scratch Resistance | Improved | Minimal | Minimal |
20. Understanding Paint Correction
Paint correction is the process of removing imperfections from your car’s paint, such as swirl marks, scratches, and oxidation, to restore its original luster.
20.1. Stages of Paint Correction
- Washing and Decontamination: Thoroughly wash and decontaminate the car using detailing clay.
- Inspection: Inspect the paint under bright lighting to identify imperfections.
- Taping: Tape off sensitive areas to protect them during the polishing process.
- Compounding: Use a cutting compound and a polishing pad to remove deeper scratches and imperfections.
- Polishing: Use a polishing compound and a polishing pad to refine the paint and remove swirl marks.
- Finishing: Use a finishing polish and a finishing pad to enhance the shine and remove any remaining imperfections.
- Protection: Apply a wax, sealant, or ceramic coating to protect the paint.
20.2. Tools and Materials
- Dual-Action (DA) Polisher
- Rotary Buffer (for advanced users)
- Polishing Pads (cutting, polishing, finishing)
- Polishing Compounds (cutting, polishing, finishing)
- Microfiber Towels
- Detailing Clay
- Painter’s Tape
- Isopropyl Alcohol (IPA)
- Paint Thickness Gauge
20.3. Importance of Proper Technique
Proper technique is essential for achieving the best results and avoiding damage to your car’s paint. Always use gentle pressure, keep the polisher moving, and avoid overheating the paint.
FAQ: How to Buff a Scratch Out of a Car
-
What is the first step in buffing out a scratch?
- The first step is to thoroughly wash and dry the car to remove any dirt or contaminants that could scratch the paint further.
-
What type of scratch can be buffed out easily?
- Light scratches that only affect the clear coat layer of the paint can be easily buffed out using a polishing compound.
-
Can I use a household cleaner to remove scratches?
- No, you should not use household cleaners. They can damage the car’s paint. Use only products specifically designed for automotive paint.
-
How do I know if a scratch is too deep to buff out?
- If you can feel the scratch with your fingernail, or if it remains visible after washing, it is likely too deep to buff out and may require touch-up paint or professional repair.
-
What is the difference between a cutting compound and a polishing compound?
- A cutting compound is more abrasive and used for removing deeper scratches, while a polishing compound is less abrasive and used for refining the paint after using a cutting compound.
-
Do I need a machine polisher to buff out scratches?
- For minor scratches, hand buffing may be sufficient. However, a machine polisher, such as a dual-action (DA) polisher, is more effective for removing moderate to severe scratches.
-
How often should I wax my car after buffing out a scratch?
- You should wax your car every few months to protect the paint and maintain its shine.
-
What safety precautions should I take when buffing out scratches?
- Wear safety glasses and gloves to protect yourself from flying debris and chemicals. Work in a well-ventilated area and avoid buffing in direct sunlight.
-
Can I use too much polishing compound?
- Yes, using too much polishing compound can make it difficult to remove and may not improve the results. Use a small amount and apply it evenly.
-
Is it better to seek professional help for scratch removal?
- For deep scratches, large areas of damage, or if you lack experience, it is best to seek professional help to avoid damaging your car’s paint.
At CARS.EDU.VN, we understand the challenges car owners face in maintaining their vehicles. From finding reliable repair services to staying informed about the latest automotive technologies, it can be overwhelming. That’s why we’re dedicated to providing you with the most up-to-date information, expert advice, and comprehensive guides to help you navigate the world of car care.
Do you want to learn more about car care and maintenance? Visit cars.edu.vn today for in-depth articles, tutorials, and expert advice to help you keep your car in top condition. Contact us at 456 Auto Drive, Anytown, CA 90210, United States, or through Whatsapp at +1 555-123-4567. We are here to assist you with all your automotive needs!