Caring for a sourdough starter might seem daunting, but it’s a rewarding journey that unlocks incredible flavors in your baking. At CARS.EDU.VN, we believe in simplifying complex processes, and this comprehensive guide will equip you with the knowledge to nurture a thriving starter. Discover essential sourdough maintenance, feeding schedules, and troubleshooting tips to bake amazing bread and more while exploring sourdough baking tips, starter feeding guide, and maintenance schedule.
1. The Allure of Sourdough: Why Bother with a Starter?
Sourdough isn’t just a type of bread; it’s a culinary experience steeped in tradition. For many, the aroma of a warm, crusty loaf is a nostalgic comfort, a taste of simpler times. But beyond its sentimental appeal, sourdough offers a unique depth of flavor and texture that commercially yeasted breads simply can’t match.
The secret lies in the sourdough starter, a living culture of wild yeasts and beneficial bacteria. This symbiotic community works its magic over time, fermenting the flour and water mixture, developing complex flavors and creating a characteristic tang. The fermentation process also breaks down gluten, making sourdough easier to digest for some people.
Beyond bread, a healthy sourdough starter can be used in a myriad of recipes. From pancakes and waffles to pizza crust and even desserts, sourdough adds a distinctive twist to everyday meals.
2. Understanding the Basics: What is a Sourdough Starter?
At its core, a sourdough starter is a simple mixture of flour and water. However, over time, it transforms into a complex ecosystem teeming with wild yeasts and lactic acid bacteria. These microorganisms are naturally present in the flour and air around us. When combined with water, they begin to ferment the flour, producing carbon dioxide (which makes the dough rise) and organic acids (which contribute to the characteristic sourdough tang).
Think of your sourdough starter as a pet: it needs regular feeding and care to thrive. Neglecting it can lead to a weak or inactive starter, resulting in flat, dense bread. But with a little attention and understanding, you can cultivate a robust starter that will provide you with delicious sourdough creations for years to come.
3. Setting Up Your Sourdough Sanctuary: Essential Equipment
Before diving into the world of sourdough, gather the necessary equipment. Don’t worry, you don’t need a fancy laboratory! Simple tools will suffice:
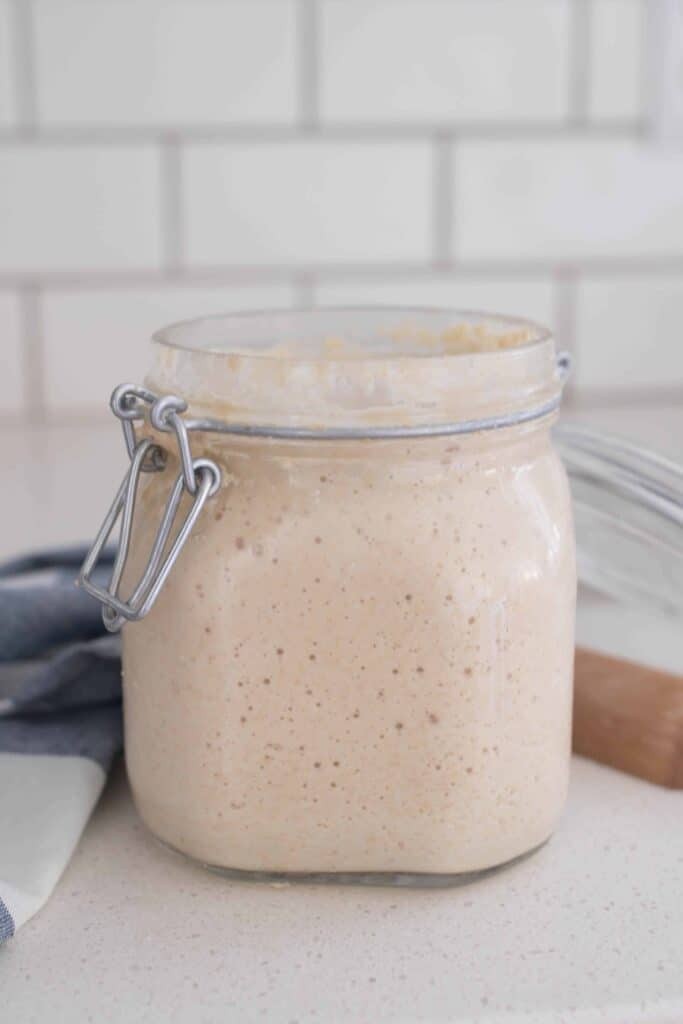
- A Glass Jar or Container: A wide-mouth glass jar is ideal as it allows for easy stirring and observation. A quart-sized jar is a good starting point. Make sure it’s clean!
- Flour: Unbleached all-purpose flour or bread flour works well. You can also experiment with whole wheat or rye flour for different flavor profiles.
- Water: Use non-chlorinated water. Filtered water is best.
- A Kitchen Scale: While not strictly necessary, a kitchen scale ensures accurate measurements, especially as you become more experienced.
- A Spatula or Spoon: For stirring the starter.
- A Cover: A loose-fitting lid, cheesecloth, or a clean kitchen towel secured with a rubber band will allow the starter to breathe while protecting it from contaminants.
- Thermometer: Digital Thermometer is very essential to track the temperature of water while preparing the dough.
4. The Initial Feeding Frenzy: Starting Your Sourdough Starter
Creating a sourdough starter from scratch takes time and patience, but it’s a rewarding process. Here’s a step-by-step guide:
-
Day 1: The Foundation
- In your clean jar, combine 1/2 cup (60g) of flour and 1/4 cup (60g) of water.
- Stir well until a thick paste forms.
- Cover loosely and let it sit at room temperature (ideally 70-75°F or 21-24°C) for 24 hours.
-
Days 2-7: The Discarding Ritual
- Each day, discard half of the starter (about 1/4 cup). This prevents the starter from becoming too acidic and encourages the growth of beneficial yeasts.
- Add 1/2 cup (60g) of flour and 1/4 cup (60g) of water to the remaining starter.
- Stir well, cover loosely, and let it sit at room temperature for 24 hours.
-
Day 8 and Beyond: Signs of Life
- By day 8, you should start to see signs of activity: bubbles forming throughout the starter, a slight increase in volume, and a tangy aroma.
- Continue to feed the starter daily, but you may need to adjust the feeding schedule based on its activity level.
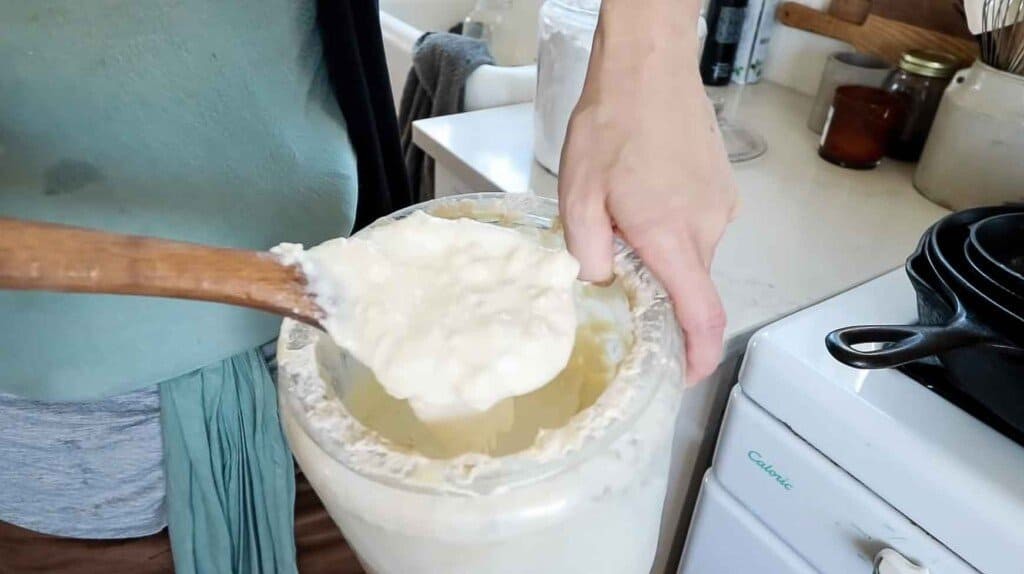
5. The Daily Grind: Feeding Your Sourdough Starter
Once your starter is established, regular feeding is crucial for maintaining its health and vigor. Here’s how to feed your sourdough starter:
- Assess the Starter: Before feeding, observe your starter. Has it doubled in size since the last feeding? Are there bubbles present? Does it have a pleasant, tangy aroma?
- The 1:1:1 Ratio: The general rule of thumb is to feed your starter with equal parts starter, flour, and water (by weight). This is often referred to as the 1:1:1 ratio. For example, if you have 50g of starter, you would add 50g of flour and 50g of water.
- Mix Thoroughly: Combine the starter, flour, and water in a clean jar. Stir well until all the ingredients are fully incorporated and the mixture is smooth.
- Let it Rise: Cover the jar loosely and let the starter sit at room temperature until it has doubled in size and is bubbly. This usually takes 4-12 hours, depending on the temperature and activity level of your starter.
6. The Temperature Tango: Finding the Sweet Spot
Temperature plays a significant role in the activity of your sourdough starter. Warmer temperatures (75-80°F or 24-27°C) will speed up fermentation, while cooler temperatures (65-70°F or 18-21°C) will slow it down.
If your home is particularly warm, you may need to feed your starter more frequently to prevent it from becoming too acidic. Conversely, if your home is cool, you may need to feed it less frequently.
7. The Refrigerator Retreat: Slowing Down the Process
If you don’t bake frequently, you can store your sourdough starter in the refrigerator to slow down its activity. This reduces the frequency of feedings.
To store your starter in the fridge:
- Feed the starter as usual.
- Let it sit at room temperature for 1-2 hours after feeding.
- Cover the jar tightly and place it in the refrigerator.
When you’re ready to bake, remove the starter from the fridge and let it sit at room temperature for 1-2 hours. Feed it as usual and wait for it to double in size before using it in your recipe.
8. Signs of a Happy Starter: What to Look For
A healthy sourdough starter will exhibit the following characteristics:
- Doubling in Size: After feeding, the starter should double in size within 4-12 hours (depending on the temperature).
- Bubbles: Numerous bubbles should be visible throughout the starter, indicating active fermentation.
- Pleasant Aroma: The starter should have a tangy, slightly acidic aroma. It should not smell moldy, rotten, or overly pungent.
- Light and Airy Texture: The starter should have a light and airy texture with a slightly spongy appearance.
9. Troubleshooting Time: Common Sourdough Starter Problems
Even with the best care, you may encounter some challenges along the way. Here are some common sourdough starter problems and how to fix them:
| Problem | Possible Cause(s) | Solution(s) |
|---|---|---|
| Starter is not rising | – Starter is too young | – Be patient and continue feeding regularly for several more days. |
| – Temperature is too cold | – Move the starter to a warmer location (ideally 75-80°F or 24-27°C). | |
| – Inactive starter | – Try feeding the starter more frequently (every 12 hours) or using a different type of flour. | |
| Starter is too acidic | – Starter is being fed too infrequently | – Feed the starter more frequently (every 12-24 hours). |
| – Temperature is too warm | – Move the starter to a cooler location. | |
| Starter has a black liquid on top (hooch) | – Starter is hungry and needs to be fed | – Pour off the hooch and feed the starter as usual. |
| Starter has mold | – Contamination | – Discard the starter and start over with a fresh batch. |
| Starter smells bad (rotten or moldy) | – Contamination or bacterial imbalance | – If the smell is very strong or unpleasant, it’s best to discard the starter and start over. A mild sour smell is normal. |
10. Discard Dilemmas: What to Do with the Excess
During the initial stages of creating a sourdough starter, you’ll need to discard a portion of the starter each day. But even after your starter is established, you may still have some discard left over after feeding.
Instead of throwing it away, get creative! Sourdough discard can be used in a variety of recipes, adding a unique flavor and texture to your baked goods.
Here are some ideas for using sourdough discard:
- Pancakes and Waffles: Add discard to your pancake or waffle batter for a tangy twist.
- Crackers: Incorporate discard into homemade cracker dough for a savory snack.
- Cakes and Muffins: Use discard in cakes and muffins for a moist and flavorful crumb.
- Pizza Dough: Add discard to your pizza dough for a chewier crust.
- Sourdough Discard Bread: There are many recipes specifically designed for using sourdough discard in bread.
11. The Flour Factor: Choosing the Right Type
The type of flour you use can significantly impact the flavor and texture of your sourdough starter and bread.
- Unbleached All-Purpose Flour: A good starting point for beginners. It provides a consistent and reliable result.
- Bread Flour: Contains a higher protein content than all-purpose flour, resulting in a stronger gluten development and a chewier texture.
- Whole Wheat Flour: Adds a nutty flavor and a slightly denser texture.
- Rye Flour: Contributes a distinctive earthy flavor and a darker color.
Experiment with different types of flour to find your preferred flavor profile. You can also use a combination of flours.
12. The Water Works: Ensuring Optimal Hydration
Water is just as important as flour in creating a healthy sourdough starter. Use non-chlorinated water, as chlorine can inhibit the growth of the yeasts and bacteria. Filtered water is ideal.
The amount of water you use will affect the consistency of your starter. A general guideline is to use equal parts flour and water (by weight). However, you may need to adjust the amount of water depending on the type of flour you use. Whole wheat flour, for example, tends to absorb more water than all-purpose flour.
13. Sourdough Starter Recipes to Try
Once you have your sourdough starter well established, you will need some awesome recipes to try. Here are a few great recipes:
- Sourdough Bread: Sourdough bread is an amazing recipe to use and test your starter with
- Sourdough Pizza: Sourdough pizza is a fun and different way to make pizza night awesome.
- Sourdough Crackers: Sourdough crackers are a great snack for the family.
14. Contact CARS.EDU.VN For More
At CARS.EDU.VN, we are dedicated to providing you with reliable information to keep your automobile investments in great shape. Contact us for more information.
Address: 456 Auto Drive, Anytown, CA 90210, United States
Whatsapp: +1 555-123-4567
Website: CARS.EDU.VN
15. Advanced Techniques: Taking Your Starter to the Next Level
Once you’ve mastered the basics, you can explore some advanced techniques to further enhance your sourdough starter and baking:
- Levain Builds: A levain is a portion of your sourdough starter that is fed separately and allowed to mature before being added to your final dough. This can improve the flavor and texture of your bread.
- Autolyse: This technique involves mixing the flour and water together in your dough and letting it rest for 20-60 minutes before adding the starter and salt. This helps to hydrate the flour and develop gluten.
- Cold Fermentation: Slowing down the fermentation process by refrigerating your dough for an extended period of time can enhance the flavor and texture of your bread.
16. Sourdough Around the World: Regional Variations
Sourdough bread is a staple in many cultures around the world, and each region has its own unique variations.
- San Francisco Sourdough: Known for its distinctive tang, San Francisco sourdough is made with a starter that is said to have originated in the city’s unique microclimate.
- German Sourdough Rye: This hearty bread is made with rye flour and a sourdough starter, resulting in a dense and flavorful loaf.
- Italian Sourdough: Often made with durum wheat flour, Italian sourdough has a slightly sweeter flavor and a lighter texture.
17. The Science of Sourdough: Understanding the Fermentation Process
Delving into the science behind sourdough can deepen your appreciation for this ancient art. The fermentation process is driven by the wild yeasts and lactic acid bacteria in the starter. These microorganisms consume the sugars in the flour, producing carbon dioxide (which makes the dough rise) and organic acids (which contribute to the characteristic sourdough tang).
The balance between the yeasts and bacteria is crucial for achieving the desired flavor and texture. Lactic acid bacteria produce lactic acid, which gives sourdough its tangy flavor, while acetic acid bacteria produce acetic acid, which contributes to a sharper, more vinegary flavor.
18. Gluten Sensitivity and Sourdough: A Possible Solution?
Some people who are sensitive to gluten may find that they can tolerate sourdough bread. This is because the long fermentation process breaks down gluten proteins, making them easier to digest.
However, it’s important to note that sourdough bread is not gluten-free. People with celiac disease or severe gluten allergies should avoid it.
19. Sourdough and Gut Health: Potential Benefits
Sourdough bread may offer some potential benefits for gut health. The fermentation process produces prebiotics, which are non-digestible fibers that feed the beneficial bacteria in your gut.
Sourdough bread also has a lower glycemic index than commercially yeasted breads, which means it doesn’t cause a rapid spike in blood sugar levels.
20. The Sourdough Community: Connecting with Fellow Bakers
One of the joys of sourdough baking is connecting with other enthusiasts. There are numerous online forums, social media groups, and local baking communities where you can share your experiences, ask questions, and learn from others.
Connecting with fellow bakers can provide valuable support, inspiration, and troubleshooting tips. You can also exchange starter samples and recipes.
21. Maintaining A Gluten-Free Sourdough Starter
Maintaining a gluten-free sourdough starter is very similar to maintaining a normal sourdough starter, but with Gluten-Free ingredients.
- Use Gluten-Free Ingredients: It is very important that you use only Gluten-Free flours and water when creating the dough and feeding the starter.
- Use a Digital Thermometer: When baking bread, it is very important to use a digital thermometer to check if the dough is done.
- Watch For Mold: This is very important. Because Gluten-Free dough is more susceptible to mold, it is important to keep a close eye and make sure mold does not grow.
22. Frequently Asked Questions (FAQ) About Sourdough Starter
Here are some frequently asked questions about sourdough starter:
-
How often should I feed my sourdough starter?
- The frequency of feedings depends on whether you’re storing it at room temperature or in the refrigerator. At room temperature, feed it every 12-24 hours. In the fridge, feed it once a week.
-
How much flour and water should I feed my sourdough starter?
- Use equal parts starter, flour, and water (by weight).
-
What type of flour should I use?
- Unbleached all-purpose flour, bread flour, whole wheat flour, or rye flour all work well.
-
What if my starter isn’t rising?
- Be patient, ensure the temperature is warm enough, and try feeding it more frequently.
-
What is the black liquid on top of my starter?
- It’s called “hooch” and indicates the starter is hungry. Pour it off and feed the starter.
-
Can I use sourdough discard in recipes?
- Yes! Sourdough discard can be used in pancakes, waffles, crackers, cakes, and more.
-
Is sourdough bread gluten-free?
- No, sourdough bread is not gluten-free.
-
How long can I keep a sourdough starter?
- A properly maintained sourdough starter can be kept indefinitely.
-
Should sourdough starter be kept airtight?
- No, it needs to breathe. Use a loose-fitting lid or cheesecloth.
-
What is the difference between sourdough discard and starter?
- They are technically the same thing. “Discard” refers to unfed starter or starter that is being discarded before feeding.
23. CARS.EDU.VN: Your Automotive Resource
Just as a sourdough starter requires consistent care and attention, so does your vehicle. At CARS.EDU.VN, we understand the importance of maintaining your car to ensure its longevity and performance.
Many car owners face challenges in finding reliable auto repair services and lack the necessary knowledge for regular vehicle maintenance. They often worry about unexpected breakdowns and the high costs associated with repairs.
CARS.EDU.VN is here to help! We provide comprehensive information on car care, maintenance schedules, and repair tips. Our expert articles and guides cover everything from basic maintenance tasks to advanced troubleshooting, empowering you to keep your car running smoothly and avoid costly repairs.
We also offer in-depth reviews of various car models and brands, helping you make informed decisions when purchasing a new or used vehicle. Our goal is to be your trusted resource for all things automotive.
Visit CARS.EDU.VN today to explore our extensive library of articles and resources!
Address: 456 Auto Drive, Anytown, CA 90210, United States
Whatsapp: +1 555-123-4567
Website: cars.edu.vn
24. Final Thoughts: Embrace the Sourdough Journey
Caring for a sourdough starter is a journey, not a destination. There will be successes and failures along the way. Don’t be discouraged by setbacks. Each loaf of bread you bake will be a learning experience.
Embrace the process, experiment with different techniques, and most importantly, have fun! With a little patience and dedication, you’ll be rewarded with delicious sourdough creations that you can share with your family and friends.