Caring for your wood cutting board is essential for food safety and longevity. At CARS.EDU.VN, we understand the importance of maintaining your kitchen tools. Let’s dive into how to keep your cutting board in prime condition with proper oiling techniques, sanitization methods, and preventative care to ensure it lasts for years. Discover how to treat wood, butcher block care, and maintain wooden kitchen surfaces for a pristine cutting surface.
1. Understanding Wood Cutting Board Basics
Wood cutting boards are a staple in many kitchens, offering a durable and aesthetically pleasing surface for food preparation. However, to keep them in top condition, it’s essential to understand the basics of wood types and their specific needs. Different types of wood react differently to moisture, heat, and cleaning agents, so knowing what you’re working with is the first step in proper care.
1.1 Types of Wood Used in Cutting Boards
Choosing the right type of wood is crucial for a cutting board’s durability and safety. Common woods include maple, walnut, cherry, and bamboo.
- Maple: A popular choice due to its hardness and tight grain, making it resistant to bacteria and knife marks.
- Walnut: Known for its rich color and moderate hardness. It’s also relatively good at resisting moisture.
- Cherry: Offers a beautiful reddish hue and is moderately hard, but requires more frequent oiling.
- Bamboo: Technically a grass, bamboo is a sustainable option that’s hard and water-resistant, but can dull knives more quickly.
Each wood type brings a unique set of characteristics to the table, influencing how you should care for your cutting board.
1.2 Why Wood Cutting Boards Require Special Care
Unlike plastic boards, wood cutting boards are porous, meaning they can absorb liquids and harbor bacteria if not properly maintained. However, wood also has natural antibacterial properties. The key is to keep the wood conditioned to prevent it from drying out, cracking, and becoming a breeding ground for germs. Regular cleaning, oiling, and proper storage are crucial for maintaining a safe and long-lasting cutting surface.
1.3 Identifying Common Issues: Warping, Cracking, and Staining
Several common issues can plague wood cutting boards if they aren’t cared for properly.
- Warping: Often caused by uneven moisture exposure, leading to the board bending or twisting.
- Cracking: Typically occurs when the wood dries out too much, causing it to split.
- Staining: Results from food residue penetrating the wood, leaving unsightly marks.
Addressing these issues promptly with proper care techniques can significantly extend the life of your cutting board. Stay tuned to CARS.EDU.VN for more in-depth solutions.
2. Essential Cleaning Practices for Wood Cutting Boards
Proper cleaning is the cornerstone of wood cutting board maintenance. Regular and thorough cleaning prevents the buildup of bacteria and food particles, ensuring a safe and hygienic food preparation surface. Follow these essential cleaning practices to keep your board in pristine condition.
2.1 Daily Cleaning: Quick and Effective Methods
For daily cleaning, a simple routine is often the most effective. After each use, follow these steps:
- Rinse: Rinse the board under warm water to remove loose food particles.
- Wash: Use a mild dish soap and a non-abrasive sponge or brush to scrub the surface.
- Rinse Again: Thoroughly rinse off all soap residue with warm water.
- Dry: Pat the board dry with a clean towel. Avoid air-drying, as this can lead to warping.
This quick routine helps prevent the accumulation of bacteria and keeps your board ready for its next use.
2.2 Deep Cleaning: Sanitizing Your Cutting Board
For a more thorough cleaning, especially after cutting raw meat or poultry, sanitizing your cutting board is essential. Here are a couple of effective methods:
- Vinegar Solution: Mix equal parts white vinegar and water in a spray bottle. Spray the solution onto the board, let it sit for a few minutes, and then wipe clean. Vinegar is a natural disinfectant and helps eliminate odors.
- Hydrogen Peroxide: After washing the board with soap and water, spray it with 3% hydrogen peroxide. Let it sit for a few minutes, then rinse and dry thoroughly.
These methods help kill bacteria and keep your cutting board sanitary.
2.3 Dealing with Stubborn Stains and Odors
Stubborn stains and odors can be a challenge, but with the right techniques, you can keep your cutting board fresh.
- Lemon and Salt Scrub: Cut a lemon in half and sprinkle coarse salt over the cutting board. Use the lemon half to scrub the salt into the board’s surface. The lemon’s acidity and the salt’s abrasiveness help lift stains and neutralize odors.
- Baking Soda Paste: Mix baking soda with a little water to form a paste. Apply the paste to the stained area, let it sit for a few minutes, and then scrub with a damp cloth. Baking soda is excellent for absorbing odors and lifting stains.
These methods can rejuvenate your cutting board and keep it looking and smelling its best.
3. The Art of Oiling: Maintaining Moisture and Preventing Cracks
Oiling your wood cutting board is crucial for maintaining its moisture content, preventing cracks, and ensuring its longevity. Regular oiling keeps the wood supple and resistant to water absorption, which can lead to warping and cracking. Here’s how to master the art of oiling your cutting board.
3.1 Choosing the Right Type of Oil
Selecting the right oil is essential for the health of your cutting board. Not all oils are created equal, and using the wrong one can lead to unpleasant odors or even rancidity. The best options include:
- Mineral Oil: A food-grade mineral oil is a popular choice due to its non-toxic and odorless nature. It penetrates the wood well and helps prevent it from drying out.
- Butcher Block Oil: Specifically formulated for cutting boards and butcher blocks, this oil often contains a blend of mineral oil and vitamin E, which acts as a stabilizer.
- Coconut Oil: Refined coconut oil is another good option because it’s solid at room temperature, which helps it stay in the wood longer.
Avoid using cooking oils like olive oil or vegetable oil, as they can turn rancid and leave a sticky residue.
3.2 Step-by-Step Oiling Guide
Follow these steps to properly oil your wood cutting board:
- Clean the Board: Ensure the cutting board is clean and dry before oiling.
- Apply the Oil: Pour a generous amount of oil onto the board.
- Rub it In: Use a clean cloth or paper towel to rub the oil into the wood, working with the grain.
- Let it Absorb: Allow the oil to soak into the wood for several hours, or preferably overnight.
- Wipe Off Excess: Wipe off any excess oil with a clean cloth.
Repeat this process regularly, especially after deep cleaning, to keep your cutting board in optimal condition.
3.3 How Often to Oil Your Cutting Board
The frequency of oiling depends on how often you use your cutting board and the humidity of your environment. A good rule of thumb is to oil it:
- Weekly: For boards used daily.
- Monthly: For boards used occasionally.
- After Each Wash: If you wash the board frequently.
Proper oiling ensures your cutting board remains a durable and hygienic surface for all your culinary needs.
4. Waxing Your Cutting Board: Adding an Extra Layer of Protection
Waxing your wood cutting board provides an additional layer of protection against moisture and wear. While oiling nourishes the wood from within, waxing seals the surface, creating a barrier that repels water and helps prevent stains. Here’s why and how to wax your cutting board.
4.1 Benefits of Waxing After Oiling
Waxing offers several benefits that complement oiling:
- Moisture Barrier: Wax creates a hydrophobic surface, preventing water from penetrating the wood.
- Stain Resistance: The wax layer helps repel food particles, reducing the likelihood of stains.
- Enhanced Appearance: Waxing can give your cutting board a subtle sheen, enhancing its natural beauty.
Waxing is an excellent way to extend the life and maintain the appearance of your wood cutting board.
4.2 Choosing the Right Type of Wax
The best type of wax for cutting boards is food-grade beeswax. Beeswax is non-toxic, natural, and provides a durable, protective finish. Look for products specifically designed for cutting boards and butcher blocks.
4.3 Step-by-Step Waxing Guide
Follow these steps to properly wax your wood cutting board:
- Oil the Board: Ensure the board has been freshly oiled and allowed to dry completely.
- Apply the Wax: Use a clean cloth or your fingers to apply a thin, even layer of wax over the entire surface of the board.
- Buff the Surface: Use a clean, dry cloth to buff the wax into the wood. Apply firm pressure and work in circular motions to create a smooth, polished finish.
- Let it Cure: Allow the wax to cure for a few hours before using the board.
Regular waxing, in conjunction with oiling, ensures your cutting board remains in top condition.
5. Proper Storage Techniques for Wood Cutting Boards
Proper storage is often overlooked but is crucial for maintaining the integrity of your wood cutting board. Storing your board correctly prevents warping, cracking, and bacterial growth. Here are some essential storage techniques to keep in mind.
5.1 Vertical vs. Horizontal Storage
The best way to store a wood cutting board is vertically, on its edge. This allows air to circulate around the entire board, promoting even drying and preventing moisture buildup. Avoid storing the board flat on a countertop, as this can trap moisture and lead to warping.
5.2 Avoiding Direct Sunlight and Heat
Direct sunlight and heat can cause the wood to dry out too quickly, leading to cracking. Store your cutting board in a cool, dry place away from direct sunlight and heat sources like ovens and stoves.
5.3 Using Cutting Board Feet
Adding feet to your cutting board can significantly improve its stability and prevent warping. Feet lift the board off the countertop, allowing air to circulate underneath. This is especially beneficial in humid environments. According to woodworking experts, adding feet to boards drastically helps prevent warpage.
6. Refinishing a Badly Scarred or Stained Board
Even with the best care, wood cutting boards can become scarred, gouged, or stained over time. Refinishing can restore your board to its former glory. Here’s how to tackle a badly scarred or stained board.
6.1 Assessing the Damage
Before you start, assess the extent of the damage. Deep gouges, stubborn stains, and uneven surfaces are all signs that your board needs refinishing. If the board is cracked or severely warped, it may be beyond repair.
6.2 Sanding Techniques: Step-by-Step Guide
Sanding is the key to refinishing a wood cutting board. Here’s a step-by-step guide:
- Prepare the Board: Ensure the board is clean and dry.
- Choose the Right Sandpaper: Start with a coarser-grit sandpaper (e.g., 80-grit) for deep gouges, then gradually move to finer grits (e.g., 120-, 150-, 180-, and finishing with 220-grit).
- Sand the Surface: Sand the board in the direction of the grain. For end-grain boards, pick any direction and stick with it.
- Inspect and Repeat: Brush away any dust and inspect the board in the light. If you see any unevenness, keep sanding with the same grit until the board looks even.
- Proceed to Finer Grits: Repeat the sanding process with each subsequent grit, ensuring you sand both sides of the board to prevent warping.
6.3 Oiling and Waxing After Sanding
After sanding, it’s crucial to re-oil and wax the board to protect and condition the wood. Follow the oiling and waxing guides mentioned earlier to ensure your refinished board is ready for use. Finishing with 220-grit sandpaper is probably sufficient in most cases, but there’s no harm in continuing on to finer grits, like 320 or 400, if you feel so inclined. Cox said that finer-grit sandpaper “creates smaller and smaller gouges into the board, which make it tougher and tougher for smaller particles to embed themselves into the board on a micro level.”
7. Dealing with Warped or Cracked Boards
Warped or cracked cutting boards can be a significant concern. Understanding the causes and knowing how to address these issues is essential for maintaining your board’s integrity. Here’s what you need to know.
7.1 Causes of Warping and Cracking
Warping and cracking are typically caused by fluctuations in moisture content. Wood is hygroscopic, meaning it absorbs or loses moisture until it reaches equilibrium with the moisture in the air around it. Other causes include:
- Uneven Moisture Exposure: One side of the board drying out faster than the other.
- Improper Storage: Storing the board flat on a countertop or in direct sunlight.
- Lack of Oiling: Neglecting to oil the wood regularly.
Understanding these causes can help you prevent warping and cracking in the first place.
7.2 DIY Repair Methods for Warped Boards
If your board is warped, you can try a few DIY methods to correct the issue:
- The Wet Towel Method: Wet a thick towel and place it on the concave side of the board. Place the board on a flat surface and weigh it down. Allow it to sit for 24-48 hours.
- The Ironing Method: Place a damp cloth over the warped area and iron it on a low setting. The heat and moisture can help the wood fibers relax and flatten out.
7.3 When to Seek Professional Help or Replace the Board
In some cases, a board may be too severely warped or cracked to repair. If the cracks are deep or the warping is extreme, it’s best to seek professional help or replace the board. A woodworker will be able to take a cracked board apart, sand it down, remove the damaged area, and reassemble and refinish it. But LaRue told us that if a crack isn’t properly cleaned and disinfected prior to filling, bacteria can migrate through the filler and/or wood back to the surface of the board.
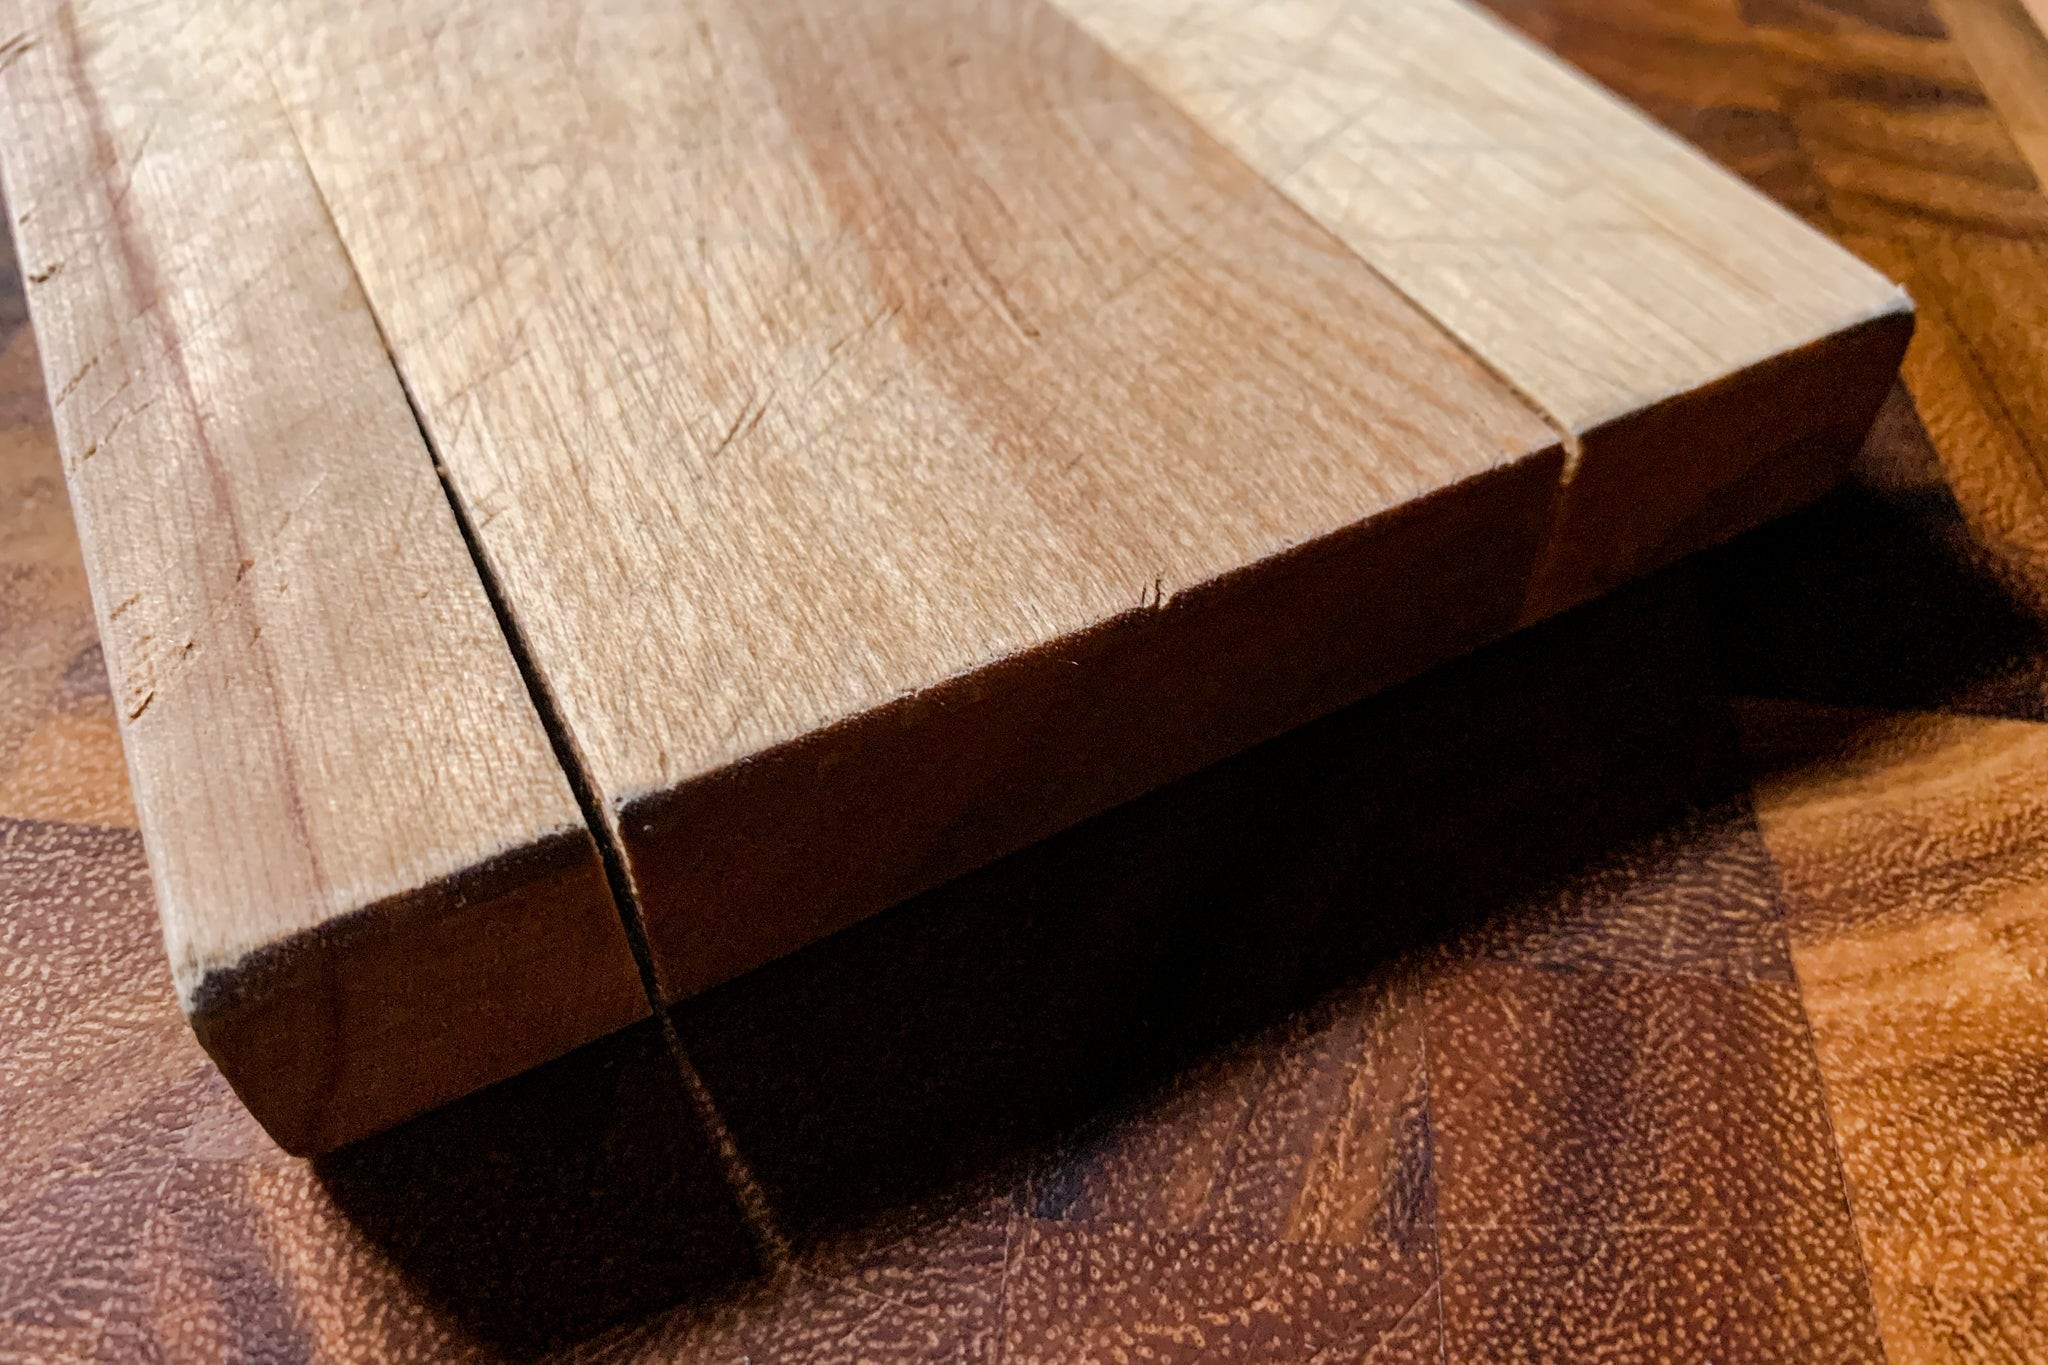 A cracked wooden cutting board that should not be used, due to bacteria risk in cracks.
8. Choosing the Right Cutting Board for Your Needs
Selecting the right cutting board from the start can minimize maintenance and extend its lifespan. Consider these factors when choosing a wood cutting board:
8.1 Size and Thickness Considerations
The size and thickness of your cutting board should match your typical food preparation tasks. Larger boards are better for handling large cuts of meat or vegetables, while thicker boards are more resistant to warping. In our guide to the best cutting boards, we recommend boards that are at least 1½ inches thick because they’re far more resistant to warping than thinner boards.
8.2 End-Grain vs. Edge-Grain Boards
- End-Grain Boards: Made with the ends of the wood fibers facing up, these boards are gentler on knives and tend to be more durable.
- Edge-Grain Boards: Made with the sides of the wood fibers facing up, these boards are typically more affordable but may show knife marks more easily.
8.3 Material Matters: Wood Type and Its Properties
As mentioned earlier, the type of wood matters. Maple is a great all-around choice, while walnut offers a beautiful aesthetic. Consider the properties of each wood type when making your decision.
9. Eco-Friendly Cutting Board Care
Caring for your wood cutting board can be environmentally friendly. Here are some tips to minimize your impact:
9.1 Natural Cleaning Solutions
Use natural cleaning solutions like vinegar, lemon, and baking soda instead of harsh chemicals. These are effective and safe for both your board and the environment.
9.2 Sustainable Wood Choices
Opt for cutting boards made from sustainable woods like bamboo or those sourced from responsibly managed forests. Bamboo is a sustainable option that’s hard and water-resistant.
9.3 Recycling and Repurposing Old Boards
When your cutting board reaches the end of its life, consider recycling or repurposing it. Old boards can be turned into decorative items, coasters, or even small shelves.
10. Frequently Asked Questions (FAQs) About Wood Cutting Board Care
Here are some common questions about wood cutting board care:
- How do I prevent my wood cutting board from warping?
- Store it vertically, oil it regularly, and avoid direct sunlight.
- What is the best oil to use on my cutting board?
- Food-grade mineral oil or butcher block oil are excellent choices.
- How often should I oil my cutting board?
- Weekly for daily use, monthly for occasional use, and after each wash.
- Can I put my wood cutting board in the dishwasher?
- No, the high heat and moisture can cause it to warp and crack.
- How do I remove stains from my cutting board?
- Use a lemon and salt scrub or a baking soda paste.
- Is it safe to cut raw meat on a wood cutting board?
- Yes, as long as you clean and sanitize it properly afterward.
- How do I get rid of odors on my cutting board?
- Use a vinegar solution or a baking soda paste.
- Can I use cooking oils on my cutting board?
- No, they can turn rancid and leave a sticky residue.
- What is the best way to store my cutting board?
- Vertically, in a cool, dry place.
- How do I know when it’s time to replace my cutting board?
- If it’s severely cracked or warped, it’s time for a new one.
At CARS.EDU.VN, we’re dedicated to providing comprehensive information and services to help you care for all your valuable assets. From your vehicles to your kitchen tools, we’ve got you covered.
Are you facing challenges finding reliable auto repair services or seeking expert advice on car maintenance? Do you want to stay updated on the latest automotive technologies and reviews? Visit CARS.EDU.VN today for in-depth guides, professional recommendations, and solutions to all your car-related concerns. Contact us at 456 Auto Drive, Anytown, CA 90210, United States, or reach out via Whatsapp at +1 555-123-4567. Let cars.edu.vn be your trusted resource for all things automotive.