Car battery terminals are crucial for delivering the electrical power needed to start your car and run its systems. However, these terminals are prone to corrosion, which can lead to a host of problems, from starting difficulties to electrical system failures. In my extensive experience in auto repair, I’ve seen firsthand the damage corroded terminals can cause. One case that stands out involved a customer whose seemingly simple battery issue led to costly ECM and AC control panel replacements due to neglected terminal corrosion.
Corrosion, often unseen beneath the surface, can severely restrict electrical flow, stressing your car’s charging system and sensitive electronics. If you’re noticing signs of corrosion or struggling with battery issues, replacing your car battery terminals might be necessary. This guide will walk you through the process of How To Change A Terminal On A Car Battery safely and effectively, ensuring your vehicle’s electrical system remains reliable.
Understanding Car Battery Terminals and Corrosion
Before diving into the replacement process, it’s important to understand why battery terminals corrode and the impact this corrosion can have on your vehicle.
Why Battery Terminals Corrode
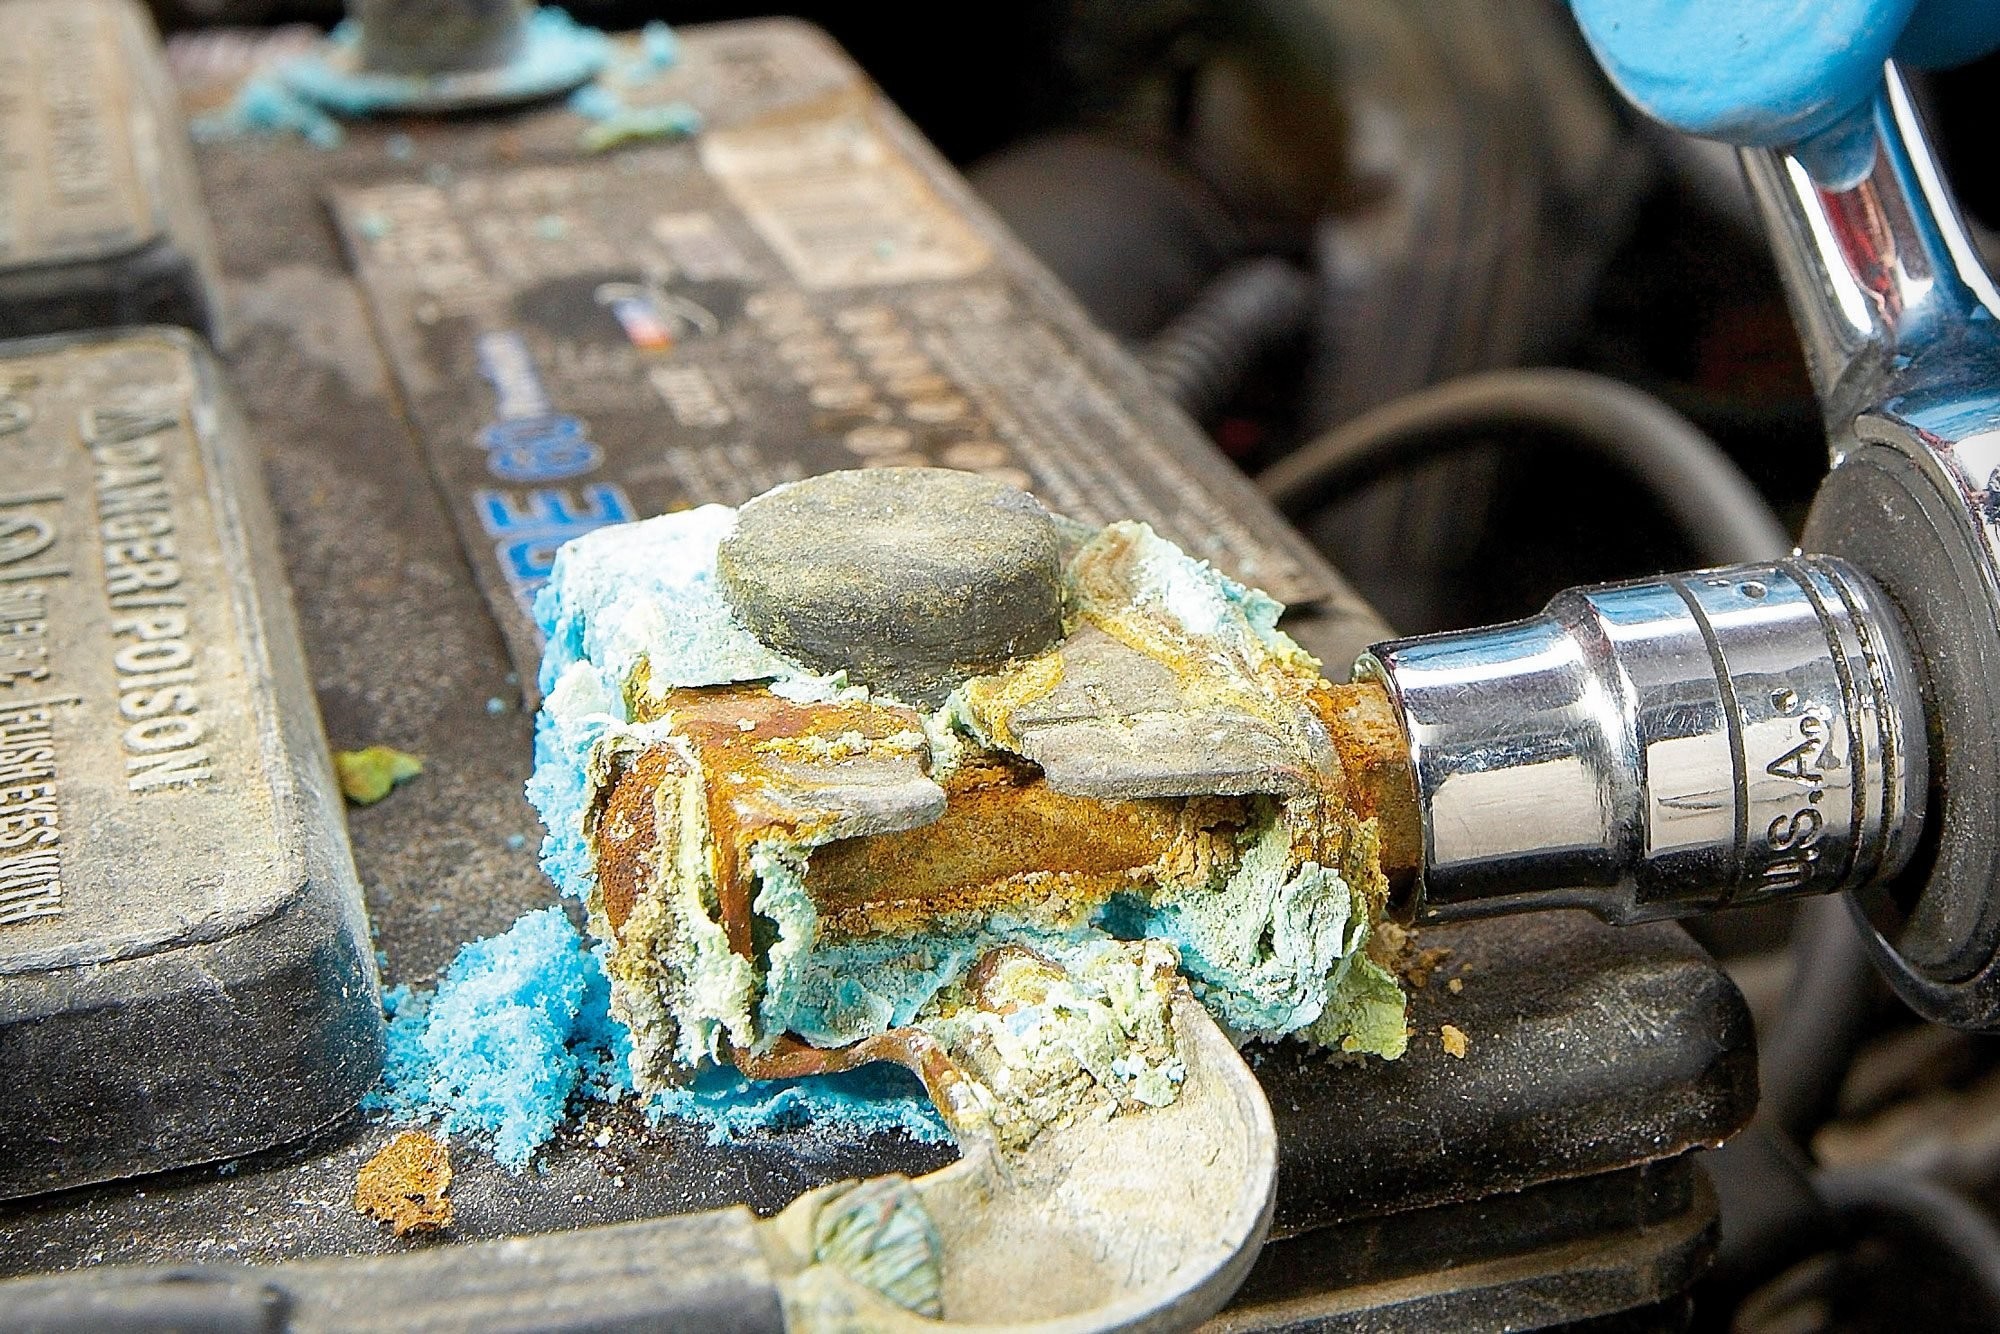
Car battery terminal corrosion is a common issue resulting from a chemical reaction. Lead-acid batteries, the standard type in most vehicles, release hydrogen gas from the sulfuric acid within them. When this gas mixes with moisture and road salts, it creates a corrosive environment around the terminals. This is why you often see a white, powdery, or bluish buildup on your battery terminals.
Alt text: Close-up view of severe corrosion buildup on a car battery terminal, highlighting the white and powdery deposits.
The Impact of Corroded Terminals
Even minor corrosion can significantly impede the flow of electricity. This reduced conductivity can lead to several problems:
- Starting Problems: Insufficient power to the starter motor can cause slow cranking or failure to start, especially in cold weather.
- Charging System Strain: The alternator has to work harder to charge the battery due to resistance from corrosion, potentially shortening its lifespan.
- Electronic Issues: Reduced voltage can negatively affect sensitive electronic components, possibly leading to premature failures of systems like the engine control module (ECM) or other electronic accessories.
- Overheating: In severe cases, as I experienced, corroded terminals can cause excessive resistance, leading to overheating of battery cables and terminals, posing a fire risk.
Step-by-Step Guide to Changing a Car Battery Terminal
Replacing a car battery terminal is a straightforward DIY task that can save you money on labor costs and prevent more serious electrical problems. Here’s how to do it safely:
Safety First: Preparation and Precautions
Working with car batteries involves potential hazards, primarily sulfuric acid and electrical current. Always prioritize safety:
- Wear safety glasses and gloves: Protect your eyes and skin from battery acid, which can cause burns.
- Work in a well-ventilated area: Hydrogen gas released by batteries is flammable.
- No smoking or open flames: Keep sparks and flames away from the battery area.
- Disconnect negative terminal first: This prevents accidental shorts when working with tools around the positive terminal.
Tools You’ll Need
Gather these tools before you begin:
- Wrench or socket set: Typically 8mm, 10mm, or 13mm, depending on your car.
- Battery terminal puller (optional but recommended): Makes removing terminals easier and prevents damage.
- Wire brush or battery terminal cleaner: For cleaning battery posts and cable ends.
- New battery terminal(s): Purchase the correct type for your battery cable size (usually universal fit, but check).
- Knife or wire stripper: To strip insulation if needed.
- Dielectric grease (optional): To prevent future corrosion.
- Digital Volt Ohm Meter (DVOM) (optional but helpful): To confirm battery voltage and polarity if needed.
Removing the Old Terminal
-
Identify Terminals: Locate the positive (+) and negative (-) terminals on your battery. The positive terminal is usually marked with a “+” symbol and a red cover, while the negative is marked with a “-” symbol and a black cover. If markings are unclear, cleaning the battery top may reveal them.
-
Disconnect Negative Terminal: Using the correct wrench or socket, loosen the nut on the negative (-) terminal clamp. Once loose, use a battery terminal puller or gently twist and pull the terminal to remove it. Ensure the terminal is completely disconnected and cannot accidentally touch the battery post. Tuck the cable aside.
Alt text: Using a wrench to loosen the nut on the negative car battery terminal in preparation for removal.
-
Disconnect Positive Terminal: Repeat the process for the positive (+) terminal. Loosen the nut, and use a terminal puller or gently twist and pull to remove. Keep this cable separate from the negative cable.
Cleaning the Battery Post
With the terminals removed, clean the battery posts thoroughly to ensure good contact with the new terminals:
- Inspect for Corrosion: Examine the battery posts for any signs of corrosion.
- Clean Posts: Use a wire brush or battery terminal cleaner to scrub away any corrosion from both the positive and negative posts. You can use a baking soda and water solution to neutralize battery acid if corrosion is heavy (refer to guides on neutralizing battery acid for safe ratios and disposal). Wipe clean with a cloth.
Installing the New Terminal
- Prepare the Cable End: Inspect the wire end of the cable. If it’s corroded, trim back a small portion to expose fresh wire using a knife or wire stripper.
- Attach New Terminal: Open the new battery terminal clamp. Place it over the cleaned positive (+) battery post. Ensure it fits snugly.
- Secure the Terminal: Tighten the terminal clamp nut securely with your wrench or socket. Do not overtighten, as this can damage the terminal or battery post. The terminal should be firmly in place and not wobble.
- Repeat for Negative Terminal: Install the new terminal on the negative (-) battery post, ensuring a snug and secure fit.
Reconnecting Cables and Final Checks
- Reconnect Positive Cable: Attach the positive (+) battery cable to the new positive terminal. Tighten the clamp nut securely.
- Reconnect Negative Cable: Attach the negative (-) battery cable to the new negative terminal. Tighten the clamp nut securely.
- Apply Dielectric Grease (Optional): For added protection against future corrosion, apply a thin layer of dielectric grease to the terminals and posts.
- Check Connections: Double-check that both terminals are securely fastened and the cables are not loose.
- Start Your Car: Start your car to ensure the connection is good and the battery is functioning correctly.
- Dispose of Old Terminals Responsibly: Old battery terminals may contain lead and corrosive materials. Dispose of them according to local regulations for hazardous waste.
When to Seek Professional Help
While replacing battery terminals is generally a DIY-friendly task, there are situations where it’s best to consult a professional:
- Extensive Corrosion Damage: If corrosion has spread beyond the terminals to the battery tray, cables, or surrounding components, professional cleaning and inspection may be needed.
- Uncertainty or Lack of Tools: If you are uncomfortable working with car batteries or don’t have the necessary tools, it’s safer to have a qualified mechanic perform the replacement.
- Persistent Battery Issues: If replacing the terminals doesn’t resolve your battery problems, there may be an underlying issue with the battery, alternator, or other part of your car’s electrical system that requires professional diagnosis.
Alt text: A detailed view of a car engine bay with a visible car battery, highlighting the complex environment where battery terminals operate.
Conclusion
Knowing how to change a terminal on a car battery is a valuable skill for any car owner. Regular inspection and maintenance of your battery terminals can prevent corrosion-related issues, ensuring reliable starting and optimal performance of your vehicle’s electrical system. By following this step-by-step guide and prioritizing safety, you can confidently tackle this DIY task. However, always remember to assess your comfort level and seek professional help when needed to ensure the job is done safely and correctly.