Checking How To Check Thermostat Car is crucial for maintaining engine health and preventing overheating issues. At CARS.EDU.VN, we provide you with the knowledge and resources needed to effectively troubleshoot and maintain your vehicle’s cooling system. Learn to identify thermostat problems early and ensure your car runs smoothly with our expert tips on coolant flow, temperature checks, and thermostat testing, plus explore the benefits of a well-functioning cooling system and how it impacts your vehicle’s performance.
1. Understanding the Car Thermostat: An Essential Component
The car thermostat is a vital component of your vehicle’s cooling system, responsible for regulating engine temperature and maintaining optimal performance. Positioned between the engine and the radiator, the thermostat acts as a gateway, controlling the flow of coolant to ensure the engine operates within its ideal temperature range. This regulation is crucial for fuel efficiency, reducing emissions, and preventing engine damage. Let’s delve deeper into the thermostat’s function and why it’s so important.
-
Regulating Coolant Flow: The primary function of the thermostat is to regulate the flow of coolant based on the engine’s temperature. When the engine is cold, the thermostat remains closed, preventing coolant from circulating through the radiator. This allows the engine to warm up quickly, reaching its optimal operating temperature. Once the engine reaches this temperature, the thermostat begins to open, allowing coolant to flow to the radiator for cooling.
-
Maintaining Optimal Engine Temperature: Maintaining the correct engine temperature is critical for efficient combustion and reducing wear and tear. Too cold, and the engine struggles to burn fuel efficiently, leading to increased emissions and reduced performance. Too hot, and the engine risks overheating, which can cause severe damage to components like the cylinder head and gaskets. The thermostat ensures the engine stays within the ideal temperature range, typically between 195 and 220 degrees Fahrenheit (90 to 104 degrees Celsius), according to data from leading automotive manufacturers.
-
Types of Thermostats:
Thermostat Type Description Advantages Disadvantages Traditional Wax Pellet Thermostat Uses a wax pellet that expands when heated, opening the thermostat valve. Simple, reliable, and cost-effective. Less precise temperature control compared to electronic thermostats. Electronic or Map-Controlled Thermostat Controlled by the engine control unit (ECU), allowing for precise temperature regulation based on various engine parameters. Highly accurate temperature control, improved fuel efficiency, and reduced emissions. More complex and expensive than traditional thermostats. Reverse Poppet Thermostat Designed to open against the coolant flow, providing more stable temperature control and reducing the risk of coolant surging. Improved temperature stability and reduced coolant surging. Can be more sensitive to debris and require more frequent maintenance. -
Importance of a Properly Functioning Thermostat: A malfunctioning thermostat can lead to a host of problems, including overheating, poor fuel economy, increased emissions, and potential engine damage. Regular checks and timely replacement are essential to maintaining your vehicle’s performance and longevity.
For more detailed information on the different types of thermostats and their specific applications, visit CARS.EDU.VN. Our comprehensive resources provide in-depth insights and practical advice to help you understand and maintain your vehicle’s cooling system.
2. Identifying Thermostat Problems: Symptoms and Warning Signs
Recognizing the symptoms of a failing thermostat is crucial for preventing major engine damage and ensuring your vehicle runs efficiently. A faulty thermostat can manifest in several ways, from temperature fluctuations to decreased fuel efficiency. By understanding these warning signs, you can take timely action and avoid costly repairs. Let’s explore the key symptoms of a problematic thermostat.
-
Overheating Engine: One of the most common and severe symptoms of a failing thermostat is engine overheating. If the thermostat is stuck closed, it prevents coolant from reaching the radiator, causing the engine temperature to rise rapidly. The temperature gauge on your dashboard may climb into the red zone, and you might notice steam coming from under the hood. Overheating can lead to serious engine damage, including warped cylinder heads and blown gaskets.
-
Engine Running Too Cold: Conversely, if the thermostat is stuck open, coolant continuously flows to the radiator, even when the engine is cold. This can prevent the engine from reaching its optimal operating temperature, resulting in decreased fuel efficiency, increased emissions, and reduced performance. You might notice that the temperature gauge never reaches the normal range or that the heater blows cold air.
-
Fluctuating Temperature Gauge: A fluctuating temperature gauge can also indicate a thermostat problem. If the gauge moves erratically between hot and cold, it suggests that the thermostat is not regulating coolant flow properly. This can be due to a partially stuck or malfunctioning thermostat.
-
Poor Fuel Economy: A thermostat that is stuck open can cause the engine to run cooler than normal, which can negatively impact fuel economy. The engine control unit (ECU) may compensate by injecting more fuel to try to bring the engine up to temperature, leading to increased fuel consumption. According to the U.S. Department of Energy, a faulty thermostat can reduce fuel economy by as much as 10-15%.
-
Check Engine Light: In some cases, a malfunctioning thermostat can trigger the check engine light. The ECU monitors various engine parameters, including temperature, and if it detects an anomaly, it will activate the check engine light. Use an OBD-II scanner to read the diagnostic trouble codes (DTCs) and determine if the thermostat is the cause.
-
Coolant Leaks: Although not always directly related to the thermostat, coolant leaks around the thermostat housing can be a sign of a problem. A damaged or corroded thermostat housing can leak coolant, leading to low coolant levels and potential overheating.
To help you quickly identify potential thermostat issues, here’s a summary table of common symptoms:
| Symptom | Possible Cause | Severity |
|---|---|---|
| Overheating Engine | Thermostat stuck closed | High |
| Engine Running Too Cold | Thermostat stuck open | Medium |
| Fluctuating Temperature Gauge | Partially stuck or malfunctioning thermostat | Medium |
| Poor Fuel Economy | Thermostat stuck open | Low |
| Check Engine Light | Thermostat malfunction detected by ECU | Medium |
| Coolant Leaks | Damaged or corroded thermostat housing | Low |
If you notice any of these symptoms, it’s essential to investigate further and address the issue promptly. CARS.EDU.VN offers detailed guides and resources to help you diagnose and resolve thermostat problems, ensuring your vehicle remains in optimal condition.
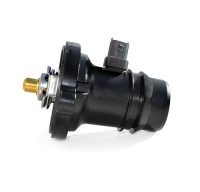 engine coolant thermostat problems
3. Preparing to Check Your Car’s Thermostat: Tools and Safety
Before you begin checking your car’s thermostat, it’s important to gather the necessary tools and take appropriate safety precautions. Working on a vehicle can be hazardous, so ensuring you have the right equipment and knowledge is essential for a safe and successful process. Let’s outline the tools you’ll need and the safety measures to follow.
-
Essential Tools:
- Socket Set: A socket set with various sizes is necessary for removing and installing the thermostat housing.
- Wrench Set: Wrenches are useful for loosening and tightening bolts and nuts.
- Screwdrivers: Both flathead and Phillips screwdrivers may be needed to remove components around the thermostat housing.
- Pliers: Pliers can be helpful for disconnecting hoses and clamps.
- Infrared Thermometer: An infrared thermometer is used to measure the temperature of the radiator hoses and engine components.
- Multimeter: A multimeter can be used to check the electrical connections of the thermostat, if applicable.
- Coolant Drain Pan: A drain pan is essential for collecting coolant when you drain the system.
- Funnel: A funnel makes it easier to pour coolant back into the system without spills.
- Gloves: Protect your hands from chemicals and sharp edges.
- Safety Glasses: Protect your eyes from debris and coolant splashes.
- Shop Rags: Keep shop rags handy for wiping up spills and cleaning components.
- OBD-II Scanner: An OBD-II scanner can help you read diagnostic trouble codes (DTCs) related to the thermostat.
-
Safety Precautions:
- Work in a Well-Ventilated Area: Ensure you are working in a well-ventilated area to avoid inhaling harmful fumes.
- Wear Safety Gear: Always wear safety glasses and gloves to protect your eyes and skin from coolant and other chemicals.
- Let the Engine Cool Down: Never work on the cooling system while the engine is hot. Allow the engine to cool down completely to avoid burns.
- Disconnect the Battery: Disconnect the negative terminal of the battery to prevent electrical accidents.
- Properly Dispose of Coolant: Coolant is toxic and harmful to the environment. Dispose of used coolant properly at a recycling center or auto parts store. Never pour it down the drain or onto the ground.
- Consult the Vehicle’s Service Manual: Refer to your vehicle’s service manual for specific instructions and torque specifications.
- Use Jack Stands: If you need to lift the vehicle, use jack stands to support it safely. Never work under a vehicle supported only by a jack.
-
Step-by-Step Preparation Checklist:
- Gather all necessary tools: Ensure you have all the tools listed above before starting the job.
- Park the vehicle on a level surface: Park your car on a flat surface and engage the parking brake.
- Allow the engine to cool down: Wait for the engine to cool down completely before proceeding.
- Disconnect the battery: Disconnect the negative terminal of the battery.
- Prepare the work area: Clear the area around the vehicle and make sure you have enough light to see what you’re doing.
- Consult the service manual: Review your vehicle’s service manual for specific instructions and torque specifications.
By following these preparation steps and safety precautions, you can minimize the risk of accidents and ensure a smooth and successful thermostat check. For more detailed guidance and safety tips, visit CARS.EDU.VN. Our resources provide comprehensive information to help you work safely and effectively on your vehicle.
4. How To Check Thermostat Car: Step-by-Step Guide
Checking your car’s thermostat involves a series of steps to ensure you accurately assess its functionality. There are several methods you can use, including visual inspection, temperature checks, and testing the thermostat in hot water. Each method provides valuable insights into the thermostat’s condition. Let’s explore these step-by-step guides to help you check your car’s thermostat effectively.
4.1. Visual Inspection of the Thermostat
A visual inspection can often reveal obvious signs of damage or wear on the thermostat. While this method may not provide a definitive diagnosis, it can help you identify potential issues.
Step 1: Locate the Thermostat Housing: The thermostat is typically located inside a housing where the upper radiator hose connects to the engine. Consult your vehicle’s service manual to find the exact location.
Step 2: Remove the Thermostat Housing:
- Allow the engine to cool down completely.
- Disconnect the negative terminal of the battery.
- Drain some coolant from the radiator to prevent spills when you remove the housing.
- Remove the bolts or nuts securing the thermostat housing.
- Carefully remove the housing cover.
Step 3: Inspect the Thermostat:
- Examine the thermostat for signs of corrosion, damage, or debris.
- Check if the thermostat is stuck open or closed. A healthy thermostat should be closed when cold.
- Look for any cracks or breaks in the thermostat housing.
Step 4: Reassemble the Thermostat Housing:
- If the thermostat appears to be in good condition, replace the gasket or O-ring.
- Reinstall the thermostat in the housing.
- Reattach the housing cover and tighten the bolts or nuts to the specified torque.
- Refill the coolant and reconnect the battery.
4.2. Temperature Checks with an Infrared Thermometer
Using an infrared thermometer to measure the temperature of the radiator hoses can help you determine if the thermostat is opening and closing properly.
Step 1: Start the Engine: Start the engine and let it idle for 10-15 minutes to reach its normal operating temperature.
Step 2: Measure the Upper Radiator Hose Temperature:
- Point the infrared thermometer at the upper radiator hose, near the thermostat housing.
- Record the temperature reading.
Step 3: Measure the Lower Radiator Hose Temperature:
- Point the infrared thermometer at the lower radiator hose.
- Record the temperature reading.
Step 4: Analyze the Results:
- If the upper radiator hose heats up quickly and the lower radiator hose remains cool, the thermostat is likely closed initially, as it should be.
- Once the engine reaches its operating temperature (typically 195-220°F or 90-104°C), the thermostat should open, and the lower radiator hose should start to heat up.
- If the lower radiator hose remains cool even after the engine is hot, the thermostat may be stuck closed.
- If the lower radiator hose heats up as soon as the engine is started, the thermostat may be stuck open.
4.3. Testing the Thermostat in Hot Water
This method involves removing the thermostat from the vehicle and testing it in a pot of hot water to observe its operation.
Step 1: Remove the Thermostat:
- Follow the steps in Section 4.1 to remove the thermostat from the housing.
Step 2: Heat Water in a Pot:
- Fill a pot with water and place it on a stove.
- Insert a thermometer into the water.
- Heat the water to a temperature slightly above the thermostat’s specified opening temperature (usually marked on the thermostat).
Step 3: Observe the Thermostat:
- Carefully lower the thermostat into the hot water.
- Observe the thermostat to see if it opens. The valve should start to open at the specified temperature.
- If the thermostat does not open or opens only partially, it is likely faulty and needs to be replaced.
Step 4: Remove and Cool the Thermostat:
- Remove the thermostat from the hot water and let it cool.
- As the thermostat cools, it should close again.
Step 5: Analyze the Results:
- If the thermostat opens at the specified temperature and closes when cooled, it is likely functioning correctly.
- If the thermostat does not open, opens only partially, or does not close when cooled, it is faulty and needs to be replaced.
Here is a table summarizing the different methods and their effectiveness:
| Method | Procedure | Effectiveness |
|---|---|---|
| Visual Inspection | Check for damage, corrosion, and whether the thermostat is stuck open or closed. | Low to Medium |
| Temperature Checks | Measure the temperature of the upper and lower radiator hoses with an infrared thermometer. | Medium to High |
| Hot Water Test | Remove the thermostat and observe its operation in hot water. | High |
By following these step-by-step guides, you can effectively check your car’s thermostat and determine if it needs to be replaced. CARS.EDU.VN offers additional resources and detailed instructions to help you with this process.
5. Interpreting Test Results: Diagnosing Thermostat Issues
After performing the tests outlined in the previous section, it’s crucial to accurately interpret the results to diagnose any thermostat issues. Understanding the implications of each test outcome will help you determine whether your thermostat is functioning correctly or needs replacement. Let’s break down the common scenarios and their corresponding diagnoses.
-
Scenario 1: Overheating Engine
-
Symptoms: The engine temperature gauge climbs into the red zone, and you may notice steam coming from under the hood.
-
Possible Cause: Thermostat stuck closed.
-
Test Results:
- Visual Inspection: Thermostat may appear closed even when hot.
- Temperature Checks: Upper radiator hose is hot, but the lower radiator hose remains cool even after the engine reaches operating temperature.
- Hot Water Test: Thermostat does not open when placed in hot water.
-
Diagnosis: The thermostat is stuck closed, preventing coolant from circulating to the radiator. Replacement is necessary.
-
-
Scenario 2: Engine Running Too Cold
-
Symptoms: The engine temperature gauge never reaches the normal range, the heater blows cold air, and fuel economy is poor.
-
Possible Cause: Thermostat stuck open.
-
Test Results:
- Visual Inspection: Thermostat may appear open even when cold.
- Temperature Checks: Lower radiator hose heats up as soon as the engine is started, and the engine struggles to reach operating temperature.
- Hot Water Test: Thermostat remains open even when cooled.
-
Diagnosis: The thermostat is stuck open, causing continuous coolant flow to the radiator. Replacement is necessary.
-
-
Scenario 3: Fluctuating Temperature Gauge
-
Symptoms: The temperature gauge moves erratically between hot and cold.
-
Possible Cause: Partially stuck or malfunctioning thermostat.
-
Test Results:
- Visual Inspection: Thermostat may show signs of corrosion or damage.
- Temperature Checks: Temperature readings fluctuate significantly, and the lower radiator hose temperature is inconsistent.
- Hot Water Test: Thermostat opens and closes erratically or only partially.
-
Diagnosis: The thermostat is malfunctioning and not regulating coolant flow properly. Replacement is recommended.
-
-
Scenario 4: Normal Operation
-
Symptoms: The engine temperature gauge reaches and maintains the normal range, the heater works properly, and fuel economy is as expected.
-
Test Results:
- Visual Inspection: Thermostat appears clean and undamaged.
- Temperature Checks: Upper radiator hose heats up and the lower radiator hose heats up after the engine reaches operating temperature.
- Hot Water Test: Thermostat opens at the specified temperature and closes when cooled.
-
Diagnosis: The thermostat is functioning correctly. No action is needed.
-
Here’s a summary table to help you interpret your test results:
| Symptoms | Possible Cause | Visual Inspection | Temperature Checks | Hot Water Test | Action Needed |
|---|---|---|---|---|---|
| Overheating Engine | Thermostat Stuck Closed | Appears closed even when hot | Upper hose hot, lower hose cool | Does not open in hot water | Replace Thermostat |
| Engine Running Too Cold | Thermostat Stuck Open | Appears open even when cold | Lower hose heats up immediately, engine struggles to reach temp | Remains open even when cooled | Replace Thermostat |
| Fluctuating Temp Gauge | Malfunctioning Thermostat | Corrosion or damage | Temperature readings fluctuate, inconsistent lower hose temperature | Opens and closes erratically or partially | Replace Thermostat |
| Normal Operation | Thermostat OK | Clean and undamaged | Upper hose heats up, lower hose heats up after engine reaches temp | Opens at specified temperature and closes when cooled | No Action Needed |
By carefully analyzing these test results and comparing them to the symptoms your vehicle is exhibiting, you can accurately diagnose thermostat issues and take the appropriate action. CARS.EDU.VN provides further assistance with troubleshooting and offers detailed guides on thermostat replacement.
6. Thermostat Replacement: A Step-by-Step Guide
If your tests indicate that your car’s thermostat is faulty, replacement is necessary to ensure proper engine cooling and prevent potential damage. Replacing a thermostat is a relatively straightforward task that can be done at home with the right tools and knowledge. Let’s walk through a step-by-step guide to help you replace your car’s thermostat effectively.
Step 1: Gather Your Tools and Supplies:
- New thermostat and gasket
- Socket set and wrench set
- Screwdrivers
- Pliers
- Coolant drain pan
- Funnel
- Gloves and safety glasses
- Shop rags
- Torque wrench
Step 2: Prepare the Vehicle:
- Park the vehicle on a level surface and engage the parking brake.
- Allow the engine to cool down completely.
- Disconnect the negative terminal of the battery.
Step 3: Drain the Coolant:
- Locate the radiator drain plug at the bottom of the radiator.
- Place the coolant drain pan under the drain plug.
- Open the drain plug and allow the coolant to drain into the pan.
- Once the coolant has drained, close the drain plug.
Step 4: Remove the Thermostat Housing:
- Locate the thermostat housing where the upper radiator hose connects to the engine.
- Disconnect any electrical connectors or hoses attached to the thermostat housing.
- Remove the bolts or nuts securing the thermostat housing.
- Carefully remove the housing cover and set it aside.
Step 5: Remove the Old Thermostat:
- Remove the old thermostat from the housing.
- Clean the thermostat housing and mating surfaces with a shop rag to remove any old gasket material or corrosion.
Step 6: Install the New Thermostat:
- Install the new thermostat into the housing, ensuring it is oriented correctly.
- Install the new gasket or O-ring onto the thermostat housing.
Step 7: Reassemble the Thermostat Housing:
- Reattach the thermostat housing cover and tighten the bolts or nuts to the specified torque (refer to your vehicle’s service manual).
- Reconnect any electrical connectors or hoses that were disconnected from the thermostat housing.
Step 8: Refill the Coolant:
- Using a funnel, carefully pour coolant back into the radiator until it reaches the proper level.
- Check the coolant level in the overflow reservoir and add coolant as needed.
Step 9: Bleed the Cooling System:
- Start the engine and let it idle for 10-15 minutes.
- Monitor the engine temperature gauge to ensure it reaches the normal range.
- Check for leaks around the thermostat housing and radiator hoses.
- If necessary, use the bleeder valve on the thermostat housing or radiator to remove any air pockets in the cooling system.
Step 10: Test Drive the Vehicle:
- Take the vehicle for a short test drive to ensure the engine temperature remains stable and there are no leaks.
- Monitor the coolant level in the overflow reservoir and add coolant as needed.
Here is a table summarizing the steps:
| Step | Action |
|---|---|
| 1. Gather Tools and Supplies | Collect all necessary tools and parts, including a new thermostat, gasket, and coolant. |
| 2. Prepare the Vehicle | Park on a level surface, allow the engine to cool, and disconnect the negative battery terminal. |
| 3. Drain the Coolant | Drain the coolant from the radiator into a drain pan. |
| 4. Remove the Thermostat Housing | Disconnect hoses and electrical connectors, then remove the housing cover. |
| 5. Remove the Old Thermostat | Remove the old thermostat and clean the housing and mating surfaces. |
| 6. Install the New Thermostat | Install the new thermostat and gasket in the correct orientation. |
| 7. Reassemble the Thermostat Housing | Reattach the housing cover and tighten bolts to the specified torque. |
| 8. Refill the Coolant | Refill the radiator and overflow reservoir with coolant. |
| 9. Bleed the Cooling System | Start the engine, monitor temperature, and use bleeder valves to remove air pockets. |
| 10. Test Drive the Vehicle | Take a test drive to ensure the engine temperature remains stable and there are no leaks. |
By following these step-by-step instructions, you can successfully replace your car’s thermostat and ensure proper engine cooling. CARS.EDU.VN offers detailed videos and guides to further assist you with this process.
7. Choosing the Right Thermostat: Factors to Consider
When replacing your car’s thermostat, it’s important to choose the right one to ensure proper engine cooling and performance. Selecting the correct thermostat involves considering several factors, including temperature rating, type, and vehicle compatibility. Let’s explore the key factors to consider when choosing a new thermostat.
-
Temperature Rating: The temperature rating of a thermostat indicates the temperature at which it begins to open and allow coolant to flow to the radiator. It’s crucial to choose a thermostat with the correct temperature rating for your vehicle, as specified by the manufacturer. Using a thermostat with a lower temperature rating can cause the engine to run too cool, while a higher temperature rating can lead to overheating. Consult your vehicle’s service manual or a trusted auto parts store to determine the correct temperature rating for your vehicle.
-
Thermostat Type: There are several types of thermostats available, including traditional wax pellet thermostats, electronic or map-controlled thermostats, and reverse poppet thermostats. Each type has its own advantages and disadvantages, and the best choice for your vehicle depends on its specific requirements. Traditional wax pellet thermostats are simple and reliable, while electronic thermostats offer more precise temperature control. Reverse poppet thermostats are designed to improve temperature stability and reduce coolant surging.
-
Vehicle Compatibility: Ensure that the thermostat you choose is compatible with your vehicle’s make, model, and year. Thermostats are designed to fit specific engine types and configurations, and using an incompatible thermostat can lead to poor performance or even damage. Check the thermostat’s product description or consult a trusted auto parts store to verify compatibility.
-
Quality and Brand: Choose a thermostat from a reputable brand known for quality and reliability. High-quality thermostats are made from durable materials and are designed to withstand the harsh conditions of the engine cooling system. Reputable brands often offer warranties on their products, providing added peace of mind.
-
Material: The material used to construct the thermostat also plays a role in its reliability and longevity. Stainless steel thermostats are known for their resistance to corrosion and durability, while brass thermostats offer good heat transfer properties. Consider the material when choosing a thermostat to ensure it can withstand the demands of your vehicle’s cooling system.
Here is a table summarizing the factors to consider:
| Factor | Description | Importance |
|---|---|---|
| Temperature Rating | The temperature at which the thermostat begins to open. | High |
| Thermostat Type | The type of thermostat, such as wax pellet, electronic, or reverse poppet. | Medium |
| Vehicle Compatibility | Ensuring the thermostat is compatible with your vehicle’s make, model, and year. | High |
| Quality and Brand | Choosing a thermostat from a reputable brand known for quality and reliability. | Medium |
| Material | The material used to construct the thermostat, such as stainless steel or brass. | Low |
By considering these factors, you can choose the right thermostat for your car and ensure proper engine cooling and performance. CARS.EDU.VN offers a wide selection of high-quality thermostats from reputable brands, along with expert advice to help you make the best choice for your vehicle.
8. Maintaining Your Car’s Cooling System: Preventive Measures
Maintaining your car’s cooling system is essential for preventing overheating, engine damage, and costly repairs. Regular inspections, coolant flushes, and proper maintenance practices can help keep your cooling system in top condition. Let’s explore the preventive measures you can take to maintain your car’s cooling system effectively.
-
Regular Coolant Flushes: Coolant loses its effectiveness over time due to contamination and degradation. Regular coolant flushes remove old coolant, debris, and contaminants from the cooling system, ensuring proper heat transfer and preventing corrosion. Follow the manufacturer’s recommended maintenance schedule for coolant flushes, typically every 30,000 to 50,000 miles or every two to five years.
-
Inspect Hoses and Clamps: Regularly inspect the radiator hoses, heater hoses, and clamps for signs of cracks, leaks, or damage. Replace any worn or damaged hoses and clamps to prevent coolant leaks and maintain proper coolant flow.
-
Check Coolant Level: Periodically check the coolant level in the overflow reservoir and add coolant as needed to maintain the proper level. Low coolant levels can lead to overheating and engine damage.
-
Pressure Test the Cooling System: A pressure test can help identify leaks in the cooling system that may not be visible. Use a pressure tester to pressurize the cooling system and check for any pressure drops, indicating a leak.
-
Inspect the Radiator: Check the radiator for signs of damage, corrosion, or blockages. Clean the radiator fins regularly to remove debris and ensure proper airflow.
-
Monitor Engine Temperature: Keep an eye on the engine temperature gauge while driving and address any signs of overheating promptly. Overheating can cause serious engine damage if left unchecked.
Here’s a maintenance checklist to help you keep your cooling system in good condition:
| Task | Frequency |
|---|---|
| Coolant Flush | Every 30,000 to 50,000 miles or every 2-5 years |
| Inspect Hoses and Clamps | Every 6 months |
| Check Coolant Level | Monthly |
| Pressure Test Cooling System | Annually |
| Inspect Radiator | Annually |
| Monitor Engine Temperature | Every drive |
By following these preventive measures, you can maintain your car’s cooling system and prevent costly repairs. CARS.EDU.VN offers detailed guides and resources to help you perform these maintenance tasks effectively.
9. Common Mistakes to Avoid When Checking or Replacing a Thermostat
Checking or replacing a car thermostat might seem straightforward, but there are several common mistakes that can lead to problems or even damage your engine. Being aware of these pitfalls can help you avoid them and ensure a successful outcome. Let’s explore some of the most common mistakes to avoid.
-
Not Allowing the Engine to Cool Down: One of the most dangerous mistakes is working on the cooling system while the engine is hot. Hot coolant can cause severe burns if it comes into contact with your skin. Always allow the engine to cool down completely before starting any work on the cooling system.
-
Using the Wrong Coolant: Using the wrong type of coolant can lead to corrosion, reduced heat transfer, and engine damage. Always use the coolant specified by the manufacturer for your vehicle.
-
Over or Under Tightening Bolts: Over tightening bolts can damage the thermostat housing or gasket, while under tightening can lead to leaks. Use a torque wrench to tighten bolts to the specified torque.
-
Reusing Old Gaskets: Reusing old gaskets can lead to leaks and improper sealing. Always use a new gasket when replacing the thermostat.
-
Forgetting to Bleed the Cooling System: Air pockets in the cooling system can cause overheating and engine damage. Always bleed the cooling system after replacing the thermostat to remove any trapped air.
-
Not Properly Disposing of Old Coolant: Coolant is toxic and harmful to the environment. Never pour it down the drain or onto the ground. Dispose of used coolant properly at a recycling center or auto parts store.
Here is a table summarizing the common mistakes to avoid:
| Mistake | Consequence |
|---|---|
| Not Allowing Engine to Cool Down | Severe burns from hot coolant |
| Using the Wrong Coolant | Corrosion, reduced heat transfer, engine damage |
| Over or Under Tightening Bolts | Damage to thermostat housing or gasket, leaks |
| Reusing Old Gaskets | Leaks, improper sealing |
| Forgetting to Bleed the Cooling System | Overheating, engine damage |
| Not Properly Disposing of Old Coolant | Environmental damage |
By avoiding these common mistakes, you can ensure a safe and successful thermostat check or replacement. CARS.EDU.VN offers detailed guides and safety tips to help you avoid these pitfalls.
10. When to Consult a Professional Mechanic
While checking and replacing a car thermostat can be a DIY task for many, there are situations where consulting a professional mechanic is the best course of action. Knowing when to seek professional help can save you time, money, and potential headaches. Let’s explore the scenarios in which you should consult a professional mechanic.
-
Lack of Experience: If you have limited experience working on cars, it’s best to consult a professional mechanic. They have the knowledge, skills, and tools to diagnose and repair cooling system problems effectively.
-
Complex Cooling System Issues: If you encounter complex cooling system issues, such as a blown head gasket or a damaged water pump, it’s best to seek professional help. These repairs often require specialized tools and expertise.
-
Uncertain Diagnosis: If you’re unsure about the diagnosis or the cause of the cooling system problem, a professional mechanic can perform a thorough inspection and provide an accurate diagnosis.
-
Lack of Time or Tools: If you don’t have the time or tools to perform the thermostat check or replacement yourself, a professional mechanic can complete the job quickly and efficiently.
-
Warranty Concerns: If your vehicle is under warranty, it’s best to consult a professional mechanic to ensure that the repairs are covered by the warranty.
Here’s a quick guide on when to consult a professional:
| Situation | Recommendation |
|---|---|
| Limited Experience | Consult a professional mechanic |
| Complex Cooling System Issues | Seek professional help |
| Uncertain Diagnosis | Get a professional inspection |
| Lack of Time or Tools | Hire a professional mechanic |
| Warranty Concerns | Consult a professional mechanic for warranty coverage |
At CARS.EDU.VN, we understand that finding a reliable mechanic can be a challenge. That’s why we provide resources to help you locate reputable service providers in your area. Trust CARS.EDU.VN to connect you with the expertise you need for all your automotive maintenance and repair requirements. Contact us at 456 Auto Drive, Anytown, CA 90210, United States or via Whatsapp at +1 555-123-4567. Visit our website cars.edu.vn for more information.
FAQ: Checking Car Thermostats
-
How often should I check my car’s thermostat? It’s a good practice to check your car’s thermostat at least once a year, preferably before the start of summer or winter, to ensure it’s functioning correctly and can handle extreme temperatures.
-
Can a bad thermostat cause poor gas mileage? Yes, a thermostat stuck open can cause the engine to run cooler than normal, leading the engine control unit (ECU) to inject more fuel, which reduces gas mileage.
-
Is it safe to drive with a bad thermostat? Driving with a thermostat stuck closed can cause the engine to overheat, leading to serious damage. It’s best to address the issue as soon as possible.
-
How much does it cost to replace a car thermostat? The cost to replace a car thermostat typically