Dealing with vomit in your car is an unfortunate reality for many car owners, especially those with children or pets. Whether it’s a sudden bout of car sickness or an unexpected illness, knowing how to effectively clean up throw up is essential to prevent lingering odors, stains, and potential damage to your vehicle’s interior. This comprehensive guide will walk you through the necessary steps and best practices to tackle this unpleasant task efficiently and restore your car to a fresh and clean state.
1. Preparing for Immediate Vomit Clean Up
Acting quickly is crucial when dealing with vomit in your car. Fresh vomit is much easier to clean and less likely to cause lasting damage or odors. Before you begin, gather the following essential tools and supplies to make the cleaning process smoother and more hygienic:
- Rubber Gloves: Protect your hands from direct contact with vomit and potential bacteria.
- Face Mask: Minimize inhalation of unpleasant odors and airborne particles.
- Spatula or Spoon: For scooping solid vomit material.
- Plastic Bags: For disposing of vomit and contaminated cleaning materials.
- Baking Soda: An excellent odor absorber and stain neutralizer.
- Warm Water: For rinsing and diluting cleaning solutions.
- Paper Towels or Rags: For blotting and wiping.
- Mixing Containers: For preparing cleaning solutions.
- Microfiber Cloths: Gentle and effective for cleaning various surfaces.
- Soft-Bristled Brush: For scrubbing carpets and upholstery.
- White Vinegar: A natural cleaner and deodorizer.
- Vacuum Cleaner (preferably wet-dry): For removing baking soda and residual moisture.
- Mild Dish Soap: For general cleaning.
- Enzymatic Cleaner (optional): For breaking down odor-causing organic matter.
- Ozone Generator (optional): For eliminating persistent odors in severe cases.
- Hydrogen Peroxide (optional): For stain removal (use with caution on colored fabrics).
- Air Freshener, Activated Charcoal, Coffee Grounds (optional): For absorbing lingering odors.
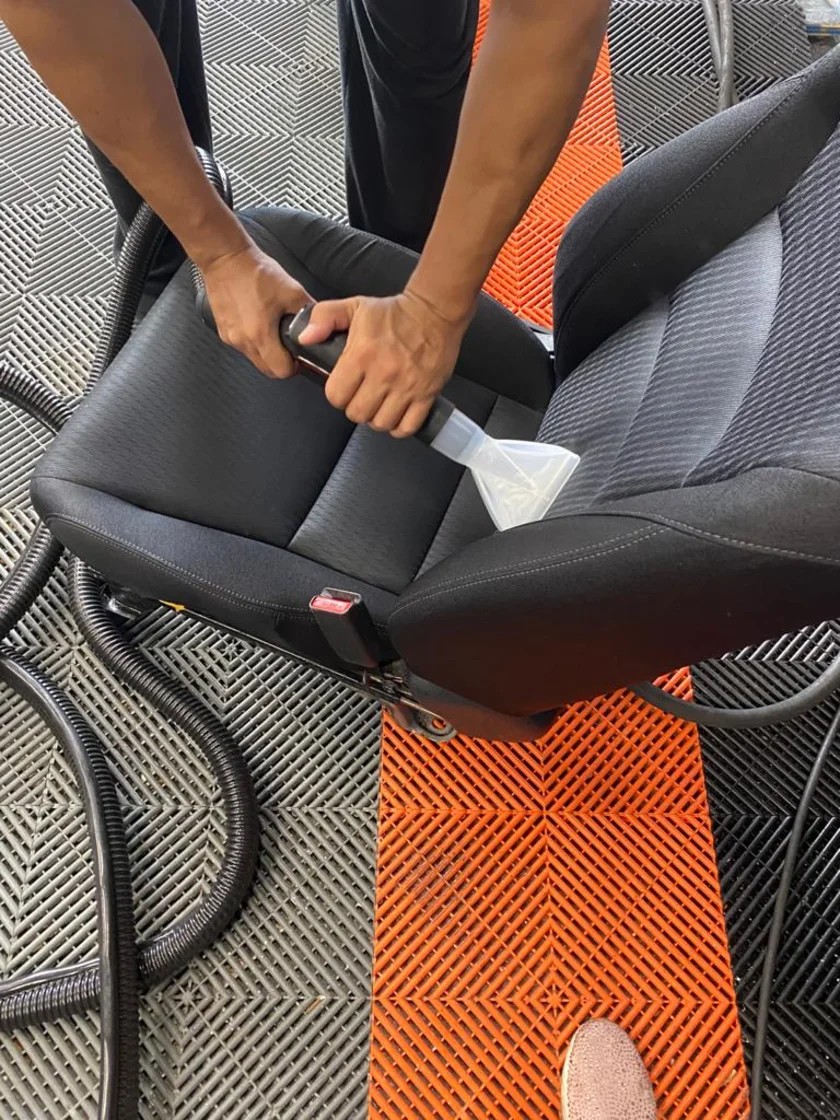
For an even more effective and professional clean, consider using a steam cleaner with an upholstery attachment. Steam cleaners like Fortador models offer deep cleaning and sanitizing capabilities, often eliminating the need for harsh chemicals and leaving your car interior truly refreshed.
Prioritizing Safety and Hygiene During Vomit Cleanup
Cleaning vomit is not just about aesthetics; it’s also about hygiene. Vomit can contain bacteria and viruses, so taking proper safety precautions is essential.
Essential Personal Protective Equipment (PPE):
- Wear Rubber Gloves: Disposable gloves create a barrier, protecting your skin from direct contact with vomit and potential pathogens.
- Use a Face Mask: A face mask is crucial for minimizing the inhalation of unpleasant odors and any airborne particles that may be present during the cleanup process.
Maintaining Good Hygiene Practices:
- Thorough Hand Washing: After handling vomit or any contaminated materials, wash your hands thoroughly with soap and warm water for at least 20 seconds. If soap and water aren’t immediately available, use an alcohol-based hand sanitizer with at least 60% alcohol content.
- Avoid Touching Your Face: During and after the cleaning process, be mindful of not touching your face, especially your eyes, nose, and mouth, to prevent the transfer of any potential germs.
- Properly Launder or Disinfect Reusable Items: If you use reusable cleaning cloths or gloves, make sure to launder them in hot water with detergent or disinfect them thoroughly before using them again.
2. Cleaning Fresh Vomit Quickly and Efficiently
When vomit is fresh, time is of the essence. Cleaning it up immediately will significantly reduce the chances of staining and lingering odors. The longer vomit sits, the more it can seep into surfaces and become harder to remove.
2.1 Step-by-Step Removal of Solid Vomit Material
Vomit often contains solid pieces. The first step is to carefully remove these solids:
- Use a Spatula or Spoon: Gently scrape up the solid vomit material from car seats, carpets, or any other affected surface.
- Paper Towels or Rags: Alternatively, you can use paper towels or rags to pick up the chunks. Be thorough to remove as much solid matter as possible.
- Dispose Properly: Place the collected solid vomit and used paper towels/rags into a zippered plastic bag or a trash bag. Seal the bag tightly to contain odors and prevent contamination.
Proper Disposal of Vomit-Contaminated Materials:
- Solid Waste Handling: Carefully remove solid vomit using a spatula, spoon, or paper towels. Immediately place the waste into a sealed plastic bag to prevent leaks and odor spread.
- Absorbent Material Disposal: All paper towels, rags, and cleaning cloths used to absorb vomit should also be placed into the same sealed bag.
- Double Bagging for Extra Protection: To further prevent leaks and contain odors, consider double-bagging the sealed waste bag, especially if disposal is not immediate.
- Responsible Waste Disposal: Dispose of the sealed bag in an appropriate outdoor waste container according to your local waste disposal guidelines.
2.2 Blotting Excess Moisture from Car Interiors
After removing solid pieces, address the liquid portion of the vomit:
- Blotting Technique: Use clean paper towels or a highly absorbent rag to blot the affected area. Press down firmly but avoid rubbing, as rubbing can spread the stain and push the vomit deeper into the fabric.
- Wet-Dry Vacuum or Steamer (Optional): If you have a wet-dry vacuum or a steam cleaner with extraction, you can use it to remove both small solid particles and excess liquid simultaneously. This is particularly effective for carpets and upholstery.
- Saturate and Extract: If using a wet-dry vacuum or steamer, gently saturate the area with warm water and then immediately extract the liquid. Repeat this process until the extracted water appears clear, indicating that most of the vomit liquid has been removed.
- Repeat Blotting: Continue blotting with clean paper towels or rags, replacing them as they become saturated, until you’ve absorbed as much liquid as possible.
- Allow to Sit (Briefly): For each blotting application, leave the paper towels or rags pressed against the surface for a few minutes to maximize liquid absorption.
2.3 Eliminating Vomit Odor with Baking Soda
Baking soda is a natural deodorizer and can effectively neutralize vomit odors:
- Apply Baking Soda: Once you’ve removed as much vomit and moisture as possible, generously sprinkle a thick layer of baking soda over the affected area.
- Let it Sit: Allow the baking soda to sit for at least 30 minutes, or even longer for stubborn odors. Baking soda works by absorbing odor molecules.
- Vacuum Thoroughly: After the baking soda has sat, use a vacuum cleaner to thoroughly remove it. A wet-dry vacuum is ideal, but a regular vacuum cleaner will also work. Ensure all baking soda is removed.
2.4 Cleaning Vinyl, Cloth, and Plastic Car Interiors After Vomit
Different car interior surfaces require slightly different cleaning approaches.
Cloth Upholstery and Carpets:
- Gentle Cleaning Solution: For cloth surfaces, mix a mild cleaning solution: 3 drops of dish soap, 1/8 cup of white vinegar, and 1 cup of warm water.
- Spray and Gently Blot: Pour or spray the solution onto the stained area. Avoid over-saturating. Gently blot with a clean microfiber cloth, working from the outside of the stain inwards to prevent spreading.
- Repeat as Needed: You may need to repeat the application and blotting process several times until the stain is lifted. Patience is key.
- Avoid Vigorous Scrubbing: Unless dealing with leather or vinyl, avoid vigorous scrubbing on cloth surfaces. Scrubbing can push the vomit deeper into the fabric fibers, making removal more difficult.
Vinyl and Plastic Surfaces:
Vinyl and plastic are generally more resistant to stains and easier to clean.
- Mild Soap and Water: Start with a simple solution of mild dish soap and warm water.
- Wipe Clean: Apply the soapy water to the vinyl or plastic surface and wipe clean with a microfiber cloth.
- Vinegar Solution (if needed): For more stubborn stains, a diluted white vinegar solution (equal parts vinegar and water) can be effective. Wipe the surface with the vinegar solution, then follow with a clean, damp cloth to remove any vinegar residue.
2.5 Expert Tips for Cleaning and Disinfecting Leather Upholstery
Leather requires a more delicate approach to cleaning.
- Baking Soda Paste: Create a paste by mixing 1 cup of baking soda with 1/3 cup of water.
- Apply and Gently Scrub: Apply the paste to the leather stain and gently scrub with a soft cloth or a very soft toothbrush in circular motions.
- Blot and Dry: Use a clean, damp microfiber cloth to blot the area and remove the baking soda paste. Allow the leather to air dry.
- Vinegar Solution (Alternative): Alternatively, you can use a white vinegar solution. Dampen a clean cloth with vinegar and gently wipe the leather surface.
- Rinse and Condition: After cleaning with vinegar, lightly dampen another cloth with clean water and wipe the leather to rinse. Follow up with a leather conditioner to prevent drying and cracking, as cleaning can remove natural oils from leather.
2.6 Rinsing and Drying: Finalizing the Cleaning Process
Rinsing and drying are crucial steps to prevent residue and ensure thorough cleaning.
- Damp Rinsing: Use a clean, damp cloth (slightly wetter for non-leather surfaces, just damp for leather) to wipe down all cleaned areas. This removes any cleaning solution residue.
- Blot Dry: Blot the rinsed areas with a clean, dry microfiber cloth to absorb excess moisture.
- Air Drying: Allow the car interior to air dry completely. Open car windows and doors to improve ventilation and speed up the drying process. You can also use a blow dryer on a cool setting to expedite drying, especially for upholstery and carpets.
3. Removing Dried Vomit: Techniques for Stubborn Stains
Dried vomit is more challenging to remove than fresh vomit, but it’s still manageable with the right techniques.
- Rehydration (If Necessary): If the vomit is very hard and crusty, you may need to gently rehydrate it slightly to soften it for easier removal. Dampen the dried vomit with a little warm water or the vinegar solution mentioned earlier. Allow it to sit for a few minutes to soften.
- Gentle Scraping: Carefully scrape off any dried, loose pieces using a spatula, spoon, or soft-bristled brush (like a toothbrush). Be gentle to avoid damaging the underlying surface, especially on delicate materials like leather or vinyl.
- Vacuum Loose Debris: Use a vacuum cleaner to remove the loose dried vomit particles.
- Apply Cleaning Solution: Apply your chosen cleaning solution (baking soda paste, vinegar solution, or mild dish soap solution) to the stained area.
- Soak and Rewet (Repeat): Let the solution sit on the stain until it dries slightly. Then, re-wet the area with the same solution and let it sit again for a few minutes before gently scrubbing with a soft brush or cloth. This allows the solution to penetrate and break down the dried stain.
- Rinse and Blot: Rinse the area with a clean, damp cloth, blotting to remove both the cleaning solution and the loosened stain. Repeat rinsing and blotting with clean water until no more cleaning solution residue remains.
- Dry Thoroughly: Ensure the area is completely dried, using air drying or a cool blow dryer setting.
If you suspect mold growth after vomit incidents, consult our guide on mold removal in cars and mold smell removal.
4. Vomit Stains on Car Carpets: Effective Removal Practices
Cleaning vomit from car carpets requires similar techniques to upholstery cleaning.
- Follow Fresh/Dried Vomit Steps: Apply the same methods for removing fresh or dried vomit as described earlier, adapting the techniques to carpet fibers.
- Natural Carpet Cleaner (Optional): For a natural carpet cleaning solution, you can try this mixture:
- 1 cup white vinegar
- 2 tablespoons baking soda
- 2 tablespoons fabric softener
- 1/2 tablespoon dish soap
- 10-15 drops essential oils (for fragrance, optional)
- Spray, Sit, and Scrub: Combine the ingredients in a spray bottle. Apply the solution to the carpet stain, let it sit for a few minutes, and then gently scrub with a carpet brush or soft-bristled brush.
- Rinse and Blot: Rinse the carpet by blotting with a clean, damp cloth, and then blot dry with a dry cloth or paper towels. Repeat rinsing and blotting until the stain and cleaning solution are removed.
Learn more about carpet shampooing techniques for more in-depth carpet stain removal guidance.
5. Deep Cleaning with Steam: For Spotless and Sanitized Car Carpets
For the most thorough cleaning and sanitization, especially for car carpets and upholstery, using a steam cleaner is highly recommended.
- Post-Cleaning Steam Treatment: After you’ve removed the vomit and cleaned the area using the methods above, follow up with a steam cleaner.
- Steam Cleaning Benefits: Steam cleaning effectively removes residual stains, eliminates bacteria, and neutralizes odors deeply embedded in carpet and upholstery fibers.
- Steam Cleaner Technique: Follow the manufacturer’s instructions for your steam cleaner. Use the upholstery attachment and gently steam clean the affected areas, moving the nozzle slowly and evenly.
- Extraction (If Available): If your steam cleaner has an extraction function, use it to remove excess moisture and loosened dirt and grime simultaneously, further enhancing the cleaning result.
- Steam for Other Stains: While steam cleaning for vomit, you may notice other stains in the vicinity. You can effectively use the steam cleaner to tackle these as well, applying a pre-treatment cleaning solution if necessary.
Discover why steam cleaners are the best tool for car cleaning and explore their versatility in auto detailing.
6. Banishing Lingering Vomit Odors Effectively
Sometimes, despite thorough cleaning, a faint vomit odor can persist. This is especially common if vomit has been left for a while, particularly in warm weather.
Deep Clean with Baking Soda and Hydrogen Peroxide for Odor Removal
For persistent vomit odors, a combination of baking soda and hydrogen peroxide can be effective.
- Baking Soda and Hydrogen Peroxide Paste: Mix 1 cup of baking soda with 1 teaspoon of hydrogen peroxide to create a paste.
- Apply and Let Sit: Apply the paste to the affected area and let it sit for at least an hour, or even overnight for stronger odors.
- Remove Residue: Remove the dried paste with a clean cloth, and then vacuum up any remaining baking soda residue. Steam cleaning can also be used to remove residue and further deodorize.
Using Enzymatic Cleaners for Odor Elimination
Enzymatic cleaners are specifically designed to break down organic matter, making them highly effective for eliminating vomit odors.
- Apply Enzymatic Cleaner: Purchase a natural enzymatic cleaner designed for odor removal.
- Saturate and Blot: Pour the cleaner directly onto the affected surface, ensuring good coverage.
- Blot Dry: Blot the area with a clean, absorbent cloth. Do not rinse, as the enzymes need to remain to continue working. Allow the area to air dry.
Freshening Car Air with Car-Specific Air Fresheners
Car air fresheners can help mask lingering odors while you’re working to eliminate them.
- Choose Car Air Fresheners: Use car-specific air fresheners to temporarily mask any remaining vomit smell.
- Essential Oil Diffuser: For a more natural approach, try a few drops of essential oils like lemon or orange in a car diffuser to impart a pleasant scent.
Learn more about cleaning car air vents as part of odor removal strategies, as vents can trap and recirculate odors.
Natural Deodorizers: Activated Charcoal, Coffee Grounds, White Vinegar
Several natural substances can absorb odors effectively.
- Activated Charcoal, Coffee Grounds, or White Vinegar Bowls: Place bowls filled with activated charcoal, dry coffee grounds, or white vinegar inside the car.
- Leave Overnight and Repeat: Leave these bowls in the car overnight, or for a few days, changing them daily. These substances will absorb lingering odors over time. Note that vinegar and coffee grounds will have their own temporary smells, but these are generally preferable to vomit odor.
- Baking Soda and Essential Oil Mixture: Dampen the affected area slightly with water and sprinkle a mixture of baking soda and a few drops of your favorite essential oil (like lemon or lavender) on top. Let it sit for about 10 minutes and then vacuum.
- Dryer Sheets and Coffee Grounds: For carpets, you can place dryer sheets over the stain, and then put coffee grounds on top of the dryer sheets to enhance deodorization.
Harnessing Enzyme-Based Cleaners for Persistent Odor Removal
Enzyme-based cleaners are exceptionally effective for breaking down and eliminating stubborn vomit odors.
- Enzyme Cleaner Application: Apply an enzyme-based cleaner directly to the affected area.
- Enzyme Action: The enzymes in these cleaners target and digest the organic molecules that cause the vomit smell, effectively neutralizing the odor at its source.
- Long-Lasting Odor Removal: Enzyme cleaners provide a thorough and long-lasting solution for vomit odor removal, ensuring a fresher car interior.
7. Conclusion: Maintaining a Fresh Car Interior After Vomit Incidents
Cleaning vomit from your car promptly and effectively is key to maintaining a clean, fresh-smelling vehicle. By following the step-by-step guide and using the recommended tools and techniques, you can successfully remove vomit stains and odors from your car’s interior. Remember to prioritize safety by using personal protective equipment and practicing good hygiene during the cleanup process.
Don’t Forget Ventilation
Ventilation is crucial both during and after the cleaning process. Keeping your car windows and doors open allows fresh air to circulate, helping to dissipate odors and dry the cleaned areas thoroughly. With these comprehensive cleaning and odor removal strategies, you can confidently tackle vomit incidents and ensure a pleasant and odor-free driving experience.