Finding a leak in AC system car can be challenging, but with the right knowledge and techniques, you can effectively diagnose and address the issue. CARS.EDU.VN is here to provide expert guidance on identifying refrigerant leaks in your vehicle’s AC system, ensuring you stay cool and comfortable on the road. Discover proven methods and explore our extensive resources for optimal AC performance. We delve into automotive air conditioning repair, refrigerant leak detection, and AC system maintenance.
1. Preliminary Steps: Visual Inspection for AC Leaks
Before diving into advanced techniques, a thorough visual inspection is paramount. Look for telltale signs of leaks around various components.
1.1. Identifying Visible Signs of Refrigerant Leaks
Carefully examine the following:
- Connections: Inspect all fittings and connections for oil or refrigerant residue.
- Hoses: Check hoses for cracks, wear, and any signs of leakage.
- Metal Lines: Look for corrosion or damage that could lead to leaks.
- Condenser: Examine the condenser for physical damage and refrigerant stains.
- Evaporator Drain Tube: Check for excessive moisture or refrigerant odor.
- Compressor: Inspect the compressor body and connections for oil seepage.
1.2. Condenser Fan Functionality and its Impact
Ensure the condenser fan is operating correctly. A malfunctioning fan can lead to high pressure and potential leaks.
- Proper Speed: Verify the fan is turning at the correct speed. A slow fan might indicate a failing motor.
- Quick Test: A temporary boost in speed after tapping the motor can confirm a failing motor.
- Overheating: An overheating engine can prevent the AC compressor from running, masking potential leaks.
A properly functioning condenser fan is crucial for maintaining optimal AC performance and preventing leaks.
1.3. Compressor Clutch Engagement Verification
Check if the compressor clutch is engaging when the AC is turned on. This confirms the compressor is receiving power and attempting to operate.
- Clutch Engagement: Observe if the clutch engages when the AC is activated.
- Coil Condition: A faulty coil can prevent clutch engagement, even with a full refrigerant charge.
- Compressor Pumping: Even with clutch engagement, the compressor might not be pumping correctly, indicating internal failure.
If the clutch isn’t engaging, or the compressor isn’t pumping, it’s essential to address these issues before further leak detection.
2. Ultraviolet (UV) Dye Method for Leak Detection
The UV dye method is a popular and effective way to pinpoint refrigerant leaks.
2.1. Introduction to UV Dye and its Application
This method involves injecting a small amount of UV dye into the AC system. The dye circulates with the refrigerant and highlights leak locations under UV light.
2.2. Step-by-Step Guide to Using UV Dye
- Injection: Inject the appropriate amount of UV dye into the AC system using a specialized injector.
- Circulation: Allow the AC system to run for a few days to circulate the dye.
- Inspection: Use a UV light to inspect all AC components for fluorescent areas, indicating leaks.
2.3. Interpreting UV Dye Results Effectively
- Fluorescent Areas: Bright, fluorescent spots indicate the presence of dye and a refrigerant leak.
- Service Port Inspection: Check service ports for dye residue, especially if the system already contains dye.
- Oil Clarity: Clear oil that doesn’t glow under UV light indicates no dye is present.
The UV dye method is highly reliable and can detect even small leaks that might be missed by other methods.
3. Electronic Leak Detectors: The “Sniffer” Approach
Electronic leak detectors, also known as “sniffers,” are highly sensitive tools that can detect refrigerant gas escaping from the system.
3.1. How Electronic Leak Detectors Work
These devices use a probe to sample the air around AC components, detecting even minute traces of refrigerant gas.
3.2. Best Practices for Using Electronic Leak Detectors
- Calibration: Ensure the detector is properly calibrated for accurate readings.
- Slow Movement: Move the probe slowly and steadily along AC components.
- Proximity: Hold the probe close to the components being inspected.
- Environmental Factors: Be aware of wind and ventilation, which can disperse refrigerant gas and affect readings.
3.3. Avoiding Common Pitfalls with Electronic Detectors
- False Alarms: Lower-priced models can sometimes give false alarms. Experience helps discern genuine leaks from false signals.
- Water Contamination: Avoid drawing water into the probe, as it can damage the tool.
- External Air Intake: Large leaks under the hood can draw refrigerant into the passenger compartment via the outside air intake, causing false alarms near the evaporator.
Electronic leak detectors are a valuable tool for quickly pinpointing leaks, but proper technique and awareness are crucial for accurate results.
4. Soap Solution Method: A Simple Yet Effective Technique
Applying a soap solution to AC components and looking for bubbles is a straightforward method for detecting leaks.
4.1. Preparing the Soap Solution
Mix a small amount of dish soap with water to create a soapy solution.
4.2. Application Techniques for Accurate Leak Detection
- Application: Apply the solution to connections, hoses, and other potential leak points.
- Observation: Watch carefully for bubbles forming, indicating escaping refrigerant.
- Accessibility: This method requires good access to the components being tested.
4.3. Advantages and Limitations of the Soap Solution Method
- Advantages: Simple, inexpensive, and can quickly identify larger leaks.
- Limitations: Requires good access, only effective for relatively fast leaks, and can be messy.
The soap solution method is a useful supplement to other leak detection techniques, particularly for accessible components.
5. Pressure Testing: Identifying Fast Leaks
Pressure testing involves pressurizing the AC system with nitrogen gas and monitoring for pressure drops.
5.1. Setting Up the Pressure Test
- Evacuate System: Ensure the AC system is completely evacuated of refrigerant.
- Pressurize: Pressurize the system with nitrogen gas to a specified pressure (e.g., 150-200 PSI).
- Monitor: Monitor the pressure gauge for any drops.
5.2. Interpreting Pressure Test Results Accurately
- Rapid Pressure Drop: A rapid pressure drop indicates a significant leak.
- Slow Pressure Drop: A slow pressure drop might indicate a smaller leak or multiple leaks.
- No Pressure Drop: If the pressure remains constant, the system is likely leak-free.
5.3. Safety Precautions During Pressure Testing
- Nitrogen Use: Use only nitrogen gas, as it is inert and non-flammable.
- Pressure Limits: Do not exceed the maximum pressure rating of the AC system components.
- Eye Protection: Wear safety glasses to protect your eyes.
Pressure testing is particularly effective for identifying fast leaks, but it may not detect very small leaks.
6. R134a vs. R1234yf: Understanding Service Port Differences
Understanding the differences between R134a and R1234yf systems is crucial for proper service and leak detection.
6.1. Physical Differences in Service Port Sizes
- R134a: Uses a 13mm quick connect fitting for the low-pressure side and a 16mm quick connect fitting for the high-pressure side.
- R1234yf: Uses a 14mm quick coupler on the low-pressure side and a 17mm quick coupler on the high-pressure side.
6.2. Preventing Cross-Contamination of Refrigerants
The different service port sizes and unique valve designs in R1234yf systems are designed to prevent accidental cross-contamination of refrigerants.
6.3. Identifying Refrigerant Type: A Technician’s Guide
- Under-Hood Label: Check the label under the hood, which indicates the type of refrigerant used. The label will also list the system’s capacity and the type of oil to be used.
- Service Fittings: The A/C service fittings and adapters used in R134a and R1234yf systems are different.
Correctly identifying the refrigerant type is essential for proper service and avoiding damage to the AC system.
7. Comprehensive Troubleshooting Checklist
This checklist helps guide you through the leak detection process, ensuring no steps are missed.
7.1. Step-by-Step Leak Detection Process
- Visual Inspection: Perform a thorough visual inspection for signs of leaks.
- Condenser Fan Check: Verify the condenser fan is functioning correctly.
- Compressor Clutch: Check if the compressor clutch is engaging.
- UV Dye Method: Inject UV dye and inspect for leaks with a UV light.
- Electronic Leak Detector: Use an electronic leak detector to pinpoint leaks.
- Soap Solution: Apply a soap solution to potential leak points.
- Pressure Testing: Pressurize the system with nitrogen and monitor for pressure drops.
- Refrigerant Identification: Ensure the correct refrigerant type is identified.
- Component Condition: Assess the overall condition of AC components.
- Repair/Replace: Repair or replace any leaking components.
- Recharge: Recharge the system with the correct amount of refrigerant.
- Final Check: Perform a final check to ensure the AC system is functioning correctly.
7.2. Common AC System Components and Their Potential Leak Points
- Compressor: Shaft seal, body, and connections.
- Condenser: Tubes, fins, and connections.
- Evaporator: Core, connections, and drain tube.
- Hoses: Cracks, wear, and connections.
- Lines: Corrosion and damage.
- Service Ports: Valves and connections.
7.3. Documenting Findings and Repair Actions
Keep detailed records of all inspections, tests, and repairs performed. This helps track the AC system’s history and identify recurring issues.
8. Understanding Refrigerant Types and Environmental Impact
Knowing the different types of refrigerants and their environmental impact is essential for responsible AC service.
8.1. Overview of Common Refrigerants: R134a, R1234yf
- R134a: A widely used refrigerant with a moderate global warming potential (GWP).
- R1234yf: A newer refrigerant with a significantly lower GWP, designed to replace R134a.
8.2. Environmental Regulations and Compliance
Regulations are increasingly favoring refrigerants with lower GWP. Stay informed about current regulations to ensure compliance.
8.3. Proper Handling and Disposal of Refrigerants
- Recovery: Always recover refrigerant before performing any AC system repairs.
- Recycling: Recycle recovered refrigerant whenever possible.
- Disposal: Dispose of refrigerant properly, following local regulations.
Handling and disposing of refrigerants responsibly is crucial for protecting the environment.
9. Advanced Diagnostic Tools for AC System Analysis
Advanced diagnostic tools can provide valuable insights into AC system performance.
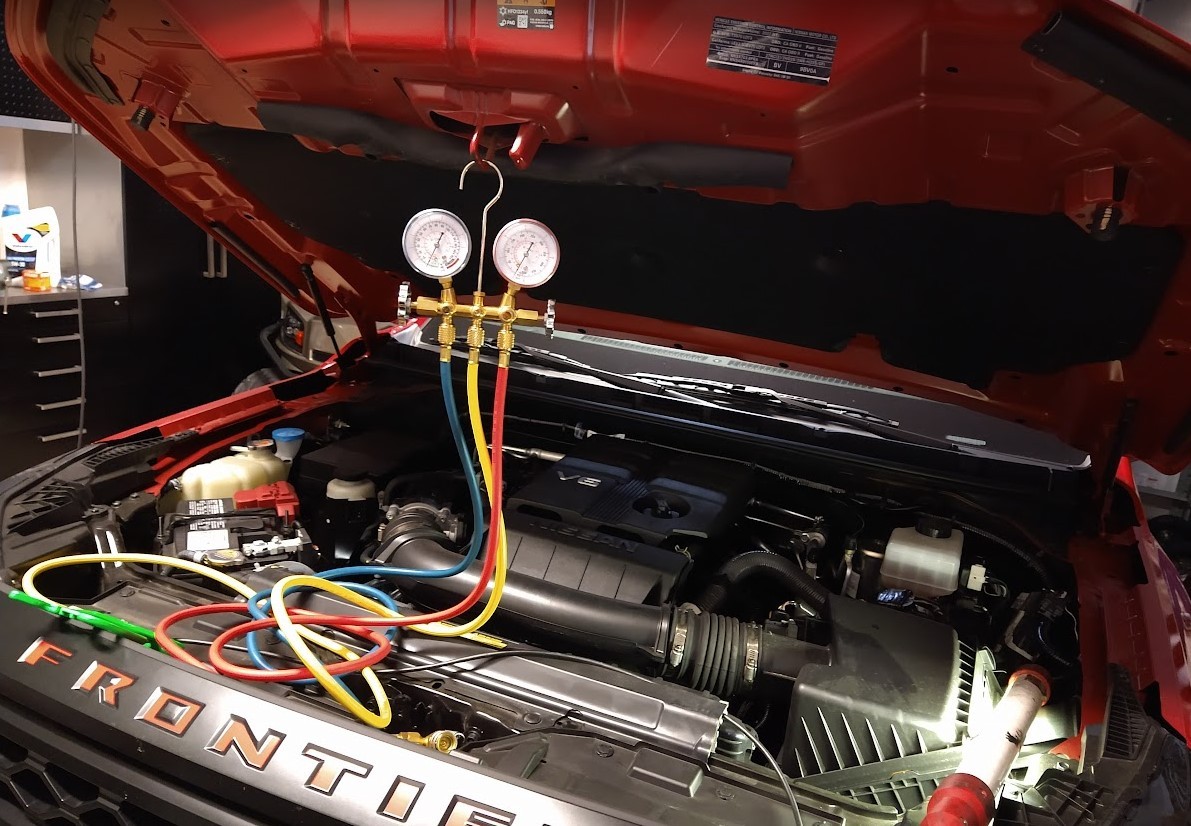
9.1. Manifold Gauge Sets: Measuring Pressure Accurately
Manifold gauge sets are used to measure the high and low-side pressures in the AC system. This helps diagnose issues such as low refrigerant charge, compressor problems, or restrictions in the system.
9.2. Digital Thermometers: Monitoring Temperature Variations
Digital thermometers can be used to measure the temperature of various AC components, such as the evaporator outlet and condenser inlet. This helps identify issues such as a clogged evaporator or a malfunctioning expansion valve.
9.3. Data Loggers: Tracking System Performance Over Time
Data loggers can record AC system parameters over time, such as pressure, temperature, and compressor duty cycle. This helps identify intermittent problems and track system performance under different operating conditions.
These advanced tools can provide valuable data for diagnosing complex AC system problems.
10. Preventative Maintenance Tips for AC System Longevity
Regular maintenance can help prevent leaks and extend the life of your AC system.
10.1. Regular AC System Inspections
Inspect the AC system at least once a year for signs of leaks, damage, or wear.
10.2. Refrigerant Recharge Recommendations
Recharge the AC system with refrigerant as needed to maintain optimal performance. A loss of cooling efficiency often indicates low refrigerant levels.
10.3. Replacing Worn Components Proactively
Replace worn hoses, belts, and other components before they fail and cause leaks or other problems.
10.4. Keeping the Condenser Clean for Optimal Performance
Clean the condenser regularly to remove dirt, debris, and insects that can restrict airflow and reduce cooling efficiency.
By following these preventative maintenance tips, you can keep your AC system running smoothly and avoid costly repairs.
11. DIY vs. Professional AC Repair: Making the Right Choice
Deciding whether to tackle AC repairs yourself or hire a professional depends on your skill level, tools, and the complexity of the problem.
11.1. Assessing Your Skill Level and Tool Availability
- Basic Tasks: Simple tasks such as visual inspections and cleaning the condenser can be done by most car owners.
- Intermediate Tasks: Tasks such as using UV dye to find leaks or replacing hoses may require some mechanical experience and specialized tools.
- Advanced Tasks: Tasks such as repairing the compressor or evaporator should be left to experienced professionals with the proper training and equipment.
11.2. When to Seek Professional Assistance
- Complex Problems: If you are unsure about the cause of the problem or if the repair is beyond your skill level, seek professional assistance.
- Refrigerant Handling: Refrigerant handling requires specialized equipment and training. It is illegal to vent refrigerant into the atmosphere.
- Warranty Concerns: If your vehicle is still under warranty, having a professional perform the repairs may be required to maintain warranty coverage.
11.3. Benefits of Professional AC Service
- Expertise: Professionals have the knowledge and experience to diagnose and repair AC system problems quickly and accurately.
- Equipment: Professionals have access to specialized tools and equipment needed for AC service.
- Warranty: Professional repairs often come with a warranty, providing peace of mind.
Making the right choice between DIY and professional AC repair can save you time, money, and frustration.
12. Frequently Asked Questions (FAQ) About AC Leaks
12.1. What are the Common Signs of an AC Leak?
Common signs include reduced cooling performance, hissing sounds, oily residue near AC components, and a musty odor inside the car.
12.2. How Often Should I Inspect My Car’s AC System for Leaks?
It is recommended to inspect your car’s AC system at least once a year, preferably before the start of the summer season.
12.3. Can I Use Stop-Leak Products to Fix AC Leaks?
While stop-leak products may temporarily seal small leaks, they are generally not recommended. They can cause clogs and damage to the AC system.
12.4. How Long Does it Take to Find and Repair an AC Leak?
The time required to find and repair an AC leak depends on the complexity of the problem. Simple leaks may take a few hours, while more complex leaks may take a day or two.
12.5. What are the Potential Consequences of Ignoring an AC Leak?
Ignoring an AC leak can lead to reduced cooling performance, compressor damage, and environmental harm due to refrigerant leakage.
12.6. Is it Safe to Drive with an AC Leak?
Driving with an AC leak is generally safe, but it can reduce your comfort and lead to further damage to the AC system.
12.7. What is the Average Cost to Repair an AC Leak?
The average cost to repair an AC leak varies depending on the location and severity of the leak, as well as the cost of parts and labor. It can range from $200 to $1000 or more.
12.8. Can Extreme Weather Conditions Affect AC System Performance?
Yes, extreme weather conditions, such as high temperatures and humidity, can affect AC system performance and increase the likelihood of leaks.
12.9. What Role Does the AC Compressor Play in Preventing Leaks?
A properly functioning AC compressor is essential for maintaining optimal system pressure and preventing leaks.
12.10. Are There Any Specific Car Models Known for AC Leaks?
Some car models are known for having more AC leak issues than others. Research your specific car model to see if there are any common AC problems.
13. CARS.EDU.VN: Your Trusted Partner for Automotive Expertise
At CARS.EDU.VN, we understand the challenges car owners face when it comes to vehicle maintenance and repair. Our mission is to provide you with the knowledge and resources you need to keep your car running smoothly. From detailed guides on AC system maintenance to expert advice on choosing the right car, CARS.EDU.VN is your trusted partner for all things automotive.
13.1. How CARS.EDU.VN Can Help You
- Comprehensive Information: Access a wealth of articles, guides, and videos on various automotive topics.
- Expert Advice: Get expert advice from experienced mechanics and automotive professionals.
- DIY Tutorials: Follow step-by-step tutorials to perform basic maintenance and repairs yourself.
- Service Provider Directory: Find reputable service providers in your area.
13.2. Contact Information
For all your automotive needs, contact us at:
- Address: 456 Auto Drive, Anytown, CA 90210, United States
- WhatsApp: +1 555-123-4567
- Website: CARS.EDU.VN
13.3. Call to Action
Are you struggling to find reliable car repair services? Do you need guidance on routine maintenance? Visit cars.edu.vn today for in-depth information, expert advice, and solutions tailored to your needs. Explore our extensive resources and discover how we can help you keep your car in top condition.