Paint blisters, also known as bubbling paint, can be a frustrating issue for car owners. These unsightly blemishes can detract from your vehicle’s appearance and, if left untreated, can lead to more significant problems like rust and paint damage. Whether you’re dealing with small, raised bubbles or larger, more pronounced blisters, understanding how to properly address them is crucial for maintaining your car’s finish.
This guide will walk you through the process of fixing paint blisters on your car, providing step-by-step instructions and expert tips to achieve a professional-looking repair. We’ll also delve into the causes of paint blisters and how to prevent them from occurring in the first place, ensuring your car’s paint job stays smooth and flawless for years to come.
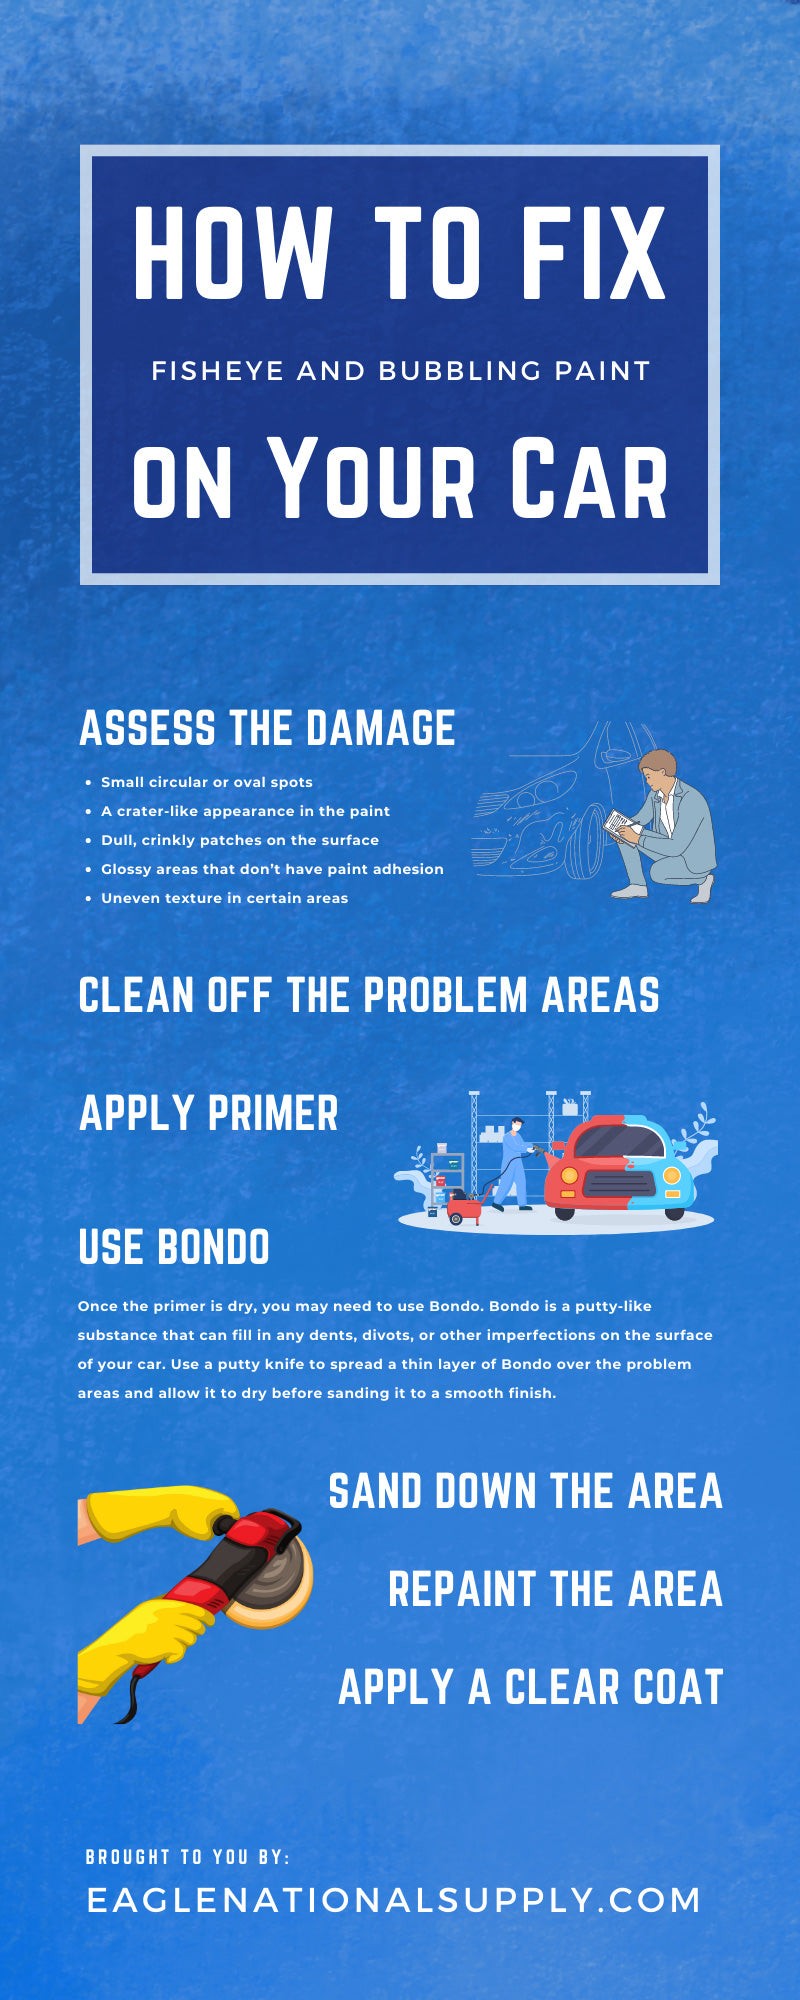
Identifying and Assessing Paint Blisters
Before you begin the repair process, it’s essential to correctly identify paint blisters and assess the extent of the damage. Paint blisters are typically characterized by raised areas on the paint surface that resemble bubbles or blisters under the finish. These can vary in size and distribution, appearing as isolated spots or covering larger areas.
Here’s what to look for when identifying paint blisters:
- Raised Bumps or Bubbles: The most obvious sign is the presence of raised areas on the paint surface. These can range from small, barely noticeable bumps to larger, more prominent blisters.
- Hollow or Air-Filled Feel: Gently pressing on a paint blister may reveal a hollow or air-filled feeling, indicating trapped air or moisture beneath the paint layers.
- Flaking or Cracking Paint: In more advanced cases, paint blisters can lead to flaking or cracking of the paint surface as the underlying pressure increases.
- Discoloration: The area around the blister may exhibit discoloration or a cloudy appearance, further highlighting the defect.
Once you’ve confirmed the presence of paint blisters, assess the severity of the damage. Are they localized to a small area, or are they widespread? Is the paint still intact, or is it already cracking and peeling? This assessment will help you determine the scope of the repair and the materials you’ll need.
Step-by-Step Guide to Fixing Paint Blisters
Repairing paint blisters requires a methodical approach and attention to detail. Follow these steps to effectively fix paint blisters and restore your car’s paint finish:
1. Gather Your Supplies
Before you start, gather all the necessary materials to ensure a smooth and efficient repair process. You will need:
- Safety Gear: Gloves, safety glasses, and a respirator mask to protect yourself from dust and chemicals.
- Cleaning Supplies: Car wash soap, degreaser, wax and grease remover, microfiber cloths.
- Sanding Materials: Sandpaper (various grits: 320, 400, 600, 800, 1000, 1500, 2000), sanding block, tack cloth.
- Body Filler (Bondo): For filling deeper blisters and imperfections.
- Putty Knife or Spreader: For applying body filler.
- Primer: Automotive primer compatible with your car’s paint system.
- Car Paint: Matching your car’s color code (ensure it’s compatible with the primer and clear coat).
- Clear Coat: Automotive clear coat for protection and shine.
- Paint Supplies: Spray gun or aerosol cans (depending on your preference and equipment), masking tape, masking paper or plastic sheeting.
- Rubbing Compound and Polish: For finishing and restoring shine.
2. Prepare the Area
Proper preparation is crucial for a successful paint blister repair.
- Wash and Degrease: Thoroughly wash the affected area and surrounding panels with car wash soap and water to remove dirt and grime. Then, use a degreaser to eliminate any wax, grease, or silicone contaminants that could interfere with paint adhesion. Finally, apply a wax and grease remover for a pristine surface.
- Sand Down the Blisters: Using 320-grit sandpaper and a sanding block, carefully sand down the paint blisters. The goal is to remove the raised areas and feather the edges of the damaged paint. Gradually increase to finer grits (400, 600) to smooth out the sanding marks and create a seamless transition to the surrounding paint. Be careful not to sand too aggressively and damage the surrounding good paint.
 Sanding down paint blisters
3. Apply Body Filler (If Necessary)
If the paint blisters are deep or have created noticeable depressions, you’ll need to use body filler to level the surface.
- Mix Body Filler: Following the manufacturer’s instructions, mix a small amount of body filler with the hardener. Work quickly, as body filler hardens relatively fast.
- Apply Body Filler: Using a putty knife, apply a thin, even layer of body filler over the sanded area. Press firmly to ensure it fills any imperfections and bonds to the surface. Apply in thin layers, building up gradually if needed, to avoid air pockets and ensure proper curing.
- Let it Cure and Sand: Allow the body filler to fully cure according to the manufacturer’s directions. Once hardened, sand it down using progressively finer grits of sandpaper (starting with 320 and moving to 400, then 600) to shape it to the contour of the car panel and blend it seamlessly with the surrounding area. Use a sanding block to maintain a flat and even surface.
4. Primer Application
Primer is essential for providing a stable base for the paint to adhere to and for preventing corrosion.
- Clean and Mask: Thoroughly clean the sanded area with a tack cloth to remove any sanding dust. Mask off the surrounding areas using masking tape and paper or plastic sheeting to protect them from overspray.
- Apply Primer Coats: Apply 2-3 thin, even coats of automotive primer to the repaired area, allowing each coat to flash dry (become slightly tacky) before applying the next. Follow the primer manufacturer’s recommendations for drying times.
- Wet Sand Primer (Optional): Once the primer is fully dry, you can lightly wet sand it with 800-grit sandpaper to further smooth the surface and remove any imperfections before painting. Ensure the surface is completely dry before moving to the next step.
5. Base Coat Application (Car Paint)
Now it’s time to apply the color coat, matching your car’s original paint.
- Clean and Tack: Clean the primed area again with a tack cloth to remove any dust.
- Apply Base Coats: Apply 2-3 thin, even coats of your car’s base coat paint. Use smooth, overlapping strokes and maintain a consistent distance from the surface for even coverage. Allow each coat to flash dry before applying the next. For metallic paints, follow the manufacturer’s recommendations for application technique to ensure proper metallic flake alignment and color match.
6. Clear Coat Application
Clear coat provides protection to the base coat and adds depth and gloss to the finish.
- Apply Clear Coats: Apply 2-3 coats of automotive clear coat, following the same technique as the base coat. Ensure even coverage and allow proper flash time between coats. The final clear coat should be slightly heavier to achieve a smooth, glossy finish, but avoid applying it too thick, which can lead to runs or drips.
7. Wet Sanding, Buffing, and Polishing (Finishing)
After the clear coat is completely dry (allow for the manufacturer’s recommended drying time, often 24-48 hours or more for full curing), you can refine the finish for a professional result.
- Wet Sanding (Optional but Recommended): If there are any minor imperfections, orange peel texture, or dust nibs in the clear coat, you can carefully wet sand with progressively finer grits of sandpaper (starting with 1000, then 1500, and finally 2000). Use plenty of water as lubricant and a sanding block for even pressure.
- Rubbing Compound: Use a rubbing compound with a polishing pad on a rotary or dual-action polisher to remove the sanding scratches and level the clear coat. Work in small sections and follow the compound manufacturer’s instructions.
- Polish: Follow up with a polishing compound and a softer polishing pad to refine the finish, remove any remaining swirl marks from the rubbing compound, and enhance the gloss.
- Wax or Sealant: Apply a high-quality car wax or paint sealant to protect the newly repaired area and enhance the shine.
Preventing Paint Blisters in the Future
Prevention is always better than cure. Here are key steps to prevent paint blisters from forming in the first place:
- Thorough Surface Preparation: Ensure the car’s surface is meticulously cleaned and degreased before any painting. Remove all traces of wax, grease, silicone, and contaminants.
- Proper Sanding: Sand the surface adequately to create proper adhesion for the primer and paint. Follow the correct sanding grit sequence and techniques.
- Use High-Quality Materials: Invest in high-quality automotive paints, primers, and clear coats from reputable brands. Avoid cheap, low-quality products that are more prone to defects.
- Control Environmental Conditions: Paint in a well-ventilated area with moderate temperature and humidity. Avoid painting in direct sunlight, extreme heat, or high humidity, as these conditions can trap moisture and contribute to blistering. Ideal conditions are typically between 60-80°F (15-27°C) and 40-70% humidity.
- Allow Proper Drying Times: Adhere to the paint and clear coat manufacturer’s recommended drying and flash times between coats. Rushing the drying process can trap solvents and moisture, leading to blisters.
- Address Rust Promptly: Rust underneath the paint is a major cause of paint blisters. Address any rust issues thoroughly before repainting to prevent blisters from recurring.
By understanding the causes of paint blisters and following these repair and prevention steps, you can effectively address this common car paint problem and maintain a flawless finish on your vehicle. Remember to take your time, be patient, and prioritize quality materials and proper technique for the best results.