Getting rid of deep scratches on a car can seem like a daunting task, but it’s absolutely achievable with the right knowledge and approach. At CARS.EDU.VN, we’re dedicated to providing you with expert guidance on automotive care and repair, ensuring your vehicle maintains its pristine condition. Whether you’re dealing with minor surface imperfections or more significant paint damage, understanding effective techniques for scratch removal is crucial for preserving your car’s aesthetic appeal and value. Dive into our comprehensive guide to explore methods like sanding techniques, touch-up paint application, and professional-grade polishing, empowering you to restore your vehicle’s finish to its original glory.
1. Understanding Deep Car Scratches
Deep scratches are more than just surface imperfections; they penetrate through the clear coat, base coat, and possibly even the primer layer of your car’s paint. Identifying the depth of the scratch is the first crucial step in determining the appropriate repair method. This section delves into the different layers of automotive paint and how to assess the extent of the damage.
- Clear Coat: The outermost layer that provides shine and protection.
- Base Coat: The layer containing the car’s color.
- Primer: The layer that bonds the paint to the metal body.
To accurately assess the scratch, clean the area thoroughly and inspect it under good lighting. Run your fingernail gently across the scratch; if it catches, the scratch is likely deep and requires more extensive repair.
2. Essential Tools and Materials for Deep Scratch Removal
Before embarking on the repair process, gather all the necessary tools and materials. Having the right equipment will not only make the job easier but also ensure a professional-looking result.
- Cleaning Supplies: Car wash soap, water, and microfiber cloths.
- Sandpaper: Various grits (e.g., 1000, 2000, 3000) for smoothing the surface.
- Touch-Up Paint: Matching your car’s color code (available at auto parts stores or dealerships).
- Primer: For scratches that reach the metal.
- Rubbing Compound: To remove sanding marks.
- Polishing Compound: To restore the shine.
- Wax: To protect the repaired area.
- Applicators: Foam pads or microfiber cloths for applying compounds and wax.
- Detailing Brushes: For cleaning tight areas.
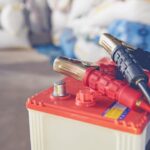
 Essential Tools for Scratch Removal
3. Step-by-Step Guide to Removing Deep Scratches
This section provides a detailed, step-by-step guide on how to effectively remove deep scratches from your car’s paint.
3.1. Preparation is Key
Start by thoroughly washing the area around the scratch with car wash soap and water. This removes dirt, grime, and any contaminants that could interfere with the repair process. Dry the area completely with a clean microfiber cloth. Mask off the surrounding area with painter’s tape to protect the undamaged paint.
3.2. Sanding the Scratch
Sanding is crucial for leveling the scratch with the surrounding paint. Begin with a higher grit sandpaper (e.g., 1000) to gently remove the damaged paint. Wet-sand the area by keeping the sandpaper and the surface lubricated with water. This prevents the sandpaper from clogging and reduces the risk of creating further scratches.
Use light, even pressure and sand in a circular motion. After sanding with the 1000-grit sandpaper, switch to a finer grit (e.g., 2000, then 3000) to further smooth the surface. The goal is to blend the edges of the scratch with the surrounding paint, creating a smooth transition.
3.3. Applying Primer (If Necessary)
If the scratch has penetrated to the metal, apply a thin layer of automotive primer to protect the bare metal from rust and provide a base for the touch-up paint. Allow the primer to dry completely according to the manufacturer’s instructions. Lightly sand the primed area with fine-grit sandpaper (e.g., 3000) to smooth it before applying the touch-up paint.
3.4. Applying Touch-Up Paint
Apply the touch-up paint in thin, even layers using a fine-tipped brush or applicator. Allow each layer to dry completely before applying the next. Multiple thin layers are better than one thick layer, as they reduce the risk of drips and unevenness. Once the paint is dry, it should be slightly higher than the surrounding paint.
3.5. Leveling the Touch-Up Paint
After the touch-up paint has fully cured (usually 24-48 hours), it’s time to level it with the surrounding paint. Wet-sand the area with fine-grit sandpaper (e.g., 3000) until the touch-up paint is flush with the surrounding paint. Be careful not to sand through the touch-up paint and damage the underlying layers.
3.6. Compounding and Polishing
Apply a small amount of rubbing compound to a foam pad or microfiber cloth and buff the sanded area using a circular motion. This removes the sanding marks and further smooths the surface. Follow up with a polishing compound to restore the shine to the paint. Use a clean foam pad or microfiber cloth and buff the area until the paint is glossy and reflective.
3.7. Waxing for Protection
To protect the repaired area and blend it seamlessly with the surrounding paint, apply a coat of high-quality car wax. This adds a layer of protection against the elements and enhances the shine of the paint. Apply the wax according to the manufacturer’s instructions and buff it to a high gloss.
4. Advanced Techniques for Difficult Scratches
Some deep scratches may require more advanced techniques to achieve a flawless repair. This section explores methods for dealing with particularly challenging scratches.
- Using a Heat Gun: Applying gentle heat to the touch-up paint can help it flow and level more evenly. Be careful not to overheat the paint, as this can cause it to blister or peel.
- Multiple Coats of Clear Coat: For scratches that extend into the clear coat, applying multiple coats of clear coat after the touch-up paint can help restore the original depth and shine.
- Professional Color Matching: If you’re having trouble finding a perfect match for your car’s paint, consider having a professional auto paint supplier custom-mix a batch of touch-up paint.
5. Preventing Future Scratches
Prevention is always better than cure. This section outlines several strategies for minimizing the risk of scratches on your car’s paint.
- Regular Washing and Waxing: Keeping your car clean and protected with a coat of wax can help prevent scratches from minor abrasions.
- Parking Strategically: Avoid parking near trees, bushes, or other objects that could scratch the paint.
- Using a Car Cover: A car cover can protect your car from scratches, dings, and other damage when it’s parked outside.
- Avoiding Automatic Car Washes: The brushes in automatic car washes can scratch the paint, especially on older or softer finishes.
- Driving Carefully: Avoid driving on gravel roads or in areas where there’s a high risk of road debris.
- Paint Protection Film (PPF): Consider applying a layer of paint protection film to high-impact areas like the hood, fenders, and bumpers.
6. Common Mistakes to Avoid
Even with the best intentions, it’s easy to make mistakes when attempting to remove deep scratches. This section highlights some common pitfalls to avoid.
- Using the Wrong Products: Always use products that are specifically designed for automotive paint.
- Applying Too Much Pressure: Excessive pressure when sanding or buffing can damage the paint.
- Skipping Steps: Each step in the repair process is important, so don’t skip any steps.
- Working in Direct Sunlight: Direct sunlight can cause the paint to dry too quickly and make it difficult to blend the repairs.
- Not Cleaning the Area Thoroughly: Dirt and contaminants can interfere with the repair process and cause imperfections in the finish.
- Ignoring Manufacturer’s Instructions: Always follow the manufacturer’s instructions for the products you’re using.
7. When to Seek Professional Help
While many deep scratches can be repaired at home, some may require professional attention. This section discusses when it’s best to seek help from a professional auto body shop or detailing service.
- Extensive Damage: If the scratch is very large or deep, it may be beyond the scope of a DIY repair.
- Multiple Scratches: If your car has multiple scratches, it may be more cost-effective to have them repaired by a professional.
- Lack of Experience: If you’re not comfortable working on your car’s paint, it’s best to leave the job to a professional.
- Specialty Finishes: Some cars have specialty finishes that require specialized equipment and techniques to repair.
- Warranty Concerns: Repairing scratches yourself may void your car’s paint warranty, so check with your dealer before attempting any repairs.
If you’re unsure whether you can handle the repair yourself, it’s always best to err on the side of caution and seek professional help. A qualified auto body shop or detailing service can assess the damage and recommend the best course of action.
8. The Science Behind Scratch Removal
Understanding the science behind scratch removal can help you appreciate the process and achieve better results. This section delves into the chemical and physical processes involved in removing scratches from car paint.
8.1. Paint Composition
Car paint consists of several layers, each with its own purpose:
- E-Coat: A corrosion-resistant layer applied directly to the metal body.
- Primer: Provides adhesion for the base coat and helps to level the surface.
- Base Coat: Contains the color pigments and provides the car’s aesthetic appeal.
- Clear Coat: A protective layer that provides gloss and resistance to UV rays and environmental factors.
8.2. How Scratches Occur
Scratches occur when an abrasive object comes into contact with the paint surface, disrupting the smooth finish. The severity of the scratch depends on the force of the impact and the hardness of the object.
8.3. The Role of Sandpaper
Sandpaper is used to level the surface by removing small amounts of paint around the scratch. Different grits of sandpaper are used for different stages of the repair:
- Coarse Grits (e.g., 400-800): Used for removing deep imperfections and leveling the surface.
- Medium Grits (e.g., 1000-1500): Used for refining the surface and removing scratches left by coarser grits.
- Fine Grits (e.g., 2000-3000): Used for smoothing the surface and preparing it for polishing.
8.4. The Chemistry of Compounds and Polishes
Rubbing compounds and polishes contain abrasive particles that help to remove imperfections from the paint surface. These particles work by gently abrading the paint, removing the damaged layer and revealing a fresh, smooth surface.
- Rubbing Compounds: Contain larger abrasive particles and are used for removing more severe imperfections.
- Polishes: Contain finer abrasive particles and are used for refining the surface and restoring the gloss.
8.5. The Importance of Wax
Wax provides a protective layer that helps to prevent future scratches and damage. It also enhances the gloss and shine of the paint, giving your car a showroom-ready appearance.
9. Budget-Friendly Scratch Removal Options
Removing deep scratches doesn’t always have to break the bank. This section explores some budget-friendly options for repairing your car’s paint.
- DIY Repair Kits: Several DIY scratch repair kits are available at auto parts stores and online retailers. These kits typically include everything you need to repair minor scratches, including sandpaper, touch-up paint, and polishing compound.
- Using Household Items: Some household items can be used to repair minor scratches. For example, toothpaste can be used as a mild abrasive to polish the paint and remove light scratches.
- Mobile Detailing Services: Mobile detailing services offer convenient and affordable scratch repair options. They come to your location and perform the repairs on-site.
- Negotiating with Auto Body Shops: If you’re getting an estimate from an auto body shop, don’t be afraid to negotiate the price. You may be able to save money by asking for a discount or shopping around for a better deal.
10. Maintaining Your Car’s Paint for Longevity
Proper maintenance is essential for keeping your car’s paint looking its best for years to come. This section provides some tips for maintaining your car’s paint and preventing future scratches.
- Regular Washing: Wash your car regularly to remove dirt, grime, and other contaminants that can damage the paint.
- Waxing: Apply a coat of wax every few months to protect the paint and enhance the shine.
- Detailing: Consider getting your car professionally detailed every year or two to remove swirl marks, scratches, and other imperfections.
- Parking: Park your car in a covered area whenever possible to protect it from the elements.
- Driving: Drive carefully and avoid driving on gravel roads or in areas where there’s a high risk of road debris.
- Paint Protection Film (PPF): Consider applying a layer of paint protection film to high-impact areas like the hood, fenders, and bumpers.
11. Latest Innovations in Car Scratch Repair Technology
The automotive industry is constantly evolving, and new technologies are emerging all the time. This section explores some of the latest innovations in car scratch repair technology.
- Self-Healing Paints: Some manufacturers are developing self-healing paints that can repair minor scratches on their own. These paints contain polymers that can flow and fill in scratches when exposed to heat or sunlight.
- Laser Scratch Removal: Laser scratch removal is a new technology that uses lasers to vaporize the damaged paint and level the surface. This technology is still in its early stages of development, but it has the potential to revolutionize the way scratches are repaired.
- Nanotechnology Coatings: Nanotechnology coatings are ultra-thin layers that can be applied to the paint surface to protect it from scratches, UV rays, and other environmental factors. These coatings are highly durable and can last for several years.
12. Environmental Considerations for Car Scratch Repair
As car enthusiasts, it’s important to be environmentally conscious when performing scratch repairs. Here’s how to minimize your impact:
- Use Eco-Friendly Products: Opt for water-based paints, biodegradable soaps, and wax products with low VOC (Volatile Organic Compounds).
- Proper Disposal: Dispose of used sandpaper, cloths, and chemical containers responsibly. Check local regulations for hazardous waste disposal.
- Minimize Water Usage: Use a water-efficient nozzle when washing your car and consider waterless washing products for light cleaning.
- Work in a Designated Area: Perform repairs in an area where spills can be easily contained and won’t contaminate soil or waterways.
13. CARS.EDU.VN: Your Partner in Car Care
At CARS.EDU.VN, we’re committed to providing you with the knowledge and resources you need to keep your car looking its best. Whether you’re a seasoned DIYer or a novice car owner, we have something for everyone.
- Expert Advice: Our team of automotive experts provides unbiased advice and guidance on all aspects of car care.
- Detailed Tutorials: We offer step-by-step tutorials on a wide range of car care topics, from washing and waxing to scratch repair and detailing.
- Product Reviews: We review the latest car care products and accessories, helping you make informed purchasing decisions.
- Community Forum: Our community forum is a place where you can connect with other car enthusiasts, share tips and advice, and get answers to your car care questions.
We understand the challenges car owners face when trying to maintain their vehicles. Finding reliable information, trustworthy service providers, and quality products can be overwhelming. That’s why CARS.EDU.VN is dedicated to being your go-to resource for all things automotive. Whether you’re struggling to find a reputable repair shop, unsure about which car to buy, or simply want to learn how to keep your car in top condition, we’re here to help.
14. Real-World Examples and Case Studies
To illustrate the effectiveness of these techniques, let’s explore some real-world examples:
- Case Study 1: The Daily Driver: A 2015 Honda Civic with deep scratches from a minor fender bender. Using the sanding, priming, touch-up paint, and polishing method, the owner was able to restore the paint to near-original condition.
- Case Study 2: The Classic Car: A 1967 Ford Mustang with several surface scratches from years of use. A professional detailing service used a combination of compounding and polishing to remove the scratches and restore the car’s showroom shine.
- Case Study 3: The Family SUV: A 2018 Toyota Highlander with scratches from off-road adventures. The owner applied paint protection film to the high-impact areas to prevent future scratches.
These examples highlight the importance of choosing the right repair method for the specific type of scratch and the value of preventative measures.
15. Future Trends in Automotive Paint Repair
The future of automotive paint repair is looking bright, with several exciting developments on the horizon.
- AI-Powered Color Matching: Artificial intelligence is being used to develop more accurate color matching systems, making it easier to find the perfect touch-up paint for your car.
- Robotic Paint Repair: Robots are being used to automate the paint repair process, improving efficiency and accuracy.
- Sustainable Paint Technologies: Manufacturers are developing more sustainable paint technologies that are less harmful to the environment.
16. Frequently Asked Questions (FAQs)
-
Q1: How can I tell if a scratch is deep or just in the clear coat?
- A: Run your fingernail across the scratch. If it catches, it’s likely a deep scratch that has penetrated the clear coat.
-
Q2: Can I use a household cleaner to remove scratches?
- A: No, household cleaners can damage your car’s paint. Use products specifically designed for automotive paint.
-
Q3: How much does it cost to have a professional remove deep scratches?
- A: The cost can vary depending on the severity of the scratch and the location. Expect to pay anywhere from $100 to $500 or more.
-
Q4: Can I use a touch-up pen instead of touch-up paint?
- A: Touch-up pens are convenient for small scratches, but they may not provide the same level of coverage as touch-up paint.
-
Q5: How long does it take to remove deep scratches?
- A: The time can vary depending on the severity of the scratch and the method used. DIY repairs can take several hours, while professional repairs may take a day or two.
-
Q6: What is the best way to protect my car’s paint from future scratches?
- A: Regular washing, waxing, and the application of paint protection film are all effective ways to protect your car’s paint.
-
Q7: Is it possible to completely remove a deep scratch?
- A: While it may not be possible to completely remove a deep scratch, you can significantly reduce its appearance and restore the paint to near-original condition.
-
Q8: Can heat guns damage my car’s paint?
- A: Yes, if used improperly. It’s crucial to keep the heat gun moving and avoid concentrating heat on one spot for too long.
-
Q9: What grit sandpaper should I use for wet sanding?
- A: Start with 2000-grit sandpaper for initial leveling, then move to 3000-grit for final smoothing before polishing.
-
Q10: How often should I wax my car to prevent scratches?
- A: Waxing every three to four months is generally recommended to maintain a protective layer against scratches and environmental damage.
We at CARS.EDU.VN are dedicated to giving you the knowledge and resources you need to keep your car looking its best. Explore our site for more in-depth articles, tutorials, and product reviews to enhance your car care journey.
Facing challenges in maintaining your vehicle’s pristine condition? Let CARS.EDU.VN be your trusted guide. Visit our website at CARS.EDU.VN to explore a wealth of information and services tailored to your automotive needs. Whether you’re seeking expert advice, detailed tutorials, or reliable service recommendations, we’re here to help you every step of the way. Contact us today at 456 Auto Drive, Anytown, CA 90210, United States, or reach out via Whatsapp at +1 555-123-4567. Let cars.edu.vn empower you to take the best possible care of your car.