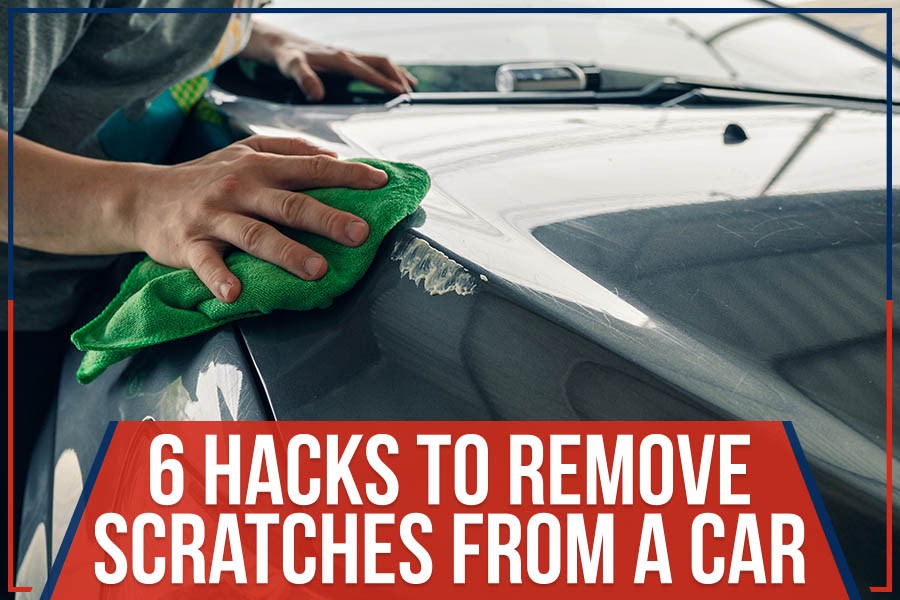
Getting scrapes off your car can be a frustrating experience, but with the right knowledge and tools, you can restore your vehicle’s appearance. At CARS.EDU.VN, we provide comprehensive guides and resources to help you tackle minor auto body repairs effectively, ensuring your car looks its best. Discover expert tips and solutions for paint correction and achieving a showroom shine.
1. Understanding Car Scratches: A Comprehensive Overview
Before diving into the methods of removing car scrapes, it’s crucial to understand the different types of scratches that can occur on your vehicle’s paint. Knowing the depth and severity of the damage will help you choose the most appropriate repair technique.
1.1. Types of Car Scratches
- Clear Coat Scratches: These are the most superficial type of scratches, affecting only the clear coat layer of the paint. They often appear as light swirls or haze on the surface.
- Paint Scratches: These scratches penetrate the clear coat and reach the paint layer. They are more noticeable than clear coat scratches and may require more aggressive methods to remove.
- Primer Scratches: These are deeper scratches that go through the clear coat and paint layers, exposing the primer underneath. They are typically more visible and may require professional repair.
- Base Metal Scratches: The most severe type of scratch, these go through all the paint layers and expose the bare metal of the car’s body. These scratches require immediate attention to prevent rust and corrosion.
1.2. Identifying the Severity of the Scratch
To determine the severity of a scratch, you can use the fingernail test. Gently run your fingernail across the scratch. If your nail catches on the edge of the scratch, it is likely a paint or primer scratch. If your nail glides smoothly over the scratch, it is probably a clear coat scratch.
1.3. Why Addressing Scratches Promptly Matters
Addressing car scratches promptly is essential for several reasons:
- Prevents Rust and Corrosion: Scratches that expose bare metal can lead to rust and corrosion, which can compromise the structural integrity of your vehicle.
- Maintains Vehicle Value: Scratches detract from the appearance of your car and can reduce its resale value.
- Enhances Aesthetic Appeal: Removing scratches can restore the aesthetic appeal of your car, making it look well-maintained and cared for.
 Car scratches on a silver door
2. Essential Tools and Materials for Scratch Removal
Before you start the scratch removal process, it’s important to gather the necessary tools and materials. Having everything on hand will make the job easier and more efficient.
2.1. Cleaning Supplies
- Car Wash Soap: Use a pH-balanced car wash soap to clean the affected area and remove any dirt or debris.
- Microfiber Towels: Soft, lint-free microfiber towels are essential for cleaning, polishing, and buffing.
- Clay Bar: A clay bar can help remove embedded contaminants from the paint surface, leaving it smooth and ready for polishing.
- Detailing Spray: Use detailing spray to lubricate the clay bar and to remove any residue after polishing.
2.2. Scratch Removal Compounds and Polishes
- Scratch Removal Compound: This abrasive compound is designed to remove light to moderate scratches from the clear coat and paint layers.
- Polishing Compound: Use a polishing compound to refine the paint surface after using a scratch removal compound, creating a smooth and glossy finish.
- Finishing Polish: A finishing polish can further enhance the gloss and clarity of the paint, removing any remaining swirl marks or imperfections.
2.3. Application Tools
- Foam Applicator Pads: Use foam applicator pads to apply scratch removal compounds and polishes evenly to the paint surface.
- Dual-Action Polisher: A dual-action polisher can make the scratch removal process faster and more effective, especially for larger areas or deeper scratches.
- Microfiber Buffing Pads: Use microfiber buffing pads with the dual-action polisher to remove compound and polish residue and to achieve a high-gloss finish.
2.4. Protective Gear
- Gloves: Wear gloves to protect your hands from chemicals and abrasive compounds.
- Eye Protection: Use safety glasses or goggles to protect your eyes from splashes and debris.
- Mask: A mask can help prevent you from inhaling harmful fumes from chemicals and compounds.
2.5. Additional Supplies
- Masking Tape: Use masking tape to protect surrounding areas of the car from accidental damage during the scratch removal process.
- Water Spray Bottle: A spray bottle filled with clean water can be used to rinse the area after cleaning and polishing.
- Good Lighting: Proper lighting is essential to see the scratches clearly and to ensure that you are removing them effectively.
3. Simple DIY Methods to Remove Light Scratches
For minor scratches that only affect the clear coat, several DIY methods can be effective. These techniques use common household items and require minimal effort.
3.1. Using Toothpaste
Toothpaste is a mild abrasive that can help buff out light scratches on the clear coat. It works by gently smoothing the edges of the scratch, making it less visible.
3.1.1. Steps for Toothpaste Application:
- Clean the Area: Wash the area around the scratch with car wash soap and water. Rinse thoroughly and dry with a microfiber towel.
- Apply Toothpaste: Apply a small amount of non-gel toothpaste to a clean, damp microfiber towel.
- Rub the Scratch: Gently rub the toothpaste onto the scratch in a circular motion for several minutes.
- Rinse and Dry: Rinse the area with water and dry with a clean microfiber towel.
- Inspect: Check the scratch to see if it has been reduced. Repeat the process if necessary.
3.1.2. Tips for Using Toothpaste:
- Use non-gel toothpaste, as it contains more abrasives.
- Avoid using toothpaste with added whitening agents, as they can be too abrasive.
- Apply gentle pressure to avoid damaging the paint.
3.2. Applying Baking Soda Paste
Baking soda is another mild abrasive that can be used to remove light scratches. When mixed with water, it forms a paste that can gently buff out imperfections on the clear coat.
3.2.1. Steps for Baking Soda Paste Application:
- Prepare the Paste: Mix baking soda with water to form a thick paste.
- Clean the Area: Wash the area around the scratch with car wash soap and water. Rinse thoroughly and dry with a microfiber towel.
- Apply the Paste: Apply the baking soda paste to a clean, damp microfiber towel.
- Rub the Scratch: Gently rub the paste onto the scratch in a circular motion for several minutes.
- Rinse and Dry: Rinse the area with water and dry with a clean microfiber towel.
- Inspect: Check the scratch to see if it has been reduced. Repeat the process if necessary.
3.2.2. Tips for Using Baking Soda Paste:
- Ensure the baking soda is completely dissolved in the water to avoid scratching the paint.
- Apply gentle pressure to avoid damaging the paint.
- Rinse the area thoroughly to remove all traces of baking soda.
3.3. Utilizing Vinegar Solution
Vinegar is a mild acid that can help remove light scratches and swirl marks from the clear coat. It works by gently etching the surface, smoothing out imperfections.
3.3.1. Steps for Vinegar Solution Application:
- Prepare the Solution: Mix equal parts white vinegar and water in a spray bottle.
- Clean the Area: Wash the area around the scratch with car wash soap and water. Rinse thoroughly and dry with a microfiber towel.
- Apply the Solution: Spray the vinegar solution onto a clean microfiber towel.
- Rub the Scratch: Gently rub the towel onto the scratch in a circular motion for several minutes.
- Rinse and Dry: Rinse the area with water and dry with a clean microfiber towel.
- Inspect: Check the scratch to see if it has been reduced. Repeat the process if necessary.
3.3.2. Tips for Using Vinegar Solution:
- Use white vinegar, as it is less likely to stain the paint.
- Avoid using vinegar on waxed surfaces, as it can strip the wax.
- Rinse the area thoroughly to remove all traces of vinegar.
4. Advanced Techniques for Deeper Scratch Removal
For scratches that penetrate the clear coat and reach the paint layer, more advanced techniques are required. These methods involve using specialized products and tools to effectively remove the scratches and restore the paint finish.
4.1. Commercial Scratch Removal Products
Commercial scratch removal products are designed to remove light to moderate scratches from the paint surface. They typically contain mild abrasives that buff out the scratches without damaging the surrounding paint.
4.1.1. Selecting the Right Product
When choosing a scratch removal product, consider the following factors:
- Scratch Severity: Choose a product that is appropriate for the depth and severity of the scratches on your car.
- Paint Type: Select a product that is compatible with your car’s paint type (e.g., clear coat, single-stage).
- User Reviews: Read online reviews to get an idea of the product’s effectiveness and ease of use.
- Brand Reputation: Choose a product from a reputable brand with a track record of producing high-quality car care products.
4.1.2. Steps for Using Scratch Removal Products:
- Clean the Area: Wash the area around the scratch with car wash soap and water. Rinse thoroughly and dry with a microfiber towel.
- Apply the Product: Apply a small amount of the scratch removal product to a foam applicator pad.
- Rub the Scratch: Gently rub the product onto the scratch in a circular motion, applying moderate pressure.
- Buff the Area: Use a clean microfiber towel to buff the area, removing any residue and restoring the shine.
- Inspect: Check the scratch to see if it has been reduced. Repeat the process if necessary.
4.1.3. Tips for Using Scratch Removal Products:
- Follow the manufacturer’s instructions carefully.
- Apply the product in a well-ventilated area.
- Use a light touch to avoid damaging the paint.
- Test the product on an inconspicuous area of the car before applying it to the scratch.
4.2. Using a Dual-Action Polisher
A dual-action polisher is a power tool that can make the scratch removal process faster and more effective. It uses a rotating and oscillating motion to gently buff the paint surface, removing scratches and swirl marks.
4.2.1. Benefits of Using a Dual-Action Polisher:
- Efficiency: A dual-action polisher can cover larger areas quickly and efficiently.
- Effectiveness: The oscillating motion of the polisher ensures even and consistent scratch removal.
- Safety: Dual-action polishers are less likely to damage the paint compared to rotary polishers.
- Versatility: Dual-action polishers can be used for a variety of paint correction tasks, including scratch removal, swirl mark removal, and polishing.
4.2.2. Steps for Using a Dual-Action Polisher:
- Clean the Area: Wash the area around the scratch with car wash soap and water. Rinse thoroughly and dry with a microfiber towel.
- Apply Compound: Apply a small amount of scratch removal compound to a polishing pad.
- Polish the Area: Use the dual-action polisher to polish the area around the scratch, applying moderate pressure and overlapping each pass.
- Refine the Finish: Switch to a polishing pad and apply a polishing compound to refine the paint surface.
- Buff the Area: Use a clean microfiber towel to buff the area, removing any residue and restoring the shine.
- Inspect: Check the scratch to see if it has been reduced. Repeat the process if necessary.
4.2.3. Tips for Using a Dual-Action Polisher:
- Start with the lowest speed setting and gradually increase as needed.
- Keep the polisher moving at all times to avoid overheating the paint.
- Use a light touch and avoid applying too much pressure.
- Clean the polishing pads regularly to remove accumulated compound and residue.
4.3. Wet Sanding Technique
Wet sanding is an advanced technique that involves using sandpaper lubricated with water to remove deeper scratches and imperfections from the paint surface. It is typically used as a last resort when other methods have failed.
4.3.1. Safety Precautions for Wet Sanding:
- Wear Gloves: Wear gloves to protect your hands from chemicals and abrasive compounds.
- Use Eye Protection: Use safety glasses or goggles to protect your eyes from splashes and debris.
- Work in a Well-Ventilated Area: Wet sanding can produce dust and fumes, so it is important to work in a well-ventilated area.
4.3.2. Steps for Wet Sanding:
- Clean the Area: Wash the area around the scratch with car wash soap and water. Rinse thoroughly and dry with a microfiber towel.
- Prepare Sandpaper: Soak a sheet of fine-grit sandpaper (e.g., 2000-grit or 3000-grit) in water for several minutes.
- Sand the Scratch: Gently sand the scratch with the wet sandpaper, using a back-and-forth motion and applying light pressure.
- Rinse the Area: Rinse the area with water to remove any sanding residue.
- Inspect: Check the scratch to see if it has been reduced. Repeat the process if necessary.
- Polish the Area: Use a dual-action polisher and polishing compound to remove any sanding marks and restore the shine.
- Buff the Area: Use a clean microfiber towel to buff the area, removing any residue and restoring the shine.
4.3.3. Tips for Wet Sanding:
- Use the finest grit sandpaper possible to minimize the risk of damage.
- Keep the sandpaper and paint surface well-lubricated with water.
- Apply light pressure and avoid sanding too aggressively.
- Regularly inspect the area to ensure that you are not removing too much paint.
- If you are not comfortable with wet sanding, it is best to leave it to a professional.
5. Professional Scratch Repair Services
For deep scratches that penetrate the primer or expose bare metal, professional scratch repair services are often the best option. Professional technicians have the expertise, tools, and materials to effectively repair the damage and restore the paint finish to its original condition.
5.1. Benefits of Professional Scratch Repair:
- Expertise: Professional technicians have the knowledge and experience to accurately assess the damage and choose the most appropriate repair technique.
- Quality Materials: Professional shops use high-quality paints, compounds, and clear coats that are designed to match the original factory finish.
- Specialized Tools: Professional shops have access to specialized tools and equipment that are not available to the general public.
- Warranty: Many professional shops offer a warranty on their work, providing peace of mind in case the repair fails.
5.2. When to Seek Professional Help:
- Deep Scratches: Scratches that penetrate the primer or expose bare metal should be repaired by a professional to prevent rust and corrosion.
- Large Areas: Scratches that cover a large area of the car’s body may require professional repair to ensure a uniform and seamless finish.
- Complex Paint Finishes: Cars with complex paint finishes, such as metallic or pearl paints, may require professional repair to match the color and texture accurately.
- Lack of Experience: If you are not comfortable with DIY scratch repair methods, it is best to seek professional help to avoid damaging the paint.
5.3. Choosing a Reputable Repair Shop:
When choosing a professional scratch repair shop, consider the following factors:
- Reputation: Look for a shop with a good reputation and positive customer reviews.
- Experience: Choose a shop with experienced technicians who have a proven track record of quality work.
- Certifications: Check if the shop is certified by industry organizations, such as I-CAR or ASE.
- Warranty: Ask about the shop’s warranty policy and what it covers.
- Estimates: Get estimates from multiple shops and compare prices and services.
6. Cost-Effective Solutions for Minor Paint Imperfections
Addressing minor paint imperfections doesn’t always require expensive professional services. Several cost-effective solutions can help restore your car’s appearance without breaking the bank.
6.1. Touch-Up Paint Pens
Touch-up paint pens are an excellent solution for small chips and scratches. They allow you to apply a precise amount of paint to the affected area, blending it seamlessly with the surrounding paint.
6.1.1. Steps for Using Touch-Up Paint Pens:
- Clean the Area: Clean the area around the chip or scratch with car wash soap and water. Rinse thoroughly and dry with a microfiber towel.
- Prime the Area: If the chip or scratch exposes bare metal, apply a thin coat of automotive primer to prevent rust.
- Apply Touch-Up Paint: Shake the touch-up paint pen thoroughly and apply a thin coat of paint to the chip or scratch.
- Allow to Dry: Allow the paint to dry completely, following the manufacturer’s instructions.
- Apply Clear Coat: Apply a thin coat of clear coat over the touch-up paint to protect it and blend it with the surrounding paint.
- Buff the Area: Use a clean microfiber towel to buff the area, removing any imperfections and restoring the shine.
6.1.2. Tips for Using Touch-Up Paint Pens:
- Use the correct color match for your car’s paint.
- Apply thin coats of paint to avoid drips and runs.
- Allow each coat of paint to dry completely before applying the next.
- Use a toothpick or fine brush to apply paint to small or intricate areas.
6.2. Color-Matched Wraps
Color-matched wraps are a cost-effective way to cover larger scratches or imperfections on your car’s body. They are made from vinyl and can be custom-printed to match your car’s paint color.
6.2.1. Benefits of Using Color-Matched Wraps:
- Cost-Effective: Color-matched wraps are typically less expensive than professional paint repairs.
- Easy Installation: Wraps can be easily installed by a professional or by yourself with the right tools and instructions.
- Protection: Wraps provide a protective layer over the paint, preventing further damage from scratches, UV rays, and other environmental factors.
- Customization: Wraps can be customized with different colors, designs, and finishes.
6.2.2. Steps for Installing Color-Matched Wraps:
- Clean the Area: Clean the area where the wrap will be applied with car wash soap and water. Rinse thoroughly and dry with a microfiber towel.
- Prepare the Wrap: Cut the wrap to the desired size and shape, leaving some extra material around the edges.
- Apply the Wrap: Peel off the backing from the wrap and carefully apply it to the surface, starting from one edge and working your way to the other.
- Smooth the Wrap: Use a squeegee to smooth out any wrinkles or bubbles in the wrap.
- Trim the Edges: Use a sharp knife or razor blade to trim the excess material around the edges of the wrap.
- Heat the Wrap: Use a heat gun or hair dryer to heat the wrap, making it more pliable and allowing it to conform to the shape of the car’s body.
- Seal the Edges: Use a sealant to seal the edges of the wrap, preventing water and dirt from getting underneath.
6.2.3. Tips for Using Color-Matched Wraps:
- Choose a high-quality wrap from a reputable brand.
- Follow the manufacturer’s instructions carefully.
- Work in a clean and dust-free environment.
- Use a heat gun or hair dryer to make the wrap more pliable.
- Seal the edges of the wrap to prevent water and dirt from getting underneath.
6.3. Bumper Repair Kits
Bumper repair kits are designed to fix scratches, dents, and cracks on your car’s bumper. They typically include fillers, sandpaper, and paint that match your car’s bumper color.
6.3.1. Steps for Using Bumper Repair Kits:
- Clean the Area: Clean the area around the damage with car wash soap and water. Rinse thoroughly and dry with a microfiber towel.
- Sand the Area: Use sandpaper to smooth out the edges of the damage and remove any loose material.
- Apply Filler: Apply the filler to the damage, filling in any dents or cracks.
- Sand the Filler: Use sandpaper to smooth out the filler and blend it with the surrounding bumper.
- Prime the Area: Apply a thin coat of automotive primer to the area.
- Paint the Area: Apply a thin coat of paint that matches your car’s bumper color.
- Allow to Dry: Allow the paint to dry completely, following the manufacturer’s instructions.
- Apply Clear Coat: Apply a thin coat of clear coat over the paint to protect it and blend it with the surrounding bumper.
- Buff the Area: Use a clean microfiber towel to buff the area, removing any imperfections and restoring the shine.
6.3.2. Tips for Using Bumper Repair Kits:
- Use the correct color match for your car’s bumper.
- Apply thin coats of filler and paint to avoid drips and runs.
- Allow each coat of filler and paint to dry completely before applying the next.
- Use a sanding block to ensure a smooth and even finish.
7. Preventative Measures to Minimize Car Scratches
Preventing car scratches is always better than trying to fix them. By taking a few simple precautions, you can minimize the risk of scratches and keep your car looking its best.
7.1. Regular Car Washing
Regular car washing is essential to remove dirt, debris, and contaminants that can scratch the paint. Wash your car at least once a week, or more often if it is exposed to harsh conditions.
7.1.1. Tips for Washing Your Car:
- Use a pH-balanced car wash soap.
- Use a soft sponge or microfiber wash mitt.
- Rinse the car thoroughly with clean water.
- Dry the car with a clean microfiber towel.
- Avoid washing the car in direct sunlight.
7.2. Applying Car Wax
Car wax provides a protective layer over the paint, shielding it from scratches, UV rays, and other environmental factors. Apply car wax every few months to maintain the protection.
7.2.1. Types of Car Wax:
- Carnauba Wax: This is a natural wax that provides a warm, glossy shine.
- Synthetic Wax: This is a man-made wax that provides long-lasting protection and durability.
- Hybrid Wax: This is a combination of carnauba and synthetic waxes that offers the best of both worlds.
7.2.2. Steps for Applying Car Wax:
- Wash the Car: Wash the car with car wash soap and water. Rinse thoroughly and dry with a microfiber towel.
- Apply Wax: Apply a thin, even coat of wax to the car’s paint, using a foam applicator pad.
- Allow to Dry: Allow the wax to dry completely, following the manufacturer’s instructions.
- Buff the Car: Use a clean microfiber towel to buff the car, removing any wax residue and restoring the shine.
7.3. Using Car Covers
Car covers provide a physical barrier between the car’s paint and the elements, protecting it from scratches, UV rays, and other environmental factors. Use a car cover when parking your car outdoors for extended periods.
7.3.1. Types of Car Covers:
- Indoor Car Covers: These are lightweight covers that are designed to protect the car from dust and scratches when parked indoors.
- Outdoor Car Covers: These are heavier-duty covers that are designed to protect the car from the elements when parked outdoors.
- Custom-Fit Car Covers: These are covers that are custom-made to fit your specific car model.
7.3.2. Tips for Using Car Covers:
- Choose a car cover that is made from breathable material to prevent moisture buildup.
- Make sure the car cover is clean and free of debris before putting it on the car.
- Secure the car cover properly to prevent it from blowing away in the wind.
- Remove the car cover regularly to allow the paint to breathe.
7.4. Parking Smart
Parking smart can help minimize the risk of scratches and dents to your car. Choose parking spots that are away from other cars, shopping carts, and potential hazards.
7.4.1. Tips for Parking Smart:
- Park in well-lit areas to deter vandalism.
- Avoid parking under trees that may drop sap or debris.
- Park away from busy areas to reduce the risk of collisions.
- Use parking sensors and cameras to help avoid obstacles.
- Be mindful of the size of your car and the space available in the parking spot.
8. What To Do After Removing Scratches
After successfully removing scratches from your car, taking the right steps to protect and maintain the repaired areas is essential. Here’s how to ensure a long-lasting and flawless finish.
8.1. Applying Sealant or Wax
One of the most crucial steps after scratch removal is applying a high-quality sealant or wax. This protective layer shields the newly repaired paint from environmental contaminants, UV rays, and further minor scratches.
8.1.1. Benefits of Sealant and Wax
- UV Protection: Prevents fading and oxidation caused by the sun.
- Water Repellency: Creates a hydrophobic surface that repels water, reducing water spots.
- Enhanced Shine: Adds depth and gloss to the paint, making it look vibrant and new.
- Contaminant Barrier: Protects against dirt, bird droppings, and other pollutants.
8.1.2. How to Apply
- Clean the Surface: Ensure the area is clean and dry. Use a microfiber cloth to remove any residue.
- Apply Sealant/Wax: Use a foam applicator pad to apply a thin, even layer of sealant or wax.
- Cure Time: Allow the product to cure according to the manufacturer’s instructions (usually 15-30 minutes).
- Buff Off: Use a clean, soft microfiber cloth to buff off the excess, revealing a glossy finish.
8.2. Inspecting for Imperfections
After applying sealant or wax, take a close look at the repaired area under different lighting conditions. This will help you identify any remaining imperfections or areas that need additional attention.
8.2.1. What to Look For
- Swirl Marks: Circular scratches caused by improper polishing techniques.
- Holograms: Faint, rainbow-like patterns that appear under certain lighting.
- Uneven Texture: Areas where the paint doesn’t blend seamlessly with the surrounding surface.
8.2.2. Corrective Measures
- For Swirl Marks and Holograms: Use a fine polishing compound with a dual-action polisher to refine the finish.
- For Uneven Texture: Consider wet sanding with very fine-grit sandpaper (3000-grit or higher) followed by polishing.
8.3. Regular Maintenance
Maintaining your car’s paint after scratch removal requires ongoing care. Regular washing, waxing, and prompt attention to new imperfections will keep your car looking its best.
8.3.1. Maintenance Tips
- Wash Regularly: Wash your car every 1-2 weeks using a pH-neutral car wash soap.
- Wax Every 3-6 Months: Reapply wax or sealant to maintain the protective layer.
- Address New Scratches Promptly: The sooner you address new scratches, the easier they are to fix.
9. Innovations in Car Scratch Repair Technology
The field of car scratch repair is continually evolving, with new technologies and products emerging to make the process more efficient and effective. Staying informed about these innovations can help you make the best choices for maintaining your vehicle’s appearance.
9.1. Self-Healing Paints
Self-healing paints are a revolutionary technology that allows minor scratches to disappear over time. These paints contain polymers that can reflow and reform when exposed to heat, effectively erasing surface imperfections.
9.1.1. How It Works
- Polymer Structure: Self-healing paints contain special polymers that are flexible and elastic.
- Heat Activation: When the paint surface is scratched, applying heat (from sunlight or a heat gun) causes the polymers to reflow.
- Scratch Repair: The reflowing polymers fill in the scratch, restoring the smooth surface.
9.1.2. Benefits
- Reduced Maintenance: Fewer trips to the body shop for minor scratches.
- Enhanced Appearance: Keeps the car looking newer for longer.
- Cost Savings: Minimizes the need for frequent scratch repair services.
9.2. Nano Coatings
Nano coatings are ultra-thin, transparent layers that provide exceptional protection against scratches, UV rays, and chemical contaminants. These coatings create a durable barrier that enhances the longevity of your car’s paint.
9.2.1. Key Features
- Scratch Resistance: Nano coatings form a hard, protective layer that resists scratches and swirl marks.
- Hydrophobic Properties: Repels water and dirt, making the car easier to clean.
- UV Protection: Shields the paint from fading and oxidation caused by the sun.
- Chemical Resistance: Protects against damage from acid rain, bird droppings, and other contaminants.
9.2.2. Application Process
- Surface Preparation: Thoroughly clean and decontaminate the paint surface.
- Coating Application: Apply the nano coating using a microfiber applicator pad.
- Curing Time: Allow the coating to cure according to the manufacturer’s instructions.
- Buffing: Use a soft microfiber cloth to buff the surface, revealing a glossy, protected finish.
9.3. Advanced Polishing Compounds
New polishing compounds are formulated with advanced abrasives and lubricants to provide superior scratch removal and paint correction. These compounds work quickly and efficiently, minimizing the risk of damage to the paint surface.
9.3.1. Types of Advanced Polishing Compounds
- Ceramic-Infused Compounds: Contain ceramic particles for enhanced scratch removal and durability.
- Micro-Abrasive Compounds: Use extremely fine abrasives to refine the paint surface without causing swirl marks.
- Self-Adjusting Compounds: Adapt to the paint’s condition, providing optimal cutting and polishing action.
9.3.2. Benefits
- Faster Scratch Removal: Reduces the time and effort required for paint correction.
- Improved Finish: Leaves the paint looking smoother and more glossy.
- Reduced Risk of Damage: Minimizes the chance of swirl marks and holograms.
10. FAQ: Addressing Your Car Scratch Concerns
10.1. Can I use any type of toothpaste to remove car scratches?
No, it’s best to use non-gel toothpaste without whitening agents, as these can be too abrasive.
10.2. How do I know if a scratch is too deep to fix myself?
If your fingernail catches on the edge of the scratch, it’s likely a paint or primer scratch that may require professional repair.
10.3. What is the best way to protect my car from future scratches?
Regular washing, waxing, and using a car cover can help protect your car from future scratches.
10.4. Can I use a household cleaner to remove scratches?
No, household cleaners can damage your car’s paint. Use specialized car care products for best results.
10.5. How often should I wax my car?
Wax your car every 3-6 months to maintain a protective layer and keep the paint looking its best.
10.6. Is it safe to use a dual-action polisher on my car?
Yes, dual-action polishers are generally safe to use if you follow the instructions carefully and use the correct pads and compounds.
10.7. What is wet sanding, and when should I use it?
Wet sanding is an advanced technique for removing deeper scratches using sandpaper lubricated with water. It should be used as a last resort when other methods have failed.
10.8. How much does it cost to have a professional repair car scratches?
The cost of professional scratch repair varies depending on the severity of the damage and the type of car. Get estimates from multiple shops to compare prices and services.
10.9. Can color-matched wraps really hide scratches effectively?
Yes, color-matched wraps can effectively hide scratches and imperfections on your car’s body, providing a cost-effective alternative to professional paint repairs.
10.10. What are self-healing paints, and are they worth the investment?
Self-healing paints contain polymers that can reflow and reform when exposed to heat, effectively erasing minor scratches. While they may be more expensive upfront, they can save you money on future repairs.
At CARS.EDU.VN, we understand the frustration of dealing with car scratches and the importance of maintaining your vehicle’s appearance. Whether you’re looking for DIY solutions or professional repair services, we’re here to provide the information and resources you need.
Ready to restore your car’s shine? Visit CARS.EDU.VN today for more expert tips, detailed guides, and trusted service recommendations. Our comprehensive resources will help you find the best solutions for your specific needs, ensuring your car always looks its best. Contact us at 456 Auto Drive, Anytown, CA 90210, United States, or reach out via Whatsapp at +1 555-123-4567. Let cars.edu.vn be your go-to source for all things automotive!