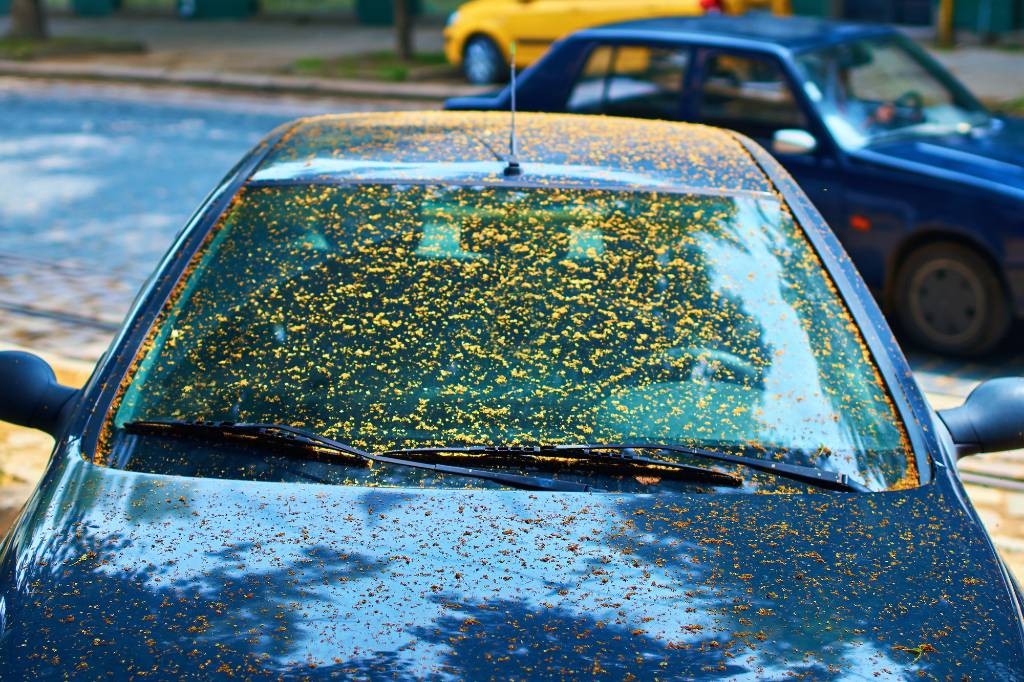
Parking under trees offers welcome shade, especially during hot summer months. However, this convenience can come at a sticky price – tree sap. This seemingly harmless substance can be a nightmare for your car’s paint, potentially causing lasting damage if not addressed promptly. Tree sap, particularly during spring, drips from branches and adheres to your vehicle, becoming a stubborn contaminant that’s more than just an eyesore.
If your car becomes a victim of tree sap, you’re not alone. This sticky resin is notoriously difficult to remove and can quickly harm your car’s paint and windows. Hardened tree sap can compromise the clarity of your windows and, more seriously, degrade your car’s paint finish. Fortunately, removing tree sap at home is achievable with the right methods and a little elbow grease. This comprehensive guide provides a step-by-step process to effectively clean tree sap off your car, ensuring you prevent damage and maintain your vehicle’s pristine condition. Let’s dive in and learn how to tackle this sticky situation head-on.
Why Immediate Tree Sap Removal is Crucial
Tree sap is just as detrimental to your car’s finish as bug splatter or bird droppings. It’s not merely a cosmetic issue; tree sap can actively damage your car’s paint and even affect components like windshield wipers. John Ibbotson, the chief mechanic at Consumer Reports Auto Test Center, emphasizes the urgency, stating, “Get the sap off as soon as possible because it will eventually eat through the paint, especially as the days warm up.”
Heat exacerbates the problem, accelerating the sap’s bonding to your car paint. This is why immediate action is essential. Regular car checks for tree sap, followed by prompt cleaning, are the most effective strategies. Don’t wait for the sap to bake onto your car’s surface; tackle it as soon as you notice it to prevent potential long-term damage.
Step-by-Step Guide: How to Clean Tree Sap off Your Car
Removing tree sap is straightforward if you act quickly and prevent it from hardening onto your car’s paint. Gather these essential supplies to get started:
- Warm water
- High-quality car wash soap
- Soft microfiber towels
- Isopropyl alcohol for stubborn sap
- Professional tree sap removal product for tougher stains
Follow these steps to effectively remove tree sap stains:
- Begin with a thorough car wash to clean the general surface.
- Gently rub the sap stain with warm, soapy water and a microfiber towel.
- If necessary, use a specialized sap remover, starting with the least aggressive chemical solutions.
- Wash your car again to remove any cleaning product residue.
- Protect your paint by applying car wax or polish to reinforce the clear coat.
This process, when followed carefully, will help restore your car’s paintwork to its original condition. Continue reading for a more detailed breakdown of each step in tree sap removal.
1. Start with a Comprehensive Car Wash
Washing your car is the crucial first step before you target the sap stains. A good wash with soap and water not only cleans the surface but also isolates the tree sap, making it more visible and preparing the area for effective treatment.
When washing, always pre-wet your car before applying soap. This prevents dirt, grime, and sap from being ground deeper into the paint, which could cause scratches. Pre-wetting helps lift surface contaminants, reducing the risk of swirl marks during the wash process.
2. Address Sap Spots with Gentle Rubbing
After washing, the sap spots should be easier to identify. Focus on the hardened, sticky, or discolored spots, as these will require more attention. It’s important to proceed to the next step quickly to prevent the sap from drying further and embedding itself into the paint.
For each sap spot, gently but firmly rub with a microfiber towel soaked in warm, soapy water. For fresh sap that hasn’t yet hardened, this may be sufficient for complete removal. If the sap proves stubborn, apply a small amount of isopropyl alcohol to the spot. Allow it to sit for about 30 seconds to break down the sap, then wipe it away with a clean microfiber towel. Repeat this process as necessary until the stain is completely removed.
If the stain persists, consider using a dedicated sap and tar remover. Apply it lightly and scrub gently. Avoid excessive scrubbing, which can damage your car’s paint. If gentle scrubbing doesn’t work, repeat the process with slightly stronger chemical solutions, as discussed later in this guide.
3. Removing Tree Sap from Your Windshield
Tree sap on your windshield or other car windows requires a similar approach. Begin by washing the entire glass area with soap and water. After washing, apply rubbing alcohol to the sap spots. Let the alcohol sit for approximately thirty seconds to dissolve the sap. Wipe clean with a microfiber towel and repeat until all sap is removed.
For stubborn sap that has been on the windshield for an extended period, you might need to use a detailing razor blade to carefully scrape it off. A 2-in-1 scraper tool, which includes both metal and plastic blades, is recommended. The plastic blade offers a safer option to prevent scratching the glass. Always be gentle and patient when using a razor blade to avoid injury or damage to your vehicle.
After removing the sap, clean your windshield with a high-quality automotive glass cleaner to eliminate any residue and ensure streak-free clarity.
Dealing with Extra Stubborn Tree Sap
If you live in an area with many trees, you might encounter particularly sticky sap, often from maple or evergreen trees, which is more challenging to remove. For these tougher cases, here are some enhanced strategies:
For a DIY approach, start with acetone-based nail polish remover. Apply a small amount to a cotton ball and gently rub the sap stain in a circular motion until it lifts. Act quickly, as prolonged acetone contact is not recommended for car paint. Alternatively, rubbing alcohol or a paste of baking soda and water can also help loosen stubborn sap. After using any of these methods, thoroughly wash the treated area to remove any residue.
For professional-grade cleaning, use a specialized sap removal product. Simply spray the product onto the affected area and wipe it clean with a microfiber towel. Always follow up with a car wash to remove any chemical residue from the product, ensuring it doesn’t remain on your car longer than necessary.
To finalize the cleaning process, consider applying a coat of car wax. Waxing reinforces the clear coat and adds a protective layer, guarding against future contaminants and maintaining your car’s shine. If the paint has been damaged, touch-up paint can be used to cover specific areas.
Protecting Your Car Paint After Using Harsh Chemicals
Chemical treatments for sap removal can sometimes strip away the clear coat, leaving your car paint vulnerable. To protect and restore your paint’s integrity, polishing and waxing are essential steps.
1. Polishing Your Car
Polishing corrects minor imperfections and restores shine to your car paint, especially after using strong chemicals. It helps to eliminate any swirl marks or minor scratches and revives faded paint areas.
Hand Polishing:
- Choose a quality car polish.
- Wash and dry your car in a shaded area.
- Apply a small amount of polish to a microfiber pad.
- Work the polish into a small section of your car using circular motions.
- Buff off the excess polish with a clean, dry microfiber cloth.
Machine Polishing:
- Apply a small dab of polish to the machine buffer pad.
- Spread the polish on the car panel before turning on the buffer.
- Move the buffer slowly and steadily in overlapping strokes (left to right, then up and down).
- Start with a low speed and gradually increase, staying within lower speed settings to avoid paint damage.
- Remove excess polish with a microfiber cloth as it starts to dry.
2. Waxing Your Car
Car wax adds a protective layer to your paint, which is particularly important after tree sap removal. Wax can also minimize light swirl marks and enhance your car’s shine.
Hand Waxing:
- Select a high-quality car wax.
- Ensure your car is washed and completely dry.
- Apply a small amount of wax to an applicator pad.
- Apply the wax to small sections using circular motions.
- Buff off the wax with a microfiber towel using moderate pressure.
Machine Waxing:
- Wash and dry your car thoroughly.
- Apply wax to the buffing pad and dab it across the panel you’re working on.
- Turn on the buffer and gently move it across the panel.
- Wipe away any excess wax with a microfiber towel.
Best Products for Removing Tree Sap from Your Car
Choosing the right product is crucial for effective tree sap removal. Options range from store-bought cleaners to DIY solutions, depending on the severity of the sap and your preferences.
Store-Bought Tree Sap Removal Products
Bug + Tar Remover Car Wash Soap: This heavy-duty soap is designed to tackle bugs, sap, and tar. Effective for light sap, it may struggle with older, more hardened stains.
Stoner Car Care Tar, Sap, and Asphalt Remover: This remover is designed for moderate sap levels, dissolving stains layer by layer. Apply, let it work, and gently rub with a microfiber towel.
Armor All Extreme Bug & Tar Remover: A powerful option for tough stains from bugs, tar, and tree sap. Spray on, wait a minute, and wipe off. Its aggressive formula requires minimal effort.
DIY Tree Sap Removal Products
Nail Polish Remover (Acetone-Based): Acetone is a strong solvent that can dissolve sap quickly. Use sparingly and for short durations (under 15 minutes) to avoid paint damage. Apply with a microfiber cloth, then wash the area thoroughly.
Rubbing Alcohol or Mineral Spirits: Rubbing alcohol effectively dissolves sap. Apply to the stain, let it dissolve, and wipe clean. Always wash the area afterward to prevent potential paint damage from prolonged alcohol exposure.
Baking Soda Paste: A mixture of baking soda and hot water can help remove sap. For extra strength, add a few drops of acetone-based nail polish remover. Apply the paste, then wipe clean with a damp cloth.
When to Call a Professional
If DIY methods fail or you lack the time or materials, hiring a professional detailing service is a wise choice. Professionals have the expertise and products to safely and effectively remove even the most stubborn tree sap, preventing potential damage to your car’s finish.
FAQs About Tree Sap and Car Paint
How Do You Get Sap off Your Car Without Ruining the Paint?
Timing is key. Most sap removal products are safe if used promptly and correctly. Always wash your car after using any sap remover and consider applying wax to reinforce the clear coat.
Does Sap Ruin Car Paint?
Yes, sap can damage car paint. As it hardens, it can etch into the clear coat, leading to stains and discoloration. The hardening process can also stress the paint finish, potentially causing paint to come off when the sap is removed.
Will Acetone Affect My Car Paint?
Acetone is a strong solvent and can damage car paint if not used carefully. Use it sparingly, apply it directly to the sap, and immediately wash the area with soap and water to minimize contact time with the paint. Waxing afterward is recommended to protect the clear coat.
This article was originally published on September 29, 2021, and updated on November 2, 2022.