Eighth-grade science projects can be surprisingly challenging, even for parents! When our twins brought home the assignment to build a mousetrap car that could travel over 4 meters, we thought, “How hard can it be?” Turns out, harder than expected! We dove into research, watching countless YouTube videos and reading online tutorials to figure it out. After some initial frustration and a few design fails, we finally built a mousetrap car that not only worked but exceeded the project requirements, traveling over 6 meters!
This guide shares our experience and step-by-step instructions to help you build a successful mousetrap car for science class. Keep in mind, I’m not a science teacher, just a parent sharing what worked for us. If you have tips to improve our design, please share them in the comments – we’re all learning together!
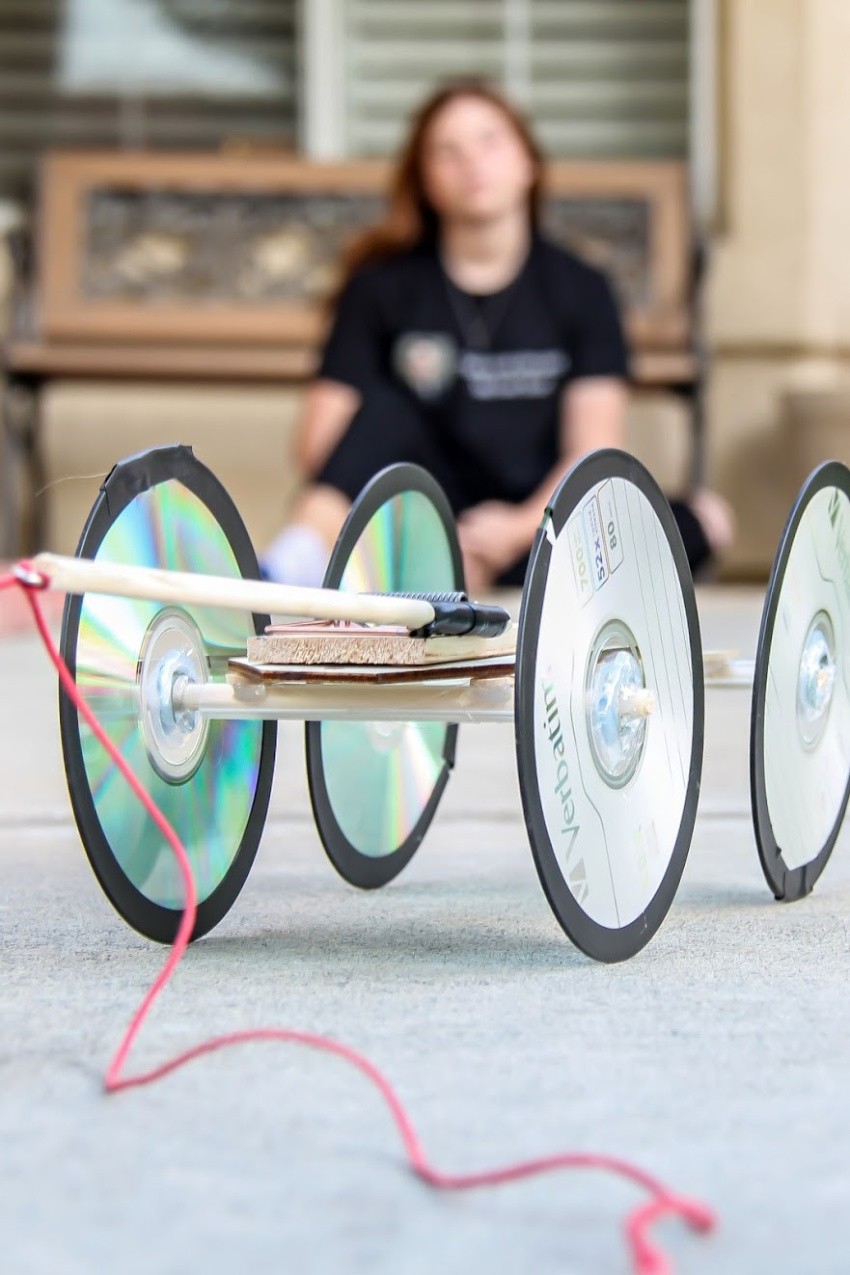
Our first attempt was… well, let’s just say it mostly spun in circles. The teacher suggested larger wheels, and that was a game-changer. We initially tried using recycled bottle caps for wheels, aiming for eco-friendliness. However, switching to blank CDs and DVDs, along with a redesigned approach, led to a car that traveled 4 meters on the first try and then an impressive 6 meters (crashing into the door for good measure!). Let’s get into what we learned and how you can build your own successful mousetrap car.
Building a Better Mousetrap Car: What We Learned
Through trial and error, we discovered some key factors that significantly impact mousetrap car performance. Here’s what we learned not to do, which is just as important as knowing what to do:
Common Mousetrap Car Mistakes to Avoid
- Don’t make it too light: Counterintuitively, a super light car is prone to flipping or losing traction. Adding some weight (like extra wood or washers) provides stability.
- Avoid short car frames: A longer car frame with a longer lever arm allows for more string to be pulled from the axle, resulting in greater travel distance.
- Bottle cap wheels are unreliable: We experimented with bottle caps and milk jug wheels, but they consistently failed. They seemed to lack grip and didn’t rotate smoothly.
Let’s dive into the successful design changes and the materials you’ll need to build a mousetrap car that goes the distance.
Mousetrap Car Supplies List
Here’s everything you’ll need to build our successful mousetrap car design:
- Mousetrap: The standard snap-style mousetrap is perfect.
- Wood rectangle (Plywood): Provides a sturdy base for your car.
- Popsicle sticks: For reinforcing and adding structural elements.
- Wood dowel rods (1/4″ width): For axles. You can use one long rod to cut or pre-cut rods.
- Hot glue: Essential for quick and strong bonding.
- Washers: To secure wheels and ensure smooth axle rotation. Choose washers that fit snugly on the dowel rod.
- Cord or rope: To connect the mousetrap lever arm to the axle and transfer the spring’s energy.
- Eye screw: To attach the string to the lever arm.
- Straws: Specifically, straws that fit snugly over your wood dowel rods to act as smooth axle bearings. (See note below about the straws we used).
- Electrical tape: For securing and adding grip if needed.
- CDs or DVDs: For wheels. They are lightweight, round, and readily available.
Step-by-Step Mousetrap Car Instructions
Follow these instructions, along with the images and video, to build your own high-performing mousetrap car:
- Prepare the Base: Cut your plywood into a long rectangle. The longer the base, the more potential distance.
- Attach the Mousetrap: Hot glue the mousetrap securely to one end of the plywood base.
- Create Axle Bearings: Cut straws slightly longer than the width of your car base. Hot glue these straws to the underside of the base where your axles will go. These act as bearings, allowing the axles to rotate freely.
- Prepare the Axles and Wheels: Cut your dowel rods into axles that are long enough to extend beyond the wheels and fit through the straw bearings. Drill a hole in the center of each CD/DVD to fit snugly onto the dowel rod. You may need to use washers to secure the wheels to the axles and prevent them from slipping.
- Assemble the Wheel and Axle System: Slide a washer onto the dowel rod, then a wheel, then another washer. Repeat for the other side. Carefully slide the axles through the straw bearings attached to the base.
- Create the Lever Arm Extension: Extend the mousetrap lever arm using popsicle sticks. Hot glue popsicle sticks to the existing lever arm to make it significantly longer. This increases the amount of string that can be pulled.
- Attach the Eye Screw and String: Screw the eye screw into the end of the extended lever arm. Tie one end of your cord or rope to the eye screw.
- Attach String to the Axle: Tie the other end of the string to the rear axle. Experiment with wrapping the string around the axle a few times. The string should wind around the axle as the mousetrap arm snaps, causing the wheels to turn.
One crucial aspect we figured out was the axle rotation. Initially, we tried a juice box straw and skewer system, but it felt too weak. When the teacher suggested larger wheels, we realized we needed to scale up everything, including the straws for the axle bearings. Serendipitously, we found the perfect straws right on our dining table! Milk Magic straws, designed to fit over thicker drink containers, were the ideal size to fit our 1/4″ dowel rods, providing smooth rotation. You can find similar straws online if needed (affiliate link below – it doesn’t cost you extra to purchase through these links).
For a visual guide, check out this video of our mousetrap car in action. The video cuts off a bit abruptly because the car was heading straight for me, but you can see it travels well over 6 meters!
[Video Link Placeholder – Insert Video Link Here]
Final Thoughts and Tips for Success
Building a mousetrap car is a fantastic hands-on science project that teaches problem-solving and engineering principles. Don’t be discouraged if your first attempt isn’t perfect – experimentation and iteration are key! Remember these key takeaways for a successful mousetrap car:
- Longer Lever Arm = More Distance: Maximize the length of your lever arm to pull more string.
- Smooth Axle Rotation is Crucial: Ensure your axles rotate freely within their bearings. Straws and washers can help achieve this.
- Wheel Size Matters: Larger wheels cover more distance per rotation. CDs/DVDs are a good starting point.
- Weight Can Improve Stability: Don’t be afraid to add a little weight to prevent flipping.
Have fun building and experimenting! Let us know in the comments how your mousetrap car project turns out and share any improvements you discover!