Programming your garage door opener to your car with a remote offers unparalleled convenience, allowing for seamless entry and exit. At CARS.EDU.VN, we provide solutions to simplify your daily routine and bolster your home’s security with ease. Explore the simplicity of garage door synchronization and elevate your vehicle’s utility. Learn essential garage door programming, remote synchronization, and vehicle integration insights at CARS.EDU.VN.
1. Identifying the Need and Benefits
Connecting your garage door opener to your car offers a seamless blend of convenience and security, making it a worthwhile upgrade for any homeowner. Let’s explore the “why” behind this integration.
1.1. Enhanced Convenience
Imagine pulling into your driveway on a rainy day and opening your garage door without fumbling for a separate remote. Connecting your garage door opener to your car eliminates this hassle, allowing you to open and close your garage door with the press of a button integrated into your vehicle. This convenience extends to various scenarios:
- Bad Weather: Avoid getting wet or cold when entering or exiting your garage.
- Carrying Groceries: Simplify unloading groceries by opening the garage door before you even park.
- Nighttime Entry: Ensure a safe and illuminated entry into your garage at night.
1.2. Improved Security
Integrating your garage door opener with your car also enhances your home’s security by reducing the risk of lost or stolen remotes. Here’s how:
- No More Lost Remotes: With the opener built into your car, you eliminate the risk of misplacing the remote.
- Reduced Theft Risk: A built-in system is less likely to be stolen compared to a clip-on remote visible in your car.
- Secure Access: Modern systems often use rolling codes, which change the access code each time the opener is used, preventing unauthorized access.
1.3. Streamlined Daily Routine
By integrating your garage door opener with your car, you streamline your daily routine, making it more efficient and less stressful.
- Simplified Operation: Operate your garage door with the same ease as your car’s other features, like the radio or navigation system.
- Consistent Access: Ensure reliable access to your garage every time, without needing to remember a separate remote.
- Increased Home Value: A smart, integrated garage system can add value to your home by showcasing modern convenience and security features.
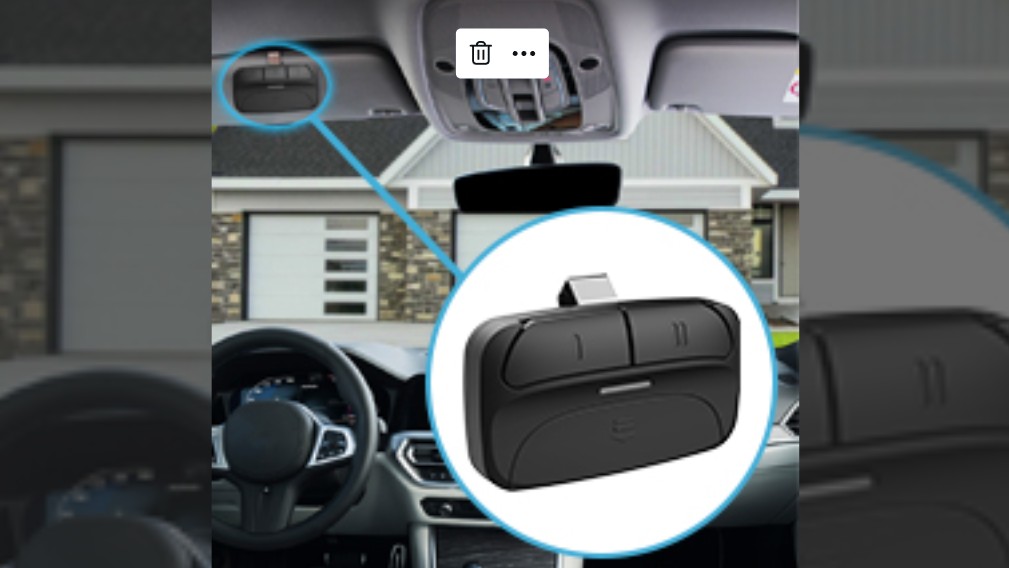
Image showing a car’s interior with integrated garage door opener buttons, highlighting convenience and modern vehicle technology.
2. Gathering the Necessary Tools
Before diving into the programming process, it’s essential to gather all the necessary tools and information. Having everything ready will streamline the process and minimize potential frustrations.
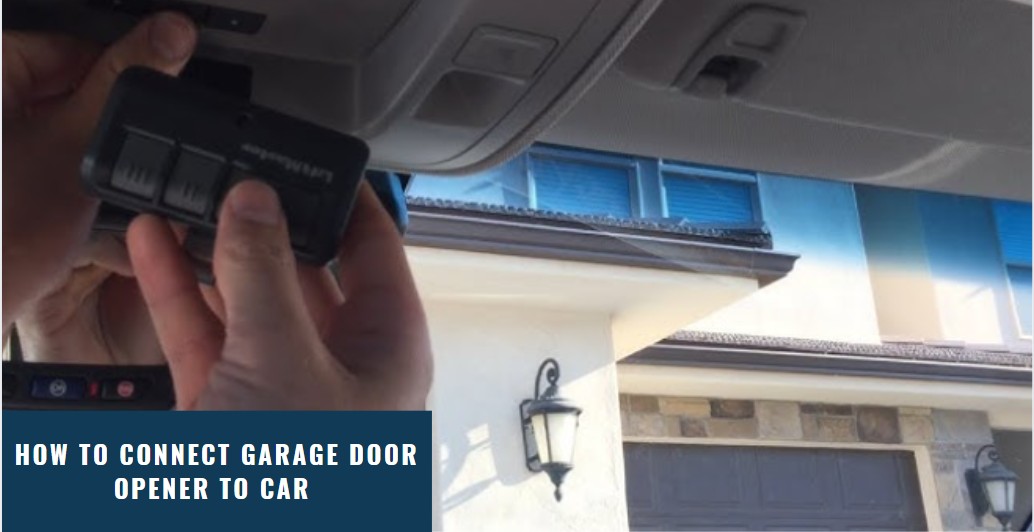
2.1. Garage Door Opener Remote
The garage door opener remote is your primary tool for synchronizing with your car’s transmitter. Ensure it’s in good working condition with fresh batteries.
- Check Functionality: Test the remote to ensure it opens and closes the garage door reliably.
- Replace Batteries: If the remote is sluggish or unresponsive, replace the batteries with new ones.
- Inspect for Damage: Examine the remote for any physical damage, such as cracked casing or broken buttons.
2.2. Built-in Car Garage Door Transmitter
Your car’s built-in garage door transmitter is typically located in the overhead console, sun visor, or rearview mirror. Identify its location and understand its functionality.
- Locate the Transmitter: Consult your car’s owner’s manual to find the exact location of the transmitter.
- Identify the Buttons: Familiarize yourself with the buttons on the transmitter and their functions.
- Check Compatibility: Ensure your car’s transmitter is compatible with your garage door opener’s frequency.
2.3. Garage Door Opener’s Manual
The garage door opener’s manual is an invaluable resource for specific programming instructions related to your particular model.
- Consult the Manual: Refer to the manual for detailed instructions on programming the opener with your car.
- Locate Digital Version: If you’ve misplaced the physical copy, download a digital version from the manufacturer’s website.
- Identify Key Information: Look for information on frequency, compatibility, and any specific programming steps.
2.4. Ladder (If Necessary)
Depending on the location of the “Learn” button on your garage door opener, you may need a ladder to access it safely.
- Ensure Stability: Choose a sturdy ladder and place it on a level surface.
- Safety First: Have someone spot you while you’re on the ladder to prevent accidents.
- Proper Height: Use a ladder that allows you to reach the “Learn” button comfortably without overreaching.
Image illustrating a garage door opener motor unit with the “Learn” button clearly highlighted, aiding users in locating this essential component.
3. Step-by-Step Programming Guide
With your tools gathered, follow these step-by-step instructions to program your garage door opener to your car.
3.1. Prepare Your Garage Door Opener
Ensuring compatibility and locating the “Learn” button are crucial first steps.
3.1.1. Check Compatibility
Modern garage door openers typically operate on frequencies between 300 MHz and 390 MHz. Verify that your car’s transmitter is compatible with this frequency range.
- Consult Manuals: Refer to both your garage door opener’s manual and your vehicle’s owner’s manual for compatibility information.
- Check for Brand-Specific Issues: Some brands may have specific pairing requirements or known issues with certain types of openers.
- Online Resources: Check online forums or customer service resources for additional insights.
3.1.2. Locate the Learn Button
The “Learn” button is essential for syncing your car’s transmitter with the garage door system.
- Motor Unit Location: On most garage door opener units, the “Learn” button is located directly on the motor unit, often mounted on the ceiling of your garage.
- Color Coding: The button may be colored differently (commonly yellow, red, or purple) to distinguish it from other buttons.
- Safety Precautions: Ensure the garage area is clear of objects and people before pressing the “Learn” button.
3.2. Clear Existing Programming (If Necessary)
Clearing any existing settings on your car’s transmitter is essential to prevent interference.
3.2.1. Reset Transmitter
Follow these steps to reset your car’s transmitter:
- Locate the Buttons: Identify the buttons on your vehicle’s built-in transmitter.
- Press and Hold: Press and hold down all the buttons simultaneously for about 20 to 30 seconds.
- Indicator Signal: Watch for an indicator light or audible beep that confirms the existing codes have been cleared.
- Release Buttons: Once you observe the confirmation signal, release the buttons.
3.2.2. Importance of Clearing
Clearing old programming helps prevent your transmitter from sending mixed signals and ensures secure access.
- Avoid Signal Confusion: Prevents your transmitter from sending incorrect signals to your garage door opener.
- Ensures Secure Access: Eliminates previously granted access that is no longer needed or secure.
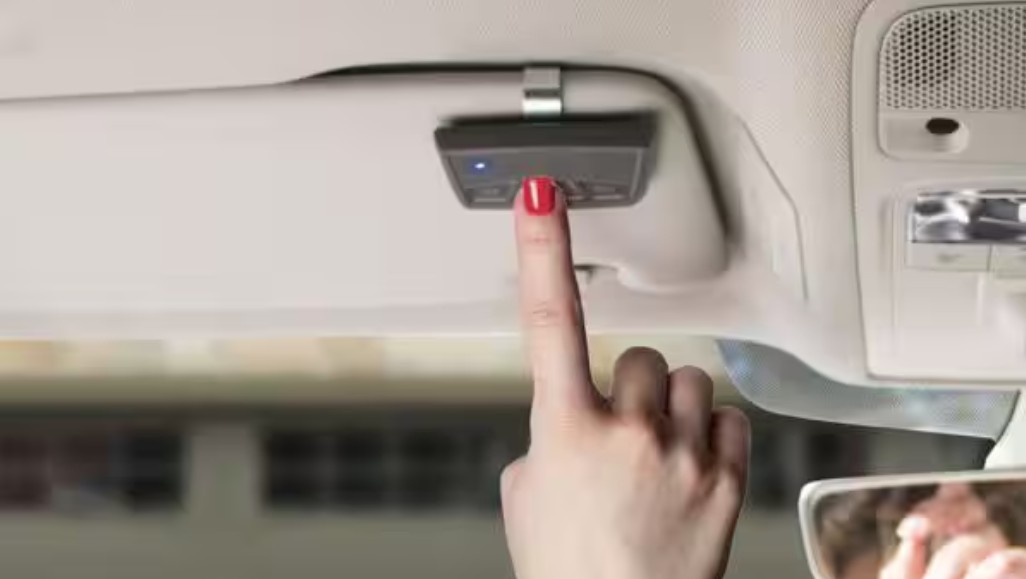
Image illustrating the location of garage door opener buttons on a car’s overhead console, highlighting the convenience of integrated systems.
3.3. Connecting the Two Systems
Synchronize your car’s transmitter with the garage door opener by following these steps:
3.3.1. Synchronization Steps
- Activate Learning Mode on the Garage Door Opener:
- Locate the “Learn” button.
- Press and release the “Learn” button.
- Program the Car’s Transmitter:
- Select the desired button on your car’s transmitter.
- Press and hold the selected button until the garage door opener’s light blinks.
- Test the Connection:
- Press the programmed button again to test if the garage door responds.
3.3.2. Troubleshooting Common Issues
- No Response: Check distance, reattempt programming, and ensure the opener is powered on.
- Intermittent Operation: Check batteries and look for signal interference.
- Door Reverses Immediately: Check for obstructions and ensure sensors are properly aligned.
3.4. Testing the Connection
Ensure the synchronization has been done correctly by testing the connection.
3.4.1. Why Testing is Important
- Verify Successful Programming: Confirms that the car’s transmitter and garage door opener are properly communicating.
- Safety Check: Ensures that the garage door opener operates smoothly and safely.
3.4.2. Steps for Testing
- Operate the Door:
- Press the programmed button to open or close the garage door.
- Try operating the door several times from various distances.
- Adjust Positioning If Necessary:
- Adjust the position of your vehicle to ensure a strong signal.
3.4.3. Troubleshooting Tips If the Connection Fails
- Repeat Programming Steps: Ensure every procedure is followed correctly.
- Signal Interference: Check for potential sources of interference.
- Battery Check: Ensure the batteries in your car’s transmitter are fresh.
- Reset and Re-try: Reset your car’s transmitter and reprogram it.
- Consult the Manuals: Revisit your car’s and garage door opener’s manuals.
- Professional Assistance: Consult a professional technician if you continue to have difficulties.
4. Addressing Common Issues
Encountering issues during the programming process is not uncommon. Here’s how to address some frequently encountered problems.
4.1. Garage Door Opener Not Responding
If your garage door opener isn’t responding to your car’s transmitter, consider these solutions:
- Check Battery Strength: Ensure the batteries in your car’s transmitter are fresh and have sufficient power.
- Verify Compatibility: Confirm that your car’s transmitter is compatible with your garage door opener’s frequency.
- Distance and Obstructions: Ensure your car is within range of the garage door opener and that there are no obstructions blocking the signal.
4.2. Intermittent Operation
Intermittent operation, where the garage door sometimes responds and sometimes doesn’t, can be frustrating. Here’s how to troubleshoot it:
- Signal Interference: Identify potential sources of interference, such as LED lights or other electronic devices.
- Battery Condition: Check the battery condition of both your car’s transmitter and the garage door remote.
- Re-Program: Sometimes, re-programming the connection can resolve intermittent issues.
4.3. Garage Door Reverses Immediately
If your garage door closes and then immediately reverses, it could be due to safety sensor issues.
- Sensor Alignment: Ensure the safety sensors at the base of the door tracks are properly aligned and clean.
- Obstructions: Check for any obstructions in the garage door’s path.
- Limit Settings: Consult your opener’s manual to adjust the limit settings correctly.
4.4. Multiple Cars, One Opener
Programming multiple cars to a single garage door opener is possible.
- Program Each Transmitter: Follow the programming steps for each car’s transmitter individually.
- Check Memory Capacity: Ensure the garage door opener has enough memory to store multiple transmitter codes.
- Consult Manual: Refer to the garage door opener’s manual for specific instructions on programming multiple transmitters.
5. Advanced Tips and Tricks
For those looking to enhance their garage door opener integration, here are some advanced tips and tricks.
5.1. Rolling Code Technology
Rolling code technology enhances security by changing the access code each time the opener is used.
- Enhanced Security: Prevents unauthorized access by using a different code each time the door is operated.
- Compatibility: Ensure your car’s transmitter and garage door opener both support rolling code technology.
- Programming: Follow the manufacturer’s instructions for programming rolling code systems.
5.2. Using Smart Home Integration
Integrating your garage door opener with a smart home system can provide additional convenience and control.
- Smart Home Systems: Explore systems like Apple HomeKit, Google Assistant, and Amazon Alexa for integration.
- Remote Control: Operate your garage door from anywhere using your smartphone or voice commands.
- Automation: Set up automated routines, such as closing the garage door at a specific time each night.
5.3. Maintenance and Care
Proper maintenance and care can extend the life of your garage door opener and ensure reliable operation.
- Regular Inspections: Inspect the garage door opener and its components regularly.
- Lubrication: Lubricate moving parts, such as hinges and rollers, to ensure smooth operation.
- Battery Replacement: Replace batteries in your remote and car’s transmitter as needed.
6. Choosing the Right Garage Door Opener
Selecting the right garage door opener is crucial for ensuring compatibility and long-term satisfaction.
6.1. Types of Garage Door Openers
Understand the different types of garage door openers available.
- Chain-Drive: Durable and cost-effective, but can be noisy.
- Belt-Drive: Quieter than chain-drive, making them ideal for homes with attached garages.
- Screw-Drive: Require minimal maintenance and are suitable for heavy doors.
- Direct-Drive: Extremely quiet and reliable, with few moving parts.
6.2. Features to Consider
Consider the features that are most important to you when choosing a garage door opener.
- Smart Home Compatibility: Integration with smart home systems for remote control and automation.
- Battery Backup: Ensures the opener works even during power outages.
- Security Features: Rolling code technology and safety sensors for enhanced security.
6.3. Top Brands
Research top brands known for their reliability and performance.
- LiftMaster: A popular brand known for its durable and feature-rich garage door openers.
- Chamberlain: Offers a range of openers with smart home compatibility and advanced features.
- Genie: Known for its innovative and reliable garage door opener solutions.
| Feature | LiftMaster | Chamberlain | Genie |
|---|---|---|---|
| Drive Type | Chain, Belt, Direct | Chain, Belt, Direct | Chain, Belt, Screw |
| Smart Home | Yes, via MyQ | Yes, via MyQ | Yes, via Aladdin Connect |
| Battery Backup | Available on select models | Available on select models | Available on select models |
| Security Features | Rolling Code, Safety Sensors | Rolling Code, Safety Sensors | Rolling Code, Safety Sensors |
| Average Price Range | $200 – $500 | $180 – $450 | $150 – $400 |
| Key Benefits | Durable, feature-rich, reliable | Smart home integration, advanced features | Innovative, reliable, budget-friendly |
| Warranty | Varies by model, typically 1-5 years | Varies by model, typically 1-5 years | Varies by model, typically 1-3 years |
| Additional Features | Smartphone control, auto-close timer | Smartphone control, battery backup | Aladdin Connect app, Safe-T-Beam sensors |
7. Understanding Garage Door Maintenance
Maintaining your garage door is crucial for its longevity and smooth operation.
7.1. Regular Inspections
Conduct regular inspections to identify potential issues early.
- Visual Check: Look for signs of wear and tear, such as frayed cables or damaged rollers.
- Listen for Noises: Pay attention to any unusual noises during operation, which could indicate a problem.
- Test Safety Features: Regularly test the safety sensors to ensure they are functioning correctly.
7.2. Lubrication
Proper lubrication keeps moving parts operating smoothly.
- Lubricant Type: Use a silicone-based lubricant for metal parts and a lithium-based grease for plastic parts.
- Application: Apply lubricant to hinges, rollers, springs, and tracks.
- Frequency: Lubricate moving parts at least twice a year, or more often in harsh environments.
7.3. Professional Servicing
Schedule professional servicing to address more complex maintenance tasks.
- Technician Expertise: A qualified technician can identify and resolve issues that may not be apparent during a visual inspection.
- Safety: Professional servicing ensures that all components are functioning safely and correctly.
- Long-Term Savings: Regular servicing can prevent costly repairs down the road.
8. Safety First: Important Precautions
Prioritizing safety is paramount when working with garage door openers.
8.1. Clear the Area
Ensure the garage area is clear of people, pets, and objects before operating the garage door.
8.2. Test Safety Sensors
Regularly test the safety sensors to ensure they are functioning correctly.
- Sensor Function: The sensors should prevent the door from closing if an obstruction is detected.
- Testing Procedure: Place an object in the door’s path and activate the opener. The door should reverse automatically.
8.3. Emergency Release
Familiarize yourself with the emergency release mechanism and how to use it in case of a power outage or malfunction.
- Location: The emergency release cord is typically a red handle hanging from the opener.
- Usage: Pull the cord to disengage the opener from the door, allowing you to manually open and close the garage door.
9. FAQs: How to Program Garage Door Opener to Car with Remote
Here are some frequently asked questions about programming garage door openers to cars.
- What do I do if my car doesn’t have a built-in garage door opener?
Consider installing a universal garage door opener that can be added to vehicles without one. - Can I connect more than one garage door opener to my car?
Yes, most systems allow you to program multiple openers to one vehicle. - What safety precautions should I take while programming the garage door opener?
Ensure your garage door is clear of obstacles and people to prevent accidents. - How do I reset the garage door opener connection in my car?
Refer to your vehicle’s manual for instructions on resetting the programming settings. - Where can I find the learn button on my garage door opener?
The learn button is usually located on the back or side of the garage door opener unit. - What if my garage door opener is not compatible with my car’s system?
Consider purchasing a universal remote or adapter that bridges the compatibility gap. - How often should I replace the batteries in my garage door opener remote and car transmitter?
Replace batteries every 1-2 years, or as needed, to ensure reliable operation. - Can weather conditions affect the performance of my garage door opener connection?
Extreme temperatures and humidity can sometimes affect the signal strength and performance. - What should I do if I move to a new home and want to reprogram my car’s garage door opener?
Clear the existing programming and follow the steps to connect to the new garage door opener. - Is it possible to program my garage door opener to multiple vehicles?
Yes, most garage door openers can be programmed to multiple vehicles by following the programming steps for each vehicle individually.
10. Conclusion: Embracing Convenience and Security
Understanding how to program your garage door opener to your car combines convenience and enhanced security. At CARS.EDU.VN, we understand the importance of reliable automotive solutions.
Facing difficulties or have more questions? Contact CARS.EDU.VN at 456 Auto Drive, Anytown, CA 90210, United States, or via Whatsapp at +1 555-123-4567. Our expert services and practical guidance help you manage your garage door system effortlessly.
Explore our website, CARS.EDU.VN, for more comprehensive support and maintenance tips that optimize your garage door system. For dependable garage door solutions, especially connecting your garage door opener to your car, trust cars.edu.vn for professional, high-quality service ensuring smooth and secure garage door operations.