Deep car scratches can be frustrating, but CARS.EDU.VN is here to guide you through effective solutions to restore your vehicle’s pristine look. Whether you’re dealing with minor blemishes or more significant damage, we’ll provide expert tips and step-by-step instructions on scratch removal and car paint repair. Discover how to tackle these issues head-on and maintain your car’s value with our detailed guide covering everything from surface scratch repair to deep paint correction.
1. Identifying the Type of Car Scratch
Before diving into How To Remove Deep Scratch On Car, it’s crucial to first identify the type of scratch you’re dealing with. The depth and severity of the scratch will determine the best approach for repair, ensuring you use the right methods and products for optimal results.
1.1. Clear Coat Scratches
These are the most superficial type of scratches, affecting only the clear coat, which is the outermost protective layer of your car’s paint. According to experts at CARS.EDU.VN, clear coat scratches are usually caused by minor abrasions like brushing against bushes or improper washing techniques.
How to Identify
- Appearance: Fine, hairline scratches that don’t penetrate the color layer.
- Feel: Smooth to the touch or only slightly rough.
- Repair: Often easily corrected with polishing compounds or scratch removal kits available at CARS.EDU.VN.
1.2. Base Coat Scratches
Base coat scratches are more severe, penetrating through the clear coat and affecting the actual color layer of the paint. These scratches are typically caused by more significant impacts, such as small rocks or minor collisions, explains a mechanic from CARS.EDU.VN.
How to Identify
- Appearance: Noticeable scratches that reveal the color of the car.
- Feel: Rough to the touch.
- Repair: Requires more than just polishing; usually involves touch-up paint and careful blending. You can find quality touch-up paint and expert advice at CARS.EDU.VN.
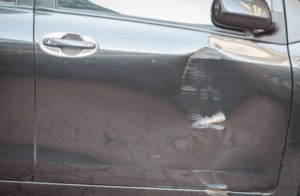
1.3. Primer Coat Scratches
Primer coat scratches are the most severe, reaching down to the primer layer, which is the protective barrier for the metal body of the car. These scratches expose the car to the risk of rust and significant damage, advises a CARS.EDU.VN automotive specialist.
How to Identify
- Appearance: Deep scratches that expose a gray or dark layer beneath the paint.
- Feel: Very rough and deep.
- Repair: Requires professional attention, including sanding, filling, and repainting. CARS.EDU.VN can help you find reputable auto body shops in your area.
1.4. Understanding Scratch Severity
Using a simple test can help you determine the severity of a car scratch:
- Clean the Area: Wash and dry the scratched area thoroughly.
- Run Your Fingernail: Gently run your fingernail across the scratch.
- Clear Coat: If your nail doesn’t catch, it’s likely a clear coat scratch.
- Base Coat: If your nail catches slightly, it’s likely a base coat scratch.
- Primer Coat: If your nail catches significantly and you see a different color underneath, it’s a primer coat scratch.
2. Essential Tools and Materials for Scratch Removal
Before you begin the process of how to remove deep scratch on car, gather all the necessary tools and materials. Having everything on hand will make the job smoother and more efficient, ensuring you achieve the best possible results. CARS.EDU.VN recommends the following essential items:
2.1. Cleaning Supplies
- Car Wash Soap: Use a pH-neutral car wash soap to clean the area around the scratch, removing dirt and debris. This ensures proper adhesion of repair products.
- Microfiber Towels: Soft microfiber towels are essential for drying and buffing without causing further scratches. CARS.EDU.VN advises using separate towels for washing, drying, and polishing.
- Detailing Clay: A detailing clay bar can remove embedded contaminants from the paint surface, providing a clean base for scratch repair.
2.2. Scratch Removal Products
- Touch-Up Paint: For base coat scratches, use touch-up paint that matches your car’s color code. CARS.EDU.VN offers a color code lookup tool to help you find the perfect match.
- Scratch Repair Kit: These kits typically include a scratch-removing compound, a buffing pad, and finishing polish. They are suitable for clear coat and light base coat scratches.
- Rubbing Compound: For more severe scratches, a rubbing compound can help level the paint surface. Use it sparingly and follow with a polishing compound for a smooth finish.
2.3. Sanding Materials
- Sandpaper (Various Grits): Wet sanding is often necessary for deeper scratches. Use 2000-grit and 3000-grit sandpaper for a smooth finish.
- Sanding Block: A sanding block ensures even pressure and prevents uneven sanding, according to expert advice from CARS.EDU.VN.
2.4. Polishing and Buffing Tools
- Polishing Compound: After sanding or using a rubbing compound, a polishing compound will restore the shine and smoothness of the paint.
- Buffing Pads: Use foam buffing pads with a dual-action polisher for best results. CARS.EDU.VN recommends using different pads for compounding and polishing.
- Dual-Action Polisher: A dual-action polisher provides consistent results and reduces the risk of damaging the paint.
2.5. Protective Gear
- Gloves: Wear gloves to protect your hands from chemicals and debris.
- Mask: A mask will prevent you from inhaling harmful fumes from the cleaning and repair products.
2.6. Additional Supplies
- Masking Tape: Use masking tape to protect surrounding areas from accidental damage.
- Isopropyl Alcohol: Use isopropyl alcohol to clean the area before applying touch-up paint or polishing compound.
- Wax or Sealant: After completing the repair, apply a wax or sealant to protect the paint and enhance the shine.
3. Step-by-Step Guide to Removing Clear Coat Scratches
Clear coat scratches are the most common and easiest to repair. This section provides a detailed, step-by-step guide on how to remove deep scratch on car affecting only the clear coat, as recommended by CARS.EDU.VN.
3.1. Cleaning the Area
- Wash the Car: Start by washing the area around the scratch with car wash soap and water. This removes dirt, grime, and any loose particles that could interfere with the repair process.
- Dry the Area: Use a clean microfiber towel to dry the area thoroughly. Ensure there is no moisture left, as this can affect the adhesion of the scratch removal product.
- Decontaminate: Use detailing clay to remove any embedded contaminants. Spray the area with detailing spray and gently rub the clay bar over the surface until it feels smooth.
3.2. Applying Scratch Removal Compound
- Apply Compound: Place a small amount of scratch removal compound on a foam applicator pad. CARS.EDU.VN recommends using a dedicated applicator pad for best results.
- Work the Compound: Gently rub the compound into the scratch using a circular motion. Apply moderate pressure and work the compound for several minutes to allow the abrasives to smooth out the scratch.
- Buff Off Excess: Use a clean microfiber towel to buff off any excess compound. Inspect the area to see if the scratch is diminishing.
3.3. Polishing the Area
- Apply Polish: Place a small amount of polishing compound on a clean foam applicator pad. Polishing compound is finer than scratch removal compound and will help restore the shine to the paint.
- Work the Polish: Rub the polish into the area using a circular motion, similar to the scratch removal compound.
- Buff Off Excess: Use a clean microfiber towel to buff off any excess polish. The area should now appear smoother and shinier.
3.4. Waxing or Sealing the Area
- Apply Wax or Sealant: Apply a thin layer of car wax or sealant to protect the repaired area. This will help prevent future scratches and maintain the shine.
- Buff to a Shine: Allow the wax or sealant to dry according to the manufacturer’s instructions, then buff it off with a clean microfiber towel.
3.5. Tips for Best Results
- Work in Sections: If the scratch is long, work in small sections to ensure even coverage and effective repair.
- Use Quality Products: Invest in high-quality scratch removal compounds and polishes for the best results. CARS.EDU.VN recommends trusted brands for automotive care.
- Take Your Time: Rushing the process can lead to mistakes. Take your time and follow each step carefully.
4. Repairing Base Coat Scratches: A Detailed Guide
Base coat scratches penetrate through the clear coat and affect the color layer of your car’s paint. Repairing these scratches requires a more detailed approach than clear coat scratches, as highlighted by experts at CARS.EDU.VN.
4.1. Preparing the Area
- Clean the Scratch: Thoroughly clean the scratched area with car wash soap and water to remove any dirt and debris.
- Dry the Area: Use a clean microfiber towel to dry the area. Make sure there is no moisture left.
- Sand the Edges: Use 2000-grit sandpaper to gently sand the edges of the scratch. This will help blend the repair and prevent a noticeable edge. Wet the sandpaper and the area before sanding.
4.2. Applying Touch-Up Paint
- Match the Paint: Use touch-up paint that matches your car’s color code. CARS.EDU.VN offers a color code lookup tool to help you find the right match.
- Apply Thin Coats: Use a fine brush to apply thin coats of touch-up paint to the scratch. Allow each coat to dry completely before applying the next. Multiple thin coats are better than one thick coat.
- Build Up the Paint: Continue applying thin coats until the paint is level with the surrounding surface.
4.3. Wet Sanding the Repaired Area
- Wait for the Paint to Cure: Allow the touch-up paint to cure completely, usually for 24-48 hours.
- Wet Sand: Use 3000-grit sandpaper to gently wet sand the repaired area. This will smooth out any imperfections and blend the touch-up paint with the surrounding paint.
- Check Progress: Regularly check your progress to avoid sanding too much. The goal is to create a smooth, even surface.
4.4. Polishing the Area
- Apply Polishing Compound: Apply a small amount of polishing compound to a foam applicator pad.
- Polish the Area: Polish the area using a circular motion until the surface is smooth and shiny.
- Buff Off Excess: Use a clean microfiber towel to buff off any excess polishing compound.
4.5. Waxing or Sealing the Area
- Apply Wax or Sealant: Apply a thin layer of car wax or sealant to protect the repaired area and enhance the shine.
- Buff to a Shine: Allow the wax or sealant to dry according to the manufacturer’s instructions, then buff it off with a clean microfiber towel.
4.6. Advanced Techniques
- Blending: Use a blending solution to help the touch-up paint seamlessly blend with the surrounding paint. CARS.EDU.VN offers blending solutions and expert advice on how to use them effectively.
- Clear Coat Application: Apply a thin layer of clear coat over the touch-up paint for added protection and shine.
5. Addressing Primer Coat Scratches: When to Seek Professional Help
Primer coat scratches are the most severe type, penetrating through the clear coat, base coat, and down to the primer layer. According to CARS.EDU.VN, these scratches require professional attention due to the complexity of the repair.
5.1. Assessing the Damage
- Identify the Depth: Determine if the scratch has indeed reached the primer layer. This is usually indicated by a gray or dark color showing beneath the paint.
- Check for Rust: If the scratch has exposed the metal to the elements, check for signs of rust. Rust can spread quickly and cause further damage if not addressed promptly.
5.2. Why Professional Repair is Necessary
- Complex Repair Process: Repairing primer coat scratches involves sanding, filling, priming, painting, and clear coating. This requires specialized tools and expertise.
- Color Matching: Professionals can accurately match the paint color to ensure a seamless repair.
- Preventing Rust: Proper repair is crucial to prevent rust and further damage to the car’s body.
5.3. Finding a Reputable Auto Body Shop
- Research: Look for auto body shops with positive reviews and a good reputation. CARS.EDU.VN provides a directory of trusted auto body shops in your area.
- Ask for Estimates: Get estimates from multiple shops and compare their prices and services.
- Check Certifications: Ensure the shop is certified and employs trained technicians.
5.4. Understanding the Repair Process
- Sanding: The damaged area will be sanded down to remove rust and smooth the surface.
- Filling: Body filler will be used to fill the scratch and create a smooth base for painting.
- Priming: A primer coat will be applied to protect the metal and provide a uniform surface for the paint.
- Painting: The area will be painted with multiple coats of color-matched paint.
- Clear Coating: A clear coat will be applied to protect the paint and provide a glossy finish.
5.5. Maintaining the Repaired Area
- Regular Washing: Wash the car regularly to remove dirt and contaminants.
- Waxing: Apply wax or sealant to protect the paint and maintain the shine.
- Inspect Regularly: Check the repaired area regularly for any signs of damage or rust.
6. Advanced Techniques for Deep Scratch Removal
For car enthusiasts and those with experience in auto detailing, certain advanced techniques can further enhance the results of deep scratch removal. CARS.EDU.VN highlights the following methods for achieving a flawless finish.
6.1. Wet Sanding with Precision
- Purpose: Wet sanding is used to level the paint surface and remove imperfections, especially after applying touch-up paint.
- Technique:
- Preparation: Use 2000-grit or 3000-grit sandpaper, soaking it in water for at least 15 minutes before use.
- Sanding: Gently sand the area with light, even pressure, keeping the surface wet at all times. Avoid sanding in one spot for too long to prevent damaging the paint.
- Inspection: Regularly inspect the surface to ensure you are not removing too much paint. The goal is to smooth out the imperfections without exposing the primer.
- CARS.EDU.VN Tip: Use a sanding block to ensure even pressure and prevent uneven sanding.
6.2. Using a Rotary Buffer
- Purpose: A rotary buffer is a powerful tool for removing scratches and restoring the shine of the paint.
- Technique:
- Preparation: Apply a small amount of rubbing compound to a buffing pad.
- Buffing: Use the rotary buffer at a low speed and apply light pressure. Move the buffer in overlapping passes, working in small sections.
- Inspection: Regularly inspect the surface to avoid overheating the paint or causing swirl marks.
- CARS.EDU.VN Caution: Rotary buffers can be aggressive and may damage the paint if used improperly. Practice on a test panel before using it on your car.
6.3. Paint Correction with Multiple Stages
- Purpose: Paint correction involves using multiple stages of compounding and polishing to remove scratches and restore the paint to its original condition.
- Technique:
- Compounding: Use a heavy-cut compound to remove deep scratches and imperfections.
- Polishing: Use a medium-cut polish to remove swirl marks and refine the paint surface.
- Finishing: Use a fine-cut polish to enhance the shine and clarity of the paint.
- CARS.EDU.VN Recommendation: Use different buffing pads for each stage of paint correction to avoid cross-contamination and achieve the best results.
6.4. Ceramic Coating for Protection
- Purpose: Ceramic coating provides a durable, long-lasting layer of protection against scratches, UV rays, and environmental contaminants.
- Technique:
- Preparation: Ensure the paint is clean and free of any imperfections.
- Application: Apply the ceramic coating according to the manufacturer’s instructions.
- Curing: Allow the coating to cure for the recommended time.
- CARS.EDU.VN Benefit: Ceramic coating not only protects the paint but also makes it easier to clean and maintain.
6.5. Blending Techniques for Seamless Repairs
- Purpose: Blending ensures that touch-up paint seamlessly integrates with the surrounding paint.
- Technique:
- Preparation: Apply blending solution to the repaired area and the surrounding paint.
- Sanding: Use 3000-grit sandpaper to gently sand the edges of the touch-up paint.
- Polishing: Polish the area to restore the shine and blend the repaired area with the surrounding paint.
- CARS.EDU.VN Insight: Blending requires a delicate touch and a keen eye for detail. Practice on a test panel before attempting it on your car.
7. Preventing Future Scratches: Proactive Car Care Tips
Prevention is always better than cure. CARS.EDU.VN offers several proactive car care tips to help you minimize the risk of future scratches and maintain your car’s pristine appearance.
7.1. Proper Washing Techniques
- Use the Right Tools: Use a pH-neutral car wash soap, a microfiber wash mitt, and two buckets—one for washing and one for rinsing.
- Wash in Straight Lines: Wash the car in straight lines rather than circular motions to minimize the risk of swirl marks.
- Dry with Microfiber Towels: Use clean, soft microfiber towels to dry the car. Avoid using abrasive towels or letting the car air dry, which can leave water spots.
7.2. Regular Waxing and Sealing
- Waxing: Apply a coat of car wax every 2-3 months to protect the paint from UV rays, environmental contaminants, and minor scratches.
- Sealing: Use a paint sealant for longer-lasting protection. Sealants can last up to 6-12 months.
- CARS.EDU.VN Benefit: Waxing and sealing not only protect the paint but also make it easier to wash and maintain.
7.3. Avoiding Automatic Car Washes
- Reason: Automatic car washes can use abrasive brushes and harsh chemicals that can scratch the paint.
- Alternative: Opt for touchless car washes or hand washing to minimize the risk of scratches.
7.4. Careful Parking Practices
- Park Away from Other Cars: Park in areas where there is less risk of other cars scratching your car.
- Avoid Tight Spaces: Avoid parking in tight spaces where you might accidentally scrape your car against walls or other objects.
- CARS.EDU.VN Tip: Use parking sensors and cameras to help you navigate tight spaces and avoid collisions.
7.5. Protecting Against Environmental Hazards
- Bird Droppings: Remove bird droppings as soon as possible, as they can damage the paint.
- Tree Sap: Remove tree sap with a specialized tree sap remover.
- Road Salt: Wash the car regularly during the winter months to remove road salt, which can cause rust.
7.6. Using a Car Cover
- Protection: Use a car cover to protect the car from scratches, UV rays, and environmental contaminants, especially when parking outdoors for extended periods.
- CARS.EDU.VN Recommendation: Choose a car cover that is specifically designed for your car model and made from breathable materials to prevent moisture buildup.
8. Understanding Paint Correction Terminology
Navigating the world of car paint correction can be confusing due to the specialized terminology. CARS.EDU.VN provides a glossary of essential terms to help you understand the process and communicate effectively with professionals.
8.1. Clear Coat
The outermost layer of paint that protects the color coat and provides a glossy finish.
8.2. Base Coat
The layer of paint that contains the color of the car.
8.3. Primer
The undercoat that protects the metal and provides a uniform surface for the paint.
8.4. Touch-Up Paint
Small amounts of paint that match the car’s color and are used to repair minor scratches and chips.
8.5. Scratch Removal Compound
Abrasive compounds used to smooth out scratches in the clear coat.
8.6. Polishing Compound
Finer compounds used to remove swirl marks and restore the shine of the paint.
8.7. Rubbing Compound
Coarser compounds used to level the paint surface and remove severe scratches.
8.8. Wet Sanding
Sanding with water to reduce friction and prevent paint damage.
8.9. Buffing Pad
Pads used with a polisher to apply compounds and polishes.
8.10. Dual-Action Polisher
A polisher that moves in a circular and oscillating motion to reduce the risk of damaging the paint.
8.11. Rotary Buffer
A more aggressive polisher that moves in a circular motion and is used for removing severe scratches.
8.12. Swirl Marks
Circular scratches that are caused by improper washing or polishing techniques.
8.13. Holograms
Fine, swirling lines that are caused by using a rotary buffer improperly.
8.14. Oxidation
The process by which the paint fades and loses its shine due to exposure to UV rays and environmental contaminants.
8.15. Ceramic Coating
A durable, long-lasting layer of protection that is applied to the paint to protect it from scratches, UV rays, and environmental contaminants.
8.16. Paint Sealant
A synthetic protectant that provides longer-lasting protection than wax.
9. DIY vs. Professional Repair: Making the Right Choice
Deciding whether to tackle a scratch repair yourself or seek professional help depends on several factors, including the type of scratch, your skill level, and the tools you have available. CARS.EDU.VN provides a guide to help you make the right choice.
9.1. When to DIY
- Clear Coat Scratches: Minor clear coat scratches can often be repaired with scratch removal compounds and polishes.
- Small Base Coat Scratches: Small base coat scratches can be repaired with touch-up paint and careful blending.
- You Have the Right Tools: If you have the necessary tools and materials, such as scratch removal compounds, polishes, buffing pads, and microfiber towels, DIY repair can be a cost-effective option.
- You Have the Skills and Experience: If you have experience in auto detailing and are comfortable using the tools and techniques involved, DIY repair can be a rewarding experience.
9.2. When to Seek Professional Help
- Primer Coat Scratches: Primer coat scratches require specialized tools and expertise and are best left to professionals.
- Large or Deep Scratches: Large or deep scratches that penetrate multiple layers of paint require professional repair to ensure a seamless finish.
- You Lack the Necessary Tools: If you lack the necessary tools and materials, the cost of purchasing them may outweigh the cost of professional repair.
- You Lack the Skills and Experience: If you lack the skills and experience in auto detailing, attempting to repair a scratch yourself may result in further damage.
- You Want a Flawless Finish: If you want a flawless finish and are not willing to compromise on quality, professional repair is the best option.
9.3. Cost Considerations
- DIY Repair: The cost of DIY repair can range from $20 to $100, depending on the products and tools you need to purchase.
- Professional Repair: The cost of professional repair can range from $100 to $500 or more, depending on the severity of the damage and the shop you choose.
9.4. Time Commitment
- DIY Repair: DIY repair can take several hours, depending on the type of scratch and your skill level.
- Professional Repair: Professional repair may take a day or more, depending on the severity of the damage and the shop’s schedule.
10. Frequently Asked Questions (FAQ) About Car Scratch Removal
Here are some frequently asked questions about how to remove deep scratch on car, compiled by CARS.EDU.VN, to provide you with additional information and guidance.
10.1. Can toothpaste remove scratches from a car?
Toothpaste may temporarily reduce the appearance of very minor clear coat scratches due to its mild abrasive properties. However, it is not a long-term solution and may not be effective for deeper scratches. CARS.EDU.VN recommends using dedicated scratch removal products for better and more lasting results.
10.2. How much does it cost to repair a deep scratch on a car?
The cost to repair a deep scratch on a car can vary widely depending on the severity of the scratch and whether you choose to DIY or seek professional help. DIY repairs may cost between $20 and $100, while professional repairs can range from $100 to $500 or more.
10.3. Is it worth it to fix a scratch on a car?
Whether it’s worth fixing a scratch on a car depends on your personal preferences and the impact of the scratch on the car’s value. Fixing scratches can improve the car’s appearance and prevent rust, maintaining its value.
10.4. Can I use a household cleaner to remove scratches?
No, household cleaners are not designed for car paint and can damage the finish. Always use products specifically formulated for automotive use, as advised by CARS.EDU.VN.
10.5. How do I find the right touch-up paint for my car?
You can find the right touch-up paint by locating your car’s color code, which is usually found on a sticker in the doorjamb or glove compartment. Use this code to purchase the correct touch-up paint from an auto parts store or online retailer. CARS.EDU.VN also offers a color code lookup tool.
10.6. What is the best way to protect my car from future scratches?
The best ways to protect your car from future scratches include proper washing techniques, regular waxing and sealing, avoiding automatic car washes, careful parking practices, protecting against environmental hazards, and using a car cover.
10.7. Can I repair a scratch myself if I have no experience?
You can attempt to repair a minor scratch yourself, but it’s important to proceed with caution and follow instructions carefully. Start with a small, inconspicuous area and use quality products. For deeper scratches, it’s best to seek professional help.
10.8. How do I know if a scratch has reached the primer?
A scratch has reached the primer if you can see a gray or dark color beneath the paint. Primer coat scratches require professional repair.
10.9. What is the difference between polishing and waxing?
Polishing removes imperfections and restores the shine of the paint, while waxing protects the paint and enhances the shine. Polishing should be done before waxing.
10.10. How often should I wax my car?
You should wax your car every 2-3 months to protect the paint and maintain its shine.
Conclusion: Maintaining Your Car’s Pristine Condition with CARS.EDU.VN
Knowing how to remove deep scratch on car is essential for maintaining its appearance and value. Whether you choose to tackle minor scratches yourself or seek professional help for more severe damage, CARS.EDU.VN is here to provide the information and resources you need. From identifying the type of scratch to implementing proactive car care tips, we offer comprehensive guidance to keep your car looking its best.
Remember, regular maintenance and prompt attention to scratches can prevent further damage and preserve the integrity of your car’s paint. By following the steps and tips outlined in this guide, you can confidently address car scratches and maintain your vehicle’s pristine condition.
For more detailed information, expert advice, and a directory of trusted auto body shops, visit CARS.EDU.VN today. Let us help you keep your car looking its best for years to come!
Address: 456 Auto Drive, Anytown, CA 90210, United States
Whatsapp: +1 555-123-4567
Website: cars.edu.vn
Ready to take the next step in car care? Visit CARS.EDU.VN for more in-depth guides, product recommendations, and professional service listings to keep your vehicle in top condition