Stripping paint from a car, whether it’s a small touch-up or a full body restoration, is a crucial step in any automotive project. Knowing how to effectively remove old paint is essential for achieving a flawless finish and ensuring the longevity of your new paint job. This guide provides a detailed overview of the most popular and effective methods for removing paint from cars, catering to various budgets, skill levels, and project scopes. From DIY-friendly techniques to professional solutions, we’ll explore the pros, cons, and step-by-step procedures to help you choose the best approach for your vehicle.
Chemical Paint Stripping: Breaking Down the Bonds
Chemical paint strippers are a go-to method for many car enthusiasts due to their affordability and effectiveness on horizontal surfaces. While modern formulations are less potent than their predecessors due to environmental regulations, they still offer a viable solution for softening and removing multiple layers of automotive paint.
Selecting the Best Chemical Stripper for Cars
The formulation of automotive paint strippers has changed significantly over the years. Methylene Chloride, a highly effective ingredient, is no longer widely available in consumer products due to safety concerns. However, effective chemical strippers are still available. Look for industrial-strength options for optimal results.
Expect to use at least one gallon, and possibly more, to strip an entire car, depending on the number of paint layers. For those seeking stronger formulas, checking with local automotive paint suppliers for strippers containing MEK (Methyl Ethyl Ketone) might be beneficial, although availability can vary by region.
Step-by-Step Chemical Paint Stripping Procedure
- Surface Preparation: Begin by lightly scuffing the paint surface with 80-grit sandpaper. This crucial step creates microscopic scratches that allow the chemical stripper to penetrate the paint layers more effectively, speeding up the process.
- Protect Seams and Gaps: Use masking tape to carefully cover any seams, gaps, or crevices. This prevents the chemical stripper from seeping into these areas and potentially causing issues later, such as paint lifting in the future.
- Application on Horizontal Surfaces: For horizontal panels like the hood or roof, pour a generous amount of chemical paint stripper directly onto the surface. Immediately cover the wet stripper with plastic sheeting. This prevents evaporation and keeps the stripper concentrated, maximizing its effectiveness.
- Application on Vertical Surfaces: For vertical panels like doors and fenders, apply the chemical stripper using a brush. Apply a thick, even coat in one direction only. Avoid over-brushing, as this can disrupt the chemical’s action.
- Waiting Time: Allow the chemical stripper to work for at least 20 minutes, or longer, until the bubbling action subsides. This indicates that the stripper has penetrated and softened the paint layers. The exact time will depend on the paint thickness and ambient temperature.
- Paint Removal: Use a plastic or metal scraper to carefully remove the softened paint. Work in sections, scraping away the loosened paint to reveal the bare metal underneath. For areas with multiple paint layers or stubborn spots, re-apply stripper as needed.
- Neutralization: Once all the paint is removed, it is vital to neutralize the chemical stripper residue. Use denatured alcohol or soap and water to thoroughly clean the stripped area. This step is crucial to prevent any chemical reactions with subsequent primers or paints.
- Epoxy Priming: Ideally, apply an epoxy primer on the same day as stripping. Follow the primer manufacturer’s instructions, but most epoxy primers require an 80-grit sanded surface for optimal adhesion.
Important Note: Chemical strippers are not suitable for fiberglass or plastic car parts. The chemicals can damage the gel coat on fiberglass and weaken the epoxy resin in plastic components. For these materials, consider mechanical or blasting methods instead.
Applying a thick layer of chemical stripper, especially on horizontal surfaces, is key to its effectiveness. If possible, removing components like doors and working on them horizontally can significantly improve the stripper’s performance. Pouring the chemical in rows and gently spreading it with a brush ensures even coverage without overworking it.
Often, chemical stripping softens the paint but doesn’t completely remove it. In these cases, combining chemical stripping with mechanical methods, such as using a surface conditioning tool or strip-it disc, is highly effective. This hybrid approach leverages the benefits of both methods for faster and more thorough paint removal.
Always remember to properly tape seams and panel gaps before applying chemical stripper. Trapped chemicals in these areas can leach out later and damage your new paint job. Avoid using chemical strippers on hemmed door skins or any areas where chemicals might get trapped and cause long-term problems.
Advantages of Chemical Paint Stripping (PROS)
- Cost-Effective: Chemical strippers are generally inexpensive compared to other methods.
- Minimal Dust: This method produces minimal dust, making it cleaner than sanding or blasting.
- Easy on Horizontal Surfaces: Application on flat, horizontal surfaces is straightforward and efficient.
- Gentle on Steel: Chemical strippers are typically gentle on steel panels, minimizing the risk of damage or warping.
- No Warping Risk: Unlike some aggressive mechanical methods, chemical stripping does not cause panel warping.
Disadvantages of Chemical Paint Stripping (CONS)
- Neutralization Required: Thorough neutralization is essential to prevent future paint adhesion issues.
- Not Ideal for Seams: Chemicals can seep into seams and cause problems later if not properly addressed.
- Slower with Modern Formulations: Current formulations work slower than older, more potent strippers.
- Unsuitable for Plastic: Chemical strippers can damage plastic car parts.
- Unsuitable for Fiberglass: They can also harm fiberglass components.
Mechanical Paint Stripping: Utilizing Abrasive Tools
Mechanical paint stripping relies on abrasive tools to physically remove paint layers. With advancements in abrasive technology, mechanical methods have become a popular DIY alternative, especially as chemical strippers have become less aggressive.
Modern Mechanical Paint Removal Tools
Two excellent tools have emerged as effective replacements for traditional heavy sandpaper: strip-it discs and surface conditioning tools.
7″ Strip-It Disc
These discs are designed for use with low-speed sanders, such as a Makita sander with a plastic backing pad. Their woven abrasive material resists clogging and effectively removes paint, body filler (Bondo), and even light surface rust.
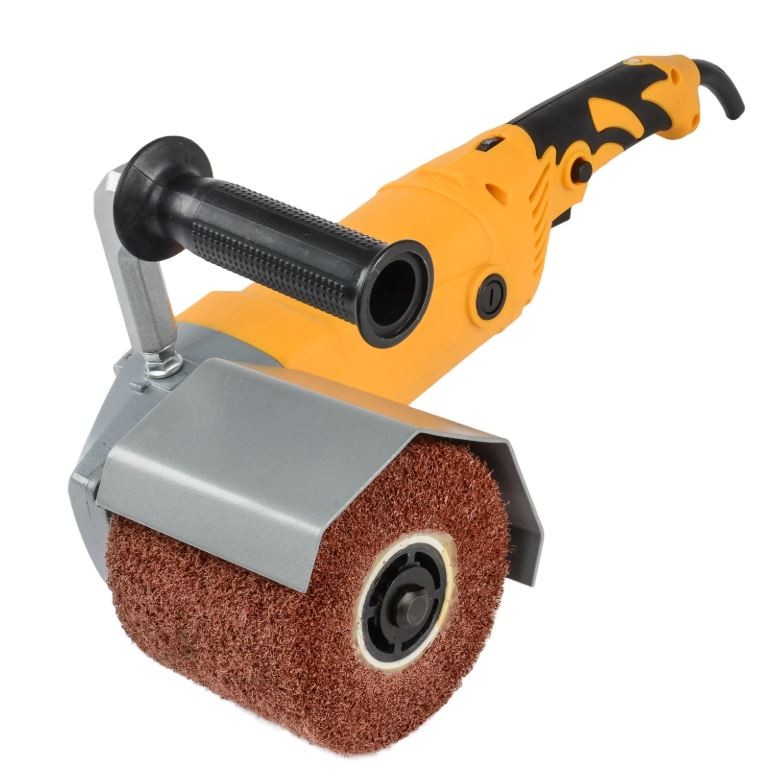
Surface Conditioning Tool
Specifically designed for automotive paint removal, surface conditioning tools also utilize a woven abrasive material. They are excellent for stripping paint and preparing surfaces for primer.
Both strip-it discs and surface conditioning tools leave a clean, bare metal surface ready for epoxy primer. The surface texture they create is close to the 80-grit abrasion recommended by most primer manufacturers, ensuring good adhesion.
The cost and availability of woven abrasive materials have improved significantly, making these tools more accessible. While larger 7-8″ discs might be less common, they offer greater efficiency for larger panels. Using a lower speed sander, around 3000 RPM, is recommended to extend the life of the discs. A 7″ disc can potentially strip an entire car if used correctly, letting the tool do the work without excessive pressure. Standard 4.5″ angle grinders are often too fast and can wear out discs quickly.
Combining mechanical methods with chemical stripping can be highly effective. Softening the paint with a chemical stripper first, then using a mechanical tool to remove the remaining softened paint, can speed up the process and reduce dust.
One limitation of woven abrasive tools is their performance on undercoating. They tend to clog and become less effective on thick undercoating materials.
Removing Tough Undercoating
For removing stubborn undercoating, consider these methods:
- Wire Wheel: Use a wire wheel on a drill or 4.5″ angle grinder to aggressively remove undercoating.
- Propane Torch and Scraper: Carefully heat the undercoating with a propane torch to soften it, then scrape it away with a metal scraper. Exercise caution when using a torch to avoid damaging the metal underneath or creating a fire hazard.
- Oscillating Slicer Tool: An oscillating tool with a slicer blade can effectively cut through and remove undercoating.
Advantages of Mechanical Paint Stripping (PROS)
- Cost-Effective: Mechanical tools and abrasives are generally affordable.
- Gentle on Metal: When used correctly, these methods are gentle on metal panels.
- DIY-Friendly: Mechanical stripping can be easily done at home.
- Safe for Seams: Unlike chemical strippers, mechanical methods are safe to use around seams and panel gaps.
- Ready for Primer: The surface is immediately ready for epoxy primer after stripping.
- Panel-by-Panel Approach: You can strip paint one panel at a time, allowing for flexible project management.
Disadvantages of Mechanical Paint Stripping (CONS)
- Dusty: Mechanical stripping generates a significant amount of dust, requiring proper respiratory protection and workspace ventilation.
- Labor-Intensive: It can be a physically demanding and time-consuming process, especially for large areas.
Media-Blasting Car Paint Removal: Professional Precision
Media blasting, often referred to as sandblasting, is a popular choice among car restorers, especially for full car paint removal and rust removal. Professional blasting services utilize high-volume airflow and specialized equipment that is difficult to replicate in a home garage.
Caution: High-pressure media blasting can warp large, thin panels like hoods and doors if performed by an inexperienced operator. For these panels, consider chemical or mechanical methods first.
Common Media Blasting Materials for Paint Removal
Various media can be used for blasting, each with different characteristics and applications:
- Walnut Shells: A softer media, ideal for delicate surfaces and removing paint without damaging the underlying metal.
- Glass Beads: Primarily used for rust removal and surface refinement, creating a smoother finish.
- Soda (Sodium Bicarbonate): A gentle, water-soluble media that effectively removes paint and is less likely to warp panels. Soda blasting requires thorough neutralization afterward.
- Sand (Various Grits): A more aggressive media suitable for heavy rust and paint removal. Different grits are available for varying levels of abrasion.
- Vapor Blasting: A mixture of water and abrasive media, reducing dust and warping potential.
- Dry Ice Blasting: Uses frozen carbon dioxide pellets. It’s the least abrasive and leaves no residual media, making it ideal for sensitive areas and intricate parts.
The choice of media depends on the paint thickness, panel shape, and desired outcome. Sandblasting excels at removing rust, particularly in hard-to-reach areas. For heavily rusted cars undergoing rotisserie restorations, blasting is often combined with cutting out and replacing severely corroded metal.
Advantages of Media Blasting (PROS)
- Professional Service: Outsourcing to professionals ensures the job is done correctly and efficiently.
- Excellent for Rust Removal: Blasting is highly effective at removing rust, even in tight spaces.
- Fast Paint Removal: Media blasting is a relatively quick method for stripping an entire car.
- Dry Ice Blasting (Least Intrusive): Dry ice blasting is the gentlest media option, minimizing the risk of damage.
Disadvantages of Media Blasting (CONS)
- Expensive: Professional media blasting can be costly, ranging from $2,000 to $3,000 or more for a full car.
- Warping Risk: Improper technique can lead to panel warping, especially on large, flat panels.
- Media Cleanup: Abrasive media (glass, shells, sand) can get everywhere, requiring thorough cleanup.
- Logistics: You need to transport the car to a blasting shop or have a mobile blasting service come to you, requiring significant outdoor space.
- Soda Neutralization: Soda blasting requires neutralization of soda residue to prevent paint adhesion issues.
Acid Dipping Paint Removal: The Immersion Solution
For extreme cases, especially with heavily rusted or intricately shaped vehicles, acid dipping offers a thorough paint and rust removal solution. This method involves immersing the entire car body in a series of acid baths to strip away paint and rust.
Acid dipping requires complete disassembly of the car. Everything, including interior components, trim, and mechanical parts, must be removed before dipping. It’s also crucial to remove any plugs or seals that might trap air and prevent the acid solution from reaching all areas, especially hidden cavities and channels.
Acid dipping is undoubtedly a professional service. Thoroughly research and choose a reputable dipping facility with experience in automotive restoration. Ask detailed questions about their process, neutralization procedures, and rust prevention measures.
Acid dipping is particularly beneficial for cars with significant rust or thin metal, such as classic VW Beetles. The acid effectively removes rust, including pitting, leaving a clean metal surface.
Proper neutralization after acid dipping is paramount. Typically, high-pressure water is used to flush away acid residue and debris. Heating seams after dipping can help boil out any trapped chemicals from spot-welded areas, preventing future paint problems caused by chemical leaching.
Most dipping services apply a phosphate coating after stripping to prevent flash rust. Verify that your chosen primer is compatible with phosphated surfaces to ensure proper paint adhesion.
Electrolysis for Rust Removal on Small Parts
Electrolysis is another dipping method, particularly useful for removing rust from smaller, delicate parts. While not acid-based, it uses an electrolyte solution and electricity to remove rust. Electrolysis is a self-limiting process, stopping once the rust is removed, and is ideal for parts where abrasive methods are undesirable.
Advantages of Acid Dipping (PROS)
- Thorough Rust Removal: Acid dipping excels at removing rust from all areas, including hidden cavities.
- Fast Process (Once Prepped): Once the car is prepped and dipped, the stripping process is relatively quick.
- No Warping Risk: Dipping eliminates the risk of panel warping associated with some mechanical or blasting methods.
Disadvantages of Acid Dipping (CONS)
- Acid Leaching Risk: Trapped acids can potentially leach through future paint layers if neutralization is not perfect.
- Complete Disassembly Required: The entire car must be completely disassembled, adding significant labor before and after dipping.
Car Paint Stripping Summary: Choosing the Right Method
Selecting the best method for removing paint from your car depends on balancing cost, time, and desired quality. High-end restoration shops often favor dry ice blasting and meticulous mechanical methods for valuable vehicles. Mechanical stripping, in particular, is favored for ensuring optimal paint adhesion, making it crucial for projects where quality and reputation are paramount.
For those overwhelmed by rust repair, outsourcing paint and rust removal to a media blasting service can be a worthwhile investment. It provides a clean slate and allows you to focus on the build process.
Ultimately, the best approach is the one that aligns with your budget, skills, and project goals. Consider the pros and cons of each method, and don’t hesitate to combine techniques for optimal results.
For further insights and visual guidance, explore the video demonstrating these paint stripping methods. Observing practical application can inspire confidence and clarify the process.
If you have specific questions about paint removal for your project, please leave a comment below. Your experience and inquiries contribute to our community knowledge.