How To Remove Stains From Fabric Car Seats effectively? Stubborn car seat stains can be frustrating, but CARS.EDU.VN is here to guide you through proven techniques to restore your car’s interior. Discover simple DIY solutions and professional tips to tackle any stain, leaving your seats looking fresh and clean. We’ll cover everything from basic cleaning to advanced stain removal, ensuring a spotless and inviting vehicle interior.
1. The Importance of Prompt Stain Removal From Car Seats
Fabric car seats, while comfortable, are magnets for stains. Whether it’s a coffee spill, a crayon mishap, or mud tracked in from outdoors, these blemishes can quickly detract from your car’s overall appeal. The longer a stain sits, the harder it becomes to remove, potentially leading to permanent discoloration or damage. Acting quickly and using the right techniques can save you time, money, and frustration in the long run. Prompt attention also prevents odors from setting in and keeps your car smelling fresh.
Think of your car’s interior as an extension of your home. Just as you wouldn’t let a spill linger on your living room sofa, you shouldn’t neglect stains on your car seats. Regular cleaning and immediate stain treatment are key to maintaining a clean and comfortable driving environment.
2. Essential Tools and Supplies for Stain Removal
Before diving into stain removal, gather your supplies. Having the right tools and products on hand will streamline the process and increase your chances of success. Here’s a list of essentials:
| Tool/Supply | Purpose |
|---|---|
| Vacuum Cleaner | Removing loose dirt and debris before treatment |
| Microfiber Cloths | Gentle wiping and blotting of stains |
| Soft-Bristled Brush | Scrubbing stains without damaging the fabric |
| Spray Bottle | Applying cleaning solutions evenly |
| Bucket | Mixing cleaning solutions |
| Warm Water | Rinsing away cleaning solutions |
| Upholstery Cleaner | Commercial stain remover for fabric car seats |
| Baking Soda | Natural deodorizer and stain remover |
| White Vinegar | Effective for many types of stains |
| Dish Soap | Gentle cleaning agent for grease and grime |
| Club Soda | Useful for lifting fresh stains |
| Enzyme Cleaner | Ideal for organic stains like food and bodily fluids |
| Steam Cleaner (Optional) | Deep cleaning and sanitizing |

Having these supplies readily available allows you to tackle stains as soon as they appear, preventing them from setting in. Remember, always test any cleaning solution on a small, inconspicuous area of the car seat first to ensure it doesn’t cause discoloration or damage.
3. Preparing Your Car Seats for Cleaning
Before applying any cleaning solutions, it’s crucial to prepare your car seats properly. This involves removing loose debris and dirt that could hinder the stain removal process. Here’s a step-by-step guide:
- Vacuum Thoroughly: Use a vacuum cleaner with an upholstery attachment to remove loose dirt, crumbs, and debris from the entire car seat. Pay special attention to crevices and seams where dirt tends to accumulate.
- Remove Floor Mats: Take out any floor mats or seat covers to allow for a more thorough cleaning of the underlying fabric.
- Ventilate the Car: Open the car doors and windows to ensure proper ventilation during the cleaning process. This will help cleaning solutions dry faster and prevent the build-up of unpleasant odors.
- Protect Surrounding Areas: Use masking tape or plastic sheeting to protect nearby surfaces, such as door panels or consoles, from accidental overspray or drips.
By taking these preparatory steps, you’ll create a clean and conducive environment for effective stain removal. Remember, a little preparation goes a long way in achieving the best results.
4. Identifying the Type of Stain for Targeted Treatment
Different stains require different approaches. Identifying the type of stain on your car seat is crucial for selecting the most effective cleaning method. Here’s a breakdown of common stain types and recommended treatments:
| Stain Type | Characteristics | Recommended Treatment |
|---|---|---|
| Food & Drink | Coffee, soda, juice, ketchup, etc. | Dish soap solution, enzyme cleaner, or upholstery cleaner |
| Grease & Oil | Motor oil, food grease, lotions | Dish soap solution, baking soda paste, or degreaser |
| Ink | Pen, marker | Rubbing alcohol, hairspray, or specialized ink remover |
| Pet Stains | Urine, vomit, saliva | Enzyme cleaner, baking soda, or vinegar solution |
| Mud & Dirt | Soil, clay, mud | Vacuuming, dish soap solution, or upholstery cleaner |
| Blood | Fresh or dried blood | Cold water, hydrogen peroxide, or enzyme cleaner |
| Gum | Chewing gum | Freezing with ice, scraping, or solvent-based adhesive remover |
Understanding the nature of the stain allows you to choose the right cleaning agents and techniques, maximizing your chances of successful stain removal. For example, an enzyme cleaner is specifically designed to break down organic stains like food and pet messes, while a solvent-based remover may be necessary for stubborn ink or adhesive residue.
5. DIY Cleaning Solutions: Recipes and Applications
For many car seat stains, you don’t need to rely on expensive commercial products. Several effective DIY cleaning solutions can be made with common household ingredients. Here are a few tried-and-true recipes:
- Dish Soap Solution: Mix a few drops of mild dish soap with warm water in a bucket. This gentle solution is effective for removing food stains, grease, and general grime.
- Vinegar Solution: Combine one part white vinegar with two parts water in a spray bottle. Vinegar is a natural disinfectant and deodorizer, making it ideal for removing odors and light stains.
- Baking Soda Paste: Mix baking soda with water to form a thick paste. This paste is excellent for absorbing odors and lifting stubborn stains.
- Club Soda: Pour club soda directly onto the stain and blot with a clean cloth. The carbonation helps lift the stain from the fabric.
When applying DIY solutions, always test on a small, inconspicuous area first. Use a soft-bristled brush or microfiber cloth to gently scrub the stain, working from the outside in. Rinse the area with clean water and blot dry.
6. Step-by-Step Guide to Removing Common Stains
Now, let’s delve into specific stain removal techniques for some common culprits:
6.1. Removing Food and Drink Stains
- Blot the Stain: Immediately blot the stain with a clean, dry cloth to absorb as much liquid as possible.
- Apply Dish Soap Solution: Mix a few drops of mild dish soap with warm water. Dip a microfiber cloth into the solution and gently blot the stain.
- Scrub Gently: Use a soft-bristled brush to gently scrub the stain, working from the outside in.
- Rinse with Clean Water: Dampen a clean cloth with water and blot the area to remove any soap residue.
- Dry Thoroughly: Blot the area with a dry cloth and allow it to air dry completely.
6.2. Removing Grease and Oil Stains
- Blot Excess Grease: Blot the stain with a clean cloth to remove as much grease as possible.
- Apply Baking Soda: Sprinkle baking soda generously over the stain and let it sit for at least 30 minutes to absorb the grease.
- Vacuum Baking Soda: Vacuum up the baking soda using an upholstery attachment.
- Apply Dish Soap Solution: Mix a few drops of mild dish soap with warm water. Dip a microfiber cloth into the solution and gently blot the stain.
- Rinse with Clean Water: Dampen a clean cloth with water and blot the area to remove any soap residue.
- Dry Thoroughly: Blot the area with a dry cloth and allow it to air dry completely.
6.3. Removing Ink Stains
- Blot the Stain: Blot the stain with a clean cloth to absorb as much ink as possible.
- Apply Rubbing Alcohol: Dip a cotton ball into rubbing alcohol and gently blot the stain. Avoid rubbing, as this can spread the ink.
- Repeat as Necessary: Repeat the process until the ink stain is removed.
- Rinse with Clean Water: Dampen a clean cloth with water and blot the area to remove any alcohol residue.
- Dry Thoroughly: Blot the area with a dry cloth and allow it to air dry completely.
6.4. Removing Pet Stains
- Blot the Stain: Blot the stain with a clean cloth to absorb as much liquid as possible.
- Apply Enzyme Cleaner: Spray an enzyme cleaner liberally over the stain. Enzyme cleaners are specifically designed to break down organic matter in pet stains.
- Let it Sit: Allow the enzyme cleaner to sit for the recommended time, usually 10-15 minutes.
- Blot with Clean Water: Dampen a clean cloth with water and blot the area to remove the enzyme cleaner.
- Dry Thoroughly: Blot the area with a dry cloth and allow it to air dry completely.
6.5. Removing Mud and Dirt Stains
- Let it Dry: Allow the mud or dirt to dry completely.
- Vacuum Thoroughly: Use a vacuum cleaner with an upholstery attachment to remove as much dried mud as possible.
- Apply Dish Soap Solution: Mix a few drops of mild dish soap with warm water. Dip a microfiber cloth into the solution and gently blot the stain.
- Scrub Gently: Use a soft-bristled brush to gently scrub the stain, working from the outside in.
- Rinse with Clean Water: Dampen a clean cloth with water and blot the area to remove any soap residue.
- Dry Thoroughly: Blot the area with a dry cloth and allow it to air dry completely.
6.6. Removing Blood Stains
- Blot the Stain: Immediately blot the stain with a clean, dry cloth to absorb as much blood as possible.
- Apply Cold Water: Dampen a clean cloth with cold water and gently blot the stain. Avoid using hot water, as it can set the stain.
- Apply Hydrogen Peroxide (Optional): If the stain persists, apply a small amount of hydrogen peroxide to a cotton ball and gently blot the stain. Test in an inconspicuous area first.
- Rinse with Cold Water: Dampen a clean cloth with cold water and blot the area to remove any residue.
- Dry Thoroughly: Blot the area with a dry cloth and allow it to air dry completely.
6.7. Removing Gum
- Freeze the Gum: Place an ice pack or several ice cubes in a plastic bag over the gum to freeze it.
- Scrape the Gum: Once the gum is frozen solid, use a blunt knife or scraper to gently lift it from the fabric.
- Clean the Area: Use a mild dish soap solution to clean any remaining residue.
- Dry Thoroughly: Blot the area with a dry cloth and allow it to air dry completely.
7. Utilizing Commercial Upholstery Cleaners Effectively
When DIY solutions fall short, commercial upholstery cleaners can provide a more powerful cleaning action. Here’s how to use them effectively:
- Choose the Right Product: Select an upholstery cleaner specifically designed for fabric car seats. Read the product label carefully to ensure it’s suitable for the type of fabric in your car.
- Test in an Inconspicuous Area: Before applying the cleaner to the entire stain, test it in a small, hidden area to ensure it doesn’t cause discoloration or damage.
- Apply the Cleaner: Follow the manufacturer’s instructions for applying the cleaner. This usually involves spraying the cleaner onto the stain and letting it sit for a few minutes.
- Scrub Gently: Use a soft-bristled brush or microfiber cloth to gently scrub the stain.
- Blot with Clean Water: Dampen a clean cloth with water and blot the area to remove the cleaner.
- Dry Thoroughly: Blot the area with a dry cloth and allow it to air dry completely.
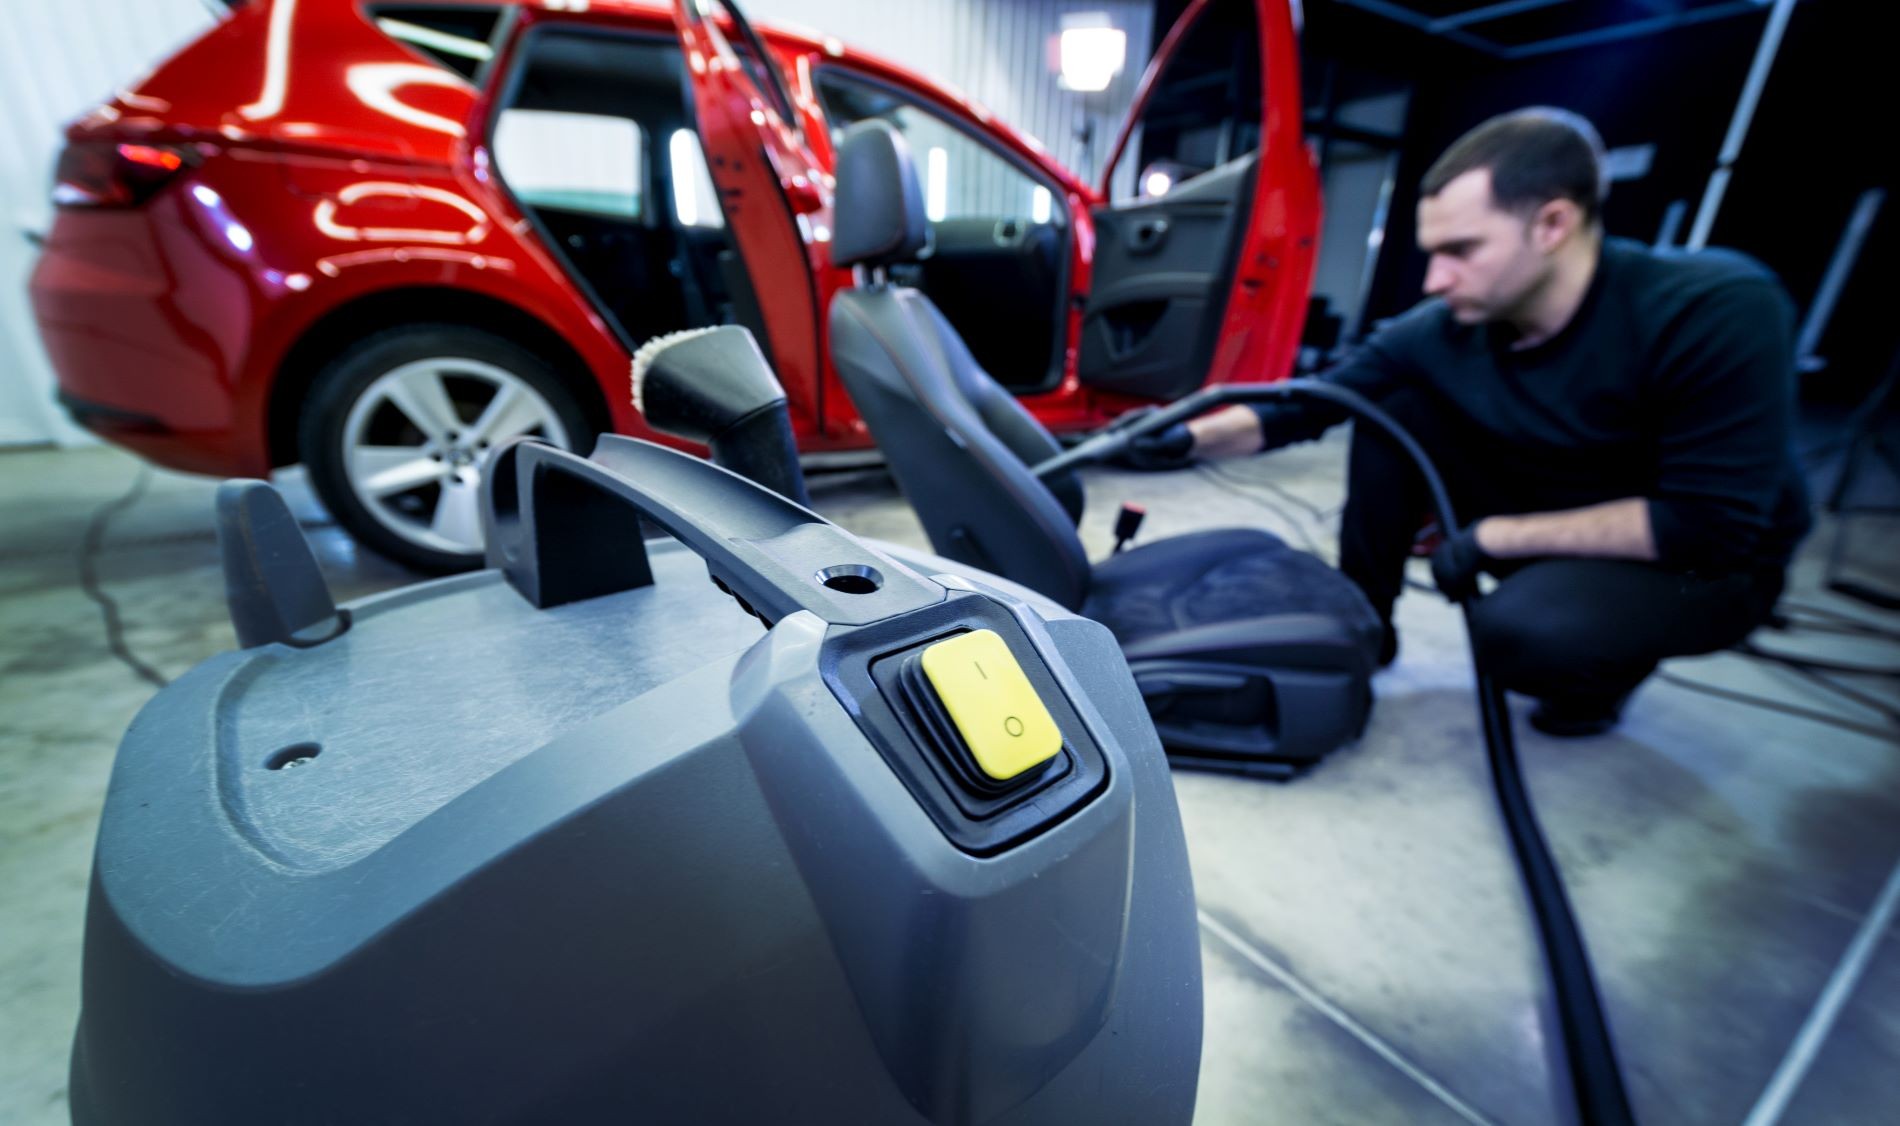
8. The Power of Steam Cleaning for Deep Stain Removal
Steam cleaning is an excellent method for deep cleaning and sanitizing fabric car seats. The high temperature of the steam helps to loosen dirt and grime, kill bacteria, and remove stubborn stains. Here’s how to steam clean your car seats:
- Vacuum Thoroughly: Vacuum the car seats to remove loose dirt and debris.
- Fill the Steam Cleaner: Fill the steam cleaner with water according to the manufacturer’s instructions.
- Steam Clean the Seats: Use the steam cleaner’s upholstery attachment to steam clean the car seats. Move the attachment slowly and evenly over the fabric.
- Wipe with a Clean Cloth: Use a clean, dry microfiber cloth to wipe away any excess moisture and loosened dirt.
- Ventilate the Car: Open the car doors and windows to allow the seats to air dry completely.
9. Drying Techniques to Prevent Mold and Mildew
Proper drying is essential after cleaning your car seats to prevent the growth of mold and mildew. Here are some effective drying techniques:
- Air Drying: Open the car doors and windows to allow for natural air circulation. This is the most gentle and environmentally friendly drying method.
- Using a Fan: Place a fan inside the car to circulate air and speed up the drying process.
- Using a Dehumidifier: A dehumidifier can help to remove excess moisture from the car, preventing mold and mildew growth.
- Using a Wet/Dry Vacuum: A wet/dry vacuum can be used to extract excess water from the car seats after cleaning.
Ensure the car seats are completely dry before closing the doors and windows to prevent moisture build-up.
10. Preventing Future Stains: Protection and Maintenance Tips
Prevention is always better than cure. Here are some tips to help prevent future stains on your car seats:
- Use Seat Covers: Seat covers can protect your car seats from spills, stains, and wear and tear.
- Clean Up Spills Immediately: The sooner you clean up a spill, the easier it will be to remove the stain.
- Avoid Eating and Drinking in the Car: This can minimize the risk of spills and stains.
- Regularly Vacuum Your Car Seats: This will help to remove loose dirt and debris before they can become embedded in the fabric.
- Apply a Fabric Protector: A fabric protector can create a barrier that repels liquids and stains.
11. When to Seek Professional Car Detailing Services
Sometimes, despite your best efforts, stubborn stains may persist. In these cases, it’s best to seek professional car detailing services. Professional detailers have the expertise, equipment, and cleaning solutions to tackle even the most challenging stains. They can also provide a thorough cleaning and conditioning of your car’s interior, leaving it looking and smelling like new.
12. Cost-Effective Stain Removal Strategies
Removing stains from fabric car seats doesn’t have to break the bank. Here are some cost-effective strategies:
- DIY Cleaning Solutions: As mentioned earlier, DIY cleaning solutions can be just as effective as commercial products and are much cheaper.
- Focus on Problem Areas: Instead of cleaning the entire car interior, focus on the stained areas to save time and money.
- Shop Around for Supplies: Compare prices at different stores to find the best deals on cleaning supplies.
- Consider Mobile Detailing: Mobile detailing services can be more convenient and cost-effective than taking your car to a traditional detailing shop.
13. Eco-Friendly Stain Removal Options
If you’re concerned about the environment, there are several eco-friendly stain removal options available:
- Vinegar and Baking Soda: These natural ingredients are effective stain removers and are safe for the environment.
- Plant-Based Cleaners: Look for upholstery cleaners made with plant-based ingredients that are biodegradable and non-toxic.
- Reusable Microfiber Cloths: These cloths can be washed and reused, reducing waste.
- Limit Water Usage: Be mindful of your water usage when rinsing cleaning solutions.
14. Understanding Fabric Types and Their Cleaning Needs
Different fabric types require different cleaning approaches. Here’s a guide to understanding common car seat fabric types and their specific cleaning needs:
| Fabric Type | Characteristics | Cleaning Needs |
|---|---|---|
| Cloth | Durable, absorbent, and relatively easy to clean | Gentle cleaning solutions, regular vacuuming, stain removal as needed |
| Velour | Soft, plush, and prone to trapping dirt and debris | Regular vacuuming, gentle brushing, avoid harsh chemicals |
| Leather | Luxurious, durable, and requires specialized care | Leather-specific cleaners and conditioners, avoid excessive moisture |
| Synthetic Leather | Durable, water-resistant, and easy to clean | Mild soap and water, avoid harsh chemicals and abrasives |
15. Addressing Odors After Stain Removal
Even after successfully removing a stain, lingering odors can be a problem. Here’s how to address odors after stain removal:
- Baking Soda: Sprinkle baking soda generously over the affected area and let it sit overnight. Vacuum up the baking soda in the morning.
- Vinegar: Place a bowl of white vinegar inside the car overnight to absorb odors.
- Enzyme Cleaner: Enzyme cleaners are specifically designed to break down odor-causing molecules.
- Air Fresheners: Use car air fresheners to mask any remaining odors.
16. Advanced Stain Removal Techniques for Professionals
Professional car detailers have access to advanced stain removal techniques and equipment. Here are a few of their secrets:
- Hot Water Extraction: This technique involves using a machine to spray hot water and cleaning solution onto the fabric and then immediately extracting the liquid with a powerful vacuum.
- Ozone Generators: Ozone generators can be used to eliminate stubborn odors by oxidizing odor-causing molecules.
- Specialized Cleaning Solutions: Professional detailers have access to stronger and more effective cleaning solutions than those available to consumers.
17. How to Maintain a Spotless Car Interior: A Routine
Maintaining a spotless car interior requires a regular cleaning routine. Here’s a suggested schedule:
- Weekly: Vacuum car seats and floor mats.
- Monthly: Wipe down interior surfaces with a damp cloth.
- Quarterly: Deep clean car seats and carpets.
- As Needed: Address spills and stains immediately.
18. Seasonal Stain Challenges and Solutions
Different seasons bring different stain challenges. Here’s how to deal with them:
- Winter: Salt stains from snow and ice can be removed with a vinegar solution.
- Spring: Mud and dirt tracked in from outdoors can be removed with a dish soap solution.
- Summer: Sweat and sunscreen stains can be removed with an enzyme cleaner.
- Fall: Leaf stains can be removed with a baking soda paste.
19. The Role of Interior Detailing in Car Resale Value
A clean and well-maintained car interior can significantly increase its resale value. Potential buyers are more likely to be impressed by a car that looks and smells fresh and new. Investing in regular interior detailing can be a smart way to protect your investment.
20. Success Stories: Real-Life Stain Removal Transformations
Here are a few real-life stain removal transformations to inspire you:
- Coffee Spill: A customer spilled coffee all over their fabric car seat. Using a combination of dish soap solution and a steam cleaner, the stain was completely removed.
- Pet Mess: A dog vomited on the car seat. An enzyme cleaner was used to remove the stain and eliminate the odor.
- Ink Stain: A pen leaked in a pocket, leaving a large ink stain on the seat. Rubbing alcohol was used to gradually lift the ink, followed by a thorough cleaning.
21. The Future of Car Interior Cleaning Technology
The future of car interior cleaning technology is looking bright. Here are a few trends to watch:
- Self-Cleaning Fabrics: Some car manufacturers are developing self-cleaning fabrics that repel dirt and stains.
- Robotic Cleaners: Robotic cleaners could be used to automatically vacuum and clean car interiors.
- Advanced Stain Removal Solutions: New and more effective stain removal solutions are constantly being developed.
22. Common Mistakes to Avoid During Stain Removal
To ensure you achieve the best results and avoid damaging your car seats, here are some common mistakes to avoid during stain removal:
- Using Harsh Chemicals: Avoid using harsh chemicals that can damage the fabric or cause discoloration.
- Rubbing the Stain: Rubbing can spread the stain and make it more difficult to remove. Always blot the stain instead.
- Using Hot Water on Blood Stains: Hot water can set blood stains, making them permanent. Always use cold water instead.
- Not Testing Cleaning Solutions: Always test cleaning solutions in an inconspicuous area before applying them to the entire stain.
23. Maximizing the Lifespan of Your Car Seats
By following these tips and maintaining a regular cleaning routine, you can maximize the lifespan of your car seats and keep them looking their best for years to come:
- Use seat covers to protect your seats from spills and stains.
- Clean up spills immediately to prevent stains from setting in.
- Regularly vacuum your car seats to remove dirt and debris.
- Condition leather seats to keep them supple and prevent cracking.
- Avoid exposing your car seats to direct sunlight for extended periods.
24. Stain Removal for Specific Car Models and Makes
While the general principles of stain removal apply to most cars, some models and makes may have unique fabric types or cleaning requirements. Consult your car’s owner’s manual or a professional car detailer for specific recommendations.
25. The Psychology of a Clean Car Interior
A clean car interior can have a positive impact on your mood and well-being. Studies have shown that a clean environment can reduce stress, improve focus, and boost productivity. Keeping your car interior clean and organized can contribute to a more pleasant and enjoyable driving experience.
26. CARS.EDU.VN’s Expert Tips for a Pristine Vehicle Interior
At CARS.EDU.VN, we understand the importance of a clean and well-maintained car interior. Our team of experts has compiled a wealth of information and resources to help you achieve a pristine vehicle interior. From detailed cleaning guides to product recommendations, we’re here to support you every step of the way.
27. Conclusion: Enjoy a Stain-Free Ride with These Expert Tips
Removing stains from fabric car seats can be a challenging but rewarding task. By following the tips and techniques outlined in this comprehensive guide, you can effectively tackle any stain and restore your car’s interior to its former glory. Remember, prompt action, the right tools, and a little patience are key to success.
Is your car interior still not up to par? Don’t stress. At CARS.EDU.VN, we understand the challenges of maintaining a spotless vehicle. From finding reliable repair services to detailed cleaning guides, we’re here to help. Visit CARS.EDU.VN today for expert advice and solutions. Our comprehensive resources cover everything from car maintenance to the latest automotive technologies. Contact us at 456 Auto Drive, Anytown, CA 90210, United States, Whatsapp: +1 555-123-4567, or visit our website at CARS.EDU.VN. Let CARS.EDU.VN be your trusted partner in car care.
FAQ: Frequently Asked Questions About Car Seat Stain Removal
Here are some frequently asked questions about car seat stain removal:
- What is the best way to remove stains from fabric car seats? The best way depends on the stain type. For most stains, start with a dish soap solution.
- How do I remove coffee stains from my car seats? Blot the stain, apply a dish soap solution, scrub gently, rinse, and dry.
- Can I use baking soda to remove stains from car seats? Yes, baking soda is effective for absorbing odors and lifting stains.
- How do I remove grease stains from my car seats? Apply baking soda, let it sit, vacuum, apply a dish soap solution, rinse, and dry.
- What is the best cleaner for car upholstery? An upholstery cleaner specifically designed for fabric car seats is recommended.
- How do I remove ink stains from my car seats? Apply rubbing alcohol to a cotton ball and gently blot the stain.
- Can I use a steam cleaner on my car seats? Yes, steam cleaning is an excellent method for deep cleaning and sanitizing car seats.
- How do I prevent mold and mildew growth after cleaning my car seats? Ensure the car seats are completely dry by ventilating the car or using a fan or dehumidifier.
- When should I seek professional car detailing services? If stubborn stains persist or if you want a thorough cleaning of your car’s interior.
- How can CARS.EDU.VN help me with car maintenance and cleaning? cars.edu.vn offers expert advice, detailed cleaning guides, and product recommendations to help you maintain a pristine vehicle interior.