Ever caught a glimpse of your car in the sunlight and noticed unsightly, spiderweb-like patterns marring its otherwise glossy finish? If you’re a car owner, you’re likely familiar with these – swirl marks. They are arguably the most prevalent paint imperfection and understanding How To Remove Swirls From Car Paint is a top concern for vehicle enthusiasts and everyday owners alike.
Swirl marks are essentially clusters of micro-scratches, often invisible to the naked eye individually, but collectively they dull your car’s paint. They reside on the clear coat, the uppermost protective layer of your car’s paint system. The primary culprits behind these imperfections are improper car washing and drying methods.
Beyond aesthetics, swirl marks are more than just a cosmetic nuisance. They create a surface that traps contaminants more readily, making it harder to keep your car clean and requiring more frequent, and potentially costly, detailing. Addressing swirl marks promptly is key to maintaining your car’s appearance and protecting your investment.
Let’s delve deeper into the causes of swirl marks, learn how to identify them, and most importantly, explore effective methods for their removal, restoring your car’s paint to its showroom shine.
Decoding the Causes of Car Paint Swirl Marks
As briefly mentioned, incorrect washing and drying practices are the chief instigators of swirl marks. Let’s break down the common mistakes that lead to these paint defects:
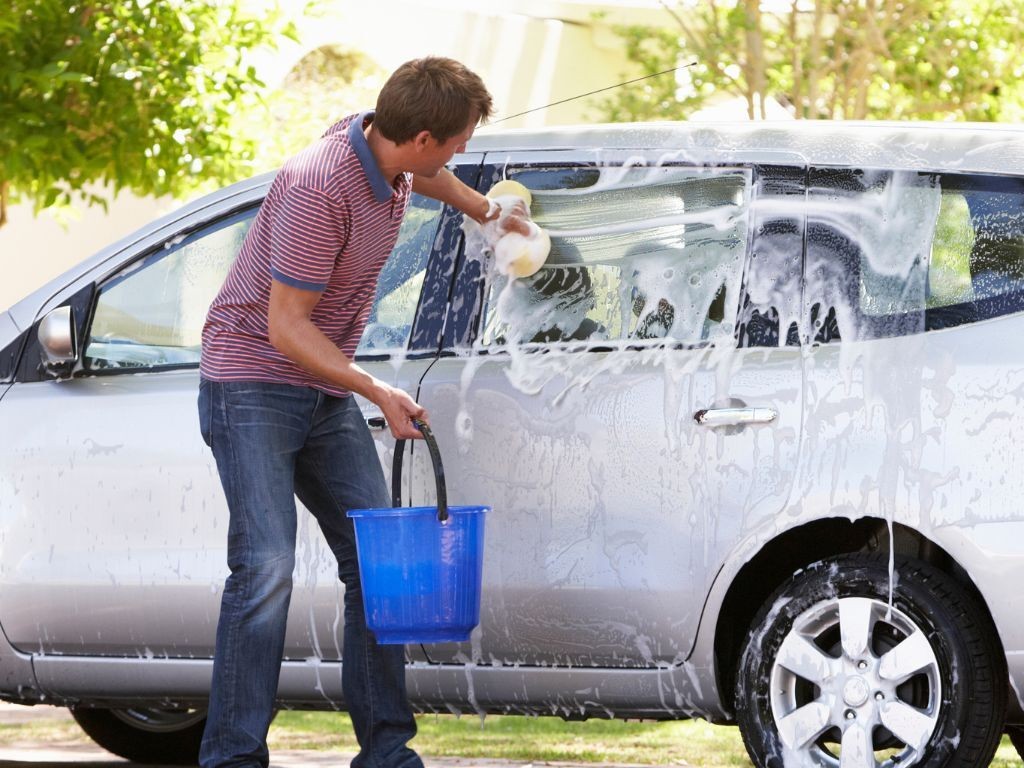
The Single Bucket Wash Faux Pas
The traditional single bucket wash is a major contributor to swirl marks. Imagine using the same bucket of soapy water to rinse your wash mitt throughout the entire cleaning process. You’re essentially redepositing dirt and grime back onto your car’s surface with each wipe. The solution? Adopt the two-bucket wash method. Utilize one bucket for your soapy wash solution and a separate bucket filled with clean water for rinsing your wash mitt or sponge after each section. This simple switch drastically reduces the amount of abrasive particles reintroduced to your paint.
Skipping the Essential Pre-Wash Rinse
Directly attacking your car with a wash mitt or sponge on a dry, dirty surface is akin to sanding your paint. Loose dirt, grit, and road grime act as tiny abrasives. A pre-wash rinse, ideally with a pressure washer, is crucial. This initial rinse effectively removes the majority of loose contaminants before physical contact with a wash mitt, minimizing the risk of dragging these particles across the paint and causing swirls.
The Pitfalls of Harsh Cleaning Products
The tools and products you use play a significant role in preventing swirl marks. Aggressive cleaning agents and improper materials can inflict micro-scratches. For instance, avoid towels and applicators containing coarse polyester fibers. Opt for ultra-soft microfiber cloths specifically designed for car detailing. Similarly, steer clear of overly abrasive polishing compounds or harsh paint cleaners for routine washing, as these can prematurely wear down the clear coat and induce swirls.
Improper Drying Techniques: A Swirl Mark Magnet
Drying your car with a dirty or abrasive towel is another common mistake. Just like washing, the drying stage requires gentle, clean materials. Always use a clean, plush microfiber drying towel. Patting or blotting the water off the surface, rather than dragging the towel, further minimizes friction and the potential for swirl creation.
Automated Car Washes: Convenience vs. Paint Damage
While automated car washes offer convenience, they are notorious for inducing swirl marks. The rotating brushes in these facilities often accumulate dirt and grit from numerous vehicles throughout the day. These contaminated brushes then act like sandpaper on your car’s paint, leaving behind a web of micro-scratches. For pristine paint, especially on newer vehicles, manual washing is always the gentler and safer option compared to frequent automated car wash visits.
Common Swirl Mark Hotspots on Your Vehicle
Swirl marks can technically appear anywhere on your car’s painted surfaces. However, they are most frequently observed on horizontal panels like the hood, roof, and trunk. These areas are typically larger, flatter, and more exposed to direct sunlight and environmental fallout, making imperfections more noticeable.
Darker colored vehicles, particularly black cars, are significantly more prone to showcasing swirl marks. Black paint absorbs light, highlighting any surface imperfections. While less conspicuous on lighter shades, swirl marks can still develop on any car, regardless of color. They often become more apparent in shaded conditions or when the car’s surface is wet, as these conditions reduce direct reflection and emphasize surface flaws.
Distinguishing Swirl Marks from Deeper Scratches
Before you can effectively tackle swirl mark removal, it’s crucial to differentiate them from deeper, more serious scratches. While both are paint defects, their causes, severity, and removal methods differ. A trained auto detailer can readily discern between the two, but here’s a guide to help you identify swirl marks:
Characteristics of Swirl Marks:
- Appearance: Resemble cobwebs or spiderwebs, exhibiting a circular or arc-like pattern with a relatively consistent diameter.
- Prevalence: The most common type of paint defect encountered by car owners.
- Depth: Confined to the clear coat surface; they do not penetrate through the paint layers.
- Tactile Feel: Usually not detectable by touch; the surface may feel smooth despite the visual imperfections.
Characteristics of Scratches:
- Appearance: Exhibit random shapes and irregular patterns, often linear or jagged, lacking the consistent circularity of swirl marks.
- Causes: Typically caused by deeper abrasions from sharp objects like keys, rocks, or branches.
- Depth: Penetrate deeper into the paint system, potentially affecting the color coat and even reaching the primer or bare metal.
- Tactile Feel: Often detectable by touch; you can usually feel a scratch with your fingernail.
Swirl marks are generally shallow, typically measuring only 2-4 microns in depth, residing solely within the clear coat.
Furthermore, swirl marks can be categorized into different types, each with slightly varying characteristics:
-
Wash Marring: These are the most common type, appearing as both swirls and straight lines, with varying degrees of damage in area and depth, directly resulting from improper washing techniques.
-
Dual Action Haze (Micro-Marring): Characterized by sporadically uniform, very fine swirl marks, often only visible under direct light sources like sunlight or fluorescent lighting. They are essentially hairline swirl marks.
-
Buffer Swirls: These are typically thicker and more pronounced than other types, with a more consistent circular diameter, and are most visible under bright or white fluorescent light, often resulting from improper machine polishing techniques.
The Step-by-Step Guide to Swirl Mark Removal
While preventing swirl marks is ideal, complete avoidance is often unrealistic. For minor swirl marks, over-the-counter scratch and swirl removers can offer a quick fix. However, for more noticeable and widespread swirl marks, a more comprehensive approach is necessary. Here’s a detailed, step-by-step process outlining how to remove swirl marks from car paint effectively:
Step 1: Thorough Car Wash – The Foundation of Flawless Paint
As with any paint correction process, starting with a meticulously clean surface is paramount. If dirt and surface contaminants remain on the paint during swirl removal, you risk inflicting more swirl marks. Begin with a pre-wash using a pressure washer to dislodge loose dirt and grime without physical contact.
Next, employ the two-bucket wash method for a thorough cleaning. Key considerations during the wash stage include:
- Gentle Soap: Use a pH-balanced, high-quality car wash soap.
- Top-Down Approach: Wash from the roof downwards, saving the dirtier lower panels for last.
- Focus on Swirl-Prone Areas: Pay extra attention to the hood, roof, and trunk, where swirls are most common.
- Thorough Rinsing: Rinse meticulously to eliminate all soap residue.
- Microfiber Drying: Dry the car using a clean, soft microfiber towel, employing a patting or blotting motion.
Step 2: Clay Bar Treatment – Decontaminating the Paint Surface
Even after a thorough wash, bonded contaminants, such as industrial fallout, brake dust iron particles, and tree sap, may remain embedded in the clear coat. These contaminants can hinder the polishing process and contribute to future swirl development. A clay bar treatment effectively removes these bonded impurities, leaving a smooth, clean surface ready for polishing.
When using a clay bar:
- Work in Sections: Divide the car’s surface into manageable sections, approximately 1ft X 1ft.
- Lubrication is Key: Liberally spray the section with clay bar lubricant (detailing spray).
- Gentle, Linear Motion: Glide the clay bar back and forth in straight, overlapping lines, using minimal pressure.
- Fold and Knead: As the clay bar picks up contaminants, fold and knead it to expose a clean surface.
- Rinse After Claying: Rinse the entire vehicle again after completing the clay bar treatment.
- Dry Thoroughly: Dry the car with a clean microfiber towel.
Cautionary Note: Proper clay bar technique is essential to avoid inflicting further damage. If you’re unfamiliar with clay bar application, seeking professional detailing assistance is advisable.
Step 3: Paint Polishing – The Swirl Mark Eradicator
With the car washed and decontaminated, the paint is now prepped for polishing – the core step in swirl mark removal. Polishing utilizes mild abrasives in polishing compounds to gently level the clear coat, eliminating the micro-scratches that constitute swirl marks and restoring paint clarity and gloss.
For machine polishing:
- Start Slow: Begin with a low speed setting on your power polisher and gradually increase as needed.
- Clean Pad Essential: Always use a clean polishing pad.
- Polish Application: Apply a few pea-sized drops of polishing compound to the pad.
- Top-Down Polishing: Work from the top of the vehicle downwards.
- Small, Overlapping Circles: Move the polisher in small, overlapping circular motions.
- Pressure Adjustment: Increase pressure slightly when polishing areas with noticeable swirl marks.
Step 4: Buffing to Refine the Finish
Buffing is an extension of the polishing process, further refining the paint finish and removing any residual polishing compound haze. Buffing can be performed either manually or with a machine buffer.
Manual Buffing Technique
When buffing by hand:
- Timely Buffing: Buff off polish residue before it dries completely.
- Clean Microfiber Towels: Use clean, plush microfiber towels or buffing pads.
- Multiple Towels: Keep several clean towels handy.
- Inspection is Key: Regularly inspect the paint under a flashlight to check for remaining swirls.
- Repeat if Necessary: If swirls persist, re-polish and buff the affected area.
- Achieve Gloss: Continue buffing until a high-gloss, swirl-free finish is achieved.
Machine Buffing with a Buffer/Polisher
For faster and more efficient buffing, a machine buffer/polisher can be used. A random orbital buffer is highly recommended for DIYers due to its safety and ease of use compared to rotary buffers. Rotary buffers, while more powerful, require expertise to prevent paint damage like burn marks due to their direct, high-speed circular motion.
Using a Random Orbital Buffer for Buffing:
- Compound Application: Apply a small amount of finishing polish or buffing compound to a 1ft X 1ft section.
- Pad Priming: Apply a small amount of compound directly to the buffing pad before starting.
- Slow and Steady Movement: Move the buffer at a slow, consistent pace (approximately one inch per second).
- Section by Section: Work in 1ft X 1ft sections.
- Multiple Passes: Make several overlapping passes over each section.
Important Note: Excessive pressure with a machine buffer can lead to paint damage. If you’re uncomfortable with machine buffing, professional detailing is a safe and reliable alternative.
Step 5: Waxing for Protection and Enhanced Shine
Waxing is the crucial final step after removing swirl marks. Polishing, while effective at swirl removal, can slightly reduce the clear coat thickness. Waxing replenishes protection, strengthens the clear coat, and creates a hydrophobic barrier against contaminants, minimizing the recurrence of swirl marks. Wax also enhances the paint’s shine and depth.
When waxing:
- Quality Wax Matters: Use a premium automotive wax, either carnauba-based or synthetic.
- Less is More: Apply a small amount of wax to an applicator pad.
- Section Waxing: Wax the car in sections.
- Avoid Over-Drying: Don’t allow the wax to dry completely before buffing off.
- Circular Application: Apply wax in small, circular, overlapping motions.
- Microfiber Removal: Remove excess wax with a clean microfiber towel.
Pro-Tip for Waxing: Wax your car in a shaded or enclosed environment like a garage or carport. This prevents dust and contaminants from settling into the wax during application and avoids rapid drying of the wax on a hot surface, ensuring optimal shine and protection.
In Conclusion: Reclaiming Showroom Shine by Removing Swirl Marks
Swirl marks are a common paint defect, but understanding how to remove swirls from car paint empowers car owners to maintain their vehicle’s appearance and value. While the removal process requires time and attention to detail, following these steps will allow you to effectively eliminate swirl marks and achieve a stunning, swirl-free finish.
For those who prefer professional assistance, expert car detailing services offer a convenient and reliable solution. Professional detailers possess the expertise, tools, and products to safely and effectively remove swirl marks and restore your car’s paint to its optimal condition. Contact a reputable car detailing service to explore options for swirl mark removal and other paint correction services to keep your car looking its best.