Removing tint from car windows can be a necessary task, whether due to bubbling, fading, or simply wanting a change. At CARS.EDU.VN, we understand the importance of maintaining your vehicle’s aesthetics and functionality. This guide provides a comprehensive, step-by-step approach to safely and effectively remove window tint, exploring both DIY methods and the benefits of professional services. Discover how to restore your windows to their original clarity and enhance your driving experience, with insights into window film removal, adhesive removal techniques, and professional tinting services.
1. Understanding the Need for Window Tint Removal
Window tinting offers numerous benefits, from UV protection to enhanced privacy. However, there are situations where removing the tint becomes necessary. Understanding these reasons will help you make an informed decision about the removal process.
- Peeling or Bubbling: Over time, especially with low-quality films, window tint can start to peel or bubble. This not only looks unsightly but also reduces visibility.
- Fading: The sun’s UV rays can cause the tint to fade, turning purple or losing its effectiveness.
- Legal Requirements: Some areas have regulations regarding the darkness of window tint. Removing the tint might be necessary to comply with local laws.
- Personal Preference: You may simply want to change the appearance of your vehicle or prefer clear windows.
Regardless of the reason, knowing when and why to remove window tint is the first step towards a successful removal process. CARS.EDU.VN offers detailed information on window film types, helping you choose the right tint if you decide to re-tint your windows.
2. DIY vs. Professional Window Tint Removal: Weighing Your Options
Removing window tint can be done yourself (DIY) or by hiring a professional. Each option has its pros and cons. Evaluating these will help you decide which route is best for you.
DIY Removal
Pros:
- Cost Savings: DIY removal is generally cheaper, as you only pay for the necessary supplies.
- Flexibility: You can work at your own pace and schedule.
- Learning Experience: It can be a satisfying project for those who enjoy hands-on tasks.
Cons:
- Time-Consuming: Removing tint can be a lengthy and tedious process.
- Risk of Damage: Improper techniques can scratch or damage the glass.
- Uneven Results: DIY removal can sometimes leave behind adhesive residue or result in uneven removal.
- Safety Concerns: Working with sharp tools and chemicals can pose safety risks.
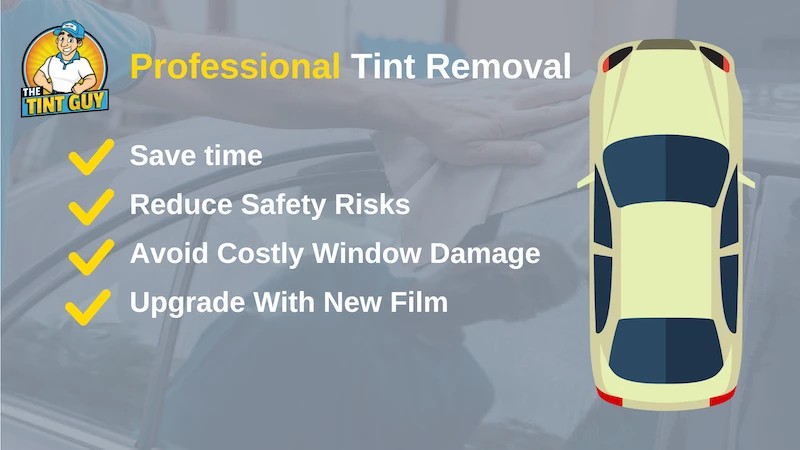
Professional Removal
Pros:
- Expertise: Professionals have the experience and tools to remove tint efficiently and safely.
- Reduced Risk of Damage: Professionals know how to avoid damaging the glass or leaving behind residue.
- Time Savings: Professionals can complete the job much faster than DIY methods.
- Convenience: You don’t have to invest your own time and effort.
Cons:
- Higher Cost: Professional removal services are more expensive than DIY.
- Scheduling: You need to schedule an appointment and work around the professional’s availability.
According to a survey by the International Window Film Association (IWFA), professional installation and removal often result in higher customer satisfaction due to the quality of work and reduced risk of damage. At CARS.EDU.VN, we recommend carefully considering your skills, time, and budget before deciding between DIY and professional removal.
3. Essential Tools and Equipment for DIY Tint Removal
If you decide to remove the window tint yourself, gathering the right tools and equipment is crucial for a smooth and safe process. Here’s a list of essential items:
- Heat Gun or Fabric Steamer: Used to loosen the adhesive. A heat gun is more effective, but a fabric steamer can also work.
- Razor Blade or Scraper: For gently lifting the film from the window. Choose a high-quality blade to avoid scratching the glass.
- Spray Bottle: To apply cleaning solutions and adhesive removers.
- Cleaning Solution: A mixture of water and mild soap is effective for initial cleaning.
- Adhesive Remover: Options include isopropyl alcohol, ammonia solution, or commercial adhesive removers.
- Microfiber Towels: For wiping down the window and removing residue.
- Safety Glasses: To protect your eyes from debris and chemicals.
- Safety Gloves: To protect your hands from cuts and chemicals.
- Face Mask: To avoid inhaling dust and chemical fumes.
- Plastic Sheeting or Tarps: To protect the surrounding area from debris and spills.
Ensuring you have all these items on hand before starting the removal process will save you time and prevent frustration. CARS.EDU.VN provides links to trusted suppliers for all the necessary tools and materials.
4. Step-by-Step Guide to DIY Window Tint Removal
Follow these detailed steps to safely and effectively remove window tint from your car windows:
Step 1: Preparing the Area
- Choose a Well-Ventilated Area: Work in a garage with the door open or outdoors to avoid inhaling fumes and dust.
- Protect Your Vehicle: Cover the interior of your car with plastic sheeting or tarps to prevent damage and make cleanup easier.
- Wear Protective Gear: Put on safety glasses, gloves, and a face mask to protect yourself.
Step 2: Heating the Film
- Roll Down the Window: Lower the window a few inches to expose the edge of the tint film.
- Apply Heat: Use a heat gun or fabric steamer to gently heat the tint film, holding it a few inches away from the window.
- Watch for Curling: Continue heating until you see the edges of the film start to curl. This indicates the adhesive is loosening.
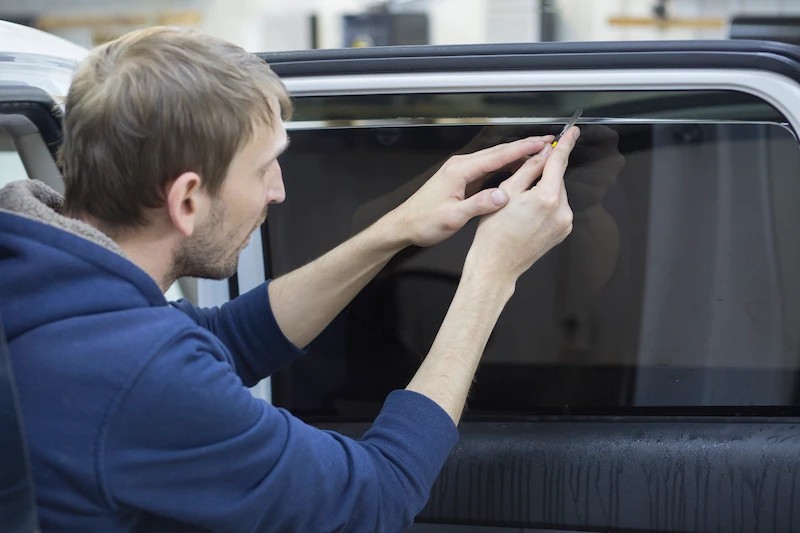
Step 3: Lifting the Film
- Use a Razor Blade or Scraper: Carefully insert the blade or scraper under the curled edge of the film.
- Peel Slowly: Gently peel the film away from the window, working a little at a time. Avoid pulling too hard, which can leave adhesive residue.
- Reheat as Needed: If the film becomes difficult to peel, apply more heat to loosen the adhesive.
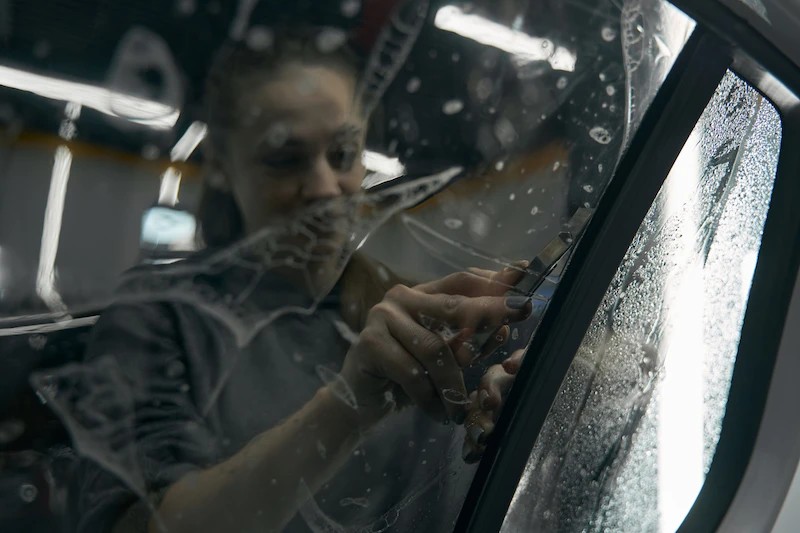
Step 4: Removing Adhesive Residue
- Apply Adhesive Remover: Spray the window with your chosen adhesive remover, ensuring the entire surface is covered.
- Let it Soak: Allow the remover to sit for several minutes to dissolve the adhesive.
- Scrape the Residue: Use a plastic scraper to gently remove the softened adhesive.
- Wipe Clean: Wipe the window with a microfiber towel to remove any remaining residue. Repeat if necessary.
Step 5: Final Cleaning
- Clean the Window: Use a glass cleaner to thoroughly clean the window, removing any traces of adhesive remover.
- Dry the Window: Wipe the window with a clean, dry microfiber towel to prevent streaks.
- Inspect: Check the window for any remaining residue or streaks and repeat the cleaning process as needed.
By following these steps carefully, you can achieve professional-quality results with DIY window tint removal. CARS.EDU.VN offers video tutorials and additional tips to guide you through the process.
5. Choosing the Right Adhesive Remover
Selecting the right adhesive remover is crucial for effectively removing residue without damaging your car’s windows. Here’s a comparison of common options:
| Adhesive Remover | Pros | Cons |
|---|---|---|
| Isopropyl Alcohol | Effective, readily available, relatively safe | May require more scrubbing |
| Ammonia Solution | Strong, quickly dissolves adhesive | Can be harsh, requires good ventilation, may damage some surfaces |
| Nail Polish Remover | Effective for small areas, readily available | Can be harsh, may damage some surfaces |
| Commercial Removers | Specifically formulated for adhesive removal, often very effective | Can be more expensive, read instructions carefully |
| Soapy Water | Gentle, safe for most surfaces | Less effective for stubborn residue, requires more time and effort |
According to product reviews on automotive forums, commercial adhesive removers like Goo Gone Automotive and 3M Adhesive Remover are highly rated for their effectiveness and safety. Always test the remover on a small, inconspicuous area first to ensure it doesn’t damage the glass or surrounding materials. CARS.EDU.VN provides customer reviews and ratings to help you choose the best product for your needs.
6. Common Mistakes to Avoid During Tint Removal
Avoiding common mistakes can save you time, money, and frustration during the tint removal process. Here are some pitfalls to watch out for:
- Using Excessive Heat: Overheating the film can cause it to bake onto the glass, making it harder to remove. Use a moderate heat setting and keep the heat gun moving.
- Pulling Too Hard: Rushing the peeling process can leave behind more adhesive residue and risk damaging the glass. Peel slowly and gently.
- Using Abrasive Cleaners: Avoid using harsh chemicals or abrasive cleaners that can scratch the glass. Stick to recommended adhesive removers and glass cleaners.
- Skipping Protective Gear: Always wear safety glasses, gloves, and a face mask to protect yourself from chemicals and debris.
- Working in Direct Sunlight: Direct sunlight can make the adhesive harder to remove. Work in a shaded area or indoors.
By being aware of these common mistakes and taking precautions, you can achieve a successful and damage-free tint removal. CARS.EDU.VN offers troubleshooting tips and expert advice to help you overcome any challenges you may encounter.
7. Cost Considerations: DIY vs. Professional Services
Understanding the cost implications of DIY versus professional tint removal can help you make an informed decision based on your budget.
DIY Costs
- Tools and Equipment:
- Heat Gun: $20 – $50
- Razor Blade/Scraper: $5 – $10
- Spray Bottle: $3 – $5
- Cleaning Solution: $5 – $10
- Adhesive Remover: $10 – $20
- Microfiber Towels: $5 – $10
- Safety Glasses, Gloves, Mask: $10 – $20
- Total Estimated Cost: $58 – $125
Professional Costs
- Side Windows (All Four): $60 – $100
- Windshield or Rear Window: $85 – $150
- Full Car (All Windows): $150 – $300
According to data from automotive service providers, the average cost for professional tint removal ranges from $75 to $200, depending on the vehicle and the complexity of the job. While DIY removal is cheaper upfront, it’s important to factor in the potential cost of mistakes, such as scratched glass or the need to re-do the job. CARS.EDU.VN provides a cost calculator to help you estimate the total expense based on your specific situation.
8. Finding a Reputable Window Tinting Service
If you decide to go the professional route, finding a reputable window tinting service is essential for quality results. Here are some tips for selecting the right provider:
- Check Reviews and Ratings: Look for online reviews on sites like Google, Yelp, and the Better Business Bureau.
- Ask for Referrals: Get recommendations from friends, family, or colleagues.
- Verify Credentials: Ensure the service is licensed and insured.
- Inquire About Experience: Ask about their experience with tint removal and installation.
- Request a Quote: Get a detailed quote that includes all costs and services.
- Inspect Their Work: If possible, visit their shop to see examples of their work.
According to a survey by Consumer Reports, customer satisfaction is highest among those who choose services with strong online reviews and positive referrals. At CARS.EDU.VN, we maintain a directory of certified window tinting services, complete with customer reviews and ratings, to help you find a trusted provider in your area.
9. Preparing Your Car for New Window Tint
After removing the old tint, preparing your car for new window tint is crucial for optimal adhesion and appearance. Follow these steps:
- Thoroughly Clean the Windows: Use a high-quality glass cleaner to remove any remaining residue, dirt, or debris.
- Inspect for Scratches: Check the windows for any scratches or imperfections that may affect the new tint.
- Dry the Windows: Wipe the windows with a clean, lint-free microfiber towel to ensure they are completely dry.
- Avoid Using Waxes or Sealants: Do not apply any waxes or sealants to the windows, as these can interfere with the tint’s adhesion.
- Schedule Installation: Contact a professional window tinting service to schedule the installation of your new tint.
Proper preparation ensures that the new window tint will adhere correctly and provide the desired benefits. CARS.EDU.VN offers guides on selecting the right type of window tint and maintaining it for long-lasting performance.
10. The Benefits of High-Quality Window Tint
Investing in high-quality window tint offers numerous benefits for your vehicle and driving experience. Here are some key advantages:
- UV Protection: Blocks up to 99% of harmful UV rays, protecting your skin and preventing interior fading.
- Heat Reduction: Reduces heat buildup inside the car, keeping the interior cooler and more comfortable.
- Glare Reduction: Minimizes glare from the sun and headlights, improving visibility and reducing eye strain.
- Enhanced Privacy: Provides increased privacy for you and your passengers.
- Improved Aesthetics: Enhances the appearance of your vehicle with a sleek, stylish look.
- Increased Safety: Holds shattered glass together in case of an accident, reducing the risk of injury.
According to the Skin Cancer Foundation, window tint is an effective way to protect yourself from harmful UV rays while driving. CARS.EDU.VN provides detailed comparisons of different window tint brands and types, helping you choose the best option for your needs and budget.
11. Understanding Window Tint Laws and Regulations
Before installing new window tint, it’s crucial to understand the laws and regulations in your state or region. These laws typically specify the allowable darkness of the tint, measured by Visible Light Transmission (VLT).
- VLT Percentage: The percentage of light that can pass through the tinted window. Lower VLT percentages indicate darker tint.
- State Regulations: Each state has its own specific VLT requirements for front side windows, rear side windows, and rear windows.
- Medical Exemptions: Some states offer medical exemptions for darker tint if a doctor certifies a medical need.
- Penalties for Non-Compliance: Violating window tint laws can result in fines, tickets, or the requirement to remove the tint.
The International Window Film Association (IWFA) provides a comprehensive database of state window tint laws. CARS.EDU.VN offers up-to-date information on window tint regulations in your area, helping you avoid legal issues and ensure compliance.
12. Maintaining Your New Window Tint
Proper maintenance is essential for preserving the appearance and performance of your new window tint. Follow these tips to keep your tint in top condition:
- Wait Before Cleaning: Allow the tint to cure for several days before cleaning the windows.
- Use Gentle Cleaners: Use a mild, ammonia-free glass cleaner.
- Avoid Abrasive Materials: Do not use abrasive sponges, brushes, or paper towels.
- Clean Softly: Gently wipe the windows with a soft, lint-free microfiber towel.
- Avoid Direct Sunlight: Park in shaded areas to prevent fading.
- Inspect Regularly: Check for any signs of peeling, bubbling, or damage.
Regular maintenance will extend the life of your window tint and keep it looking its best. CARS.EDU.VN offers a range of window tint care products and detailed cleaning guides to help you maintain your investment.
13. Troubleshooting Common Window Tint Problems
Even with proper installation and maintenance, you may encounter some common window tint problems. Here’s how to troubleshoot them:
- Bubbling: Caused by improper installation or low-quality film. Consider re-tinting with a higher-quality film.
- Peeling: Often due to age or exposure to extreme temperatures. Re-tinting is usually necessary.
- Fading: Caused by UV exposure. Choose a UV-resistant film for replacement.
- Scratches: Avoid abrasive cleaners and materials. Minor scratches can sometimes be buffed out, but severe scratches require re-tinting.
- Hazy Appearance: Can be caused by improper cleaning or low-quality film. Clean the windows thoroughly and consider re-tinting if the problem persists.
Addressing these issues promptly can prevent further damage and maintain the appearance of your vehicle. CARS.EDU.VN provides expert advice and solutions for common window tint problems, helping you keep your tint looking its best.
14. Innovative Window Tint Technologies
The window tint industry is constantly evolving, with new technologies emerging to enhance performance and aesthetics. Here are some innovative options to consider:
- Ceramic Tint: Offers superior heat rejection and UV protection compared to traditional films.
- Spectrally Selective Tint: Blocks specific wavelengths of light while allowing others to pass through, maximizing comfort and visibility.
- Photochromic Tint: Automatically adjusts its darkness based on the amount of sunlight, providing optimal comfort in varying conditions.
- Infrared (IR) Tint: Specifically designed to block infrared radiation, reducing heat buildup inside the car.
These advanced technologies can significantly improve the performance and longevity of your window tint. CARS.EDU.VN offers in-depth reviews and comparisons of these innovative tint options, helping you make an informed decision.
15. Benefits of Choosing Professional Installation Services
While DIY installation may seem appealing, choosing professional installation services offers several significant advantages:
- Expertise and Experience: Professionals have the knowledge and skills to ensure a flawless installation.
- Proper Tools and Equipment: Professionals use specialized tools to achieve precise and bubble-free results.
- Warranty Protection: Many professional installers offer warranties on their work, providing peace of mind.
- Time Savings: Professionals can complete the installation much faster than DIY methods.
- Reduced Risk of Damage: Professionals know how to avoid damaging the glass or tint film.
Choosing professional installation ensures that your window tint will perform optimally and last for years to come. CARS.EDU.VN connects you with certified installers who offer quality workmanship and excellent customer service.
16. Window Tinting for Different Vehicle Types
The type of vehicle you own can influence the best window tinting options. Here are some considerations for different vehicle types:
- Cars: Standard window tint options are suitable for most cars.
- Trucks and SUVs: Darker tint options may be preferred for added privacy and heat reduction.
- Vans: Consider UV-resistant films to protect passengers from sun exposure.
- Luxury Vehicles: Ceramic or spectrally selective tints can enhance comfort and maintain the vehicle’s aesthetics.
- Classic Cars: Consult with a professional to ensure the tint is compatible with the vehicle’s glass and style.
Understanding the specific needs of your vehicle can help you choose the right window tint for optimal performance and appearance. CARS.EDU.VN provides tailored recommendations based on your vehicle type and preferences.
17. Environmental Considerations of Window Tinting
Window tinting can also contribute to environmental sustainability. Here are some eco-friendly benefits:
- Reduced Air Conditioning Use: Window tint can reduce the need for air conditioning, saving energy and reducing emissions.
- Extended Interior Lifespan: By blocking UV rays, window tint can prevent interior fading and cracking, reducing the need for replacements.
- Energy Efficiency: Window tint can improve the energy efficiency of your vehicle, reducing its overall environmental impact.
- Sustainable Materials: Some window tint manufacturers use recycled materials and eco-friendly adhesives.
Choosing sustainable window tint options can help you reduce your carbon footprint and contribute to a greener future. CARS.EDU.VN promotes environmentally responsible window tinting practices and products.
18. How Window Tint Affects Resale Value
Window tint can impact the resale value of your vehicle. Here’s what you need to know:
- Positive Impact: High-quality window tint can enhance the appearance and comfort of your vehicle, potentially increasing its resale value.
- Negative Impact: Poorly installed or excessively dark tint can detract from the vehicle’s appearance and reduce its value.
- Compliance with Laws: Ensuring the tint complies with local laws is crucial for maintaining resale value.
- Professional Installation: Professional installation can demonstrate that the tint was applied correctly and is of high quality.
Maintaining your window tint and ensuring it is in good condition can help preserve or even enhance your vehicle’s resale value. CARS.EDU.VN provides tips for maximizing the value of your vehicle through proper window tinting practices.
19. Window Tinting for Safety and Security
Window tinting can enhance the safety and security of your vehicle. Here’s how:
- Shattered Glass Protection: Window tint can hold shattered glass together in case of an accident, reducing the risk of injury.
- Smash-and-Grab Deterrent: Darker tint can make it more difficult for thieves to see inside your vehicle, deterring smash-and-grab attempts.
- Privacy and Security: Window tint can provide increased privacy, reducing the risk of unwanted attention.
- UV Protection: Protecting your skin from harmful UV rays while driving can improve your long-term health and safety.
Investing in window tinting can provide added safety and security for you and your passengers. CARS.EDU.VN offers resources and products to enhance the safety and security of your vehicle.
20. Frequently Asked Questions (FAQs) About Window Tint Removal
- How long does it take to remove window tint? The time varies depending on the size and number of windows, but it typically takes 1-3 hours for DIY removal and 30 minutes to 1 hour for professional removal.
- Can I use a household iron to remove window tint? While some DIY methods suggest using an iron, it is not recommended as it can damage the glass and is less effective than a heat gun or steamer.
- What is the best way to remove adhesive residue? Isopropyl alcohol or commercial adhesive removers are most effective. Apply, let it soak, and then scrape gently.
- Will removing window tint damage my car’s windows? If done carefully, removing window tint should not damage your windows. However, improper techniques can scratch the glass.
- How much does it cost to have a professional remove window tint? Professional removal typically costs $60-$100 for side windows and $85-$150 for a windshield or rear window.
- Is it legal to remove window tint myself? Yes, it is legal to remove window tint yourself, but be sure to comply with local laws if you plan to re-tint the windows.
- Can I reapply window tint after removing the old tint? Yes, you can reapply window tint after removing the old tint, but ensure the windows are thoroughly cleaned and prepared.
- What tools do I need to remove window tint? Essential tools include a heat gun, razor blade, spray bottle, cleaning solution, adhesive remover, microfiber towels, safety glasses, gloves, and a face mask.
- How do I prevent bubbling in new window tint? Ensure professional installation, use high-quality film, and avoid extreme temperature changes.
- Where can I find a reputable window tinting service? Check online reviews, ask for referrals, and verify credentials before choosing a service. CARS.EDU.VN provides a directory of certified services.
Conclusion: Making the Right Choice for Your Vehicle
Removing window tint from your car can be a straightforward process, whether you choose to do it yourself or hire a professional. Understanding the reasons for removal, weighing the pros and cons of each method, and following the proper steps will ensure a successful outcome. At CARS.EDU.VN, we are dedicated to providing you with the knowledge and resources you need to make informed decisions about your vehicle.
Whether you’re looking to remove old tint, install new high-quality film, or simply maintain your vehicle’s appearance, we’re here to help. Explore our extensive library of articles, guides, and product reviews to discover everything you need to know about automotive care.
Ready to take the next step? Visit CARS.EDU.VN today to find trusted service providers, explore the latest window tinting technologies, and discover expert tips for maintaining your vehicle’s beauty and performance. Contact us at 456 Auto Drive, Anytown, CA 90210, United States, or reach out via WhatsApp at +1 555-123-4567. Let cars.edu.vn be your trusted partner in automotive excellence.