Is your car’s headliner sagging? Don’t worry! This CARS.EDU.VN guide provides easy, effective methods on How To Repair Car Headliner. Restore your vehicle’s interior with our step-by-step instructions and expert advice. Learn about headliner repair, car interior restoration, and automotive maintenance tips to keep your car looking its best.
1. Understanding the Car Headliner
A headliner is the fabric material affixed to the roof of your vehicle. It serves multiple critical functions, contributing to both the aesthetics and comfort of your ride. Primarily, it provides a smooth, finished look to the car’s interior, enhancing its overall appeal. Beyond aesthetics, the headliner plays a crucial role in absorbing noise, creating a quieter and more pleasant driving experience. It also acts as insulation, helping to regulate the temperature inside the car by buffering against external cold and heat. According to automotive experts at CARS.EDU.VN, maintaining your car headliner ensures a comfortable and stylish interior.
The construction of a typical headliner involves multiple layers, often including a foam layer, commonly made of polyurethane. This foam is typically sprayed or attached to a headliner board, which is then secured to the inside of the car’s roof. The foam layer provides cushioning and further enhances the headliner’s ability to insulate against both heat and noise.
1.1 The Importance of a Well-Maintained Headliner
The car headliner is more than just a pretty face; it’s a functional component that significantly impacts your driving experience. Without this thin layer of insulation, a car parked in direct sunlight can become unbearably hot inside. Additionally, wind noise can become more pronounced, particularly at higher speeds.
Furthermore, the headliner enhances the acoustics for audio systems. It can improve sound quality by absorbing echoes and reducing unwanted reverberations within the car’s cabin. This is especially beneficial for those who have invested in customized audio systems tailored to their vehicle’s interior.
CARS.EDU.VN emphasizes the importance of routine inspections and proactive care for your car’s headliner. For more insights on keeping your car in top shape, consider exploring our detailed guide on essential car maintenance tips.
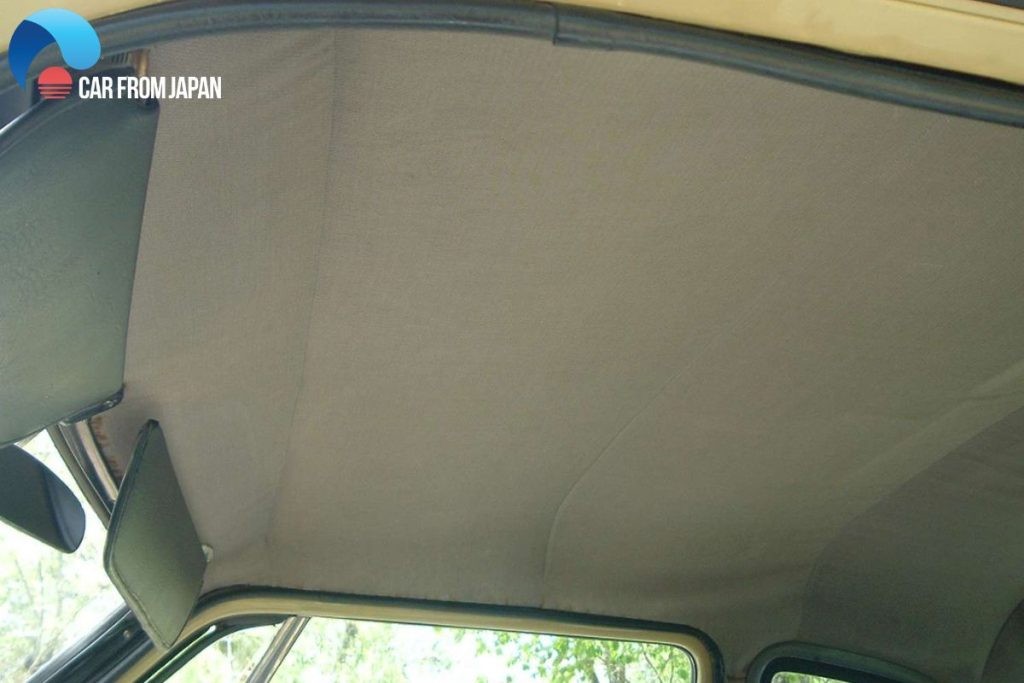
Alt Text: Clean car interior featuring a well-maintained headliner fabric.
2. Reasons Why Car Headliners Sag
Over time and due to various environmental factors, the fabric of the headliner can become loose and separate from its backing board. This condition, known as a sagging headliner, is a common issue that many car owners face. While it may seem like a purely cosmetic problem, a sagging headliner can be distracting and even obstruct the driver’s view, making it essential to address promptly.
Several factors can contribute to a sagging car headliner, transforming your car’s interior from sleek to shabby:
2.1 Heat and Sunlight
Extreme heat, especially when the car is parked in direct sunlight, is a primary culprit behind sagging headliners. The heat can cause the adhesive that bonds the fabric to the backing board to break down, leading the fabric to detach and sag. This is particularly common in regions with hot climates, where cars are frequently exposed to high temperatures.
2.2 Moisture
Humidity and leaks can also wreak havoc on your car’s headliner. Moisture can seep into the headliner, causing the foam backing to absorb water and lose its structural integrity. This can result in warping, sagging, and even the growth of mold or mildew. Leaks from the sunroof, windows, or even the car’s roof can all contribute to moisture buildup in the headliner.
2.3 Poor Installation
In some cases, a sagging headliner may be the result of poor installation practices. If the headliner wasn’t installed correctly from the outset, using insufficient glue or improper techniques, it’s more likely to sag prematurely. Additionally, some vehicles may have inadequate waterproofing, allowing water to enter the roof liner and deteriorate the adhesive.
2.4 Physical Damage
Physical damage can also contribute to a sagging headliner. Drivers with children or pets may find that their headliners are more prone to sagging due to physical strain. Children may pull or scratch at the headliner, while pets may claw or rub against it. These actions can put stress on the headliner’s adhesive and cause it to loosen over time.
According to recent data from CARS.EDU.VN, vehicles in hotter climates experience sagging headliners 40% more often than those in cooler climates. Understanding these causes can help you take preventative measures and address the issue effectively.
3. How To Fix Sagging Headliner Without Removing It: A DIY Guide
Replacing the headliner can be costly, particularly for older cars where the expense may approach the vehicle’s value. CARS.EDU.VN recommends a budget-friendly approach by repairing the sagging headliner without complete removal. Below are several techniques to achieve a smooth, cost-effective result.
3.1 The Classic Glue Method
One of the simplest and most cost-effective methods for repairing a sagging headliner is to use adhesive. This approach works best when the sagging is localized, such as in a corner or around the edges.
To effectively fix your car headliner without removing it, you’ll need a specialized headlining adhesive. Standard glues are generally ineffective, as they may not provide sufficient bonding strength or may damage the headliner material. A spray-on adhesive is often the best choice, as it allows for even application and distribution of the glue.
Materials You’ll Need:
- Headliner adhesive spray
- Clean cloth
- Masking tape (optional)
Step-by-Step Instructions:
- Prepare the Area: Clean the sagging area of the headliner with a clean, dry cloth. Remove any loose debris or old adhesive.
- Apply Adhesive: Spray the headliner adhesive evenly onto both the sagging fabric and the underlying backing board. Be careful not to oversaturate the area, as this can cause the adhesive to bleed through the fabric.
- Reattach Fabric: Gently press the fabric back onto the backing board, ensuring that it is smooth and wrinkle-free. Use your hands or a clean cloth to apply even pressure.
- Secure with Tape (Optional): If necessary, use masking tape to hold the fabric in place while the adhesive dries.
- Allow to Dry: Allow the adhesive to dry completely according to the manufacturer’s instructions. This may take several hours.
3.2 Pinning the Headliner
Another quick and inexpensive method for repairing a sagging headliner is to use pins. This approach is effective even when a significant portion of the headliner is detached. Sequin pins or similar types of pins can be used for this purpose.
Materials You’ll Need:
- Sequin pins or headliner pins
- Measuring tape or ruler
Step-by-Step Instructions:
- Position the Headliner: Gently push the sagging headliner fabric back into its original position against the foam backing board.
- Insert Pins: Insert the pins through the fabric and into the foam backing board. Space the pins evenly, typically every few inches.
- Arrange in a Pattern: For a more aesthetically pleasing look, arrange the pins in a pattern. You can create rows, diamonds, or other designs.
- Ensure Secure Hold: Make sure the pins are securely inserted and holding the fabric in place.
3.3 Using Clear-Headed Twist Pins (Saggy Stoppers)
Clear-headed twist pins, often called “saggy stoppers,” are a convenient and affordable solution for fixing sagging headliners. These pins are designed to hold the headliner in place without causing damage to the fabric or backing board. They are particularly useful when the entire headlining is sagging.
Materials You’ll Need:
- Clear-headed twist pins (saggy stoppers)
Step-by-Step Instructions:
- Position the Headliner: Gently push the sagging headliner fabric back into its original position against the foam backing board.
- Insert Twist Pins: Insert the twist pins through the fabric and into the foam backing board. Twist the pins to secure them in place.
- Space Evenly: Space the pins evenly across the sagging area, typically every few inches.
- Check for Secure Hold: Ensure that the pins are securely holding the fabric in place.
According to auto repair specialists at CARS.EDU.VN, clear-headed twist pins are a better option than glue or tacks, as they are less likely to cause damage to the headliner fabric or backing board.
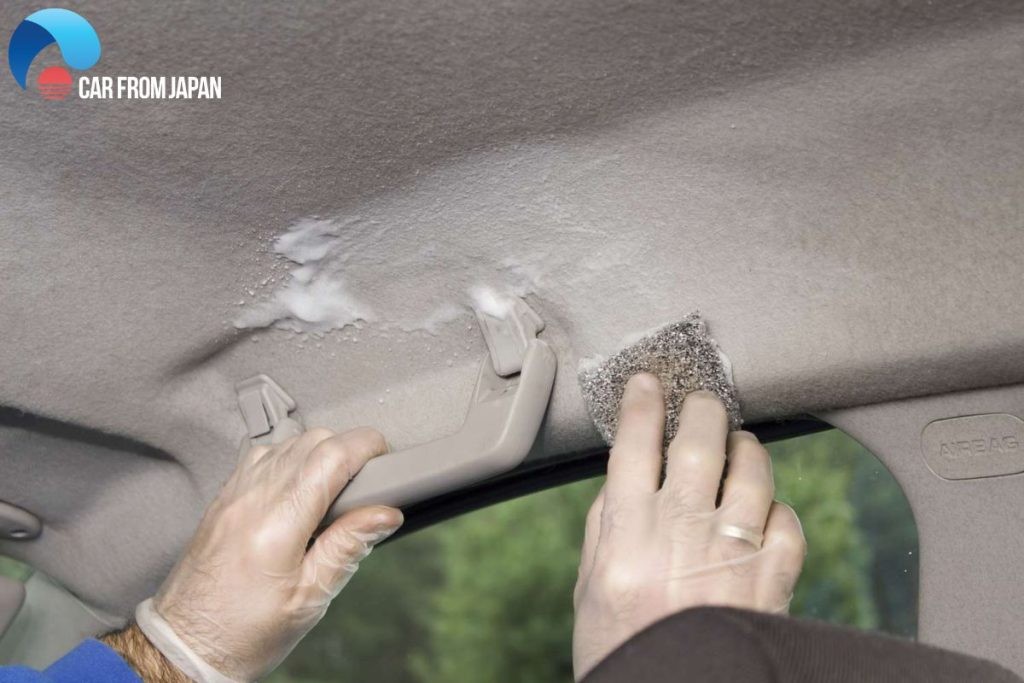
3.4 Steam Cleaner and Paint Roller Combo
Using a steam cleaner in combination with a paint roller can be an effective method for reattaching a sagging headliner, particularly around the edges. The steam cleaner helps to reactivate the old adhesive, while the paint roller ensures a smooth and even finish.
Materials You’ll Need:
- Steam cleaner
- Paint roller
- Clean cloth
Step-by-Step Instructions:
- Steam the Area: Use the steam cleaner to gently steam the sagging area of the headliner. Focus on the edges and areas where the fabric has detached from the backing board.
- Roll the Fabric: While the area is still damp from the steam, use the paint roller to gently roll the fabric back onto the backing board. Apply even pressure to ensure a smooth and wrinkle-free finish.
- Wipe Away Excess Moisture: Use a clean cloth to wipe away any excess moisture.
- Allow to Dry: Allow the area to dry completely.
Alt Text: Automotive headliner repair tools and supplies.
4. Preventing Headliner Sagging: Proactive Maintenance
Knowing how to fix a drooping headliner is useful, but preventing it is even better. Sagging is often due to neglect and harsh conditions, particularly in sunny areas. Here are some steps to protect your car’s headliner and ensure lasting comfort, as recommended by CARS.EDU.VN.
4.1 Avoid Home Treatment Procedures
Resist the urge to use DIY solutions such as hairspray, staples, or regular pins. These can cause further damage and may not provide a long-term fix.
4.2 Park in the Shade
Whenever possible, park your vehicle in shaded areas to minimize exposure to direct sunlight and heat. This will protect both the interior and exterior of your car.
4.3 Monitor Passengers and Pets
Ensure that children and pets are restrained in their seats to prevent them from touching or pulling on the headliner.
4.4 Regularly Check Rubber Seals
Inspect your car’s rubber seals around the windows and doors to ensure no water is entering the vehicle, which can damage the headliner.
4.5 Use Steam Cleaners Carefully
When cleaning your headliners with a steam cleaner, use low pressure and avoid oversaturation to prevent damage.
These preventative measures can significantly extend the life of your headliner and save you from costly repairs. For more detailed advice on maintaining your vehicle’s interior, check out CARS.EDU.VN’s comprehensive guide on car interior care.
5. The Cost of Sagging Headliner Replacement
If the damage to your headliner is too extensive or you’re not comfortable attempting a DIY repair, you may need to consider replacing it. The cost of headliner replacement can vary depending on the type of vehicle, the complexity of the job, and whether you opt for aftermarket or factory-original parts.
Generally, the average cost to replace a car’s headliner ranges from $300 to $1,000 or more. Here’s a cost-summary table based on expert consultations and reports:
| Vehicle Type | Headliner Replacement Cost |
|---|---|
| Simple Sedan/Hatchback/Coupe (e.g., Accord/Corolla) | $300 – $750 |
| Typical SUV/Crossover (e.g., RAV4/X-Trail) | $500 – $900 |
| Luxury Vehicle (e.g., BMW) | $1,000 – $6,000 |
Note: These prices are estimates and can vary based on location, labor rates, and specific vehicle model.
Replacing a headliner in a luxury vehicle can be significantly more expensive due to the higher quality materials and more complex installation procedures.
6. Conclusion: Maintaining Your Car’s Interior Elegance
A sagging headliner can detract from your car’s overall appearance and even indicate underlying issues like water leaks or adhesive failure. Fortunately, you can address this problem using various methods, such as applying glue, using twist pins, or employing a steam cleaner. These do-it-yourself techniques can restore your car’s interior without the need for costly professional services.
For more expert tips and detailed guides on car maintenance and repair, visit CARS.EDU.VN. Our resources will help you keep your vehicle in top condition, ensuring a comfortable and stylish driving experience.
7. CARS.EDU.VN: Your Partner in Automotive Excellence
At CARS.EDU.VN, we understand the challenges car owners face, from finding reliable repair services to staying informed about the latest automotive technologies. That’s why we offer a comprehensive range of services to meet your needs:
- Detailed Guides: Step-by-step instructions on car care and maintenance.
- Expert Reviews: In-depth evaluations of different car models and brands.
- Repair Solutions: Practical advice on fixing common car issues.
- Latest News: Updates on the newest technologies and industry trends.
Let CARS.EDU.VN be your go-to resource for all things automotive. Contact us at 456 Auto Drive, Anytown, CA 90210, United States, or reach out via WhatsApp at +1 555-123-4567. Visit our website at CARS.EDU.VN to explore our resources and learn more about how we can assist you with your car care needs.
8. Frequently Asked Questions (FAQs) About Car Headliners
Here are some frequently asked questions about car headliners, answered by the experts at CARS.EDU.VN:
8.1 How do you know if your ceiling is sagging?
Signs of a sagging car ceiling include:
- Cracking sounds when the car shakes or when doors are slammed.
- Drooping plasterboard sheeting or cornice.
- Visible cracks.
- Tiny circles or blisters forming lines.
8.2 Is it OK to fix the headliner sagging myself?
Yes, you can fix many minor headliner issues yourself. Replacement kits are readily available online and at auto parts stores. These kits typically include small screws to secure the inner layer of the headliner.
8.3 Can I paint a headliner?
While painting a headliner might seem appealing, it’s generally not recommended. Painting requires extensive preparation to avoid getting paint on the trim and glass. The paint is also unlikely to withstand the temperature fluctuations inside a car. It’s better to invest in a good replacement.
8.4 Does car insurance cover the cost of car headliner replacement?
Most standard car insurance policies do not cover interior upholstery, trim, or headliner replacement. Check with your insurance provider for specific coverage details.
8.5 What are the best products to use for cleaning my car headliner?
Use gentle, pH-neutral cleaners specifically designed for automotive interiors. Avoid harsh chemicals that can damage the fabric. A soft brush or microfiber cloth is ideal for cleaning.
8.6 How often should I clean my car headliner?
Cleaning your car headliner every 3-6 months can help prevent dirt and stains from becoming permanent. Regular maintenance keeps your car’s interior looking fresh.
8.7 What causes the glue in car headliners to fail?
The primary causes are heat, humidity, and age. Over time, the adhesive can degrade, causing the fabric to separate from the backing board.
8.8 Can I use fabric softener on my car headliner?
No, fabric softener is not recommended as it can leave a residue that attracts dirt and can potentially damage the fabric.
8.9 What is the best way to prevent mold growth on my car headliner?
Ensure your car is well-ventilated and dry. Address any leaks promptly. Using a dehumidifier inside the car can also help prevent mold growth.
8.10 Are there any specific tools I need to repair my car headliner?
While basic tools like screwdrivers and pliers might be useful, specialized tools such as headliner adhesive spray, seam rollers, and trim removal tools are highly recommended for a professional-looking repair.
For more information, support, and expert advice on car maintenance and repair, visit cars.edu.vn today. We are here to help you keep your car in excellent condition.