Repairing leather car seats with cracks can seem daunting, but with the right techniques and products, you can restore your car’s interior to its former glory. At CARS.EDU.VN, we’ll guide you through the process, providing expert advice and resources to tackle this common automotive issue, ensuring a professional-looking outcome. Explore methods for automotive leather restoration, interior care, and leather seat conditioning to prevent future damage.
1. Understanding Leather Car Seat Damage
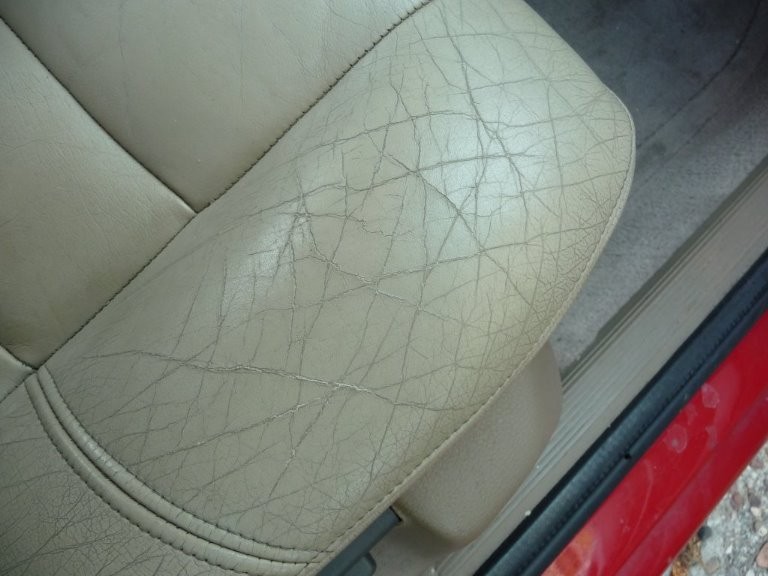
Leather car seats, while luxurious, are susceptible to wear and tear. Understanding the common causes of cracks can help you prevent future damage.
1.1. Common Causes of Leather Cracks
- Sun Exposure: Prolonged exposure to sunlight can dry out leather, causing it to crack.
- Lack of Maintenance: Neglecting regular cleaning and conditioning can lead to the leather becoming brittle and prone to cracking.
- Temperature Fluctuations: Extreme temperature changes can expand and contract the leather, leading to cracks over time.
- Wear and Tear: Regular use, especially friction from clothing, can wear down the leather’s surface.
- Spills and Stains: Untreated spills can penetrate the leather, weakening its structure and causing discoloration and cracks.
1.2. Types of Leather Used in Car Seats
Understanding the type of leather in your car can help you choose the right repair and maintenance products. Here’s a table showcasing common types:
| Leather Type | Characteristics | Common Uses | Maintenance Needs |
|---|---|---|---|
| Aniline Leather | Natural, soft, and porous; shows natural markings | High-end car seats, luxury interiors | Requires regular conditioning and gentle cleaning to prevent stains and wear. |
| Semi-Aniline Leather | Slightly more protected than aniline; more resistant to stains | Mid-range car seats | Regular cleaning and occasional conditioning. |
| Pigmented Leather | Most durable; coated with a protective layer; uniform appearance | Entry-level and family car seats | Easy to clean; requires less frequent conditioning but needs protection from harsh chemicals. |
| Nappa Leather | Full-grain, very soft and supple; known for its luxurious feel | Premium car interiors | Demands meticulous care; frequent conditioning to maintain its softness and prevent drying. |
| Bonded Leather | Made from leather scraps and fibers; less expensive | Trim and non-seating surfaces | Use appropriate cleaning products to avoid damage; limited repair options for significant wear. |
1.3. Assessing the Damage: Is Repair Possible?
Before starting any repair, assess the extent of the damage. Minor cracks and surface wear are usually repairable, but severe damage might require professional attention or seat replacement.
- Minor Cracks: Surface-level cracks that don’t penetrate deep into the leather. These are typically easy to repair with DIY kits.
- Moderate Cracks: Cracks that go deeper into the leather but don’t cause significant structural damage. These may require more extensive repair techniques.
- Severe Damage: Large tears, deep cracks, or significant wear. These might necessitate professional repair or seat replacement.
- Discoloration: Fading or color loss due to sun exposure or wear. Color restoration can be part of the repair process.
2. Essential Tools and Materials
Gather the necessary tools and materials to ensure a smooth and effective repair process.
2.1. Cleaning Supplies
- Leather Cleaner: A pH-balanced cleaner specifically designed for leather.
- Soft Brushes: Nylon or horsehair brushes for gentle cleaning.
- Microfiber Cloths: For wiping and buffing the leather.
- Vacuum Cleaner: To remove loose dirt and debris.
2.2. Repair Materials
- Leather Filler: A flexible filler compound to fill cracks and imperfections.
- Leather Dye or Colorant: Matching the original color of your car seats. Leather Magic offers custom color matching services.
- Leather Conditioner: To moisturize and protect the leather after repair.
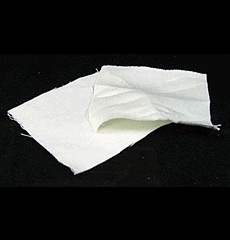
- Linen Subpatch Material: For reinforcing larger tears or holes.
2.3. Tools for the Job
- Sandpaper: Fine-grit sandpaper (220-grit or higher) for smoothing the repair area.
- Putty Knife or Spreader: For applying and smoothing the leather filler.
- Heat Gun or Hair Dryer: To help the filler dry and cure faster.
- Small Paint Brushes or Sponges: For applying dye or colorant.
- Gloves: To protect your hands.
- Safety Glasses: To protect your eyes.
3. Step-by-Step Guide to Repairing Leather Car Seats
Follow these detailed steps to repair cracks in your leather car seats effectively.
3.1. Cleaning the Leather
- Vacuum: Start by vacuuming the seats to remove any loose dirt and debris.
- Apply Leather Cleaner: Spray a small amount of leather cleaner onto a microfiber cloth or soft brush.
- Gentle Scrub: Gently scrub the leather surface in a circular motion to lift dirt and grime.
- Wipe Clean: Use a clean, damp microfiber cloth to wipe away any remaining cleaner.
- Dry Thoroughly: Allow the leather to air dry completely before proceeding to the next step.
3.2. Preparing the Damaged Area
- Sand the Cracks: Use fine-grit sandpaper (220-grit) to lightly sand the area around the cracks. This will help to smooth the edges and create a better surface for the filler to adhere to.
- Remove Dust: Wipe away any sanding dust with a clean microfiber cloth.
- Clean Again: Apply a small amount of leather cleaner to the area to remove any remaining residue.
- Dry: Ensure the area is completely dry before moving on.
3.3. Applying Leather Filler
- Apply a Small Amount: Use a putty knife or spreader to apply a small amount of leather filler to the cracked area.
- Smooth the Filler: Spread the filler evenly, making sure to fill the cracks completely. Use the putty knife to smooth the surface, blending it with the surrounding leather.
- Multiple Layers: For deeper cracks, apply the filler in thin layers, allowing each layer to dry before applying the next. This prevents the filler from shrinking and cracking as it dries.
- Drying Time: Allow the filler to dry completely. This may take several hours, depending on the product and the humidity. Using a heat gun or hair dryer on a low setting can speed up the drying process.
- Sand Again: Once the filler is dry, lightly sand the area again with fine-grit sandpaper to smooth out any imperfections.
3.4. Coloring the Repaired Area
- Match the Color: Use a leather dye or colorant that matches the original color of your car seats. Leather Magic provides custom color matching services to ensure a perfect match.
- Apply Dye: Use a small paint brush or sponge to apply the dye to the repaired area. Apply in thin, even coats, allowing each coat to dry before applying the next.
- Blend the Color: Blend the edges of the dyed area with the surrounding leather to create a seamless transition.
- Drying Time: Allow the dye to dry completely. This may take several hours.
- Apply Additional Coats: If necessary, apply additional coats of dye until the color matches the surrounding leather.
3.5. Conditioning the Leather
- Apply Conditioner: Once the dye is completely dry, apply a leather conditioner to the entire seat. This will help to moisturize the leather and protect it from future damage.
- Massage the Conditioner: Use a clean microfiber cloth to massage the conditioner into the leather, making sure to cover all areas.
- Buff the Leather: Allow the conditioner to sit for a few minutes, then buff the leather with a clean, dry microfiber cloth to remove any excess.
3.6. Reinforcing Larger Tears with Subpatch Material
- Cut Subpatch Material: Cut a piece of linen subpatch material slightly larger than the tear.
- Insert Material: Insert the material under the tear, using tweezers or a small tool to position it correctly. Ensure the edges of the tear align as closely as possible.
- Apply Filler: Apply leather filler over the tear, covering the subpatch material. Smooth the filler to blend with the surrounding leather.
- Allow to Dry: Let the filler dry completely, then sand lightly to smooth the surface.
- Color and Condition: Apply leather dye to match the seat’s color, followed by a leather conditioner to protect and moisturize the repaired area.
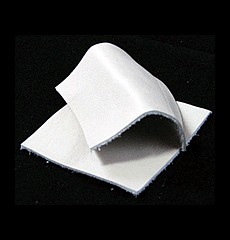
3.7. Dealing with Material Loss Using Leather Inserts
- Cut Leather Insert: Cut a piece of leather insert slightly larger than the missing area.
- Trim and Fit: Trim the insert until it fits snugly into the missing area. Use a razor blade for precise trimming.
- Secure Insert: Apply leather adhesive to the edges of the insert and the surrounding leather. Press firmly and allow to dry.
- Apply Filler: Apply leather filler around the edges of the insert to blend it seamlessly with the surrounding leather.
- Sand and Finish: Sand the area smooth, then apply leather dye and conditioner as described above.
3.8. Final Touches
- Inspect the Repair: Carefully inspect the repaired area to ensure that the cracks are completely filled and the color matches the surrounding leather.
- Apply a Final Coat of Conditioner: Apply a final coat of leather conditioner to the entire seat to protect and moisturize the leather.
- Allow to Cure: Allow the repair to cure for at least 48 hours before sitting on the seat. This will give the filler and dye time to fully set and bond with the leather.
4. Advanced Techniques for Leather Repair
For more complex damage, consider these advanced techniques.
4.1. Using a Heat Gun for Faster Drying
A heat gun can significantly reduce drying time for leather fillers and dyes. Use it on a low setting and keep it moving to avoid overheating the leather.
4.2. Custom Color Matching
Achieving a perfect color match is crucial for a seamless repair. Services like Leather Magic offer custom color matching to ensure the dye blends perfectly with your car’s interior.
4.3. Working with Perforated Leather
Perforated leather requires extra care. Use a small brush or sponge to apply dye and conditioner, being careful not to clog the perforations.
5. Maintaining Leather Car Seats to Prevent Cracks
Regular maintenance is key to preventing cracks and keeping your leather car seats in top condition.
5.1. Regular Cleaning and Conditioning
- Frequency: Clean and condition your leather seats every 3-6 months, or more often if you live in a hot or sunny climate.
- Products: Use pH-balanced leather cleaners and high-quality conditioners.
- Application: Apply cleaner and conditioner with a soft microfiber cloth, working it into the leather in a circular motion.
- Drying: Allow the leather to air dry completely after cleaning and conditioning.
5.2. Protecting from Sun Exposure
- Parking: Park in the shade whenever possible to minimize sun exposure.
- Window Tint: Install window tint to block harmful UV rays.
- Seat Covers: Use seat covers to protect the leather from direct sunlight.
- UV Protectant: Apply a leather conditioner with UV protectant regularly.
5.3. Avoiding Extreme Temperatures
- Ventilation: Use your car’s ventilation system to regulate the temperature inside the car.
- Parking: Avoid parking in direct sunlight during hot weather.
- Conditioning: Regularly condition the leather to keep it supple and prevent cracking in extreme temperatures.
5.4. Promptly Addressing Spills and Stains
- Immediate Action: Clean up spills as soon as they occur to prevent them from penetrating the leather.
- Blot, Don’t Rub: Blot the spill with a clean microfiber cloth, working from the outside in.
- Leather Cleaner: Use a leather cleaner to remove any remaining residue.
- Conditioning: Apply leather conditioner to restore moisture to the leather.
6. When to Seek Professional Help
While DIY repairs can be effective for minor damage, severe damage might require professional attention.
6.1. Signs of Irreparable Damage
- Extensive Tears: Large tears that cannot be easily patched.
- Deep Cracks: Cracks that penetrate deep into the leather’s structure.
- Significant Wear: Areas where the leather has worn away completely.
- Frame Damage: Damage to the underlying seat frame or support structure.
6.2. Finding a Reputable Leather Repair Service
- Research: Look for local leather repair services with positive reviews and testimonials.
- Experience: Choose a service with experience repairing automotive leather.
- Quotes: Get quotes from multiple services to compare prices and services offered.
- Warranty: Ask about warranties or guarantees on their work.
6.3. Cost Considerations for Professional Repair
Professional leather repair costs can vary depending on the extent of the damage and the type of leather. Minor repairs might cost a few hundred dollars, while more extensive repairs could cost several hundred. It’s essential to weigh the cost of professional repair against the cost of seat replacement.
7. Choosing the Right Leather Repair Kit
Selecting the appropriate leather repair kit can significantly impact the outcome of your repair project. Consider the following factors to make an informed decision.
7.1. Types of Repair Kits Available
- Basic Repair Kits: Ideal for minor cracks and scratches. These kits typically include leather cleaner, filler, dye, and conditioner.
- Deluxe Repair Kits: Suitable for more extensive damage, such as tears and deep cracks. These kits often include subpatch material, leather inserts, and a wider range of color options.
- Professional Repair Kits: Designed for automotive professionals and experienced DIYers. These kits include advanced tools and materials for complex repairs.
7.2. Key Features to Look For
- Color Matching: Ensure the kit offers accurate color matching to blend seamlessly with your car’s interior.
- Filler Quality: Choose a kit with a high-quality filler that is flexible, durable, and easy to sand.
- Conditioner: Opt for a kit that includes a premium leather conditioner to protect and moisturize the repaired area.
- Tools and Accessories: Check if the kit includes essential tools such as sandpaper, putty knives, and applicators.
7.3. Recommended Brands and Products
- Leather Magic: Known for their custom color matching and high-quality repair products. Their deluxe kit is a popular choice for DIY repairs.
- Chemical Guys: Offers a wide range of leather care products, including cleaners, conditioners, and repair kits.
- Leather Honey: Specializes in leather conditioners and cleaners that are safe and effective for automotive leather.
8. Understanding Leather Care Products
Choosing the right leather care products is essential for maintaining the appearance and longevity of your car seats.
8.1. Types of Leather Cleaners
- pH-Balanced Cleaners: These cleaners are gentle on leather and won’t strip away natural oils.
- Enzyme Cleaners: Effective for removing tough stains and odors.
- Foam Cleaners: Easy to apply and work into the leather.
8.2. Types of Leather Conditioners
- Cream Conditioners: Provide deep moisturization and protection.
- Liquid Conditioners: Easy to apply and absorb quickly into the leather.
- UV Protectant Conditioners: Help protect the leather from sun damage.
8.3. Application Techniques for Best Results
- Clean First: Always clean the leather before applying conditioner.
- Apply Evenly: Use a soft microfiber cloth to apply the product evenly.
- Massage In: Gently massage the product into the leather.
- Buff Excess: Buff away any excess product with a clean, dry microfiber cloth.
9. DIY vs. Professional Repair: Making the Right Choice
Deciding whether to tackle leather car seat repair yourself or hire a professional depends on several factors, including your skill level, the extent of the damage, and your budget.
9.1. Assessing Your Skill Level
- Beginner: If you have little to no experience with leather repair, start with minor repairs and use a basic repair kit.
- Intermediate: If you have some experience and are comfortable with more complex repairs, consider a deluxe repair kit.
- Advanced: If you have extensive experience and the right tools, you might be able to handle professional-level repairs.
9.2. Evaluating the Extent of the Damage
- Minor Damage: Small cracks, scratches, and minor wear can often be repaired with a DIY kit.
- Moderate Damage: Larger cracks, tears, and discoloration might require more advanced techniques or professional help.
- Severe Damage: Extensive tears, deep cracks, and significant wear usually necessitate professional repair or seat replacement.
9.3. Considering Your Budget
- DIY Repair: DIY repairs are typically more affordable, with basic repair kits costing around $50-$100.
- Professional Repair: Professional repairs can range from a few hundred dollars for minor repairs to several hundred or more for extensive repairs.
10. Real-World Examples and Case Studies
Explore real-world examples and case studies to better understand the leather repair process and its outcomes.
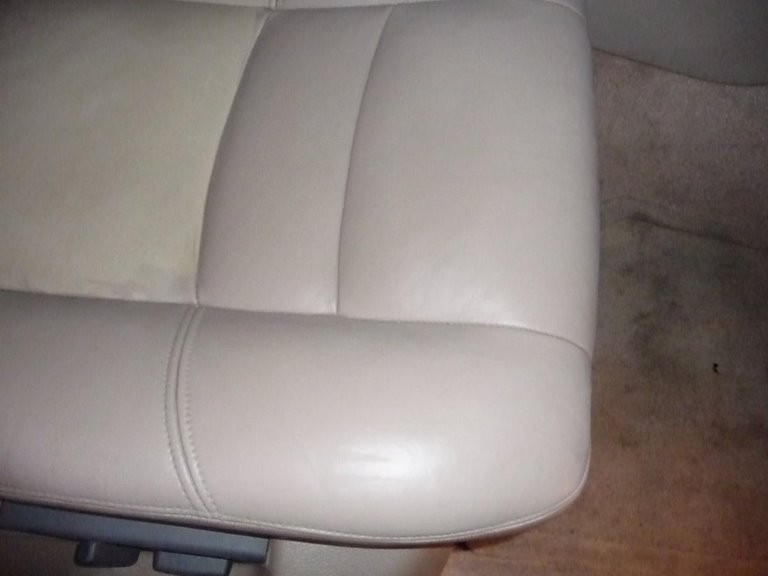
10.1. Before and After Photos of Successful Repairs
Examine before and after photos to see the potential results of DIY and professional leather repairs.
10.2. Case Studies of Common Leather Damage
- Sun Damage: A case study of repairing leather seats damaged by prolonged sun exposure, including cleaning, conditioning, and color restoration.
- Wear and Tear: A case study of repairing leather seats with significant wear and tear, including filling cracks, patching tears, and applying protective coatings.
- Spills and Stains: A case study of removing stubborn stains from leather seats and restoring their original appearance.
10.3. Lessons Learned from DIY Repair Projects
- Preparation is Key: Thorough cleaning and preparation are essential for a successful repair.
- Take Your Time: Rushing the repair process can lead to poor results.
- Follow Instructions: Carefully follow the instructions provided with the repair kit.
- Practice Makes Perfect: Don’t be afraid to practice on a small, inconspicuous area before tackling the main repair.
11. Troubleshooting Common Leather Repair Issues
Address common challenges that arise during leather repair projects.
11.1. Filler Not Adhering Properly
- Cause: Dirty or oily leather surface.
- Solution: Thoroughly clean the leather with a pH-balanced cleaner before applying the filler.
11.2. Dye Not Matching the Original Color
- Cause: Incorrect color matching.
- Solution: Use a custom color matching service or carefully compare color samples before applying the dye.
11.3. Uneven Texture After Repair
- Cause: Improper sanding or smoothing of the filler.
- Solution: Use fine-grit sandpaper to smooth the surface and blend it with the surrounding leather.
11.4. Cracking After Repair
- Cause: Insufficient conditioning or using a low-quality filler.
- Solution: Apply a high-quality leather conditioner regularly and use a flexible, durable filler.
12. Latest Innovations in Leather Repair Technology
Stay updated with the latest advancements in leather repair technology.
12.1. Self-Healing Leather Coatings
- Description: Coatings that can repair minor scratches and scuffs with heat or sunlight.
- Benefits: Enhances durability and reduces the need for frequent repairs.
12.2. Advanced Color Matching Systems
- Description: Computerized systems that can precisely match leather colors using spectrophotometry.
- Benefits: Ensures a seamless color match for professional-quality repairs.
12.3. Biodegradable Leather Repair Products
- Description: Environmentally friendly repair products made from sustainable materials.
- Benefits: Reduces environmental impact and promotes sustainable practices.
13. Safety Precautions When Working with Leather Repair Products
Prioritize safety when working with leather repair products to protect yourself and your vehicle.
13.1. Ventilation
- Importance: Work in a well-ventilated area to avoid inhaling harmful fumes.
- Recommendations: Open windows and doors or use a fan to circulate air.
13.2. Protective Gear
- Gloves: Wear gloves to protect your hands from chemicals.
- Safety Glasses: Wear safety glasses to protect your eyes from splashes and debris.
- Mask: Wear a mask to avoid inhaling dust and fumes.
13.3. Proper Disposal of Materials
- Regulations: Follow local regulations for disposing of used repair products and materials.
- Containers: Store used products in sealed containers to prevent leaks and spills.
14. Reader Engagement and Feedback
We value your feedback and encourage you to engage with CARS.EDU.VN to share your experiences and ask questions.
14.1. Comment Section
- Purpose: Share your thoughts, ask questions, and provide feedback on our articles.
- Guidelines: Be respectful, stay on topic, and provide constructive comments.
14.2. Social Media Channels
- Platforms: Follow us on Facebook, Twitter, and Instagram for the latest updates and tips.
- Engagement: Share your repair projects and tag us in your posts.
14.3. Contact Information
- Address: 456 Auto Drive, Anytown, CA 90210, United States.
- WhatsApp: +1 555-123-4567.
- Website: CARS.EDU.VN.
15. Conclusion: Revitalize Your Car’s Interior
Repairing leather car seats with cracks is a worthwhile investment in your vehicle’s appearance and value. With the right tools, materials, and techniques, you can achieve professional-quality results and enjoy a revitalized car interior. Whether you choose to tackle the repair yourself or seek professional help, remember that regular maintenance is key to preventing future damage and keeping your leather seats in top condition.
Are you struggling to find reliable car care and repair information? Do you want expert advice on maintaining your vehicle’s value? Visit CARS.EDU.VN today for detailed guides, professional tips, and the latest innovations in automotive care. Let us help you keep your car looking and running its best! Discover insights into automotive leather restoration, interior care, and crucial leather seat conditioning techniques. Explore cars.edu.vn now to unlock a wealth of knowledge in automotive maintenance.
16. FAQ: Repairing Leather Car Seats
16.1. Can I use household cleaners on leather car seats?
No, household cleaners can damage leather. Use pH-balanced leather cleaners specifically designed for car seats.
16.2. How often should I condition my leather car seats?
Condition your leather seats every 3-6 months, or more often if you live in a hot or sunny climate.
16.3. What is the best way to prevent leather cracks?
Regular cleaning, conditioning, and protecting your seats from sun exposure are essential to prevent cracks.
16.4. Can I repair a tear in my leather car seat myself?
Yes, small tears can be repaired with a leather repair kit that includes subpatch material.
16.5. How do I match the color of the dye to my car seats?
Use a custom color matching service or carefully compare color samples before applying the dye.
16.6. What is the drying time for leather filler?
Drying time varies depending on the product and humidity, but it typically takes several hours. Use a heat gun or hair dryer to speed up the process.
16.7. Is it necessary to sand the leather before applying filler?
Yes, sanding helps to smooth the edges of the cracks and create a better surface for the filler to adhere to.
16.8. Can I use a heat gun to dry the leather after applying conditioner?
No, do not use a heat gun after applying conditioner, as this can damage the leather. Allow it to air dry.
16.9. What should I do if the filler shrinks after drying?
Apply additional layers of filler, allowing each layer to dry before applying the next.
16.10. How can I find a reputable leather repair service near me?
Research local leather repair services with positive reviews, check their experience, and ask for quotes and warranties.