Is your car’s electrical system acting up? Learn How To Test Car Alternator With Multimeter, ensuring your vehicle’s charging system functions optimally. At CARS.EDU.VN, we provide you with a straightforward guide to diagnose alternator issues using a multimeter, helping you maintain your car’s performance. By understanding how to check your alternator, you can prevent unexpected breakdowns and ensure a reliable electrical system, addressing common issues like voltage drops and regulator malfunctions.
1. Understanding the Role of the Alternator
The alternator is a vital component of your car’s electrical system, responsible for charging the battery and powering electrical components while the engine is running. Without a functioning alternator, your car’s battery will eventually drain, leading to a breakdown. Alternators, also known as synchronous generators, convert mechanical energy from the engine into electrical energy, ensuring a constant power supply for all your car’s needs.
1.1 What is an Alternator?
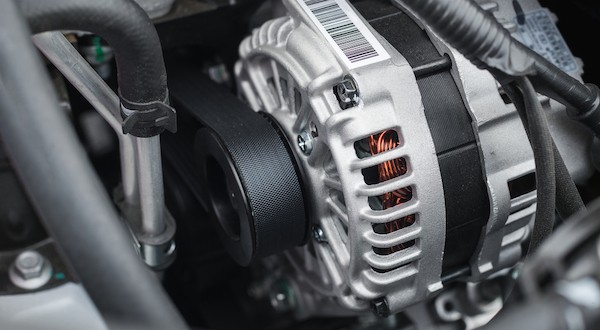
An alternator (Figure 1), or synchronous generator, generates AC (alternating current) power at a specific frequency. It uses electromagnetic induction with coils wrapped around an iron core to produce electricity. There are two ways a coil can generate electricity:
- Rotating the coil within a stationary magnetic field.
- Rotating the magnetic field around a stationary coil.
The alternator uses the latter approach. Its main components are:
- Rotor: A DC (direct current) power source creates a magnetic field, exciting the rotor coils. The car engine drives the rotor, causing the rotor’s magnetic flux to rotate at the same speed.
- Armature coils: These coils are stationary, and the rotating magnetic flux in the rotor induces electricity within them.
Alternators are crucial in vehicles for charging the battery while driving and are also used in power generation plants such as nuclear, gas, thermal, and hydropower stations. CARS.EDU.VN offers in-depth guides to help you understand the inner workings of your car’s components, including detailed articles on alternator functions and maintenance.
Figure 1: Alternator
1.2 Why Testing Your Alternator is Important
Regularly testing your alternator can save you from unexpected breakdowns and costly repairs. A faulty alternator can lead to a dead battery, dimming lights, and even engine stalling. By learning how to check your alternator with a multimeter, you can identify potential issues early and take corrective action. This proactive approach ensures your car’s electrical system remains in top condition, providing a safe and reliable driving experience. CARS.EDU.VN provides resources and tips to help you stay ahead of potential car troubles, offering detailed guides on preventive maintenance and troubleshooting.
2. Recognizing the Symptoms of a Failing Alternator
Identifying the symptoms of a failing alternator is crucial for timely intervention. A failing alternator can manifest in various ways, affecting your car’s performance and reliability. Being aware of these signs can help you take action before the problem escalates.
2.1 Common Symptoms
Several signs indicate that your alternator might be failing:
- Illuminated Battery Light: The battery light on your dashboard is a primary indicator of an alternator issue.
- Slowly Cranking Engine: If the engine cranks slowly or doesn’t crank at all, the alternator might not be charging the battery adequately.
- Weak Electrical Components: Dim headlights, weak interior lights, and other electrical components may indicate an underperforming alternator. Overcharging alternators, on the other hand, may produce excessively bright lights.
- Rumbling Sounds: Unusual noises from the alternator, such as rumbling or whining, can signify mechanical problems.
- Burning Smell: A burning smell may indicate electrical issues within the alternator.
- Vehicle Fails to Jump Start: If your car fails to jump start, even with a good battery, the alternator may be the culprit.
2.2 Detailed Explanation of Each Symptom
Understanding the reasons behind each symptom can help you diagnose alternator problems more effectively:
- Illuminated Battery Light: This light indicates that the car’s computer system has detected a voltage issue. It could mean the alternator isn’t producing enough voltage to charge the battery.
- Slowly Cranking Engine: A weak alternator may not provide enough power to the starter motor, leading to a slow or non-existent engine crank.
- Weak Electrical Components: When the alternator cannot supply enough power, electrical components draw power from the battery, causing them to function weakly.
- Rumbling Sounds: These noises may indicate worn bearings or other mechanical issues within the alternator.
- Burning Smell: Overheated wires or components within the alternator can produce a burning smell.
- Vehicle Fails to Jump Start: If the alternator is severely damaged, it may not be able to charge the battery even with an external power source.
CARS.EDU.VN provides comprehensive guides to help you understand these symptoms, offering detailed explanations and troubleshooting tips to keep your car running smoothly.
3. Essential Tools for Testing Your Alternator
Before you begin testing your alternator, it’s essential to gather the necessary tools. Having the right equipment ensures accurate measurements and a safe testing process.
3.1 The Multimeter: Your Key Diagnostic Tool
A multimeter is a handheld device used to measure electrical parameters such as voltage, current, and resistance. It’s an indispensable tool for diagnosing electrical issues in your car, including alternator problems.
3.2 Other Helpful Tools and Equipment
In addition to a multimeter, you might find the following tools helpful:
- Safety Glasses: Protect your eyes from potential sparks or debris.
- Gloves: Insulated gloves protect you from electrical shocks.
- Wrench Set: Useful for disconnecting and reconnecting battery terminals.
- Battery Charger: To charge the battery if it’s too low for testing.
- Car Manual: Provides specific information about your car’s electrical system.
CARS.EDU.VN offers recommendations on where to find quality multimeters and other automotive tools, ensuring you have reliable equipment for all your car maintenance needs.
4. Understanding Car Battery Voltage
Knowing the proper voltage levels for your car battery is crucial for diagnosing alternator issues. Different voltage readings can indicate whether the alternator is functioning correctly or if there’s a problem.
4.1 Typical Voltage Ranges
A healthy car battery typically has a resting voltage between 12.4 and 12.6 volts. When the car is running, the alternator should produce a higher voltage to charge the battery and power the electrical system.
4.2 What to Expect in Different Scenarios
Here’s what you should expect under different conditions:
- Resting Voltage: 12.4 to 12.6 volts when the car is off.
- Running Voltage: 14.0 to 14.5 volts when the engine is running and the alternator is charging the battery.
- Voltage with Electrical Loads: Slightly lower than the running voltage when electrical components are turned on.
4.3 Factors Affecting Battery Voltage
Several factors can affect the voltage readings of your car battery:
- Temperature: Extreme temperatures can affect battery performance and voltage.
- Battery Age: Older batteries may have lower voltage readings.
- Electrical Load: Turning on headlights, the radio, or other electrical components can lower the voltage.
- Alternator Condition: A failing alternator may not provide enough voltage to charge the battery properly.
- Parasitic Drain: Even when the car is off, certain components may drain the battery over time.
CARS.EDU.VN provides detailed articles on understanding car battery voltage, offering insights into the factors that affect voltage readings and how to interpret them accurately.
5. Step-by-Step Guide: How to Test Car Alternator With Multimeter
Testing your car’s alternator with a multimeter is a straightforward process that can help you diagnose charging system issues. Follow these steps to perform the test accurately.
5.1 Checking the Car Battery’s Voltage in Standby and Running Conditions
This is the quickest and easiest way to test the alternator’s basic function by checking the car battery’s voltage:
- Turn Off the Car Engine: Ensure the car is turned off before starting the test.
- Set the Multimeter: Rotate the multimeter dial and set the knob to measure DC voltage in the range of 15-20V (Figure 2).
- Connect the Leads: Connect the positive (red) lead to the positive terminal of the car battery and the negative (black) lead to the negative terminal.
- Check the Standby Voltage: Note the voltage displayed on the multimeter. It should be approximately 12-13 volts. If the value is below 12V, charge the battery before proceeding.
- Start the Car: Start the car and recheck the battery voltage with the multimeter.
- Check the Running Voltage: If the voltage is between 14 and 15 volts, the alternator is likely working correctly. If the voltage remains constant or drops, proceed to the next steps.
Figure 2: Multimeter dial set to measure DC voltage under 20V.
5.2 Loading the Car’s Electrical System
This test assesses the alternator’s ability to maintain voltage under load:
- Keep the Car Running: Ensure the car is running after the previous test.
- Check the Battery Voltage: Use the multimeter to check the battery voltage as before.
- Turn On Heavy Loads: Turn on all major electrical components, such as headlights, radio, fan, and heater blower motor.
- Recheck the Voltage: Note the voltage displayed on the multimeter.
- Compare the Voltage: Compare the voltage value with the value when the additional loads were turned off (13-14V). If the voltage drops significantly below 13V, the alternator may struggle to keep up with the electrical system’s demand.
5.3 Checking the Alternator Directly
This method involves directly measuring the alternator’s output voltage:
- Locate the Alternator: Find the alternator within the vehicle and ensure the belt isn’t loose.
- Set the Multimeter: Set the multimeter to measure DC voltage in the range of 15-20V.
- Start the Car Engine: Start the car engine and check if the alternator belt is spinning properly without slipping.
- Connect the Leads: Connect the positive (red) lead to the red-colored terminal on the alternator. Touch the negative (black) lead to any metallic part of the car frame (never ground to the alternator itself).
- Note the Reading: Read the voltage displayed on the multimeter. A functioning alternator should read around 13-14V.
- Analyze the Results: If the voltage is excessively high (greater than 15V), the voltage regulator may be faulty. If the reading is lower than 13V, rev the engine to 2000 rpm or higher and recheck. If the voltage remains low, check the alternator connectors and belt. If the alternator still doesn’t deliver enough power, the voltage regulator or the alternator itself may need replacement.
Figure 3: Checking a car battery using a multimeter
5.4 Performing a Voltage Drop Test
A voltage drop test can identify excessive resistance in the alternator circuit:
- Prepare the Multimeter: Set the multimeter to DC voltage mode, with a low voltage range (e.g., 2V).
- Test the Positive Side:
- With the engine running and electrical loads on, place one multimeter lead on the alternator’s positive terminal.
- Place the other lead on the battery’s positive terminal.
- Note the voltage reading. A reading above 0.5V indicates excessive resistance.
- Test the Negative Side:
- Place one lead on the alternator’s housing.
- Place the other lead on the battery’s negative terminal.
- Note the voltage reading. A reading above 0.2V indicates excessive resistance.
5.5 Interpreting the Results
Here’s how to interpret the results from the various tests:
- Standby Voltage: A reading below 12.4V indicates a discharged battery, which could be due to a faulty alternator or another issue.
- Running Voltage: A reading between 14.0 and 14.5V indicates that the alternator is charging the battery correctly.
- Voltage Under Load: A significant drop below 13V indicates that the alternator cannot handle the electrical load.
- Direct Alternator Reading: A reading below 13V suggests that the alternator is not producing enough voltage.
- Voltage Drop Test: High voltage drop readings indicate excessive resistance in the circuit, which can prevent the alternator from charging the battery effectively.
CARS.EDU.VN provides detailed tutorials on how to perform these tests, offering step-by-step instructions and video guides to ensure you get accurate results.
6. Troubleshooting Common Issues
After performing the alternator tests, you may encounter some common issues. Understanding these issues and how to troubleshoot them can help you resolve charging system problems effectively.
6.1 Low Voltage Readings
If you consistently get low voltage readings, consider the following:
- Check the Alternator Belt: Ensure the belt is properly tensioned and not slipping.
- Inspect Connections: Check all electrical connections to the alternator and battery for corrosion or damage.
- Test the Battery: Ensure the battery is in good condition and can hold a charge.
- Evaluate the Voltage Regulator: The voltage regulator controls the alternator’s output. If it’s faulty, it can cause low voltage readings.
6.2 High Voltage Readings
High voltage readings can also indicate a problem:
- Check the Voltage Regulator: A faulty voltage regulator can cause the alternator to overcharge the battery, leading to damage.
- Inspect Wiring: Damaged wiring can cause the alternator to produce excessive voltage.
6.3 Addressing Parasitic Drain
Parasitic drain can cause your battery to lose charge even when the car is off. Here’s how to address it:
- Identify the Source: Use a multimeter to measure current draw while systematically disconnecting fuses to identify the circuit causing the drain.
- Isolate the Component: Once you’ve identified the circuit, isolate the specific component causing the drain.
- Repair or Replace: Repair or replace the faulty component to eliminate the parasitic drain.
6.4 When to Seek Professional Help
If you’re unsure about any of the testing or troubleshooting steps, or if you encounter persistent issues, it’s best to seek professional help. A qualified mechanic can diagnose and repair alternator problems accurately, ensuring your car’s electrical system is functioning correctly.
CARS.EDU.VN offers a directory of trusted mechanics and service centers, helping you find reliable professionals to address your car’s needs.
7. Preventing Alternator Problems
Preventing alternator problems can save you time and money in the long run. Regular maintenance and care can extend the life of your alternator and keep your car running smoothly.
7.1 Regular Maintenance Tips
Follow these maintenance tips to prevent alternator issues:
- Inspect the Alternator Belt: Check the belt regularly for wear and tear. Replace it if it’s cracked or frayed.
- Keep Connections Clean: Clean battery terminals and alternator connections to prevent corrosion.
- Avoid Excessive Electrical Loads: Avoid running too many electrical components simultaneously, as this can strain the alternator.
- Monitor Battery Voltage: Regularly check the battery voltage to identify potential issues early.
7.2 Best Practices for Car Care
Here are some best practices for overall car care that can indirectly benefit your alternator:
- Regular Servicing: Follow the manufacturer’s recommended service schedule.
- Proper Battery Maintenance: Keep the battery clean and properly charged.
- Check Wiring Regularly: Inspect wiring for damage and repair as needed.
- Drive Regularly: Allowing your car to sit unused for extended periods can lead to battery and alternator issues.
7.3 Recognizing Warning Signs Early
Early detection of potential alternator problems can prevent more significant issues. Pay attention to warning signs such as:
- Dimming Lights: If your headlights dim intermittently, it could indicate an alternator problem.
- Unusual Noises: Strange noises from the alternator area should be investigated promptly.
- Battery Light: Any illumination of the battery light on the dashboard should be taken seriously.
CARS.EDU.VN offers a wealth of resources on preventive car maintenance, providing tips and guides to help you keep your car in top condition and avoid costly repairs.
8. Upgrading Your Alternator
Consider upgrading your alternator if you frequently use high-power electrical accessories or if you’re experiencing charging issues. An upgraded alternator can provide more power and improve the reliability of your car’s electrical system.
8.1 When to Consider an Upgrade
Here are some situations when you might consider upgrading your alternator:
- Frequent Use of High-Power Accessories: If you often use accessories like high-wattage audio systems, off-road lights, or winches, an upgraded alternator can provide the necessary power.
- Persistent Charging Issues: If you’re experiencing persistent charging issues despite replacing the battery and alternator, an upgraded alternator might be the solution.
- Increased Electrical Demands: If you’ve added electrical components to your car, such as a new sound system or lighting, an upgraded alternator can ensure sufficient power supply.
8.2 Types of Upgraded Alternators
Several types of upgraded alternators are available, each offering different levels of power and performance:
- High-Output Alternators: These alternators provide more amperage than stock alternators, making them ideal for vehicles with high electrical demands.
- One-Wire Alternators: These alternators simplify the wiring process, making them easier to install.
- Performance Alternators: These alternators are designed for high-performance vehicles and offer improved reliability and durability.
8.3 Choosing the Right Alternator
Selecting the right upgraded alternator depends on your car’s electrical needs and your budget. Consider the following factors when choosing an alternator:
- Amperage Output: Determine the amperage output needed to support your car’s electrical accessories.
- Compatibility: Ensure the alternator is compatible with your car’s make and model.
- Quality and Reliability: Choose an alternator from a reputable brand known for quality and reliability.
- Installation: Consider whether you can install the alternator yourself or if you’ll need professional installation.
CARS.EDU.VN offers detailed guides on choosing the right upgraded alternator, providing reviews and recommendations to help you make an informed decision.
9. Addressing Safety Concerns
When working with your car’s electrical system, safety should always be your top priority. Follow these safety precautions to protect yourself from electrical shocks and other hazards.
9.1 Essential Safety Precautions
- Disconnect the Battery: Always disconnect the negative battery cable before working on the electrical system.
- Wear Safety Glasses: Protect your eyes from potential sparks or debris.
- Use Insulated Tools: Use tools with insulated handles to prevent electrical shocks.
- Work in a Well-Ventilated Area: Ensure adequate ventilation to avoid inhaling harmful fumes.
- Avoid Working on a Hot Engine: Allow the engine to cool down before working on the electrical system.
9.2 Handling Electrical Components Safely
- Avoid Touching Bare Wires: Never touch bare wires or terminals while the car is running.
- Use a Multimeter Correctly: Follow the manufacturer’s instructions when using a multimeter.
- Be Aware of Short Circuits: Be cautious of potential short circuits and take steps to prevent them.
9.3 Dealing with Potential Hazards
- Electrical Shocks: If you experience an electrical shock, seek medical attention immediately.
- Battery Acid: Avoid contact with battery acid, which can cause burns.
- Sparks and Flames: Be cautious of potential sparks or flames, especially when working near fuel lines.
CARS.EDU.VN provides detailed safety guides for working on your car, offering tips and precautions to help you avoid accidents and injuries.
10. Frequently Asked Questions (FAQs)
Here are some frequently asked questions about testing car alternators with a multimeter:
10.1 Common Questions Answered
- How do I test to see if my alternator is bad?
Remove the negative cable from the battery while the car engine is running. If the vehicle stalls, the alternator may be bad. Alternatively, use a multimeter to check the voltage generated by the alternator to determine if it is fit for use. - What voltage should an alternator test at?
13.5 – 14.5 volts - Can I test the alternator while it’s still in the car?
Yes, you can test the alternator while it’s still in the car using a multimeter. - What does it mean if the battery light is on?
The battery light indicates a charging system issue, which could be due to a faulty alternator, battery, or wiring. - How often should I test my alternator?
You should test your alternator if you notice any symptoms of a failing alternator or as part of your regular maintenance schedule. - What tools do I need to test an alternator?
You need a multimeter, safety glasses, gloves, and a wrench set. - How do I perform a voltage drop test on the alternator circuit?
Set the multimeter to DC voltage mode, place one lead on the alternator’s positive terminal and the other on the battery’s positive terminal. Note the voltage reading. Repeat for the negative side. - Can a bad alternator drain my car battery?
Yes, a bad alternator can drain your car battery by not providing enough charge or by causing a parasitic drain. - How much does it cost to replace an alternator?
The cost to replace an alternator can vary depending on the make and model of your car, as well as the cost of labor. - What are the signs of a failing voltage regulator?
Signs of a failing voltage regulator include overcharging the battery, undercharging the battery, and fluctuating voltage readings.
CARS.EDU.VN provides an extensive FAQ section on various car-related topics, offering answers to common questions and expert advice to help you maintain your vehicle.
Conclusion
Testing your car alternator with a multimeter is a simple yet effective way to diagnose potential charging system issues. By following the steps outlined in this guide, you can identify alternator problems early and take corrective action, ensuring your car’s electrical system remains in top condition. Remember, regular maintenance and care can extend the life of your alternator and prevent unexpected breakdowns.
Need More Help?
If you’re still unsure about testing your alternator or encounter persistent issues, don’t hesitate to seek professional help. Our team at CARS.EDU.VN is here to assist you with all your car maintenance needs.
Contact Us:
- Address: 456 Auto Drive, Anytown, CA 90210, United States
- WhatsApp: +1 555-123-4567
- Website: CARS.EDU.VN
At cars.edu.vn, we are dedicated to providing you with the information and services you need to keep your car running smoothly. From detailed guides and troubleshooting tips to a directory of trusted mechanics, we’ve got you covered. Visit our website today to explore our comprehensive resources and discover how we can help you with all your car care needs.