Tinting your car windows can significantly enhance your driving experience and the appearance of your vehicle. Not only does it add a touch of style, but window tinting also provides valuable benefits such as increased privacy, reduced glare, and protection from harmful UV rays. CARS.EDU.VN is here to guide you through the process of achieving a professional-looking tint job yourself. Discover the benefits of automotive window film, proper tint installation techniques, and explore the world of vehicle customization.
1. Understanding the Benefits of Car Window Tinting
Car window tinting offers a multitude of advantages that extend beyond mere aesthetics. It’s a practical upgrade that enhances comfort, safety, and the overall value of your vehicle.
1.1. Enhanced Privacy and Security
Tinted windows obscure the view into your car, deterring potential thieves and protecting your valuables. According to a study by the National Highway Traffic Safety Administration (NHTSA), vehicle break-ins are a common occurrence, and tinted windows can act as a visual deterrent.
1.2. UV Ray Protection
Window tint blocks up to 99% of harmful ultraviolet (UV) rays from the sun, protecting your skin from sun damage and reducing the risk of skin cancer. The Skin Cancer Foundation recommends window tint as part of a comprehensive sun protection strategy.
1.3. Reduced Glare
Tinting reduces glare from the sun and headlights, improving visibility and reducing eye strain while driving. This is particularly beneficial during sunrise and sunset, when glare can be intense.
1.4. Interior Protection
UV rays can fade and crack your car’s interior over time. Window tint helps protect your upholstery, dashboard, and other surfaces from sun damage, preserving their appearance and extending their lifespan.
1.5. Temperature Control
Tinted windows can significantly reduce heat buildup inside your car, keeping it cooler in the summer and reducing the need for air conditioning. This can improve fuel efficiency and reduce wear and tear on your vehicle’s air conditioning system. According to the EPA, reducing AC use can improve fuel economy by up to 25%.
1.6. Enhanced Aesthetics
Tinted windows can dramatically improve the look of your car, giving it a sleek, customized appearance. With various shades and colors available, you can choose a tint that complements your vehicle’s style.
1.7. Shattered Glass Protection
In the event of an accident, window tint can help hold shattered glass together, reducing the risk of injury to occupants. This is a valuable safety feature that can provide added peace of mind.
2. Legal Considerations for Car Window Tinting
Before you tint your car windows, it’s crucial to understand the legal regulations in your state or region. Window tint laws vary widely, and violating them can result in fines, penalties, or even the removal of your tint.
2.1. Understanding Visible Light Transmittance (VLT)
VLT refers to the percentage of visible light that passes through the window tint film. Most jurisdictions have specific VLT requirements for front side windows, rear side windows, and rear windows. These regulations are designed to ensure adequate visibility for drivers and law enforcement.
2.2. State-Specific Regulations
Each state has its own set of laws regarding window tinting. These laws typically specify:
- Minimum VLT percentages for different windows.
- Allowable reflectivity of the tint film.
- Whether a medical exemption is available for darker tints.
- Penalties for violating the tint laws.
For example, California law prohibits tinting on the front windshield and specifies a minimum VLT of 70% for the front side windows. In contrast, Florida allows darker tints on the rear side and rear windows but has stricter regulations for the front side windows.
2.3. Resources for Finding Legal Requirements
- State Department of Motor Vehicles (DMV) websites: These websites typically provide information on window tint laws and regulations.
- Local law enforcement agencies: Contacting your local police department or sheriff’s office can provide clarification on specific tint laws in your area.
- Professional tint shops: Reputable tint shops are knowledgeable about local tint laws and can help you choose a tint that complies with regulations.
- Online legal resources: Websites like the International Window Film Association (IWFA) provide summaries of tint laws in different states.
2.4. Consequences of Non-Compliance
Violating window tint laws can result in various penalties, including:
- Fines: Fines for illegal tint can range from a few dollars to several hundred dollars, depending on the jurisdiction.
- Repair orders: You may be required to remove the illegal tint and have your vehicle inspected to verify compliance.
- Points on your driver’s license: Some states may assess points on your driver’s license for illegal tint, which can affect your insurance rates.
- Vehicle impoundment: In some cases, law enforcement may impound your vehicle if it has illegal tint.
To avoid these consequences, it’s essential to research and understand the window tint laws in your state before applying any tint to your car windows. CARS.EDU.VN advises consulting with a professional tint shop to ensure compliance with all applicable regulations.
3. Gathering the Necessary Tools and Materials
Before embarking on your DIY window tinting project, it’s essential to gather all the necessary tools and materials. Having everything on hand will streamline the process and ensure a professional-looking result.
3.1. Essential Tools
- Heat Gun: A heat gun is used to shrink the tint film to the curvature of the window. It helps to remove wrinkles and bubbles, ensuring a smooth, seamless application.
- Squeegee: A squeegee is used to apply pressure to the tint film, removing air bubbles and ensuring proper adhesion to the glass. Look for a squeegee with a soft, flexible edge to avoid scratching the tint film.
- Razor Blade or Utility Knife: A sharp razor blade or utility knife is needed to trim the tint film to the exact size and shape of the window. Ensure the blade is new and sharp for clean, precise cuts.
- Spray Bottle: A spray bottle is used to apply a slip solution (typically a mixture of water and a small amount of dish soap) to the window and tint film. This solution allows you to reposition the tint film and remove air bubbles during application.
- Measuring Tape: A measuring tape is essential for accurately measuring the dimensions of your car windows. This will help you determine how much tint film you need and ensure a proper fit.
- Soft Microfiber Towels: Soft microfiber towels are used to clean the windows before tinting and to wipe away excess slip solution during application. Avoid using paper towels, as they can leave lint on the glass.
- Hard Card: A hard card is used to press out stubborn air bubbles and wrinkles in the tint film. It can also be used to smooth the edges of the tint film for a clean, finished look.
3.2. Tinting Materials
- High-Quality Window Tint Film: This is the most critical component of your tinting project. Choose a high-quality film from a reputable brand to ensure durability, UV protection, and a professional appearance. Ceramic films are great for heat reduction.
- Slip Solution: A slip solution is used to lubricate the window and tint film, allowing you to reposition the film and remove air bubbles. You can purchase a commercially available slip solution or make your own by mixing water with a small amount of dish soap (typically 1-2 drops per quart of water).
- Glass Cleaner: A glass cleaner is used to thoroughly clean the windows before tinting. Choose a cleaner that is specifically designed for automotive glass and does not contain ammonia, which can damage some tint films.
3.3. Optional but Recommended
- Heat-Resistant Gloves: Heat-resistant gloves can protect your hands from the heat of the heat gun.
- Lint Roller: A lint roller can be used to remove any lint or debris from the windows before tinting.
- Drop Cloth: A drop cloth can be used to protect your car’s interior from overspray and debris.
By gathering all the necessary tools and materials before you begin, you’ll set yourself up for a successful DIY window tinting project. Remember to choose high-quality materials and take your time to ensure a professional-looking result. CARS.EDU.VN recommends checking online retailers and local auto parts stores for the best deals on tinting supplies.
4. Step-by-Step Guide to Tinting Your Car Windows
Tinting your car windows can seem like a daunting task, but with patience, the right tools, and a clear understanding of the process, you can achieve professional-looking results at home.
4.1. Preparing the Windows
- Clean the windows thoroughly: Use a high-quality glass cleaner and a microfiber towel to remove all dirt, grime, and debris from the interior and exterior of the windows. Pay special attention to the edges and corners.
- Scrape away stubborn residue: Use a razor blade to carefully scrape away any stubborn residue, such as bug splatter or adhesive. Be gentle to avoid scratching the glass.
- Dry the windows: Use a clean, dry microfiber towel to thoroughly dry the windows.
4.2. Cutting the Tint Film
- Measure the windows: Use a measuring tape to accurately measure the height and width of each window. Add a few extra inches to each dimension to allow for trimming.
- Cut the film: Lay the tint film on a flat surface and use a sharp razor blade or utility knife to cut it to the measured dimensions. Be precise and avoid tearing the film.
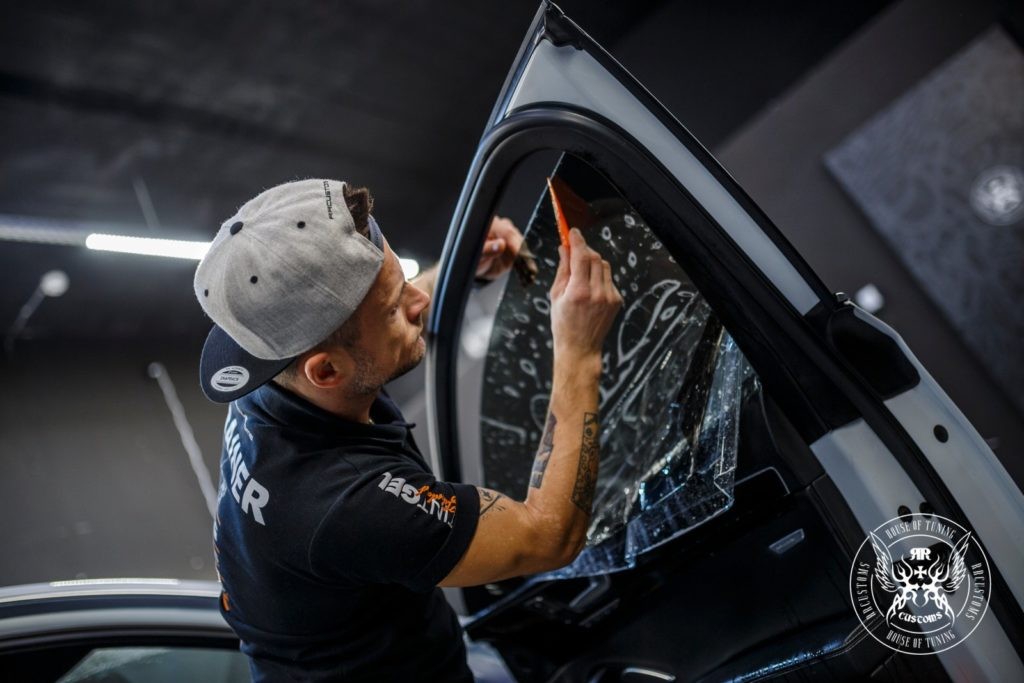
4.3. Applying the Tint Film
- Spray the window: Generously spray the interior of the window with the slip solution. Make sure the entire surface is wet.
- Remove the film liner: Carefully peel off the clear liner from the tint film, exposing the adhesive side. Spray the adhesive side with the slip solution.
- Apply the film: Position the tint film onto the window, adhesive side down. Align the edges and corners as accurately as possible.
- Squeegee the film: Use a squeegee to gently press the film onto the window, starting from the center and working your way outwards. Use overlapping strokes to remove air bubbles and wrinkles.
4.4. Heat Shrinking (If Necessary)
- Identify problem areas: If the tint film wrinkles or doesn’t conform to the curvature of the window, use a heat gun to shrink the film.
- Apply heat: Hold the heat gun a few inches away from the film and gently heat the wrinkled areas. Use the squeegee to smooth the film as it shrinks.
- Be careful: Avoid overheating the film, as this can damage it. Use short bursts of heat and keep the heat gun moving.
4.5. Trimming the Edges
- Use a sharp blade: Use a sharp razor blade or utility knife to trim the excess film around the edges of the window.
- Follow the window’s contours: Carefully follow the contours of the window to create a clean, precise edge.
- Be gentle: Avoid scratching the glass or damaging the surrounding trim.
4.6. Final Squeegee and Inspection
- Final squeegee: Use the squeegee to give the entire film a final smoothing, removing any remaining air bubbles or wrinkles.
- Inspect the film: Carefully inspect the film for any imperfections, such as bubbles, wrinkles, or tears. Use the squeegee or heat gun to correct any problems.
4.7. Curing Time
- Avoid rolling down windows: Avoid rolling down the tinted windows for at least 24-48 hours after application. This will allow the adhesive to fully cure and prevent the film from peeling or bubbling.
- Avoid cleaning: Avoid cleaning the tinted windows for at least a week after application. Use a soft microfiber towel and a mild glass cleaner to avoid damaging the film.
By following these steps carefully, you can successfully tint your car windows and achieve a professional-looking result. Remember to take your time, be patient, and don’t be afraid to ask for help if you encounter any problems. CARS.EDU.VN is here to provide additional tips and resources to help you succeed.
5. Common Mistakes to Avoid When Tinting Car Windows
While tinting your car windows can be a rewarding DIY project, it’s essential to be aware of common mistakes that can lead to unsatisfactory results. Avoiding these pitfalls will help you achieve a professional-looking tint job and save you time and money.
5.1. Insufficient Window Cleaning
One of the most common mistakes is failing to thoroughly clean the windows before applying the tint film. Any dirt, grime, or residue on the glass can prevent the film from adhering properly, resulting in bubbles, peeling, or a cloudy appearance. Always use a high-quality glass cleaner and a clean microfiber towel to ensure a spotless surface.
5.2. Using Low-Quality Tint Film
Choosing a low-quality tint film can be a costly mistake. Inexpensive films often lack UV protection, fade quickly, and are difficult to work with. Invest in a high-quality film from a reputable brand to ensure durability, UV protection, and a professional appearance. CARS.EDU.VN recommends researching different brands and reading reviews before making a purchase.
5.3. Incorrect Cutting of the Film
Accurately cutting the tint film to the size and shape of your windows is crucial for a seamless application. Avoid estimating or eyeballing the measurements, as this can lead to gaps, overlaps, or uneven edges. Use a measuring tape and a sharp razor blade or utility knife to cut the film with precision.
5.4. Applying the Film in Direct Sunlight
Applying the tint film in direct sunlight can cause the slip solution to dry too quickly, making it difficult to reposition the film and remove air bubbles. Work in a shaded area or inside a garage to avoid this issue.
5.5. Overheating the Film
Using a heat gun to shrink the tint film is a common technique, but overheating the film can cause it to wrinkle, bubble, or even melt. Use short bursts of heat and keep the heat gun moving to avoid damaging the film.
5.6. Using Excessive Slip Solution
While slip solution is essential for repositioning the tint film, using too much can make it difficult to squeegee out the air bubbles. Use a moderate amount of slip solution and wipe away any excess with a clean microfiber towel.
5.7. Neglecting the Edges
The edges of the tint film are particularly prone to peeling and bubbling if not properly sealed. Use a hard card or squeegee to firmly press the edges of the film onto the glass, ensuring a clean, smooth seal.
5.8. Rushing the Process
Tinting your car windows is a time-consuming process that requires patience and attention to detail. Avoid rushing through the steps, as this can lead to mistakes and an unsatisfactory result. Take your time and focus on achieving a professional-looking finish.
5.9. Rolling Down the Windows Too Soon
Rolling down the tinted windows too soon after application can cause the film to peel or bubble. Allow the adhesive to fully cure for at least 24-48 hours before rolling down the windows.
5.10. Improper Storage of Materials
Tint film and other materials should be stored in a cool, dry place, away from direct sunlight and extreme temperatures. Improper storage can damage the film and affect its performance.
By avoiding these common mistakes, you can increase your chances of achieving a successful DIY window tinting project. Remember to take your time, follow the instructions carefully, and don’t be afraid to ask for help if you encounter any problems. CARS.EDU.VN is here to provide additional tips and resources to help you succeed.
6. Maintaining Your Tinted Car Windows
Once you’ve successfully tinted your car windows, it’s essential to maintain them properly to ensure their longevity and appearance. Proper maintenance will help prevent fading, peeling, and other issues that can detract from the benefits of window tinting.
6.1. Wait Before Cleaning
Avoid cleaning your tinted windows for at least a week after application. This will allow the adhesive to fully cure and prevent the film from peeling or bubbling.
6.2. Use the Right Cleaning Products
Use a mild, ammonia-free glass cleaner specifically designed for tinted windows. Ammonia-based cleaners can damage the tint film and cause it to fade or discolor. CARS.EDU.VN recommends checking the label of your glass cleaner to ensure it is safe for tinted windows.
6.3. Use a Soft Cloth
Use a soft, lint-free microfiber towel to clean your tinted windows. Avoid using abrasive materials such as paper towels or scrub brushes, as these can scratch the tint film.
6.4. Gentle Cleaning Technique
Spray the glass cleaner onto the microfiber towel, not directly onto the window. Gently wipe the window in a circular motion, avoiding excessive pressure.
6.5. Avoid Abrasive Cleaners
Avoid using abrasive cleaners or polishing compounds on your tinted windows. These products can damage the tint film and reduce its effectiveness.
6.6. Avoid Window Stickers
Avoid applying window stickers or decals to your tinted windows. Removing these stickers can damage the tint film and leave behind adhesive residue.
6.7. Park in the Shade
Parking your car in the shade can help protect your tinted windows from sun damage and fading. Prolonged exposure to direct sunlight can cause the tint film to break down over time.
6.8. Inspect Regularly
Regularly inspect your tinted windows for any signs of damage, such as peeling, bubbling, or scratches. Address any issues promptly to prevent further damage.
6.9. Professional Maintenance
Consider having your tinted windows professionally cleaned and inspected periodically. A professional tint shop can identify and address any potential problems before they become major issues.
By following these maintenance tips, you can keep your tinted car windows looking their best for years to come. Remember to choose the right cleaning products, use gentle cleaning techniques, and protect your windows from sun damage. CARS.EDU.VN is here to provide additional tips and resources to help you maintain your car’s appearance and value.
7. Choosing the Right Type of Car Window Tint
Selecting the appropriate type of car window tint is crucial for achieving the desired aesthetic, performance, and compliance with local regulations. There are various types of tint films available, each with its own unique characteristics and benefits.
7.1. Dyed Window Tint
Dyed window tint is the most basic and affordable type of tint film. It consists of a layer of dye applied to a polyester film. Dyed tint provides some heat and UV protection, but it is less effective than other types of tint. It is also prone to fading over time.
7.2. Metalized Window Tint
Metalized window tint contains tiny metallic particles that reflect heat and UV rays. It provides better heat rejection than dyed tint and is more resistant to fading. However, metalized tint can interfere with electronic signals, such as GPS and cell phone reception.
7.3. Carbon Window Tint
Carbon window tint contains carbon particles that absorb heat and UV rays. It provides excellent heat rejection and UV protection without interfering with electronic signals. Carbon tint is also more resistant to fading than dyed tint.
7.4. Ceramic Window Tint
Ceramic window tint is the highest quality and most expensive type of tint film. It contains ceramic particles that block heat and UV rays without interfering with electronic signals. Ceramic tint provides superior heat rejection, UV protection, and fade resistance compared to other types of tint.
7.5. Hybrid Window Tint
Hybrid window tint combines different types of tint film to achieve a balance of performance and cost. For example, a hybrid tint may combine dyed and metalized layers to provide some heat rejection and fade resistance at a lower price point than metalized tint alone.
7.6. Considerations When Choosing
- Budget: Dyed tint is the most affordable, while ceramic tint is the most expensive.
- Performance: Ceramic tint provides the best heat rejection and UV protection, while dyed tint provides the least.
- Appearance: Different types of tint have different finishes and colors. Choose a tint that complements your vehicle’s style.
- Local Regulations: Ensure that the tint you choose complies with local window tint laws.
7.7. Recommendation
CARS.EDU.VN recommends considering carbon or ceramic window tint for the best combination of performance, appearance, and compliance with local regulations. While these types of tint are more expensive than dyed or metalized tint, they provide superior heat rejection, UV protection, and fade resistance, making them a worthwhile investment.
By carefully considering your budget, performance requirements, and local regulations, you can choose the right type of car window tint for your needs. Remember to research different brands and read reviews before making a purchase.
8. Troubleshooting Common Tinting Problems
Even with careful preparation and execution, you may encounter some common problems during the window tinting process. Knowing how to troubleshoot these issues can help you achieve a professional-looking result and avoid costly mistakes.
8.1. Air Bubbles
Air bubbles are one of the most common problems encountered during window tinting. They occur when air becomes trapped between the tint film and the glass.
- Cause: Insufficient cleaning, improper squeegeeing, or uneven application of the slip solution.
- Solution: Use a hard card or squeegee to gently push the air bubbles towards the edge of the film. If the bubbles are stubborn, use a heat gun to gently heat the film and then squeegee out the air.
8.2. Wrinkles
Wrinkles can occur when the tint film doesn’t conform to the curvature of the window.
- Cause: Improper heat shrinking, uneven application of the slip solution, or using low-quality tint film.
- Solution: Use a heat gun to gently heat the wrinkled areas of the film. Use the squeegee to smooth the film as it shrinks. Be careful not to overheat the film.
8.3. Peeling
Peeling can occur when the tint film doesn’t adhere properly to the glass.
- Cause: Insufficient cleaning, using low-quality tint film, or rolling down the windows too soon after application.
- Solution: Clean the affected area thoroughly and reapply the tint film. Ensure that the edges of the film are properly sealed. Avoid rolling down the windows for at least 24-48 hours after application.
8.4. Fading
Fading can occur over time, especially with low-quality tint film.
- Cause: Exposure to sunlight, using abrasive cleaning products, or using low-quality tint film.
- Solution: Replace the faded tint film with a higher quality film. Use mild, ammonia-free cleaning products and protect your windows from direct sunlight.
8.5. Hazy Appearance
A hazy appearance can occur if the tint film is not properly cleaned or if the slip solution is not completely removed.
- Cause: Insufficient cleaning, using the wrong cleaning products, or leaving too much slip solution on the film.
- Solution: Clean the affected area thoroughly with a mild, ammonia-free glass cleaner and a clean microfiber towel. Ensure that all traces of slip solution are removed.
8.6. Scratches
Scratches can occur if the tint film is not handled carefully or if abrasive cleaning products are used.
- Cause: Using abrasive cleaning products, using rough cloths, or scratching the film during application.
- Solution: Replace the scratched tint film. Use mild, ammonia-free cleaning products and soft microfiber towels. Be careful when handling the film during application.
By knowing how to troubleshoot these common tinting problems, you can save time, money, and frustration. Remember to take your time, be patient, and don’t be afraid to ask for help if you encounter any difficulties. CARS.EDU.VN is here to provide additional tips and resources to help you succeed.
9. Professional vs. DIY Car Window Tinting
When it comes to tinting your car windows, you have two main options: hiring a professional tint shop or doing it yourself. Both options have their pros and cons, and the best choice for you will depend on your budget, skills, and desired level of quality.
9.1. Professional Car Window Tinting
- Pros:
- High-Quality Results: Professional tint shops have experienced installers who can achieve a seamless, professional-looking tint job.
- Warranty: Most professional tint shops offer a warranty on their work, protecting you from defects in materials or workmanship.
- Convenience: Hiring a professional tint shop saves you time and effort. You simply drop off your car and pick it up when the job is done.
- Compliance: Professional tint shops are knowledgeable about local window tint laws and can ensure that your tint complies with regulations.
- Cons:
- Cost: Professional tinting is typically more expensive than DIY tinting.
- Scheduling: You may need to schedule an appointment and wait for your car to be tinted.
9.2. DIY Car Window Tinting
- Pros:
- Cost Savings: DIY tinting can save you money on labor costs.
- Flexibility: You can tint your windows at your own pace and on your own schedule.
- Learning Experience: DIY tinting can be a rewarding learning experience.
- Cons:
- Skill Required: DIY tinting requires patience, skill, and attention to detail.
- Potential for Mistakes: It’s easy to make mistakes when tinting your windows yourself, which can result in a less-than-professional appearance.
- No Warranty: DIY tinting typically does not come with a warranty, so you’re responsible for any defects or problems.
9.3. Which Option Is Right for You?
Consider the following factors when deciding between professional and DIY car window tinting:
- Budget: If you’re on a tight budget, DIY tinting may be the more attractive option.
- Skills: If you’re comfortable working with your hands and have experience with similar projects, DIY tinting may be a good fit.
- Time: If you’re short on time, hiring a professional tint shop may be the better choice.
- Desired Quality: If you want the highest quality results, hiring a professional tint shop is the way to go.
CARS.EDU.VN recommends carefully weighing the pros and cons of each option before making a decision. If you’re unsure whether you have the skills and patience to tint your windows yourself, it’s best to hire a professional tint shop.
10. Frequently Asked Questions (FAQs) About Car Window Tinting
Here are some frequently asked questions about car window tinting to help you make informed decisions:
10.1. What is the darkest legal tint?
The darkest legal tint varies by state. Check your state’s DMV website or consult with a local tint shop to determine the legal VLT percentage for your area.
10.2. How much does it cost to tint car windows?
The cost of tinting car windows depends on the type of tint film, the size of your car, and whether you hire a professional or do it yourself. Professional tinting typically costs between $200 and $500, while DIY tinting can cost between $50 and $150.
10.3. Can I tint my windshield?
Most states prohibit tinting the front windshield below the AS-1 line. Check your state’s DMV website for specific regulations.
10.4. Does window tint affect visibility at night?
Darker tints can reduce visibility at night, especially in poorly lit areas. Choose a tint that provides adequate visibility while still providing the desired level of privacy and UV protection.
10.5. How long does window tint last?
The lifespan of window tint depends on the quality of the film, the climate, and how well it is maintained. High-quality tint can last for 10 years or more, while low-quality tint may start to fade or peel after a few years.
10.6. Can I remove window tint?
Yes, you can remove window tint, but it can be a time-consuming and messy process. You can use a heat gun, a steamer, or a commercial tint removal product to remove the film.
10.7. Does window tint void my car’s warranty?
Window tint typically does not void your car’s warranty, but it’s always a good idea to check with your car’s manufacturer or dealer to be sure.
10.8. Can I get a medical exemption for darker tint?
Some states offer medical exemptions for darker tint to individuals with certain medical conditions, such as photosensitivity or lupus. Check your state’s DMV website for more information.
10.9. How do I clean tinted windows?
Use a mild, ammonia-free glass cleaner and a soft microfiber towel to clean tinted windows. Avoid using abrasive materials or cleaning products.
10.10. Will window tint keep my car cooler?
Yes, window tint can significantly reduce heat buildup inside your car, especially in the summer. Choose a tint with a high heat rejection rating for maximum cooling effect.
CARS.EDU.VN hopes these FAQs have answered your questions about car window tinting. Remember to research your options, follow the instructions carefully, and take your time to achieve a professional-looking result.
Ready to take the next step in car care and customization? Visit CARS.EDU.VN today to explore a wealth of information on car maintenance, repair services, and in-depth vehicle reviews. Whether you’re seeking tips on maintaining your new window tint, looking for reliable repair shops, or researching your next vehicle purchase, CARS.EDU.VN is your trusted resource. Contact us at 456 Auto Drive, Anytown, CA 90210, United States, or reach out via Whatsapp at +1 555-123-4567. Let cars.edu.vn help you make informed decisions and keep your vehicle running smoothly.