Have you ever been captivated by a vehicle boasting a custom exterior that truly stands out? If you’re reading this, chances are you’re considering giving your own car that head-turning transformation.
Fortunately, you’ve landed in the perfect spot. With a bit of dedication and patience, you can infuse your personality into your ride, making it a unique expression of yourself. The best part? Achieving this distinctive look through a vinyl car wrap is significantly more budget-friendly than opting for a custom paint job.
Armed with the correct tools, materials, and the right instructions, applying a vinyl car wrap is a task well within your reach. However, before diving in, ensure you’ve gathered everything you need for a smooth and successful application.
WHAT YOU’LL NEED
- Vinyl car wrap film
- Utility knife or trimming knife
- Squeegee (hard card with felt edge)
- Heat gun (or hair dryer as a less powerful alternative)
- Isopropyl alcohol (70%)
- Microfiber cloths (lint-free)
- Measuring tape
- Blue painter’s tape
- Primer 94 (optional, for edges and inlays)
- Folding table (for cutting vinyl)
- Clean spray bottles (for soapy water and slip solution – mixture of water and a few drops of application fluid or baby shampoo)
- Gloves (nitrile or latex)
- Good lighting
- Clean, climate-controlled space (garage preferred)
VINYL CAR WRAP INSTALLATION GUIDE
Thanks to advancements in vinyl technology, even those new to car customization can achieve a professional-looking vehicle transformation relatively quickly. Follow our detailed 10-step guide to master vinyl car wrapping like a seasoned pro.
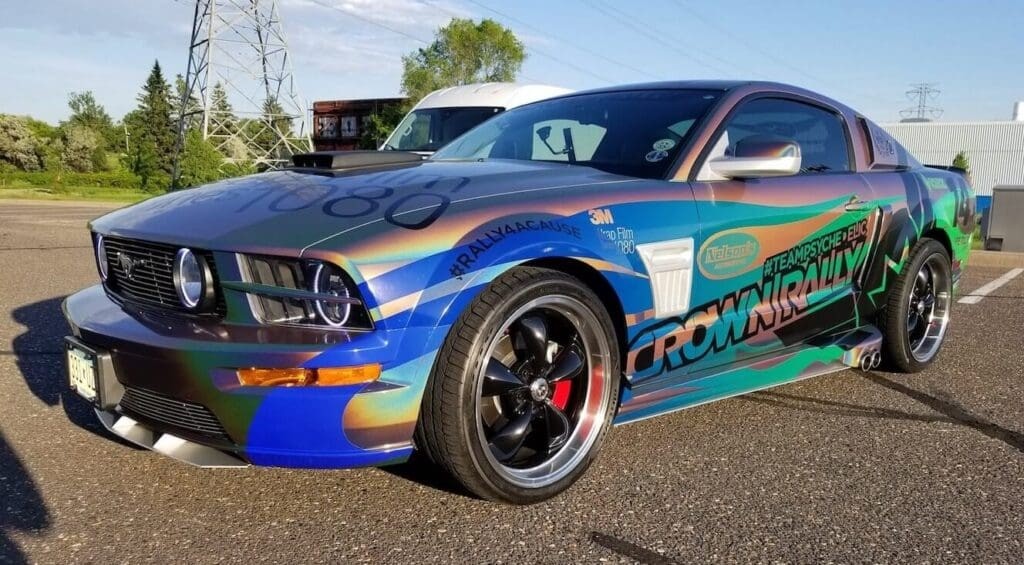
Alt text: Ford Mustang showcasing a vibrant custom vinyl wrap in blue and black, demonstrating a professional car wrap application.
STEP 1: ACCURATELY MEASURE YOUR VEHICLE PANELS
Before you even think about purchasing your vinyl film, precise measurements of the panels you intend to wrap are crucial to determine the exact amount you’ll need. A simple and effective method for this is using blue painter’s tape.
Apply the tape across the center, or the longest dimension, of each panel. Make sure to extend the tape about an inch beyond each edge of the panel to account for the vinyl that will be wrapped around and tucked for a seamless finish. Once you’ve taped all the panels you plan to wrap, carefully remove the tape strips. Lay these tape strips straight on a flat surface, like your floor, and use a measuring tape to find the total length of each strip. This measurement will give you the dimensions needed for each panel, plus the extra for tucking. Sum up the lengths for all panels to get the total vinyl length required. It’s always wise to add a little extra to this total to compensate for any mistakes or complex curves you might encounter during the wrapping process.
STEP 2: SELECT AND PURCHASE YOUR VINYL WRAP
With your measurements in hand, you’re now ready to purchase your vinyl wrap material. For beginners and seasoned wrappers alike, we highly recommend 3M™ Wrap Film Series 2080. This series is renowned for its exceptional quality, user-friendly application, and extensive range of colors and textures. If this is your first foray into car wrapping, it’s best to steer clear of chrome finishes initially. Chrome wraps are typically more expensive and significantly more challenging to apply due to their delicate nature and tendency to show imperfections.
When it comes to vinyl, sticking with reputable, well-established brands from major manufacturers is a smart move. While tempting, opting for cheaper, off-brand vinyl from online marketplaces might seem cost-effective, but often leads to frustration. Quality vinyl is engineered for both aesthetics and ease of installation. In contrast, budget vinyl might look appealing initially, but often falls short in terms of durability and workability during application.
3M films are typically available in rolls of 25 yards, with many suppliers offering custom cuts down to as little as 1 yard. It’s crucial to source your vinyl from a reputable supplier who maintains fresh inventory stored under optimal temperature conditions. Aged or improperly stored vinyl can become significantly harder to work with, compromising the final result. Always order a bit more vinyl than your measurements indicate. Mistakes happen, and having extra material on hand can save you from needing to reorder and potentially delay your project, or worse, being short on material to finish the job.
For those seeking a truly unique aesthetic, custom designs or specialized finishes are an option. In such cases, connecting with a vehicle wrap professional in your local area can be invaluable. They can provide personalized consultation and create a bespoke design that perfectly matches your vision for your vehicle.
Alt text: Close-up of a custom vehicle wrap design featuring vibrant blue and white graphics, highlighting the creative possibilities of car wraps.
STEP 3: PREPARE YOUR WORKSPACE ENVIRONMENT
Choosing the right workspace is paramount for a successful car wrap application. Ideally, opt for a large, climate-controlled indoor space, such as a garage. Attempting to wrap your car outdoors exposes you to a host of challenges. Wind can wreak havoc, making vinyl handling extremely difficult. Heat and humidity can affect the vinyl’s adhesive properties and workability. Sudden weather changes can halt your progress, and airborne particles like sand and dust can easily become trapped under the wrap during installation, leading to imperfections. Avoid these potential pitfalls by working indoors.
Ensure your chosen space is thoroughly clean and well-lit. Dust and dirt in the environment can quickly contaminate your freshly cleaned vehicle. Ample lighting is essential for seeing every detail and ensuring precise vinyl application. Aim for a workspace temperature around 72 degrees Fahrenheit (22 degrees Celsius). This temperature range is optimal; it’s warm enough to allow the vinyl to conform properly to curves and contours, but not so hot that the vinyl becomes overly stretchy and difficult to manage.
Understanding static electricity is also important. As you peel the backing liner from the vinyl, a static charge builds up. This static attracts airborne particles from within a roughly 4-foot radius. A clean workspace minimizes the presence of these particles, reducing the chance of contamination under your wrap.
STEP 4: METICULOUSLY PREPARE YOUR VEHICLE SURFACE
Thorough vehicle preparation is non-negotiable for achieving a flawless and long-lasting car wrap. If your vehicle has any dents, dings, or deep scratches, addressing these imperfections before applying the wrap is highly recommended. While the vinyl wrap will change the color and surface appearance, it will conform to the existing surface. This means any underlying imperfections will still be visible, or “telegraph” through the vinyl, detracting from the smooth, professional finish you’re aiming for.
Equally important is the condition of your vehicle’s paint job. The wrap adheres best to factory paint in good condition. If your paint is already chalking, peeling, or failing, applying a wrap on top is not a solution. In fact, it can exacerbate the problem. When the failing paint eventually gives way, it will take the wrap with it, leading to premature failure and wasted effort. In such cases, investing in a repaint to address the root issue is the better long-term approach.
Next, carefully inspect the panels you intend to wrap and remove any protruding items that might hinder the wrapping process. This includes items like car badges, emblems, trim pieces, door handles, and hood ornaments. If you’re unsure about the safest way to remove these items without causing damage, it’s wise to research the specific removal methods for your vehicle model or consult with a professional body shop for assistance.
Once the vehicle is de-trimmed, proceed with a thorough soapy wash. Use a quality car wash soap and the washing tools you have on hand. After washing, rinse the vehicle thoroughly with clean water. Once rinsed, use lint-free microfiber cloths to meticulously dry every surface of the vehicle. Pay close attention to seams, crevices, and around trim areas where water tends to collect. After drying the exterior, leave the vehicle indoors, preferably in your prepared workspace, overnight. This allows any trapped water within body panels and crevices to evaporate completely, ensuring a completely dry surface for wrapping.
On the day you plan to install the wrap, the final step in preparation is a thorough wipe-down of the entire car with 70% isopropyl alcohol. This crucial step removes any residual wax, grease, or contaminants that might have been missed during the wash, or accumulated overnight. Isopropyl alcohol ensures a pristine, perfectly clean surface for optimal vinyl adhesion. Pay particular attention to all edges where the vinyl will terminate, such as the inside edges of body panels, door edges, and around wheel wells. Many seemingly perfect wrap installations fail prematurely because insufficient attention was paid to this critical cleaning and preparation stage. Don’t let your project become another statistic.
For expert installers, an additional step for enhanced adhesion, especially in critical areas, is the application of 3M primer 94. Primer 94 is a specialized adhesive promoter that significantly improves vinyl adhesion on edges and deep recesses. It’s particularly useful for areas prone to lifting. Primer 94 is available in small cans or convenient ampules. Importantly, don’t apply primer 94 to the entire car all at once. Apply it only to the sections you plan to wrap within the next 4 hours. Work in sections: prime an area, wrap it, and then move on to the next section, repeating the priming process as you go.
Important safety note regarding isopropyl alcohol and Primer 94: Both isopropyl alcohol and Primer 94 require adequate ventilation during use, especially isopropyl alcohol. Always consult the Material Safety Data Sheets (MSDS) for both products before use and take necessary safety precautions. Your health and safety are paramount.
Alt text: A vibrant red Camaro showcasing a full car vinyl wrap, parked inside a professional wrapping facility, highlighting the sleek look achievable with car wraps.
STEP 5: APPLYING THE VINYL TO YOUR FIRST PANEL
If this is your first time attempting to wrap a vehicle – and it likely is if you are reading this guide – it’s highly recommended to begin with a relatively flat and simple panel. Ideal starting points include the hood, roof, or a door panel (if you’ve removed the door handles). Starting with an easier panel allows you to develop your technique, build confidence, and get a feel for the vinyl before tackling more complex, curved sections of the car.
Using the panel measurements you took in Step 1, unroll the required amount of vinyl film from your roll. Place the vinyl on your clean folding table or a similar clean, flat surface, away from the floor and potential contaminants. Using your utility knife or trimming knife, carefully cut the vinyl to the size needed for the panel, adding a few extra inches on each side for handling and trimming later.
If you are using a premium vinyl film with special effects, like color-shifting or directional finishes, pay close attention to the arrows printed on the film’s backing paper. Ensure these arrows are consistently pointing in the same direction across all panels as you install the wrap. Maintaining consistent directionality is crucial for the effect to flow seamlessly across the vehicle, achieving the intended visual outcome.
With the cut piece of vinyl ready, enlist a helper. Working with a partner is extremely beneficial, especially for larger panels. Carefully peel off the backing liner from the entire piece of vinyl, exposing the adhesive side. With your helper, gently position and lightly “tack” the vinyl onto your first panel. The initial tack should be light, allowing for repositioning if needed. Once positioned, take your 4-inch squeegee and begin the application process. Start in the center of the panel and work your way outwards towards the edges using overlapping strokes. The primary goal at this stage is to progressively push out air trapped between the vinyl and the vehicle panel. Maintain consistent, overlapping squeegee strokes to ensure no areas are missed and all air is expelled.
As you work around the contours and curves of the vehicle panel, you’ll likely need to stretch the vinyl to conform to both convex (outward curves) and concave (inward curves) areas. Initially, attempt to stretch the vinyl “cold,” meaning without heat, using firm squeegee pressure. If you encounter wrinkles or imperfections, don’t panic. Carefully lift the vinyl in the affected area, pulling it back slightly. Apply heat gently with your heat gun (or hair dryer), but without applying tension to the vinyl at this stage. The heat will relax the vinyl and activate its “memory,” allowing it to return closer to its original shape. Let the vinyl cool down completely before re-attempting the application in that area. You can repeat this process of lifting, heating (without tension), cooling, and re-squeegeeing several times in the same spot. However, vinyl has its limits. Excessive stretching or manipulation can overwork the material. If you are struggling significantly with a section, it may be necessary to use a fresh piece of vinyl for that area.
Exercise patience and restraint when using heat during the initial application. Avoid the temptation to immediately reach for the heat gun to stretch the film from the outset. Overheating and overstretching prematurely can lead to problems across the entire panel. Highly skilled installers understand this nuance and strategically use heat sparingly, making small adjustments and stretches as needed, only resorting to heat for more complex contours and challenging areas. This approach prevents “painting yourself into a corner” and makes the wrapping process more manageable.
STEP 6: ELIMINATING AIR BUBBLES AND IMPERFECTIONS
Once the vinyl is applied to the panel, the next step is to meticulously address any air bubbles that may have formed during the application process. While modern, high-quality vinyl films incorporate air release channels in their adhesive layer to minimize bubble formation, some bubbles are still likely to appear, particularly for beginners.
Re-engage your squeegee. Once again, begin working from the center of the panel and move outwards towards the edges of the vinyl, directing any trapped air towards the nearest exit points at the edges of the film. Use firm, overlapping squeegee strokes.
For a thorough inspection and to ensure you’ve eliminated all trapped air, a helpful technique is to “post-heat” the applied vinyl. Gently heat the vinyl surface to approximately 200 degrees Fahrenheit (93 degrees Celsius) using your heat gun. Post-heating serves several purposes: it further activates the adhesive, helps to eliminate any remaining air pockets, and breaks the vinyl’s “memory,” helping it to conform permanently to the panel’s shape. As you post-heat, carefully observe the vinyl surface. Any areas where air is still trapped beneath the vinyl will often become more pronounced, manifesting as small bubbles that puff up slightly as the vinyl heats. If you spot any such bubbles, immediately stop heating that specific area. Allow it to cool down briefly, and then use your squeegee to firmly push the trapped air outwards towards the nearest edge. Repeat the post-heating process for that area, and re-squeegee if necessary, until no more bubbles appear.
Alt text: Professional installer meticulously applying a vibrant blue vinyl wrap to a BMW i8 in a workshop, showcasing precision and technique in car wrapping.
STEP 7: TRIMMING EXCESS VINYL AND TUCKING EDGES
With the vinyl smoothly applied and bubble-free, it’s time to trim away the excess material around the panel edges. Using a fresh, sharp blade in your utility knife or trimming knife, carefully cut away the overhanging film. Aim to leave a consistent 1/4 to 1/8 inch (approximately 6-3mm) of vinyl extending beyond the panel edge all around. Remember, your vehicle’s paint is directly beneath the vinyl, and close to your blade. Take your time, use controlled, shallow cuts, and prioritize precision over speed in this step to avoid accidentally scratching the paint.
Now, take the remaining 1/4 to 1/8 inch strip of vinyl you left around the edge and carefully tuck it around the curved edge of the panel. Use your squeegee or a tucking tool to neatly push the vinyl into the gap between panels or around trim edges, creating a clean, finished look and securing the vinyl edge. If you encounter resistance or the vinyl feels too tense to tuck smoothly, gently apply heat with your heat gun to soften it slightly. The heat will make the vinyl more pliable and easier to tuck. Be mindful not to overheat, and use the heat in short bursts. As you tuck, watch for any wrinkles forming near the edges. If wrinkles appear, use the heat gun to gently relax the vinyl and smooth them out as you tuck.
STEP 8: FINAL HEAT SETTING FOR PERMANENCE
Once the panel is fully wrapped, trimmed, and the edges are neatly tucked, the final step is to use your heat gun to “set” the vinyl in place permanently. This process ensures long-term adhesion and durability. Apply heat evenly across the entire wrapped surface of the panel.
A recommended technique for controlled heat application is to use a heat gun in one hand and an infrared (IR) temperature sensor in the other. The IR sensor allows you to precisely monitor the surface temperature of the vinyl as you heat it. Aim to bring the surface temperature up to approximately 200 degrees Fahrenheit (93 degrees Celsius). This temperature is ideal for setting the vinyl and activating the adhesive to its maximum bond strength. However, it’s crucial not to exceed this temperature significantly, as excessive heat can scorch or damage the vinyl and potentially harm the underlying paint. Keep the heat gun moving constantly and monitor the temperature reading to maintain the target temperature range.
After heat setting, carefully inspect all edges and seams of the wrapped panel. Check for any areas where the vinyl might be lifting or peeling back, and look for any new bubbles that might have appeared during the heat-setting process. If you find any such issues, address them immediately. It’s far better to rectify minor imperfections now than to have them worsen later when exposed to sun, rain, and the elements. If edges are lifting, re-heat and firmly press them down. If new bubbles have formed, carefully puncture them with a pin or the tip of your knife, and then squeegee the air out and re-heat set the area. In severe cases of lifting or bubbling, it may be necessary to redo a small section of the wrap to ensure a long-lasting and flawless finish.
Alt text: Close-up of a hand using a heat gun to post-heat a newly applied car wrap, with a temperature sensor for precise heat control, demonstrating the heat-setting process.
STEP 9: WRAPPING THE REMAINING VEHICLE PANELS
Having successfully wrapped your first panel and gained valuable experience, it’s time to apply the same techniques and processes (Steps 5-8) to the rest of your vehicle. While the initial panel might have taken some time and learning, you’ll likely find that subsequent panels become progressively easier and faster as you become more comfortable and proficient with the materials and techniques.
When working on curved surfaces, such as bumpers, fenders, and side mirrors, you will inevitably encounter creases and folds forming in the vinyl film. When this happens, your first approach should be to try and reposition the film. Gently lift the vinyl, reposition it to redistribute the excess material, and re-apply. Adding a small amount of tension to the vinyl as you reposition can also help to minimize creases and ripples. As a last resort, if repositioning and tension alone aren’t sufficient to eliminate creases, you can carefully apply a small amount of heat from your heat gun to soften the film. The heat makes the vinyl more pliable and conformable, allowing you to stretch and shape it around complex curves. Use heat sparingly and in short bursts, and always squeegee immediately after heating to set the vinyl into its new shape. Overheating can damage the vinyl, so proceed cautiously.
STEP 10: CELEBRATE YOUR NEWLY WRAPPED RIDE
Congratulations! You have now successfully completed a DIY car wrap and are the proud owner of a vehicle with a truly unique and personalized exterior that will undoubtedly turn heads wherever you go. Beyond the enhanced aesthetics, you’ve also provided your vehicle’s original paintwork with a protective layer, shielding it from minor scratches, UV rays, and environmental elements for up to 10 years!
If, after reading this comprehensive guide, the prospect of DIY car wrapping still feels a bit daunting or too complex to tackle on your own, remember that professional help is readily available. Your car is a significant investment and a source of pride, and there’s absolutely no shame in seeking assistance from experienced professionals. If you prefer to ensure a flawless, professionally installed car wrap, don’t hesitate to contact the vehicle wrap experts at Brand Ink for expert guidance and services.
At Brand Ink, we are passionate about car wraps and dedicated to providing top-tier vehicle restyling solutions. Our team of skilled professionals is ready to assist you in realizing your vision, from initial design concepts to expert printing and flawless installation. We pride ourselves on delivering outstanding client service, meticulous quality control, and transforming your automotive dreams into reality.
Alt text: A Lamborghini, fully wrapped in a striking gloss black vinyl by Brand Ink, parked outdoors, showcasing a high-end, professional car wrap finish.