What Color Is Negative On A Car Battery? Understanding automotive battery terminals and their color-coding is crucial for safe and effective vehicle maintenance. CARS.EDU.VN provides expert insights into identifying negative terminals, proper connection procedures, and essential safety tips. Ensure your vehicle’s electrical system operates smoothly by mastering battery basics, including polarity identification and maintenance practices that promote battery longevity.
1. Decoding Car Battery Terminals: Negative Identification
Car batteries are essential for starting and powering a vehicle’s electrical system. Identifying the negative terminal is paramount for safe and correct connections. Let’s delve into the color-coding and markings that distinguish the negative terminal.
1.1. Standard Color Coding for Car Batteries
The automotive industry adheres to a standard color-coding system for battery terminals.
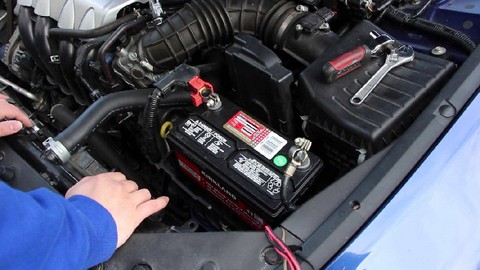
- Negative Terminal: Typically marked with the color black. This convention helps prevent accidental polarity reversal, which can damage the vehicle’s electrical system.
- Positive Terminal: Usually marked with the color red, providing a clear visual contrast to the negative terminal.
This color-coding system is crucial for ensuring correct battery connections, especially when jump-starting a car or replacing a battery.
1.2. Visual Markings and Symbols on Battery Terminals
In addition to color coding, battery terminals are often marked with symbols to indicate polarity.
- Negative Terminal: Usually indicated with a “–” (minus) symbol. This symbol is often embossed or printed directly on the battery casing near the terminal.
- Positive Terminal: Typically marked with a “+” (plus) symbol, providing an additional visual cue.
These symbols offer a redundant identification method, particularly useful in low-light conditions or when color perception is limited.
1.3. Why Correct Terminal Identification is Crucial
Connecting battery cables to the wrong terminals can have severe consequences:
- Electrical Damage: Reverse polarity can cause significant damage to the vehicle’s electrical system, including the alternator, starter motor, and electronic control units (ECUs).
- Fires: Incorrect connections can lead to short circuits, generating excessive heat and potentially causing a fire.
- Personal Injury: Battery explosions can occur due to reverse polarity, posing a risk of serious injury.
Always double-check the color coding and symbols on the battery terminals before making any connections. For more detailed information, refer to the car’s manual or consult with a qualified mechanic. CARS.EDU.VN offers a range of resources to help you understand and maintain your vehicle’s battery system safely.
2. Step-by-Step Guide: Identifying the Negative Terminal
Identifying the negative terminal on a car battery is a straightforward process. Here’s a detailed, step-by-step guide to help you do it safely and accurately.
2.1. Gather Necessary Tools and Safety Gear
Before you start, gather the necessary tools and safety gear to protect yourself and your vehicle.
- Safety Glasses: Protect your eyes from potential splashes or debris.
- Gloves: Insulated gloves will protect your hands from acid and electrical shock.
- Wrench: Use a wrench to loosen and tighten the battery terminals.
- Battery Terminal Cleaner: This will help remove corrosion and ensure a good connection.
2.2. Locate the Car Battery
The car battery is typically located under the hood, but in some vehicles, it may be in the trunk or under the rear seat. Consult your car’s manual if you’re unsure of its location.
2.3. Inspect the Terminals for Color Coding
The most common way to identify the negative terminal is by its color.
- Black Terminal: The negative terminal is usually black.
- Red Terminal: The positive terminal is typically red.
However, color coding can sometimes fade or be obscured by dirt and corrosion, so it’s essential to check other indicators as well.
2.4. Check for Polarity Symbols
Look for symbols on or near the terminals to confirm the polarity.
- Minus Sign (-) The negative terminal will usually have a “–” (minus) sign.
- Plus Sign (+) The positive terminal will have a “+” (plus) sign.
These symbols are often embossed directly on the battery casing near the terminals.
2.5. Follow the Cable to the Ground
The negative terminal is connected to the car’s chassis or engine block via a cable.
- Ground Connection: The negative cable connects to a metal part of the car’s frame or engine.
- Positive Connection: The positive cable connects to the starter solenoid or other electrical components.
By following the cable connected to the negative terminal, you can confirm that it leads to a ground point on the vehicle.
2.6. Use a Multimeter (Optional)
If you are still unsure, you can use a multimeter to check the voltage and polarity.
- Set the Multimeter: Set the multimeter to DC voltage mode.
- Connect the Probes: Place the black probe on the terminal you suspect is negative and the red probe on the terminal you suspect is positive.
- Read the Voltage: If the multimeter reads a positive voltage (around 12.6 volts for a fully charged battery), you have the probes correctly placed. If it reads a negative voltage, the terminals are reversed.
2.7. Double-Check Before Proceeding
Before disconnecting or connecting any cables, double-check that you have correctly identified the negative terminal. Incorrect connections can cause serious damage to your car’s electrical system.
By following these steps, you can confidently and safely identify the negative terminal on your car battery. For further assistance and expert advice, visit CARS.EDU.VN.
3. Safety Precautions: Handling Car Batteries
Working with car batteries can be hazardous if proper safety precautions are not followed. Car batteries contain sulfuric acid, which is highly corrosive, and can produce explosive hydrogen gas. Here are essential safety measures to take when handling car batteries to prevent accidents and injuries.
3.1. Wear Appropriate Protective Gear
Protecting yourself from potential hazards is the first step in handling car batteries safely.
- Safety Glasses: Always wear safety glasses to shield your eyes from acid splashes or debris.
- Gloves: Use chemical-resistant gloves to protect your hands from the corrosive effects of battery acid.
- Apron: An apron can protect your clothing from acid spills.
3.2. Work in a Well-Ventilated Area
Car batteries release hydrogen gas, which is highly flammable and can explode if ignited.
- Outdoor or Open Space: Work in an open area or a well-ventilated garage to allow the gas to dissipate.
- Avoid Enclosed Spaces: Never work on a car battery in a confined space where gas can accumulate.
3.3. Disconnect the Negative Terminal First
When disconnecting a car battery, always disconnect the negative terminal first to prevent short circuits.
- Negative First: Use a wrench to loosen the nut on the negative terminal and remove the cable.
- Positive Second: Then, disconnect the positive terminal.
- Prevent Sparks: Avoid touching the wrench to any metal parts of the car while disconnecting the terminals to prevent sparks.
3.4. Avoid Sparks and Open Flames
Hydrogen gas can ignite easily, so it’s crucial to avoid any source of ignition.
- No Smoking: Never smoke or use open flames near a car battery.
- Static Electricity: Be mindful of static electricity, which can also ignite hydrogen gas.
- Disconnect Power: Ensure that the car’s ignition is turned off and all electrical devices are switched off before working on the battery.
3.5. Use Insulated Tools
Using insulated tools can help prevent accidental short circuits.
- Rubber Handles: Ensure that your wrenches and other tools have rubber-coated handles to provide insulation.
- Avoid Metal Contact: Prevent tools from coming into contact with both terminals simultaneously.
3.6. Properly Dispose of Old Batteries
Car batteries contain hazardous materials and must be disposed of properly.
- Recycling Centers: Take old batteries to a recycling center or an auto parts store that accepts them for recycling.
- Avoid Landfills: Do not dispose of car batteries in landfills, as the chemicals can leach into the environment.
3.7. Keep Battery Clean and Maintained
Regular maintenance can extend the life of your car battery and reduce the risk of accidents.
- Clean Terminals: Clean battery terminals with a terminal cleaner to remove corrosion, which can impede current flow.
- Check Electrolyte Levels: For batteries with removable caps, check the electrolyte levels regularly and add distilled water if necessary.
By following these safety precautions, you can handle car batteries safely and confidently. Always prioritize your safety and the safety of others when working with car batteries. For more safety tips and expert advice, visit CARS.EDU.VN.
4. Understanding Battery Cables and Clamps
Battery cables and clamps play a critical role in connecting the car battery to the vehicle’s electrical system. Understanding their construction, function, and maintenance is crucial for ensuring reliable performance.
4.1. Anatomy of Battery Cables
Battery cables are designed to carry high currents between the battery and the vehicle’s electrical components.
- Conductor: Typically made of copper, which provides excellent conductivity.
- Insulation: Covered with a thick layer of insulation, usually made of rubber or plastic, to prevent short circuits.
- Terminal Ends: Equipped with metal terminals for secure attachment to the battery posts.
4.2. Types of Battery Clamps
Battery clamps are essential for creating a secure and reliable connection between the cables and the battery terminals.
- Lead Clamps: Traditional clamps made of lead, which are easy to mold and provide good conductivity.
- Brass Clamps: Offer better corrosion resistance than lead clamps and provide excellent electrical contact.
- Universal Clamps: Designed to fit a variety of battery terminal sizes and types.
4.3. Functions of Battery Cables and Clamps
The primary functions of battery cables and clamps are to:
- Conduct Electricity: Transfer electrical current from the battery to the vehicle’s starter, alternator, and other electrical systems.
- Secure Connection: Ensure a tight and reliable connection to the battery terminals, preventing voltage drops and power loss.
- Prevent Corrosion: Protect the battery terminals from corrosion, which can impede current flow and reduce battery life.
4.4. Maintaining Battery Cables and Clamps
Proper maintenance of battery cables and clamps is essential for ensuring reliable performance and extending battery life.
- Regular Inspection: Check the cables and clamps regularly for signs of wear, damage, or corrosion.
- Cleaning: Clean the terminals and clamps with a battery terminal cleaner to remove corrosion buildup.
- Tightening: Ensure that the clamps are securely tightened to the battery terminals to prevent loose connections.
- Replacing: Replace damaged or corroded cables and clamps to maintain optimal electrical performance.
4.5. Upgrading Battery Cables for Improved Performance
For vehicles with high electrical demands, upgrading to higher-quality battery cables can improve performance.
- Thicker Gauge Cables: Offer lower resistance and can handle higher currents.
- High-Quality Clamps: Provide better corrosion resistance and a more secure connection.
- Improved Grounding: Enhancing the grounding system can improve overall electrical performance.
4.6. Troubleshooting Battery Cable Issues
Common issues with battery cables and clamps include:
- Corrosion: Buildup of corrosion on the terminals and clamps can impede current flow.
- Loose Connections: Loose clamps can cause voltage drops and intermittent power loss.
- Damaged Cables: Cracked or frayed cables can lead to short circuits and electrical failures.
Regular maintenance and timely replacement of damaged components can prevent these issues and ensure reliable battery performance.
By understanding the anatomy, function, and maintenance of battery cables and clamps, you can keep your vehicle’s electrical system in top condition. For more expert tips and guidance, visit CARS.EDU.VN.
5. What Happens If You Reverse Car Battery Cables?
Reversing the car battery cables, connecting the positive cable to the negative terminal and vice versa, can cause severe damage to your vehicle’s electrical system. Understanding the potential consequences is crucial for preventing costly repairs and ensuring safety.
5.1. Immediate Effects of Reverse Polarity
When the battery cables are connected in reverse, several immediate effects can occur:
- Blown Fuses: The most common consequence is the blowing of fuses throughout the vehicle’s electrical system. Fuses are designed to protect circuits from overcurrent, and reverse polarity can cause an immediate surge.
- Damaged Wiring: The vehicle’s wiring harness can suffer damage due to the reversed electrical flow. Wires can overheat, melt, and cause short circuits.
- Malfunctioning Electronics: Sensitive electronic components, such as the car’s ECU (Engine Control Unit), radio, and other modules, can be damaged or destroyed.
5.2. Long-Term Damage to Vehicle Systems
In addition to the immediate effects, reversing battery cables can lead to long-term damage to various vehicle systems:
- Alternator Damage: The alternator, responsible for charging the battery and powering the electrical system while the engine is running, can be severely damaged. Reverse polarity can cause the alternator’s diodes to fail, leading to reduced charging capacity or complete failure.
- Starter Motor Damage: The starter motor, which cranks the engine to start the car, can also be damaged. The reversed electrical flow can cause the starter solenoid to malfunction or the motor windings to burn out.
- ECU Damage: The Engine Control Unit (ECU) is the brain of the vehicle, controlling various engine functions. Damage to the ECU can result in poor engine performance, reduced fuel efficiency, and diagnostic trouble codes.
- Battery Damage: The battery itself can be damaged by reverse polarity. The internal chemical reactions can be disrupted, leading to reduced capacity and shortened lifespan.
5.3. Safety Hazards
Reversing battery cables can also create safety hazards:
- Fire Risk: Overheated wires and short circuits can increase the risk of a vehicle fire.
- Battery Explosion: In extreme cases, reverse polarity can cause the battery to explode, releasing corrosive acid and hazardous gases.
5.4. Steps to Take If You Reverse the Cables
If you accidentally reverse the battery cables, take the following steps immediately:
- Disconnect the Cables: Immediately disconnect the cables from the battery terminals to prevent further damage.
- Inspect Fuses: Check all the fuses in the vehicle’s fuse boxes and replace any that are blown.
- Check Wiring: Inspect the wiring harness for any signs of damage, such as melted or burned wires.
- Consult a Mechanic: Take your vehicle to a qualified mechanic to have the electrical system thoroughly inspected. The mechanic can diagnose any damage and make necessary repairs.
5.5. Prevention Tips
Preventing reverse polarity is crucial for avoiding costly repairs and safety hazards:
- Double-Check Polarity: Always double-check the polarity of the battery terminals before connecting the cables.
- Use Color-Coded Cables: Use color-coded cables (red for positive and black for negative) to help prevent mistakes.
- Read the Manual: Consult your vehicle’s manual for specific instructions and safety precautions related to battery connections.
- Seek Professional Help: If you are unsure about any aspect of battery connections, seek assistance from a qualified mechanic.
By understanding the consequences of reversing car battery cables and taking preventive measures, you can protect your vehicle and ensure your safety. For expert advice and troubleshooting tips, visit CARS.EDU.VN.
6. Jump Starting a Car: Correct Cable Connection
Jump-starting a car with a dead battery requires connecting jumper cables in the correct sequence to avoid damage and ensure safety. Here’s a comprehensive guide to help you jump-start a car properly.
6.1. Gather Necessary Equipment
Before you start, gather the necessary equipment:
- Jumper Cables: Ensure the jumper cables are in good condition, without any cuts or exposed wires.
- Working Vehicle: A vehicle with a fully charged battery.
- Safety Glasses: To protect your eyes.
- Gloves: To protect your hands.
6.2. Position the Vehicles
- Proximity: Park the working vehicle close to the car with the dead battery, ensuring that the cables can reach both batteries.
- Avoid Contact: Make sure the vehicles are not touching each other to prevent electrical grounding issues.
- Turn Off Ignition: Turn off the ignition in both vehicles.
6.3. Connect the Jumper Cables
Follow this sequence to connect the jumper cables correctly:
- Positive to Dead Battery: Attach one red (positive) clamp to the positive (+) terminal of the dead battery.
- Positive to Working Battery: Attach the other red (positive) clamp to the positive (+) terminal of the working battery.
- Negative to Working Battery: Attach one black (negative) clamp to the negative (-) terminal of the working battery.
- Negative to Ground: Attach the other black (negative) clamp to a grounded metal part of the car with the dead battery, such as the engine block or a metal strut. This helps prevent sparks near the battery.
6.4. Start the Working Vehicle
- Start and Run: Start the working vehicle and let it run for a few minutes. This will help transfer some charge to the dead battery.
- Rev the Engine: Gently rev the engine of the working vehicle to increase the charging rate.
6.5. Attempt to Start the Dead Vehicle
- Start the Engine: After a few minutes, try starting the car with the dead battery.
- Wait If Necessary: If it doesn’t start immediately, wait a few more minutes and try again.
6.6. Disconnect the Jumper Cables
Once the dead vehicle starts, disconnect the jumper cables in the reverse order:
- Negative from Ground: Remove the black (negative) clamp from the grounded metal part of the car that was dead.
- Negative from Working Battery: Remove the black (negative) clamp from the negative (-) terminal of the working battery.
- Positive from Working Battery: Remove the red (positive) clamp from the positive (+) terminal of the working battery.
- Positive from Dead Battery: Remove the red (positive) clamp from the positive (+) terminal of the now-charged battery.
6.7. Let the Revived Vehicle Run
- Drive Around: Let the revived vehicle run for at least 20-30 minutes to allow the alternator to recharge the battery fully.
- Avoid Shutting Off: Avoid shutting off the engine immediately after jump-starting, as the battery may not have enough charge to restart the car.
6.8. Common Mistakes to Avoid
- Reversing Cables: Connecting the cables in the wrong order can cause severe damage.
- Poor Connections: Ensure the clamps have a solid connection to the terminals and ground.
- Smoking: Avoid smoking or open flames near the batteries, as they can release explosive gases.
- Touching Vehicles: Ensure the vehicles are not touching each other to prevent grounding issues.
6.9. What to Do If Jump-Starting Fails
If the car fails to start after several attempts, there may be other issues:
- Faulty Battery: The battery may be too damaged to hold a charge.
- Alternator Problems: The alternator may not be charging the battery properly.
- Starter Issues: There may be a problem with the starter motor.
In these cases, it’s best to consult a mechanic for further diagnosis and repair.
By following these steps, you can safely and effectively jump-start a car with a dead battery. Remember to always double-check the connections and follow safety precautions to prevent accidents and damage. For more car care tips and expert advice, visit CARS.EDU.VN.
7. Car Battery Maintenance Tips for Longevity
Proper car battery maintenance is essential for ensuring reliable performance and extending its lifespan. Here are valuable tips to help you keep your car battery in top condition.
7.1. Regular Inspection of Battery Terminals
Inspect the battery terminals regularly for signs of corrosion, which can impede current flow.
- Visual Check: Look for white, blue, or green deposits on the terminals and clamps.
- Cleaning: Use a battery terminal cleaner or a mixture of baking soda and water to clean the terminals.
- Protective Spray: Apply a battery terminal protector spray to prevent future corrosion.
7.2. Keeping the Battery Clean
A clean battery performs more efficiently and lasts longer.
- Wipe Down: Regularly wipe down the battery case with a damp cloth to remove dirt and grime.
- Dry Surfaces: Ensure the battery surface is dry to prevent electrical leakage.
7.3. Checking Battery Voltage
Regularly check the battery voltage to ensure it is within the proper range.
- Multimeter Test: Use a multimeter to measure the battery voltage. A fully charged battery should read around 12.6 volts.
- Load Testing: Have a load test performed to check the battery’s ability to deliver current under load.
7.4. Secure Battery Mounting
Ensure the battery is securely mounted to prevent vibrations, which can damage the internal components.
- Check Mounting Brackets: Verify that the mounting brackets are tight and in good condition.
- Tighten Clamps: Ensure the battery hold-down clamps are properly tightened.
7.5. Avoiding Short Trips
Frequent short trips can prevent the battery from fully charging.
- Longer Drives: Take longer drives periodically to allow the alternator to fully recharge the battery.
- Battery Charger: Use a battery charger to periodically top off the charge, especially if you frequently drive short distances.
7.6. Limiting Accessory Use When Idling
Using accessories like headlights, air conditioning, and the radio while the engine is idling can drain the battery.
- Minimize Use: Limit the use of accessories when the engine is not running or is idling for extended periods.
7.7. Protecting Battery from Extreme Temperatures
Extreme temperatures can affect battery performance and lifespan.
- Heat Protection: Park in the shade during hot weather to prevent overheating.
- Cold Protection: Use a battery blanket in cold climates to maintain optimal battery temperature.
7.8. Regular Professional Checkups
Have your battery professionally tested as part of your regular vehicle maintenance.
- Diagnostic Tests: Mechanics can perform diagnostic tests to assess the battery’s health and charging system.
7.9. Choosing the Right Battery
Ensure you select the correct battery type and size for your vehicle.
- OEM Specifications: Follow the original equipment manufacturer (OEM) specifications for battery size and type.
- Climate Considerations: Choose a battery designed for your local climate.
7.10. Disconnecting Battery During Long Storage
If you plan to store your vehicle for an extended period, disconnect the battery to prevent drain.
- Disconnect Negative Terminal: Disconnect the negative terminal to prevent parasitic drain.
- Maintain Charge: Use a battery maintainer to keep the battery charged during storage.
By following these car battery maintenance tips, you can significantly extend the life of your battery and ensure reliable performance. Regular care and attention can help you avoid unexpected breakdowns and costly replacements. For more expert advice on car maintenance, visit CARS.EDU.VN.
8. Upgrading Your Car Battery: When and Why
Upgrading your car battery can improve your vehicle’s performance and reliability, especially if you have increased electrical demands or live in a region with extreme temperatures. Here’s when and why you should consider upgrading your car battery.
8.1. Signs You Need to Upgrade Your Battery
Several signs indicate that it’s time to consider upgrading your car battery:
- Frequent Jump Starts: If you find yourself needing to jump-start your car frequently, it’s a sign that your battery is losing its ability to hold a charge.
- Slow Engine Crank: A slow or sluggish engine crank, especially in cold weather, indicates that the battery is not providing enough power.
- Dim Headlights: Dimming headlights, particularly when idling, can be a sign of a weak battery.
- Battery Age: Most car batteries last between three to five years. If your battery is older than that, it may be time to replace it, even if it doesn’t show obvious signs of failure.
- Corrosion on Terminals: Excessive corrosion on the battery terminals can indicate that the battery is nearing the end of its lifespan.
- Swollen Battery Case: A swollen or bulging battery case is a sign of internal damage and indicates that the battery needs immediate replacement.
8.2. Reasons to Upgrade Your Car Battery
There are several compelling reasons to upgrade your car battery:
- Increased Electrical Demands: Modern vehicles have more electronic components than ever before, including infotainment systems, GPS, heated seats, and advanced safety features. These components place a higher demand on the battery, and an upgraded battery can provide the necessary power.
- Improved Cold Weather Performance: Cold weather can significantly reduce battery performance. An upgraded battery with a higher cold-cranking amps (CCA) rating can provide better starting power in cold climates.
- Enhanced Reliability: A higher-quality battery can provide more reliable performance and reduce the risk of unexpected breakdowns.
- Longer Lifespan: Upgraded batteries often have a longer lifespan than standard batteries, providing better value over time.
- Supporting Aftermarket Accessories: If you have added aftermarket accessories to your vehicle, such as a high-powered audio system, off-road lights, or a winch, an upgraded battery can ensure these accessories receive the power they need.
8.3. Types of Upgraded Batteries
When upgrading your car battery, consider the following types:
- AGM (Absorbent Glass Mat) Batteries: AGM batteries are spill-proof, vibration-resistant, and offer superior performance compared to traditional flooded lead-acid batteries. They are ideal for vehicles with high electrical demands and those used in extreme conditions.
- Lithium-Ion Batteries: Lithium-ion batteries are lighter and more energy-dense than lead-acid batteries. They offer excellent performance and a long lifespan but are typically more expensive.
- Enhanced Flooded Batteries (EFB): EFB batteries are an enhanced version of traditional flooded batteries, offering improved performance and lifespan. They are a good compromise between flooded and AGM batteries.
8.4. Factors to Consider When Choosing an Upgraded Battery
When selecting an upgraded car battery, consider the following factors:
- CCA (Cold Cranking Amps): Choose a battery with a CCA rating that meets or exceeds the manufacturer’s recommendations for your vehicle.
- Reserve Capacity: Consider the reserve capacity, which indicates how long the battery can provide power if the alternator fails.
- Battery Size: Ensure the battery size matches the specifications for your vehicle.
- Warranty: Look for a battery with a good warranty to protect your investment.
- Brand Reputation: Choose a battery from a reputable brand known for quality and reliability.
8.5. Installation Considerations
Installing an upgraded battery is similar to installing a standard battery. However, it’s essential to follow the manufacturer’s instructions and take the necessary safety precautions.
- Disconnect Negative Terminal: Always disconnect the negative terminal first to prevent short circuits.
- Secure Mounting: Ensure the battery is securely mounted to prevent vibrations.
- Proper Connections: Verify that the battery cables are properly connected to the terminals and tightened securely.
Upgrading your car battery can significantly improve your vehicle’s performance and reliability, especially if you have increased electrical demands or live in a region with extreme temperatures. By considering the signs that you need an upgrade and choosing the right type of battery, you can ensure that your vehicle has the power it needs for years to come. For more information and expert advice on car batteries, visit CARS.EDU.VN.
9. Common Car Battery Problems and Solutions
Car batteries are essential for starting and running your vehicle, but they can experience various problems over time. Understanding these common issues and their solutions can help you maintain your battery and avoid unexpected breakdowns.
9.1. Dead Battery
A dead battery is one of the most common car battery problems.
- Causes: Leaving lights on, extreme temperatures, parasitic drain, or an aging battery.
- Solutions:
- Jump Start: Use jumper cables to jump-start the car.
- Charge the Battery: Use a battery charger to recharge the battery.
- Replace the Battery: If the battery is old or damaged, replace it with a new one.
9.2. Corrosion on Terminals
Corrosion on battery terminals can impede current flow and reduce battery performance.
- Causes: Chemical reactions between the battery acid and the terminal metals.
- Solutions:
- Clean the Terminals: Use a battery terminal cleaner or a mixture of baking soda and water to clean the terminals.
- Apply Protective Spray: Apply a battery terminal protector spray to prevent future corrosion.
- Replace Terminals: If the terminals are severely corroded, replace them.
9.3. Sulfation
Sulfation occurs when lead sulfate crystals build up on the battery plates, reducing the battery’s ability to hold a charge.
- Causes: Undercharging, infrequent use, or storing the battery in a discharged state.
- Solutions:
- Equalization Charge: Use a battery charger with an equalization mode to dissolve the sulfate crystals.
- Desulfating Charger: Use a desulfating charger to break down the sulfate crystals.
- Replace the Battery: If sulfation is severe, replace the battery.
9.4. Overcharging
Overcharging can damage the battery and shorten its lifespan.
- Causes: A faulty alternator or a malfunctioning battery charger.
- Solutions:
- Test the Alternator: Have the alternator tested to ensure it is charging the battery properly.
- Replace the Alternator: If the alternator is overcharging the battery, replace it.
- Use a Smart Charger: Use a smart battery charger that automatically adjusts the charging rate.
9.5. Parasitic Drain
Parasitic drain occurs when electrical components continue to draw power from the battery even when the engine is off.
- Causes: Faulty relays, aftermarket accessories, or malfunctioning electronic modules.
- Solutions:
- Identify the Source: Use a multimeter to identify the source of the parasitic drain.
- Repair or Replace: Repair or replace the faulty component causing the drain.
- Disconnect Battery: If the drain cannot be easily fixed, disconnect the battery when the car is not in use.
9.6. Low Electrolyte Levels
Low electrolyte levels can reduce the battery’s capacity and lifespan.
- Causes: Evaporation or leakage of electrolyte.
- Solutions:
- Add Distilled Water: Add distilled water to the battery cells to bring the electrolyte level up to the proper level.
- Check for Leaks: Inspect the battery case for any signs of leaks.
- Replace the Battery: If the battery is leaking, replace it.
9.7. Swollen Battery Case
A swollen battery case indicates internal damage and can be dangerous.
- Causes: Overcharging, extreme temperatures, or internal short circuits.
- Solutions:
- Replace the Battery: Immediately replace the battery if the case is swollen.
- Check Charging System: Have the charging system checked to ensure it is functioning properly.
9.8. Vibration Damage
Excessive vibration can damage the internal components of the battery.
- Causes: Loose battery mounting or rough driving conditions.
- Solutions:
- Secure Battery Mounting: Ensure the battery is securely mounted with tight brackets and clamps.
- Use Vibration Dampeners: Use vibration dampeners to reduce the impact of vibrations on the battery.
By understanding these common car battery problems and their solutions, you can take proactive steps to maintain your battery and prevent unexpected issues. Regular maintenance and prompt repairs can help extend the life of your battery and ensure reliable performance. For more expert advice on car batteries and maintenance, visit CARS.EDU.VN.
10. FAQ: Car Battery Colors, Polarity, and Safety
Here are some frequently asked questions about car battery colors, polarity, and safety, along with detailed answers to help you better understand your vehicle’s battery system.
Q1: What color is negative on a car battery terminal?
The negative terminal on a car battery is typically black. This color-coding is a standard convention to help prevent accidental reverse polarity connections.
Q2: Why is it important to identify the correct polarity of a car battery?
Identifying the correct polarity is crucial because connecting the battery cables in reverse can cause severe damage to your vehicle’s electrical system, including blown fuses, damaged wiring, and malfunctioning electronics.
Q3: How can I identify the positive and negative terminals if the colors are faded?
If the colors are faded, look for the “+” (plus) symbol on or near the positive terminal and the “–” (minus) symbol on or near the negative terminal. You can also follow the cables to see where they connect; the negative cable usually connects to the car’s chassis or engine block.
Q4: What happens if I accidentally connect the positive cable to the negative terminal?
Connecting the positive cable to the negative terminal can cause an immediate surge of electricity, blowing fuses, damaging the wiring, and potentially harming sensitive electronic components. In extreme cases, it can also lead to a battery explosion.
Q5: Is it safe to jump-start a car if I’m not sure about the polarity?
If you’re unsure about the polarity, it’s best to consult your vehicle’s manual or seek assistance from a qualified mechanic. Incorrectly connecting the jumper cables can cause significant damage to both vehicles.
Q6: What safety precautions should I take when working with a car battery?
Always wear safety glasses and gloves to protect your eyes and hands from battery acid. Work in a well-ventilated area to avoid accumulating explosive hydrogen gas. Disconnect the negative terminal first to prevent short circuits.
Q7: How do I clean corrosion off my car battery terminals?
To clean corrosion, disconnect the battery cables and use a battery terminal cleaner or a mixture of baking soda and water. Scrub the terminals with a brush, rinse with water, and dry thoroughly before reconnecting the cables.
Q8: Can extreme temperatures affect my car battery’s performance?
Yes, extreme temperatures can significantly affect battery performance. Cold weather can reduce the battery’s cranking power, while hot weather can accelerate corrosion and shorten its lifespan.
Q9: How often should I have my car battery tested?
It’s a good idea to have your car battery tested at least twice a year, especially before the start of winter and summer. Regular testing can help identify potential problems early and prevent unexpected breakdowns.
Q10: What is the typical lifespan of a car battery?
The typical lifespan of a car battery is between three to five years, depending on factors such as climate, driving habits, and maintenance practices.
For more detailed information on car batteries, maintenance tips, and expert advice, visit CARS.EDU.VN. We provide a comprehensive resource for all your automotive needs.
At CARS.EDU.VN, we understand the challenges of maintaining your vehicle and finding reliable information. Whether you’re seeking detailed service guides, expert repair advice, or comparisons of the latest models, we’re here to help.
Ready to dive deeper? Visit CARS.EDU.VN today to explore our extensive collection of articles and resources, tailored to address your specific needs. Our team of automotive experts is dedicated to providing you with the knowledge and support you need to keep your car running smoothly.
Need professional assistance? Contact us or visit our location at 456 Auto Drive, Anytown, CA 90210, United States. You can also reach us via WhatsApp at +1 555-123-4567. Let cars.edu.vn be your trusted partner in automotive care.
 car battery![car battery](https://cdn.shopify.com/s/files/1/0551/0912/4272/files/ccc_480x48