Science projects can sometimes feel like a hurdle, especially when you’re navigating the world of 8th-grade science! Like many parents, I found myself diving into the realm of physics when my twins were tasked with building a mousetrap car for their science class. The challenge? To create a car powered only by a mousetrap that could travel over 4 meters.
Initially, we encountered a few bumps in the road. Our first attempt resulted in a car that seemed determined to spin in circles rather than move in a straight line. After some trial and error, and lots of online research, we managed to build a mousetrap car that not only worked but exceeded the project requirements, traveling over 6 meters!
This guide is for parents and students alike who are looking for clear instructions on how to build a successful mousetrap car. Consider this a helpful starting point, born from our own hands-on experience. And remember, the best learning often comes from experimentation, so feel free to adapt and improve upon these steps. Let’s get building!
Avoiding Common Pitfalls in Mousetrap Car Design
Before we get into the building process, let’s talk about what not to do. Learning from our initial mistakes can save you time and frustration. Here are a few key things we learned the hard way:
- Don’t make it too light: It might seem counterintuitive, but a super lightweight car is prone to flipping or losing traction. You need some weight to keep it stable and moving forward. Adding more wood or washers can help.
- Avoid short car designs: A longer car provides space for a longer lever arm, which translates to greater travel distance. Shorter cars often underperform.
- Steer clear of bottle cap wheels: We initially tried using bottle caps and milk jug lids, aiming for recycled materials as encouraged by the project guidelines. However, these simply didn’t work well as wheels. Even with electrical tape for better grip, they lacked consistent performance.
Now that we know what to avoid, let’s move on to the components and steps that will lead to a successful mousetrap car.
Essential Supplies for Your Mousetrap Car Project
To build a mousetrap car that travels a good distance, you’ll need to gather these materials:
- Mousetrap: The standard snap mousetrap is the power source for your vehicle.
- Wood rectangle (Plywood): This will serve as the base of your car. Plywood is a good, sturdy option.
- Popsicle sticks: These are useful for reinforcing structures and creating lever arms.
- Wood dowel rods (1/4″ diameter): These will act as your axles. You can use one long rod to cut into pieces or purchase pre-cut lengths.
- Hot glue: Essential for quickly and securely joining components. Don’t underestimate how much you’ll need!
- Washers: Choose washers with a hole size that snugly fits your wood dowel rods. These help secure the wheels and reduce friction.
- Cord or rope: This will connect the mousetrap lever arm to the axle, transferring the mousetrap’s power to the wheels.
- Eye screw: This will be attached to the lever arm to provide an attachment point for the cord.
- Straws: Crucial for creating smooth axle housings. Look for straws that fit snugly over the dowel rods while allowing them to rotate freely. Milk Magic straws, as we discovered, work perfectly.
- Electrical tape: Useful for securing parts and improving wheel grip if needed.
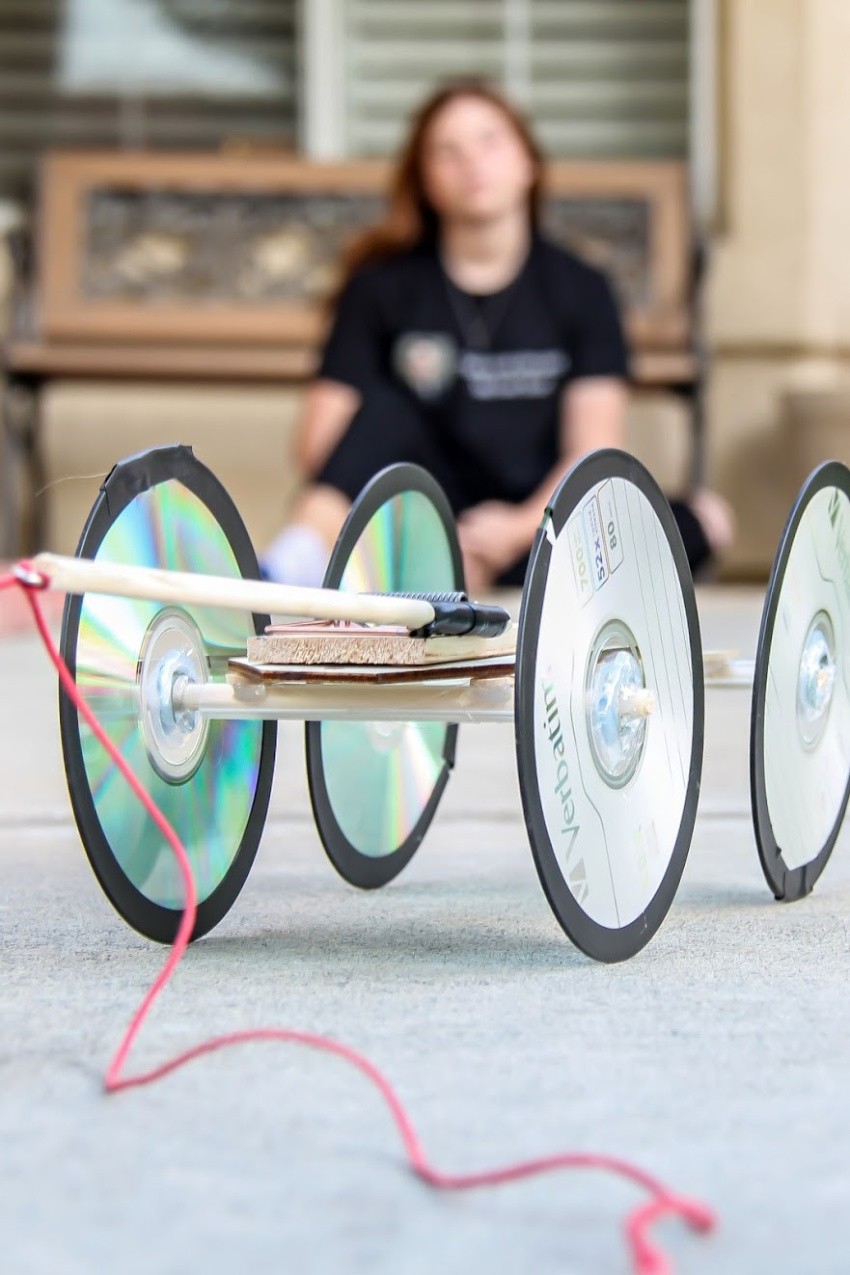
- CDs or DVDs: These make excellent lightweight and uniform wheels.
Step-by-Step Instructions to Build Your Mousetrap Car
Here’s how to assemble your mousetrap car. Refer to the images and video for visual guidance.
- Prepare the Base: Cut your plywood into a rectangle to form the chassis of your car. The length can be adjusted, but remember, a longer base generally performs better.
- Attach Axle Supports: Use popsicle sticks and hot glue to create supports for your axles on the underside of the base. Ensure these are aligned so your axles will be parallel.
- Create Axle Housings: Cut straws slightly longer than the width of your car base. These straws will be the housings for your axles, allowing them to spin freely. Hot glue the straws to the popsicle stick supports, ensuring they are centered and aligned.
- Prepare the Axles: Cut your wood dowel rods into axles that are long enough to extend slightly beyond the wheels on each side of the car.
- Assemble the Wheels: Carefully attach the CDs/DVDs to the axles. You might need to use washers and hot glue to ensure they are centered and secure and spin smoothly.
- Mount the Mousetrap: Position the mousetrap towards the rear of the car base and securely hot glue it down.
- Install the Lever Arm: Extend the mousetrap lever arm by attaching popsicle sticks to it. This longer lever arm will increase the distance your car travels.
- Attach the Eye Screw and Cord: Screw the eye screw into the end of the extended lever arm. Tie one end of your cord to the eye screw.
- Connect to the Axle: This is a crucial step. Wrap the other end of the cord around the rear axle. The number of wraps will affect the car’s performance – experiment to find what works best. Secure the cord tightly to the axle, often with glue or tape.
Getting the axle to rotate smoothly is key. We found that using straws as axle housings made a significant difference. Initially, we considered smaller straws, but opting for larger straws, like Milk Magic straws, allowed for the use of sturdier dowel rods and smoother rotation.
For a visual demonstration of how it all works, check out the video. You’ll see our mousetrap car in action, traveling over 6 meters!
[Video of Mousetrap Car in Action – link to video if available, or keep as a placeholder description]
Final Thoughts
Building a mousetrap car is a fantastic hands-on science project that combines creativity and problem-solving. By understanding the mechanics and avoiding common mistakes, you can create a car that really goes the distance. Experiment with different lever arm lengths, wheel sizes, and cord wrapping techniques to optimize your car’s performance. Good luck, and have fun building!